 Get BlackFriday 25% for Limited Time on Lifetime & 35% for Bundle Deal


If you are tired of manually creating a Google Meet link and emailing it to every person who registers for your online sessions, you can hand that job to an automation. Using Zapier with a WordPress event management website lets a new registration trigger a meeting invite, a calendar entry and a confirmation email without you touching a single record. This guide walks through the full setup on WpEvently, from installing the MagePeople Zapier add-on to testing a live booking.
The workflow you will build takes about 15–20 minutes and requires no code. You need a WordPress site with WpEvently and WooCommerce installed, the MagePeople Zapier Integration add-on, a Zapier account and a Google account. A test event with a throwaway booking completes the picture, because you cannot verify a trigger without at least one registration record.
A quick note on scope: this tutorial covers the automation layer — the webhook, the trigger and the automated action — not the full booking engine. If you are still deciding how event registration itself should be configured on the site, the WooCommerce event booking setup guide covers ticketing, attendee records and order flow in depth.
- What Zapier Actually Does for an Event Website
- Why Automate Hybrid and Online Events?
- Before You Start: Requirements and Settings to Check
- Step 1: Install the Add-On and Find Your Webhook Settings
- Step 2: Set Up the Zapier Trigger
- Step 3: Create a Test Online Event and Place a Booking
- Step 4: Add the Google Meet Action
- Step 5: Verify End to End
- What Else You Can Automate From the Same Trigger
- Hybrid Events Need Booking Logic, Not Just Automation
- Testing Checklist Before You Rely on the Zap
- Troubleshooting: Five Things That Usually Go Wrong
- Common Questions
- Final Thoughts
What Zapier Actually Does for an Event Website
Zapier is a no-code automation platform that passes data between applications. It works through workflows called Zaps, and every Zap has two halves:
- Trigger — the event that starts the workflow. Here, that is a new registration arriving from your event site.
- Action — what happens next. Here, that is Google Meet or Google Calendar creating the meeting and emailing the invite.
Your WordPress site is not connected to Google directly. The MagePeople add-on sends each new booking to a webhook URL, which is a private address Zapier listens on. Zapier receives the payload, hands the fields to Google, and Google sends the meeting link to the attendee. Because the handoff is one-way and event-driven, it works whether the registration lands at 2pm or 2am.
Why Automate Hybrid and Online Events?
Hybrid events add a layer that pure in-person ticketing never had: a remote audience that needs a working join link, correct in its local time, delivered before the session starts. Doing that by hand does not scale, and it quietly breaks in predictable ways.
- Speed. Attendees who register minutes before a session starts still receive a usable link, because the action runs on submission rather than on your attention.
- Consistency. Every registration follows the same path, so date, time and attendee email are copied from the order rather than retyped.
- Scale without extra admin. Ten registrations or a thousand follow the same process.
- A cleaner attendee experience. One confirmation, one link, no follow-up thread asking where the meeting details are.
What automation does not do is replace your booking logic. Registration dates, capacity, pricing and ticket types still belong to the event plugin. Automation only picks up the record once it exists.
Before You Start: Requirements and Settings to Check
Confirm these four items before building anything, because a missing dependency mid-build is the most common reason a first Zap silently returns no data.
- WpEvently and WooCommerce installed and active. The free WpEvently plugin is enough to create and sell a seat; WooCommerce handles the order that triggers the workflow.
- The MagePeople Zapier Integration add-on. Purchase it, download the zip from your order email, then upload and install it like any other plugin.
- A Zapier account. Sign up with your work email. Check current pricing on Zapier’s own pricing page before you commit — task limits change, and heavy registration volume can consume tasks quickly.
- A Google account with calendar access. The account you connect will own the calendar entries and the Meet links it creates.
Also decide which address sends confirmations. If you already automate mail, keep this workflow focused on the meeting link rather than duplicating messages. Our walkthrough of automating event confirmation emails and reminders in WordPress covers the notification side, and the two setups sit well together.
Step 1: Install the Add-On and Find Your Webhook Settings
Upload and activate the plugin
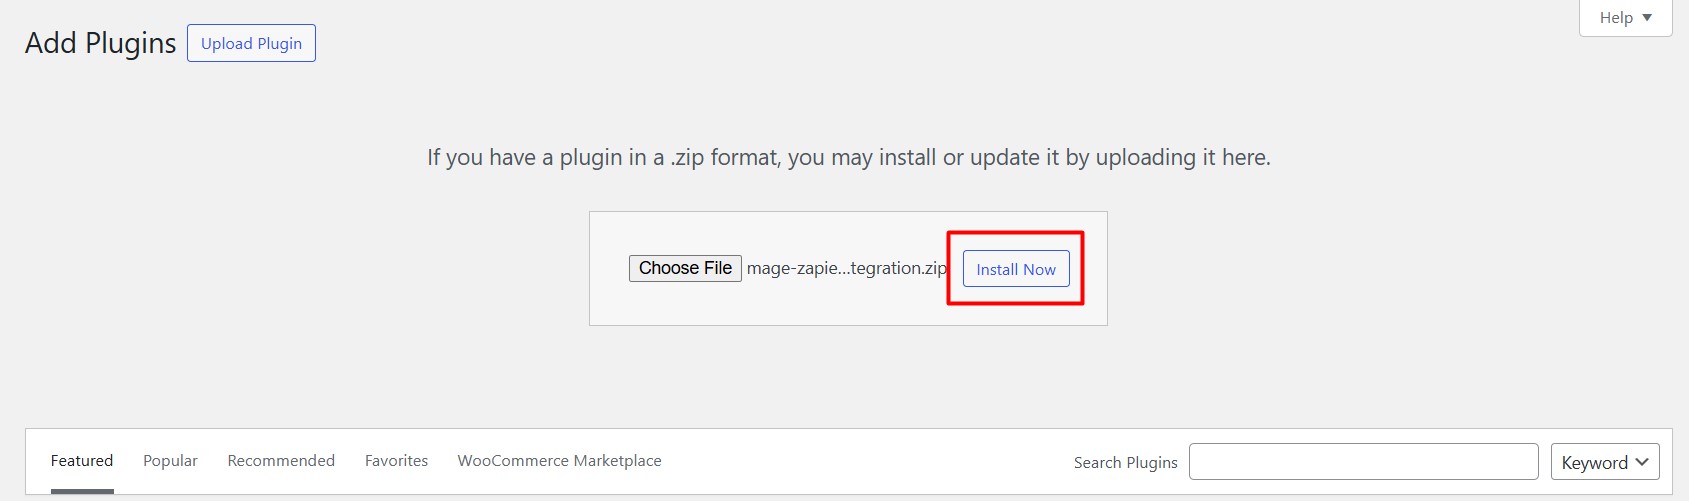
Purchase the MagePeople Zapier Integration plugin, then install the zip file from your WordPress dashboard under Plugins > Add New > Upload Plugin and activate it.
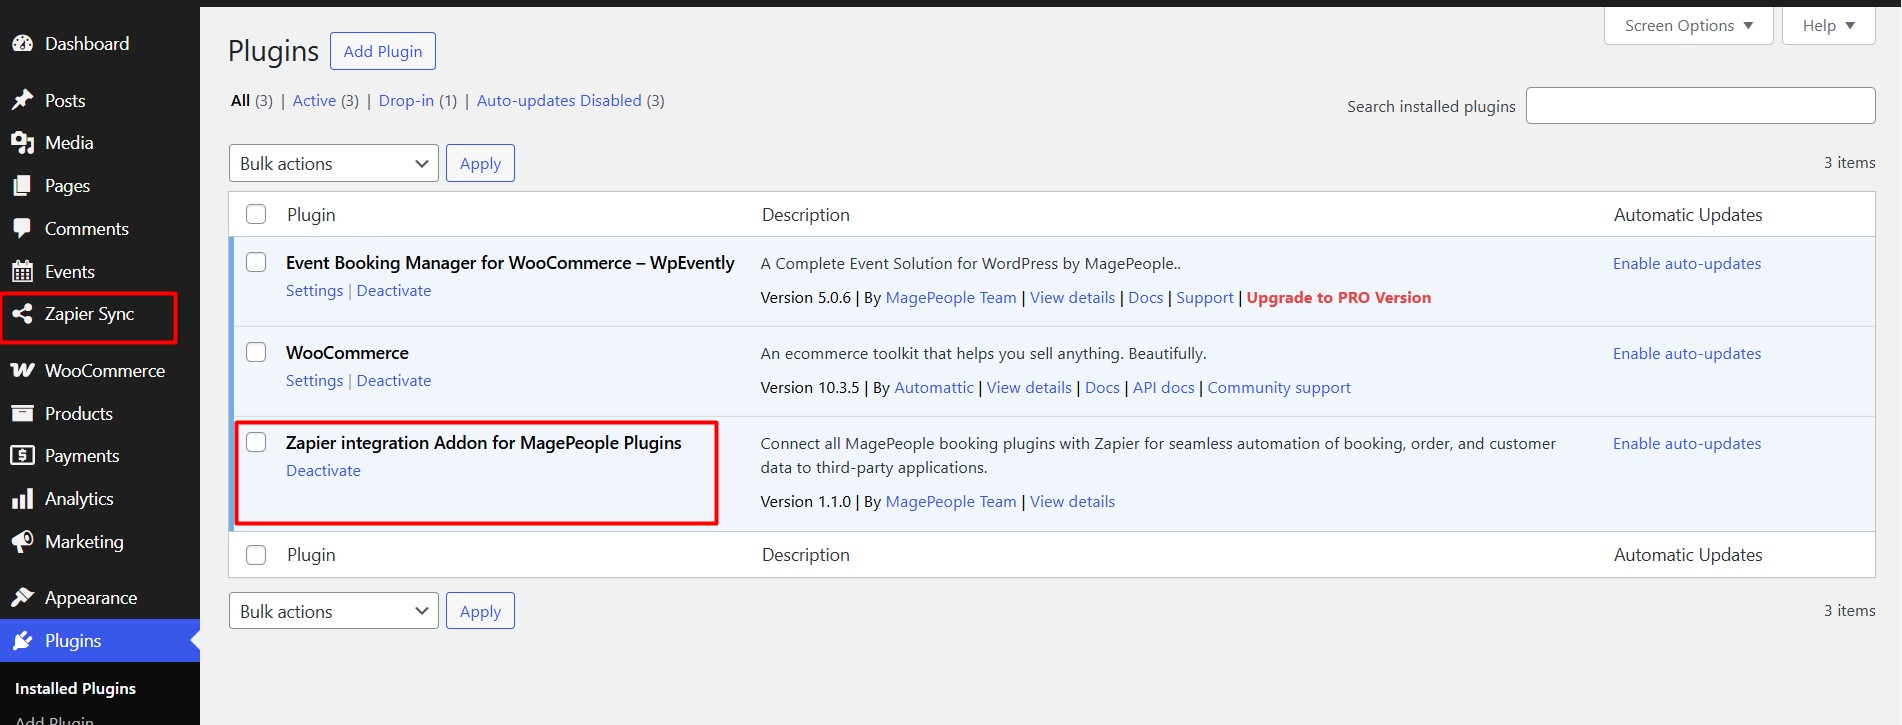
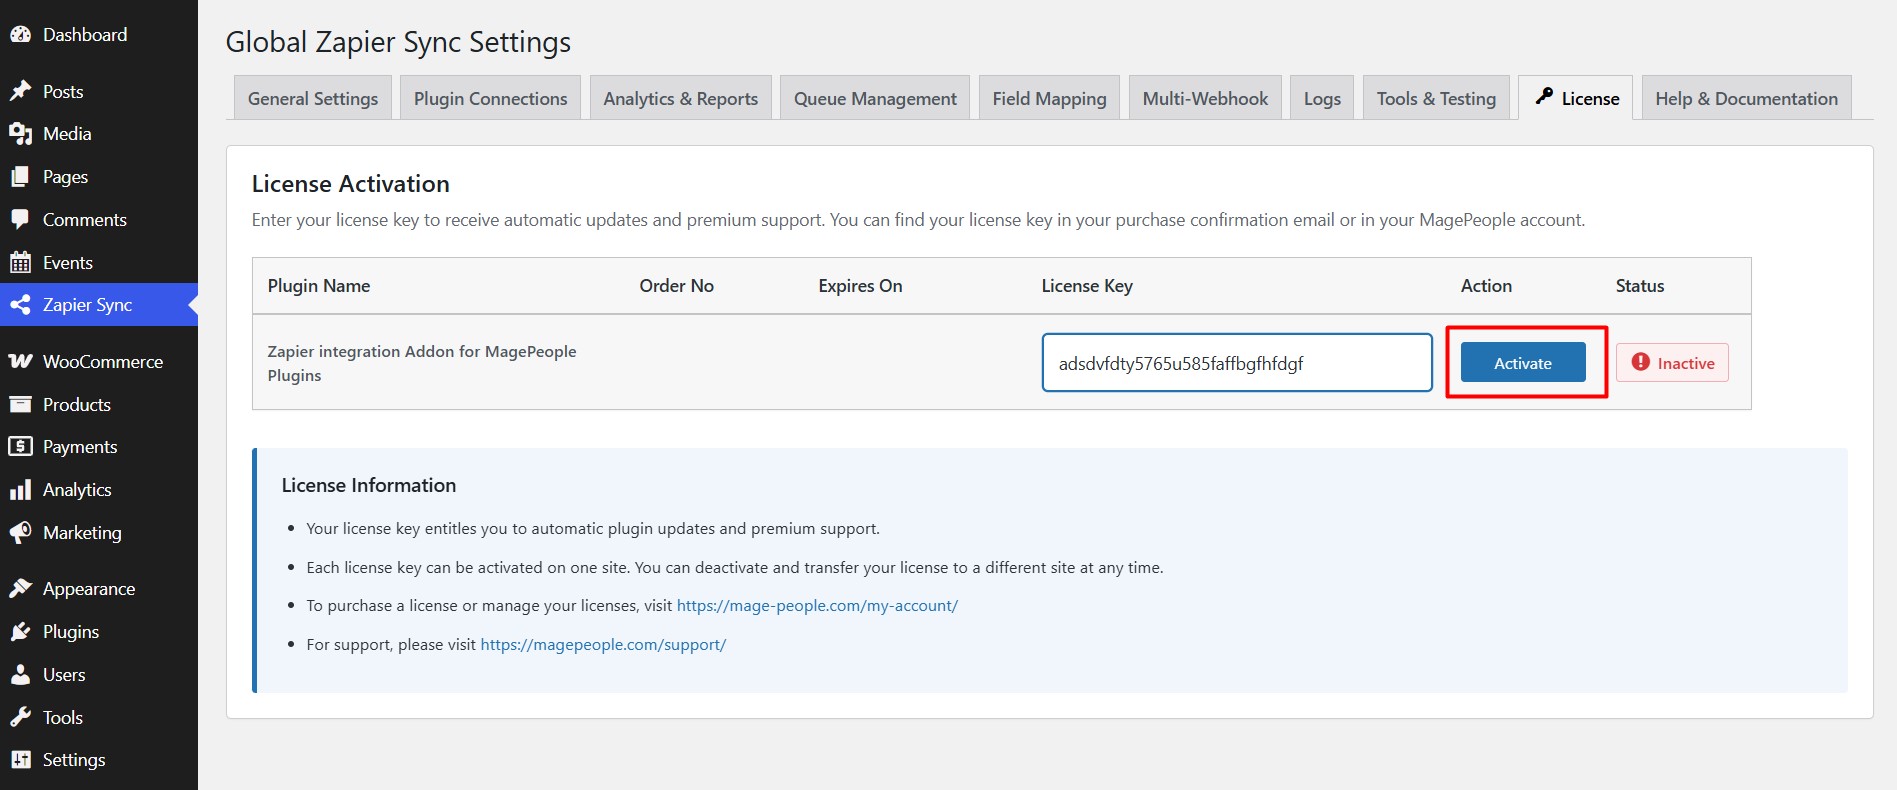
Once active, a new Zapier Sync menu appears in your dashboard. Activate your license there so the add-on receives updates and support.
Create the Zapier account and choose the app
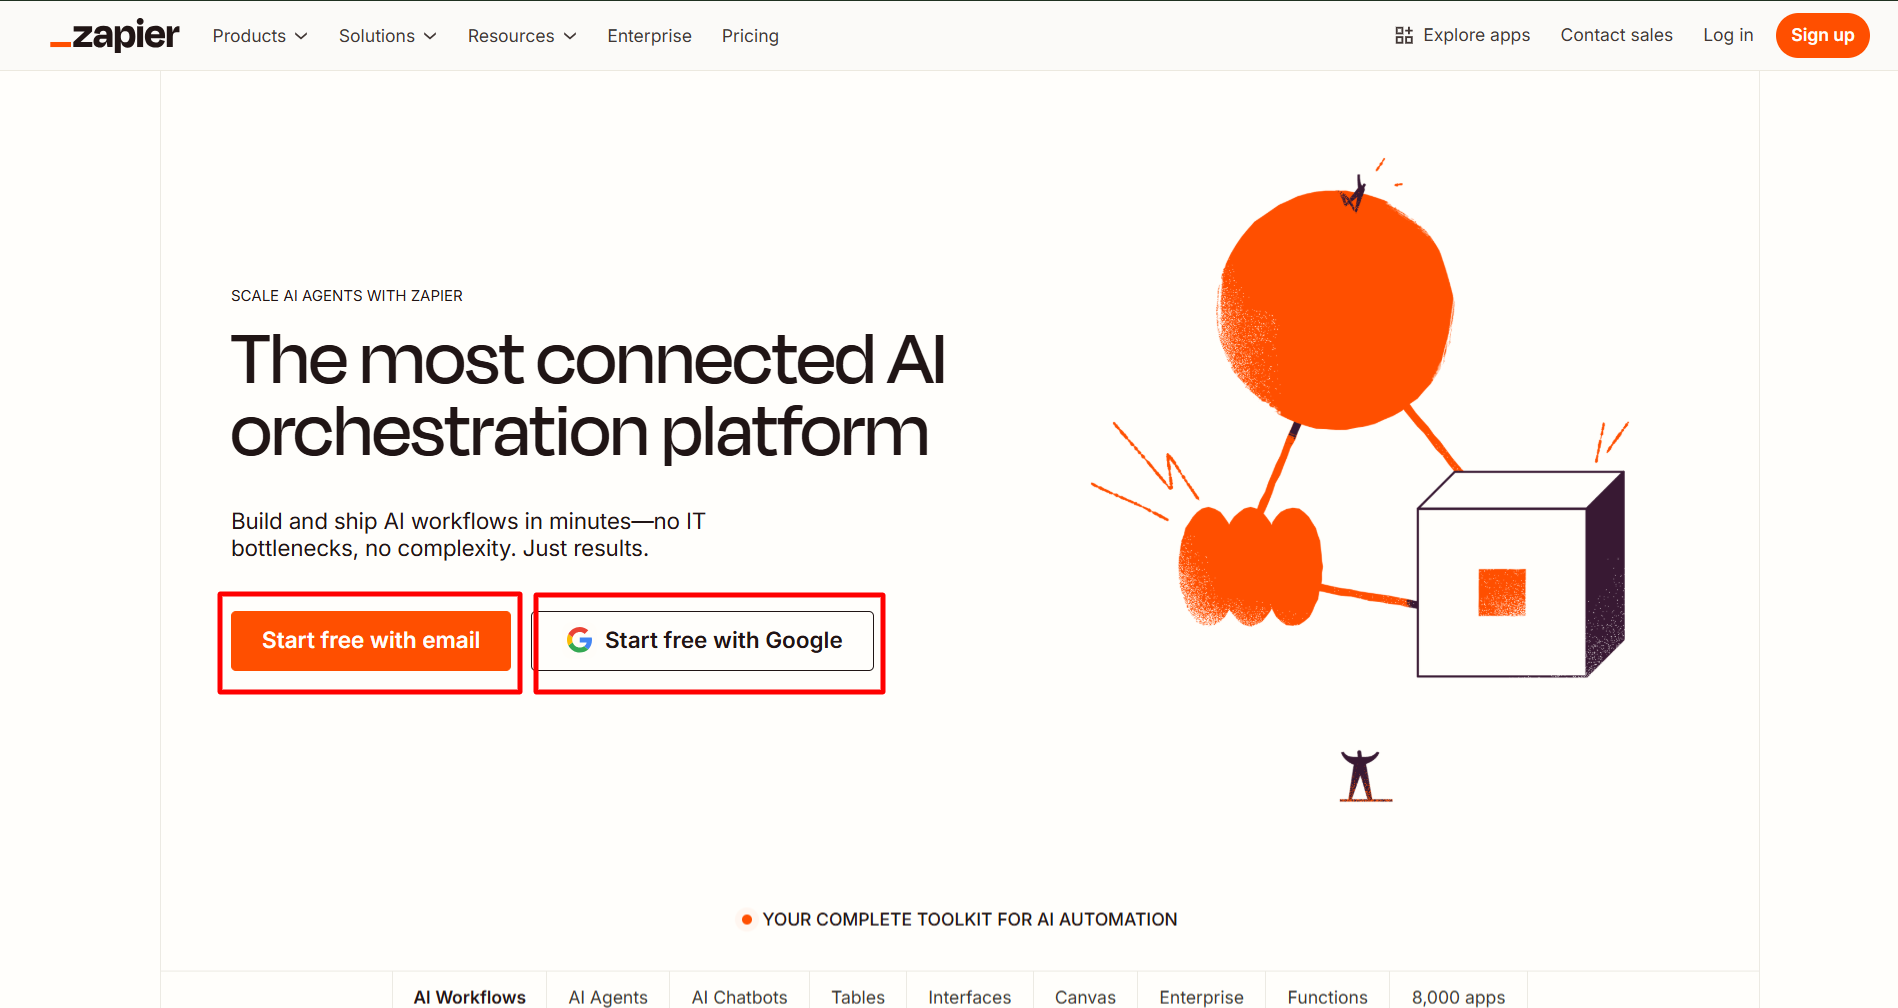
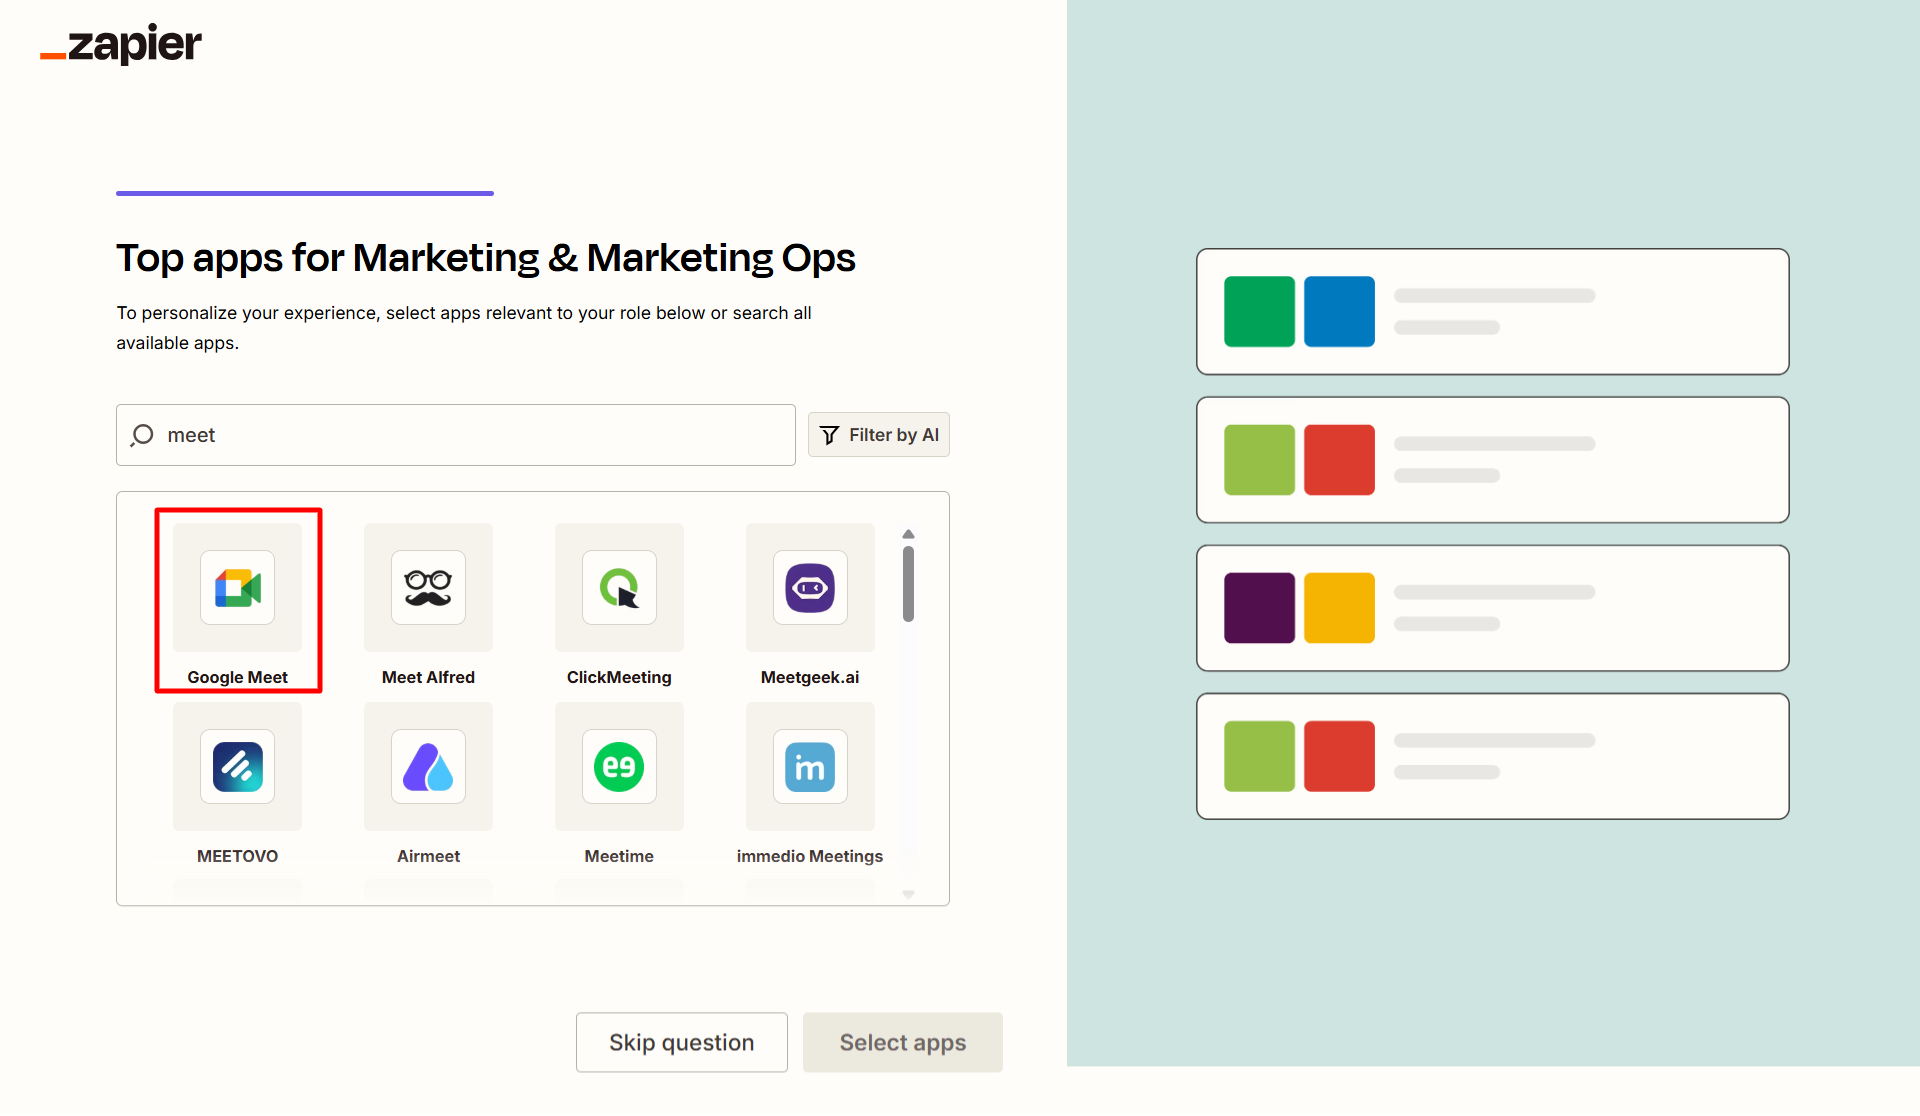
Go to Zapier.com and sign up with Google or your email. During onboarding, Zapier asks what you want to automate and which app you plan to use. Naming Google Meet or Google Calendar here only personalises the account; you will still choose the app inside the Zap itself.
Step 2: Set Up the Zapier Trigger
A trigger needs two things: a Zapier-side hook that listens, and a WordPress-side hook that posts to it. Build the listener first, then paste its address into the plugin.
Create the Zap and choose Catch Hook
From the Zapier dashboard, click + Create and choose Zap. Give it a name you will recognise in a list — something like “WpEvently order to Google Meet” beats “Zap 1”.
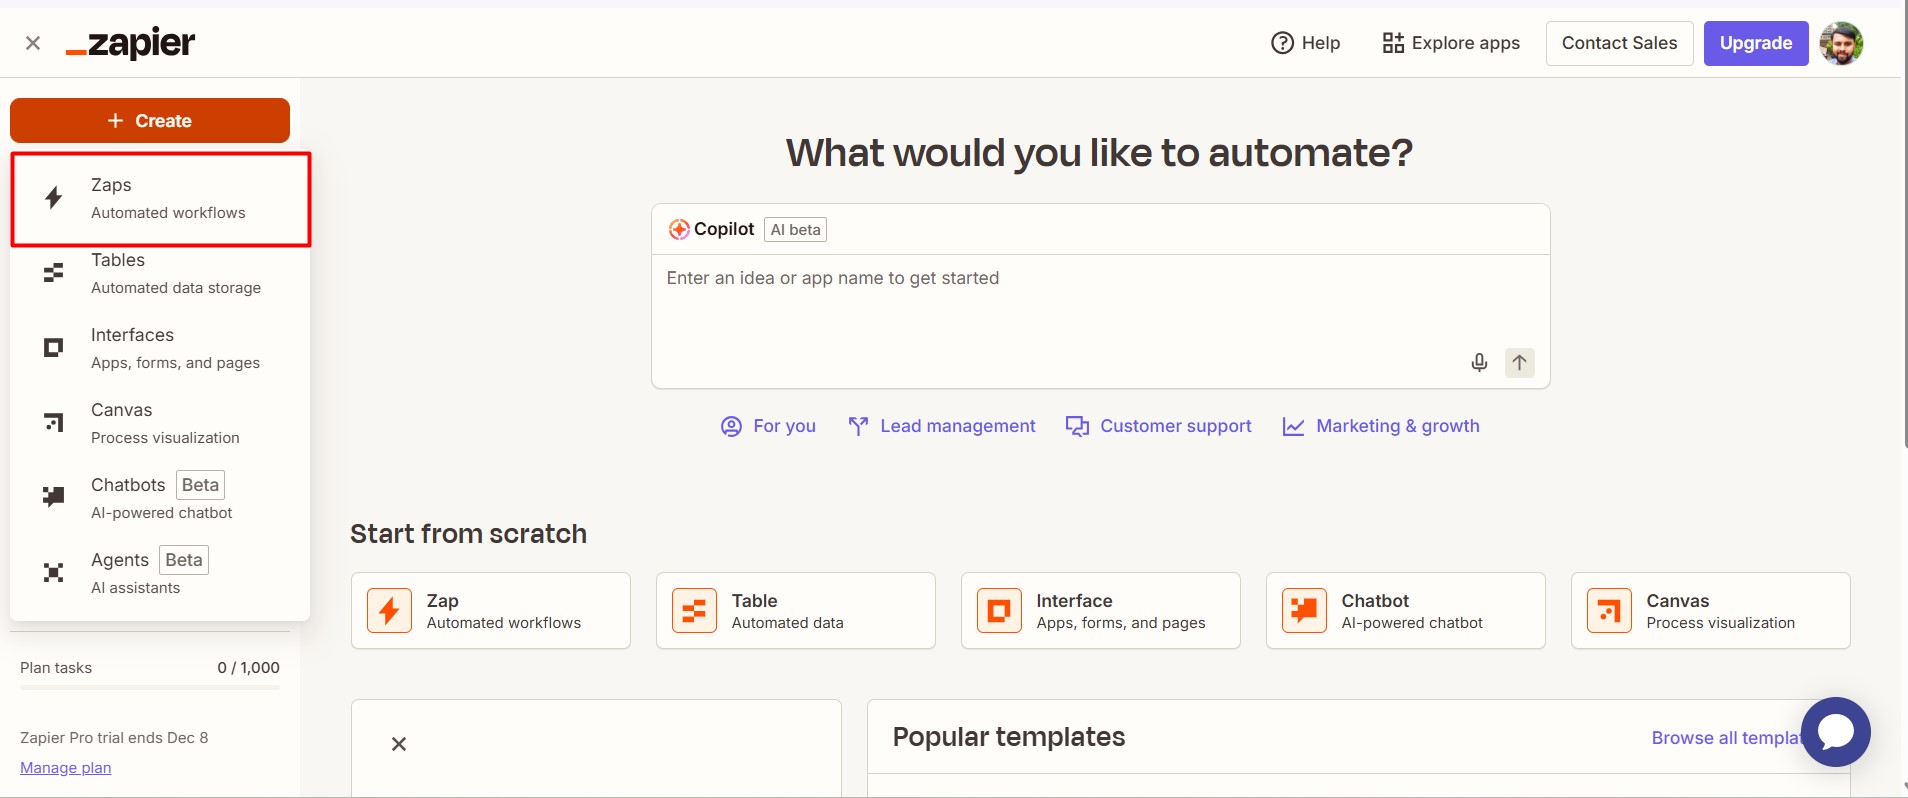
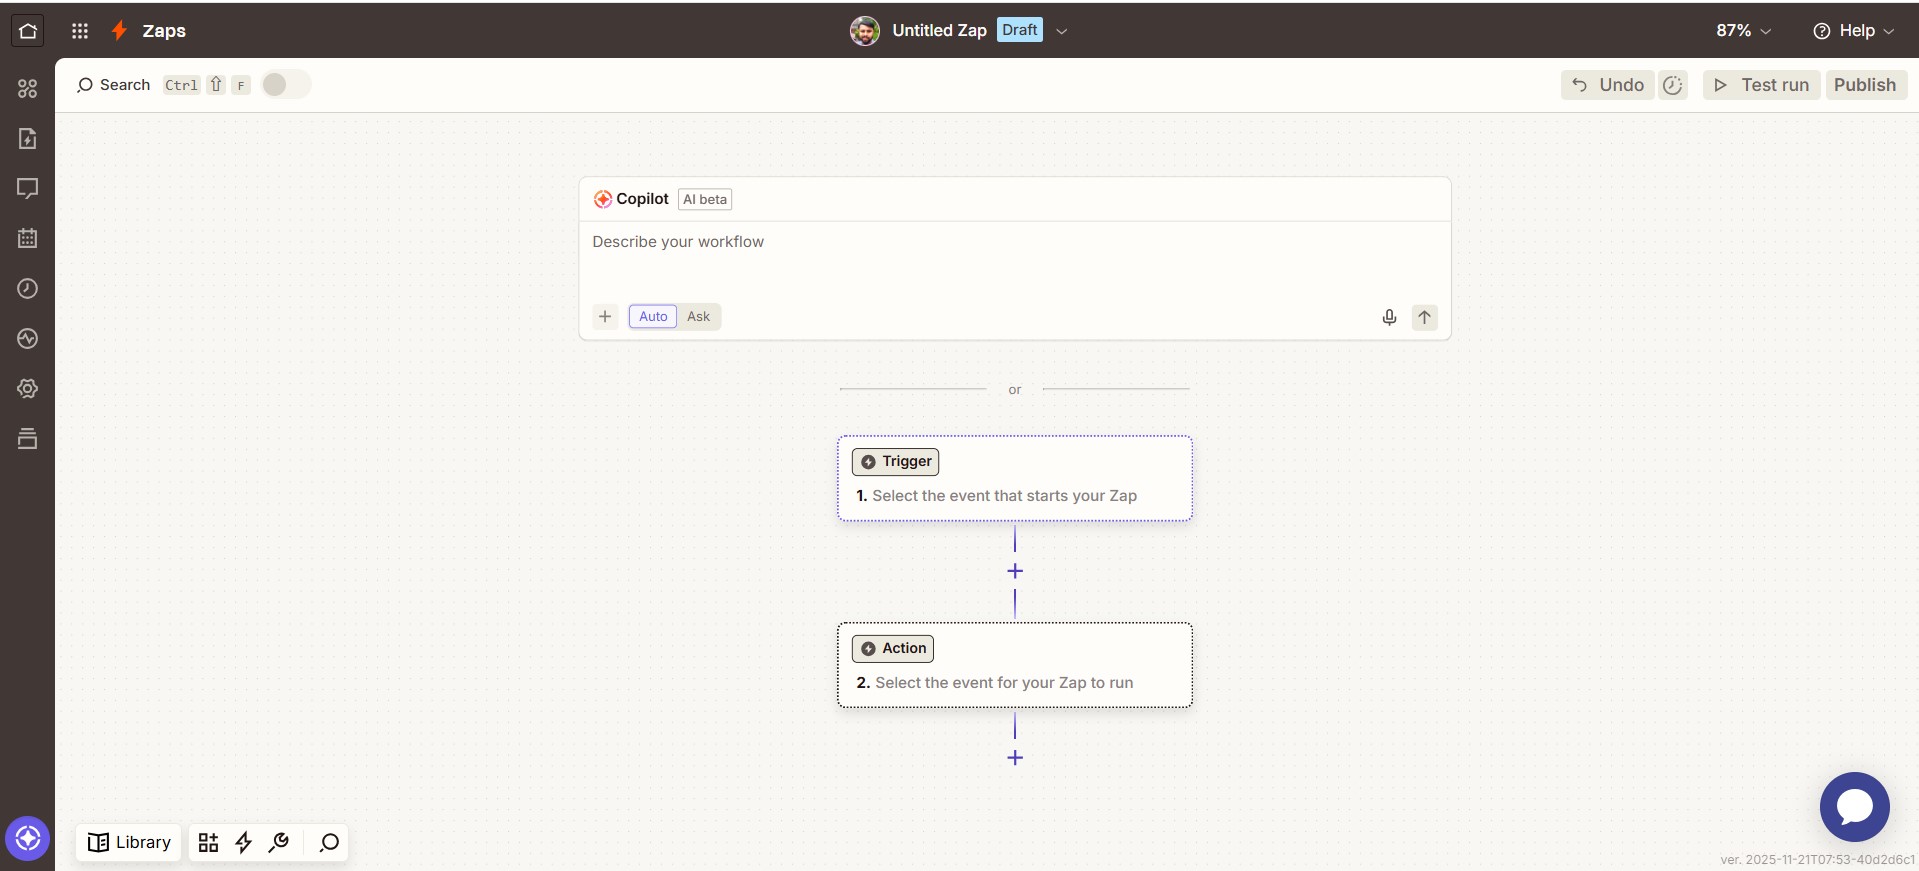
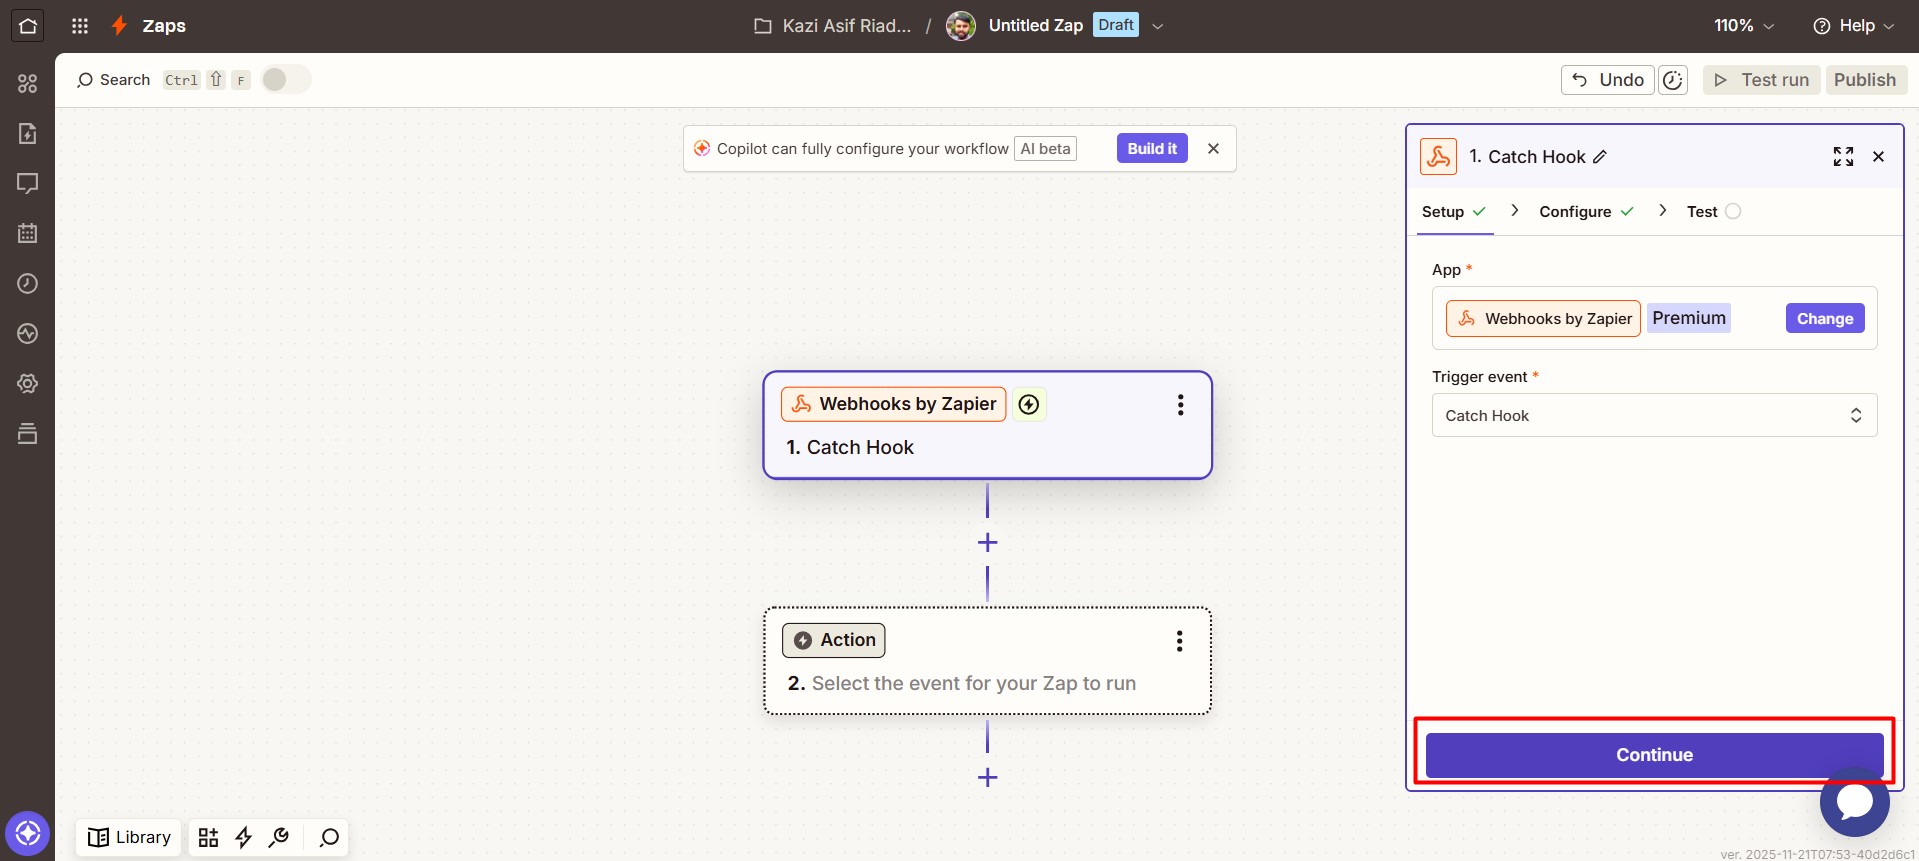
Open the Trigger step and select Webhooks by Zapier as the app.
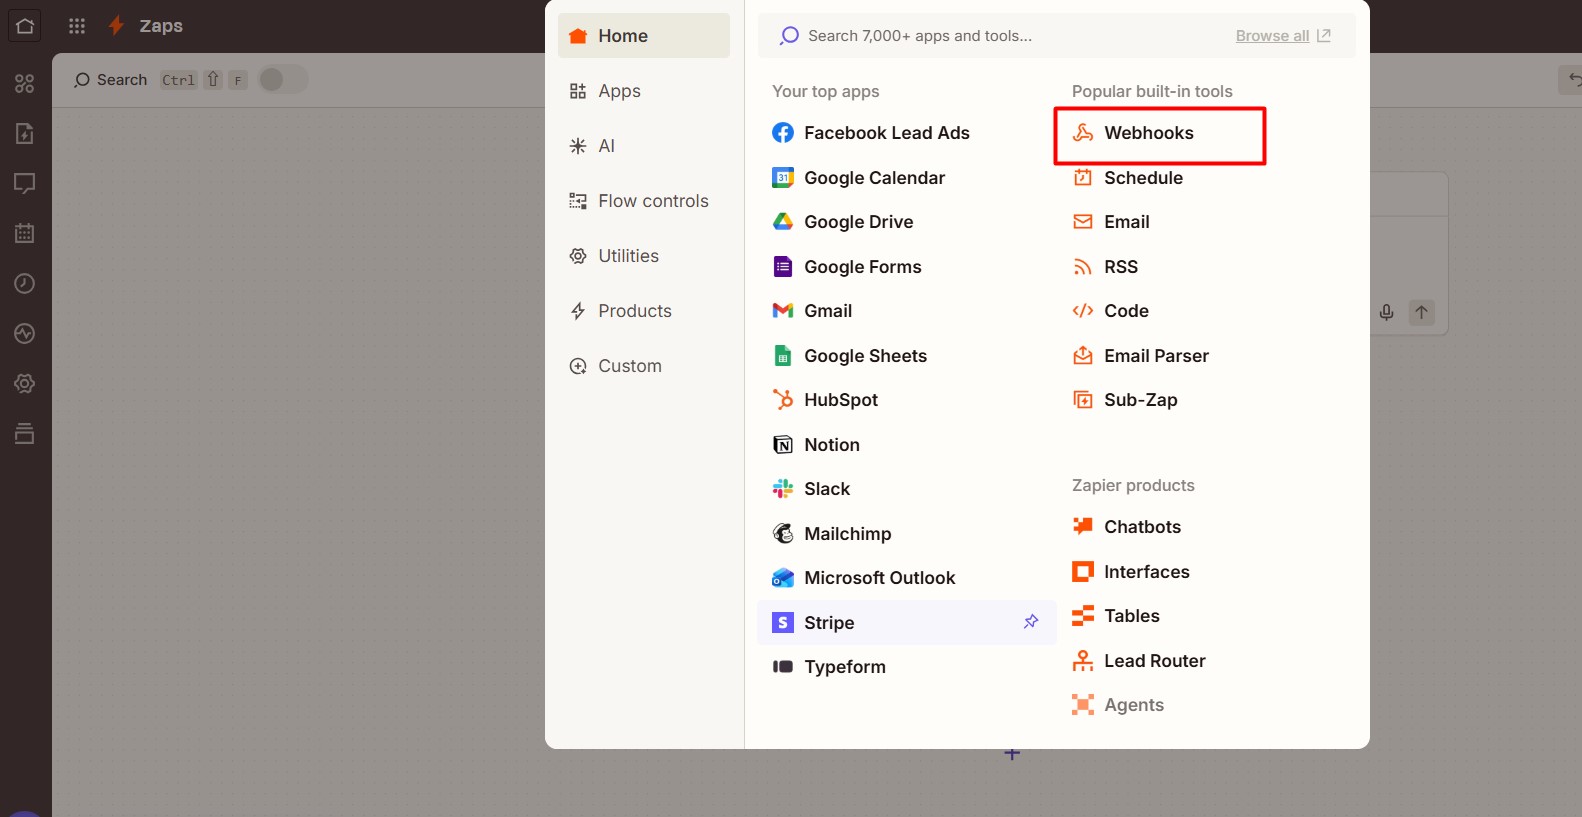
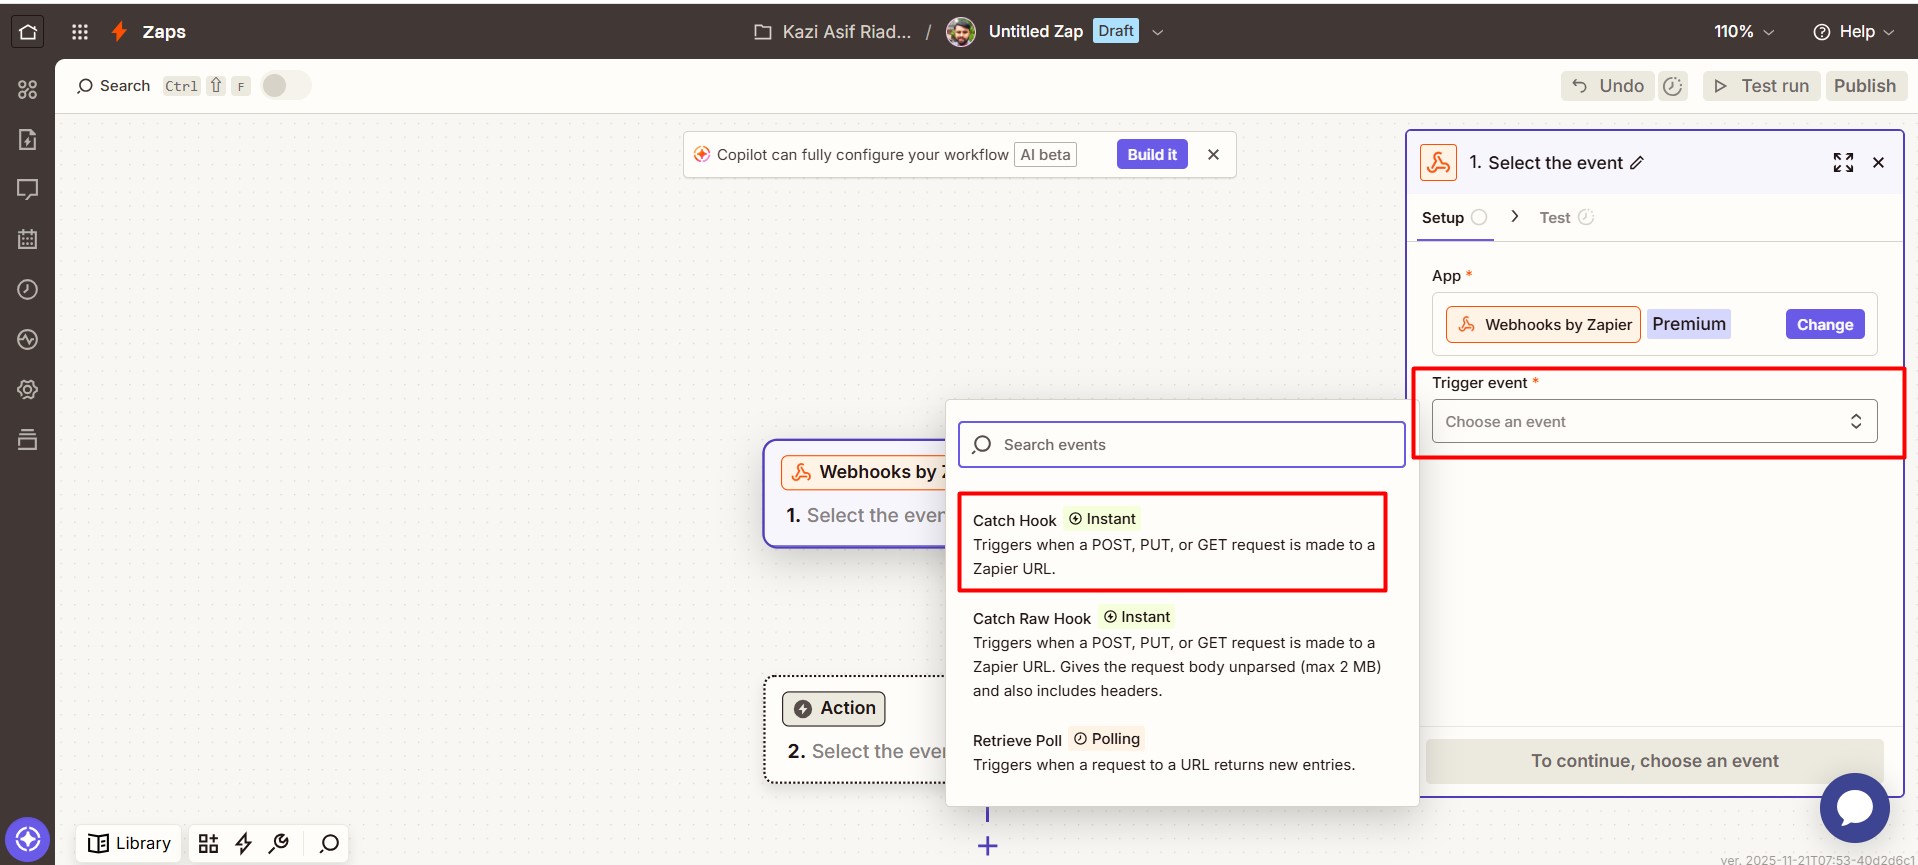
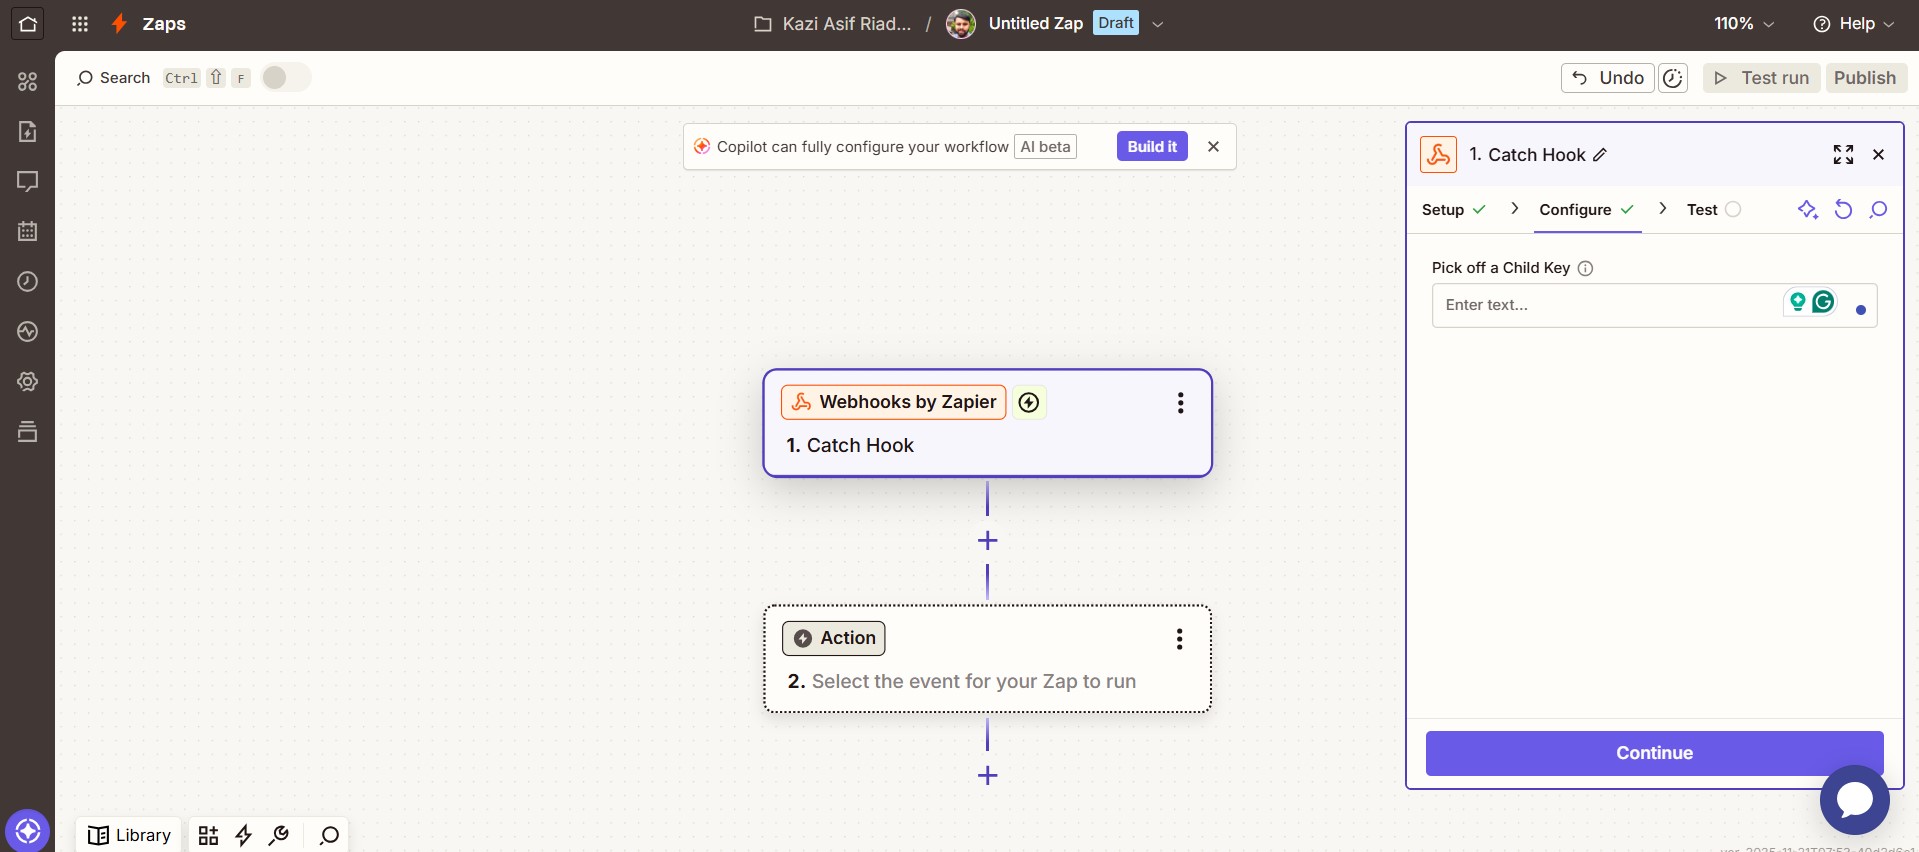
Set the trigger event to Catch Hook and click Continue.
Copy the webhook URL
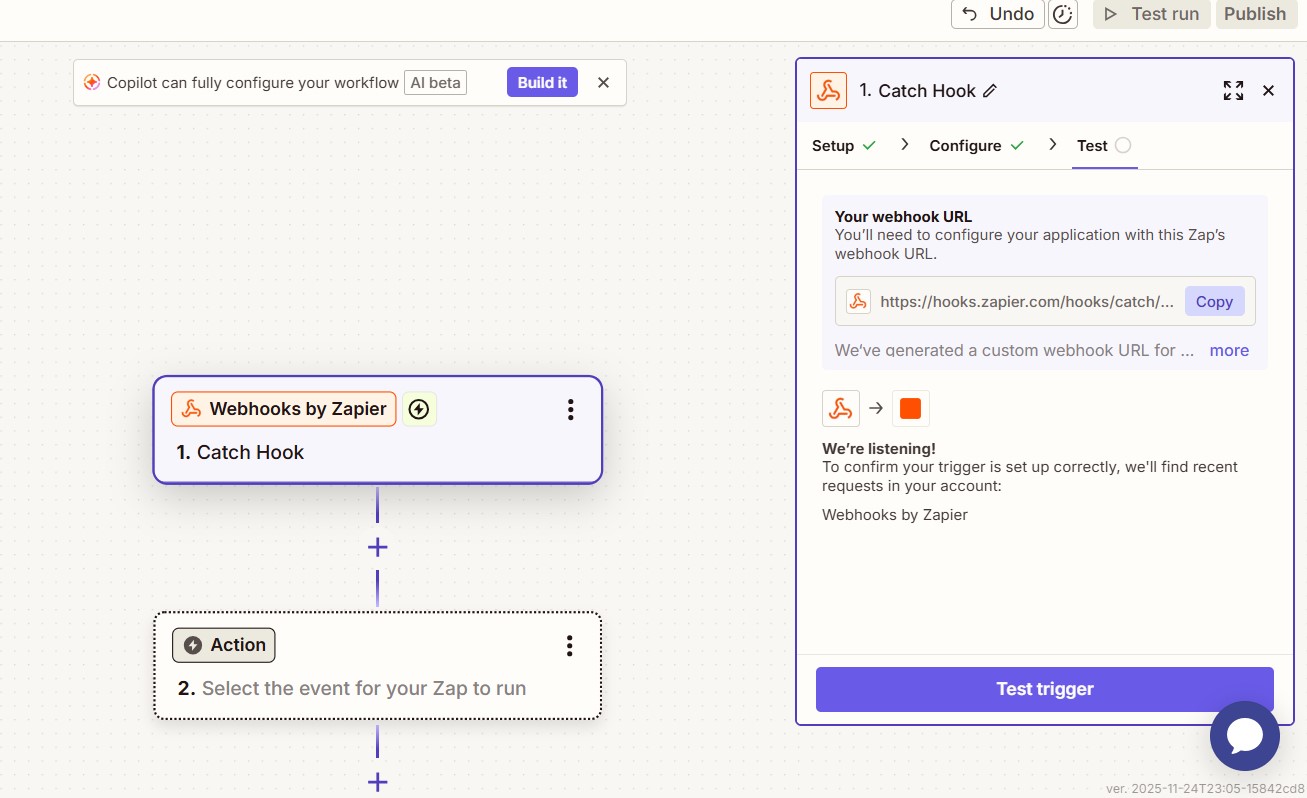
Zapier now shows a webhook URL on the test step. This is the address your WordPress site will post registration data to. Copy it exactly, including the trailing path.
Paste the URL into the plugin
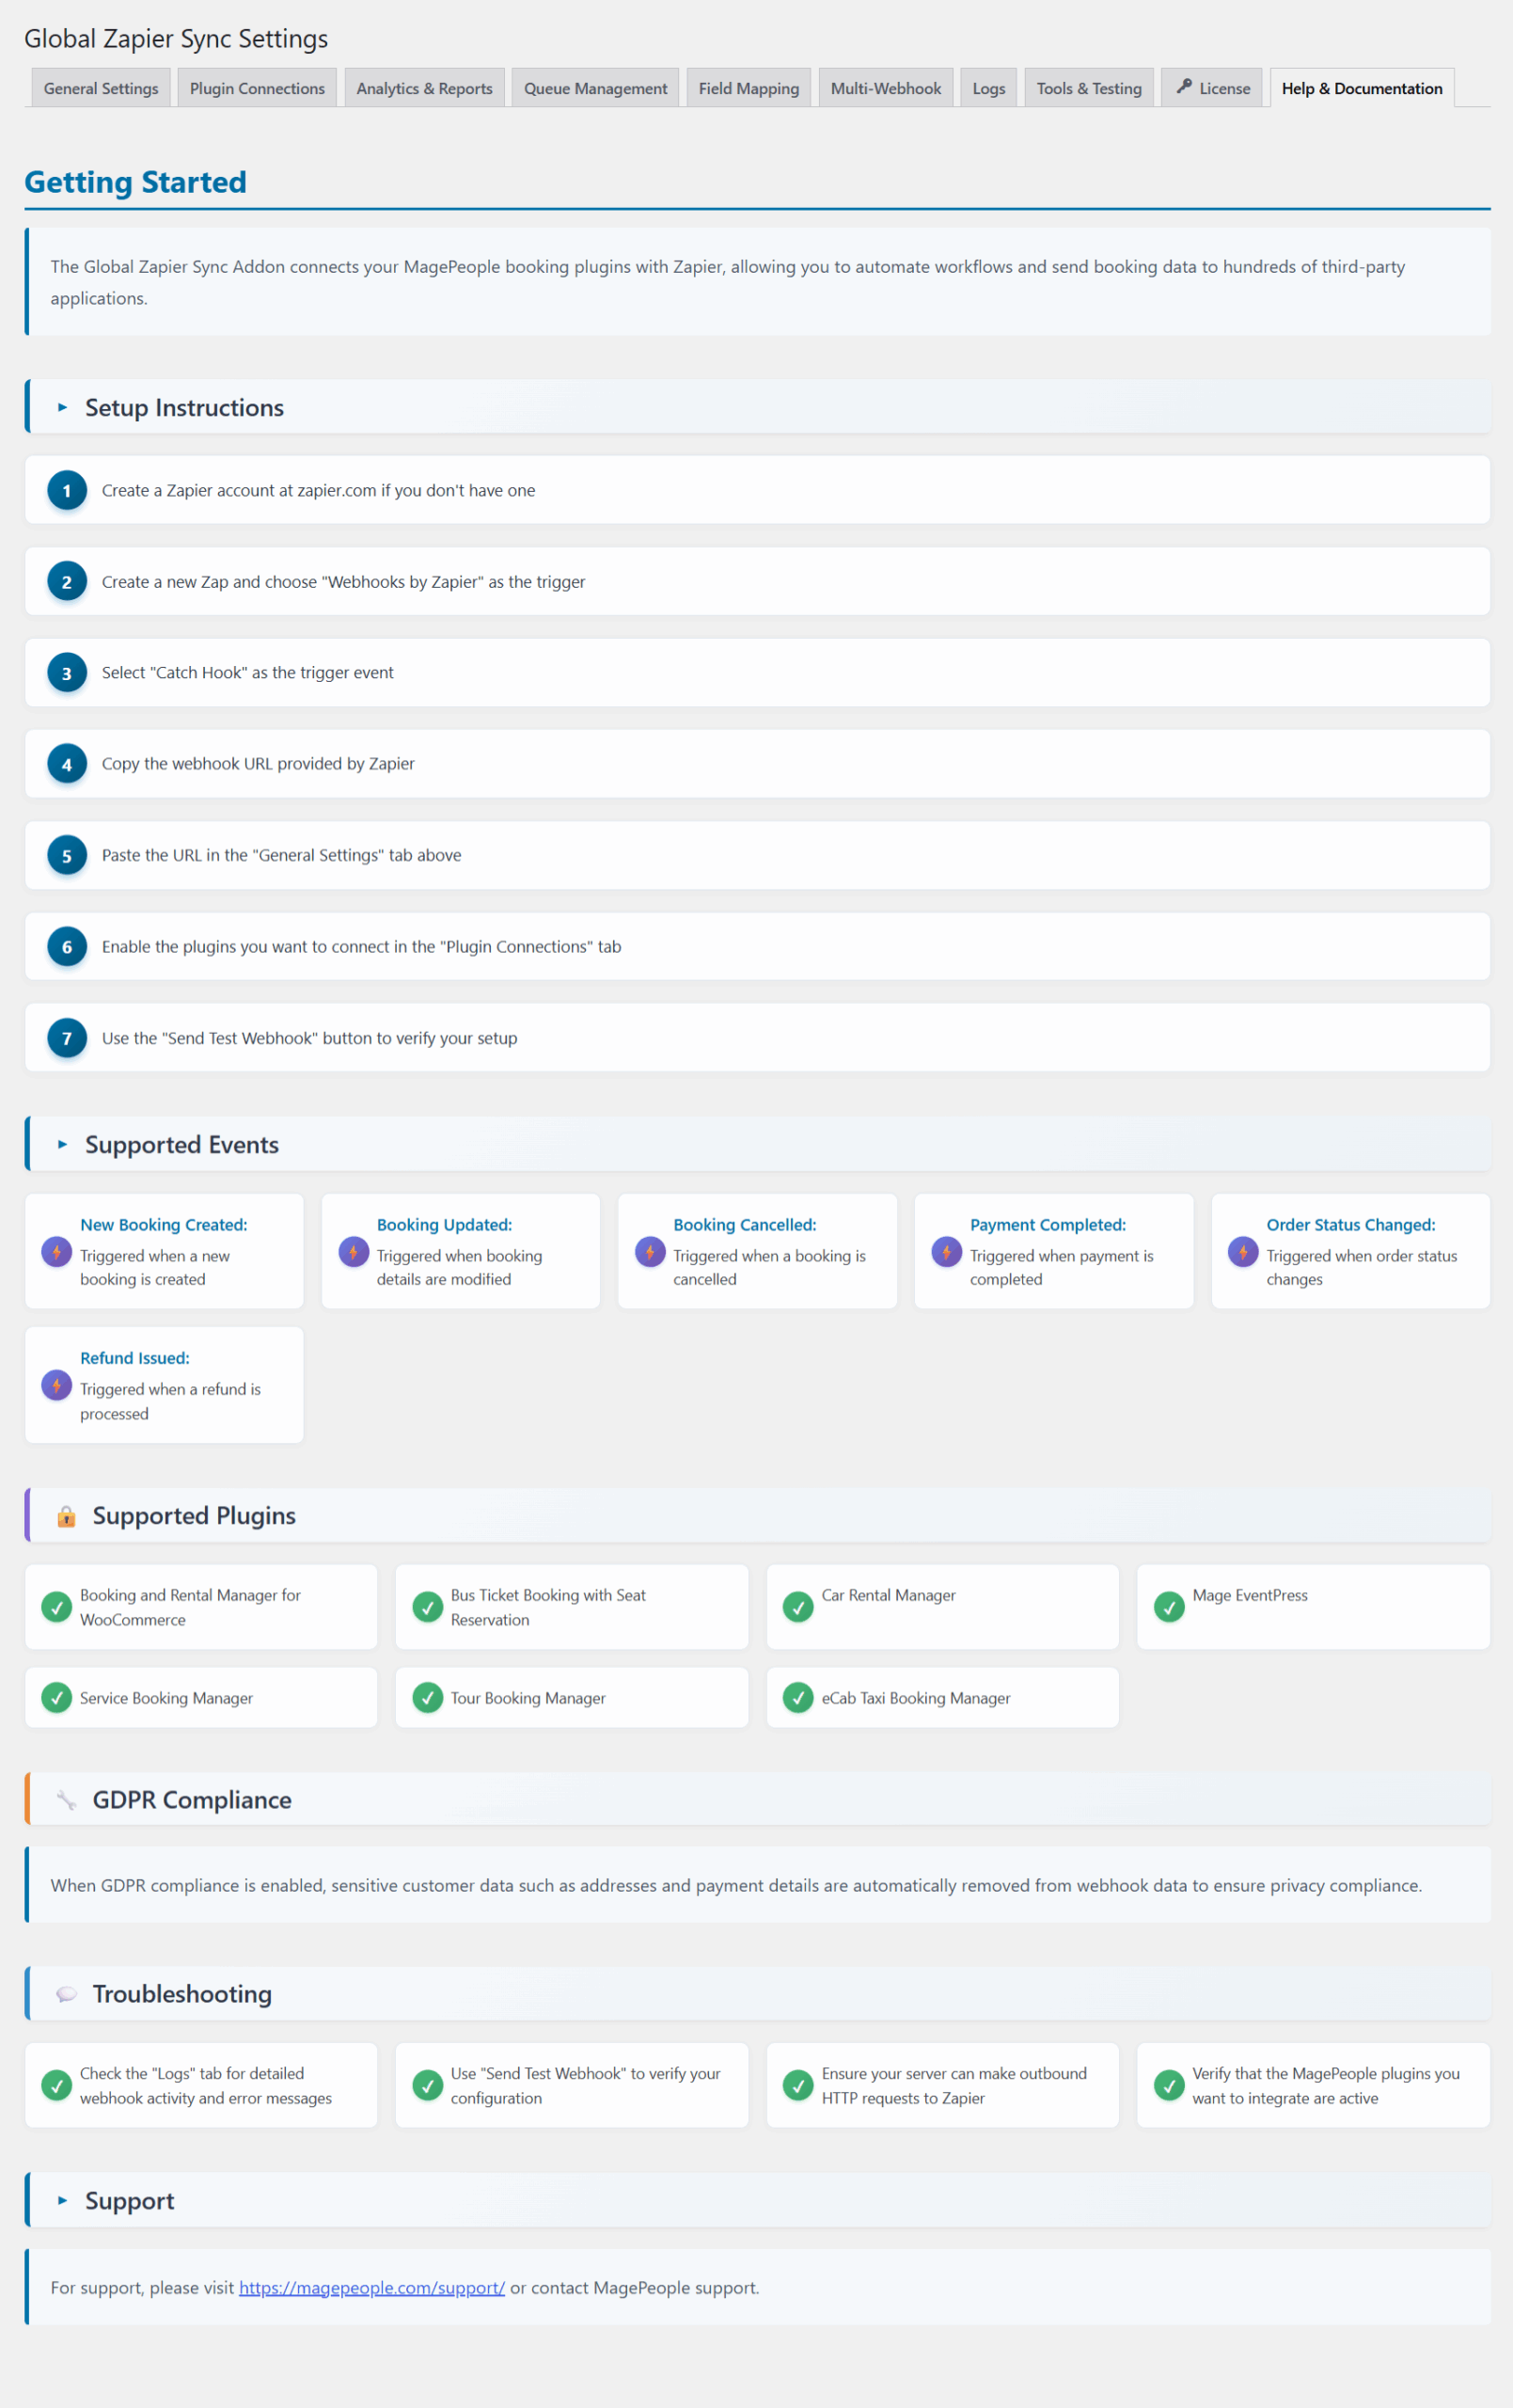
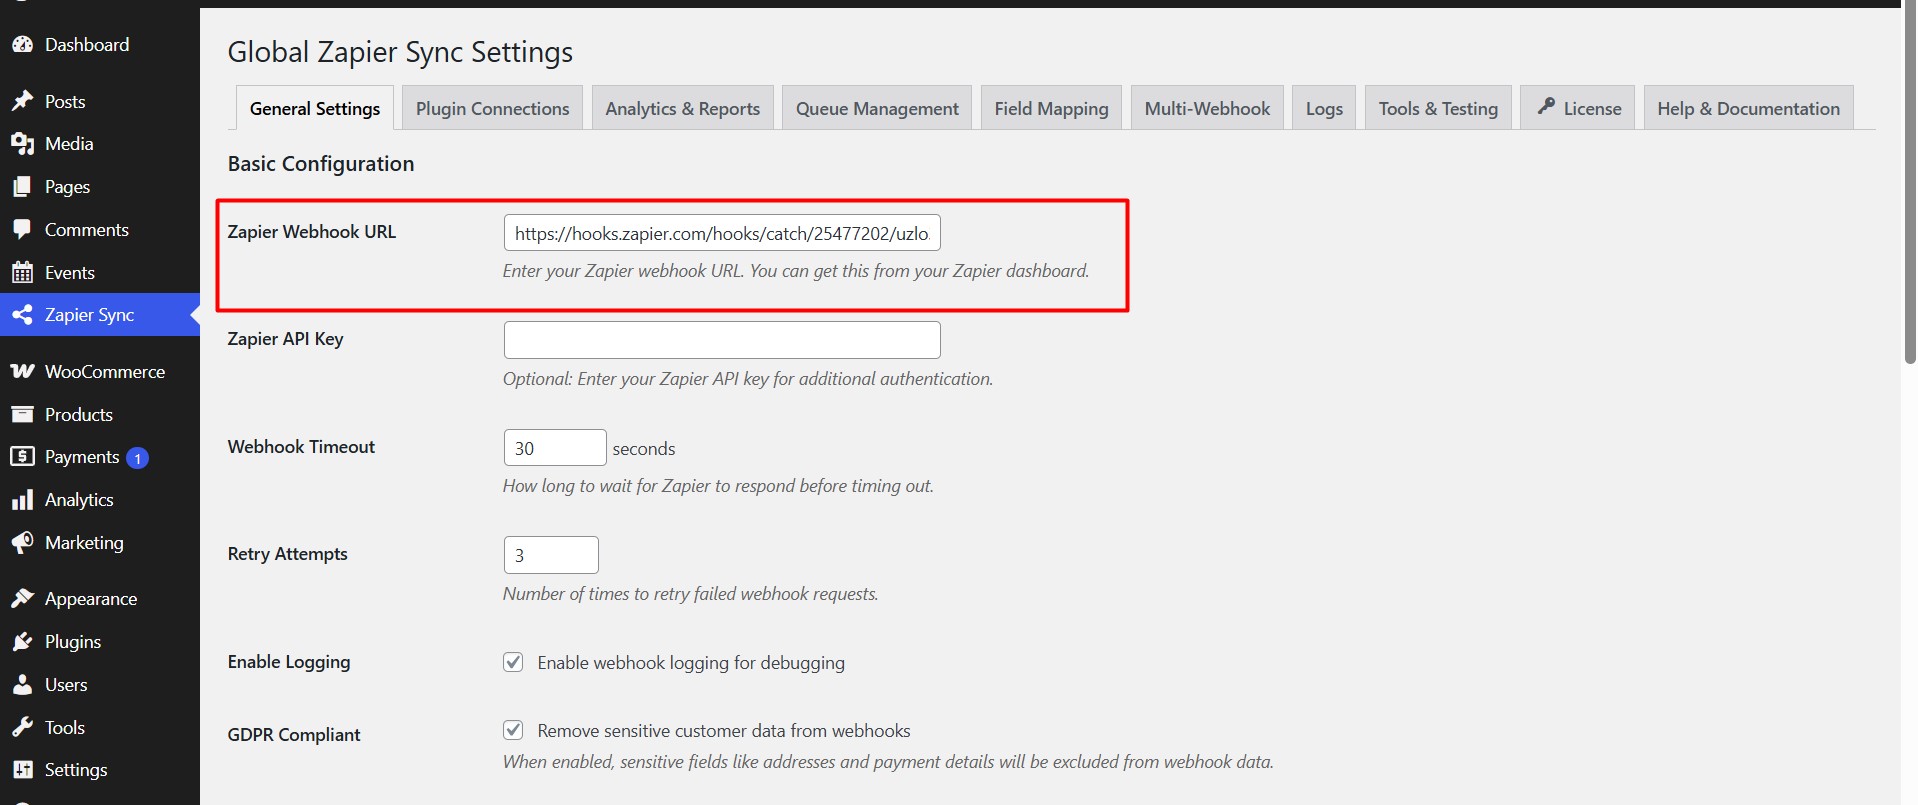
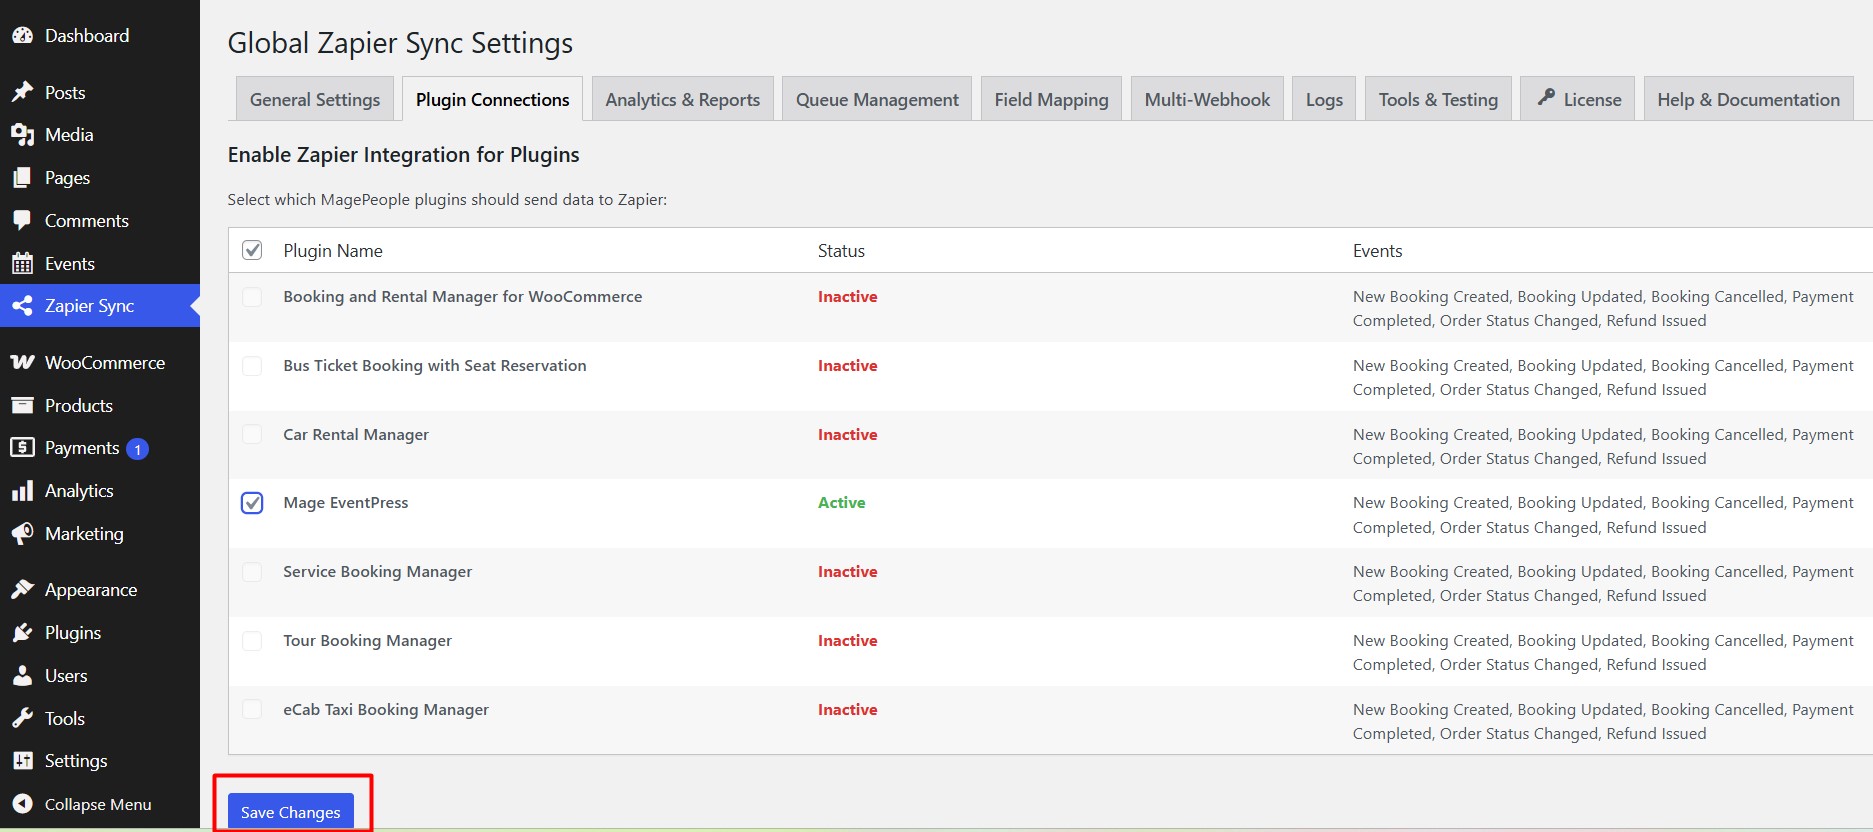
Return to your WordPress dashboard and open Zapier Sync > Global Zapier Sync Settings.
- Under General Settings, paste the URL into the Zapier Webhook URL field and save.
- Under Plugin Connections, select WpEvently (Mage EventPress) as the source plugin and save.
Send a test payload
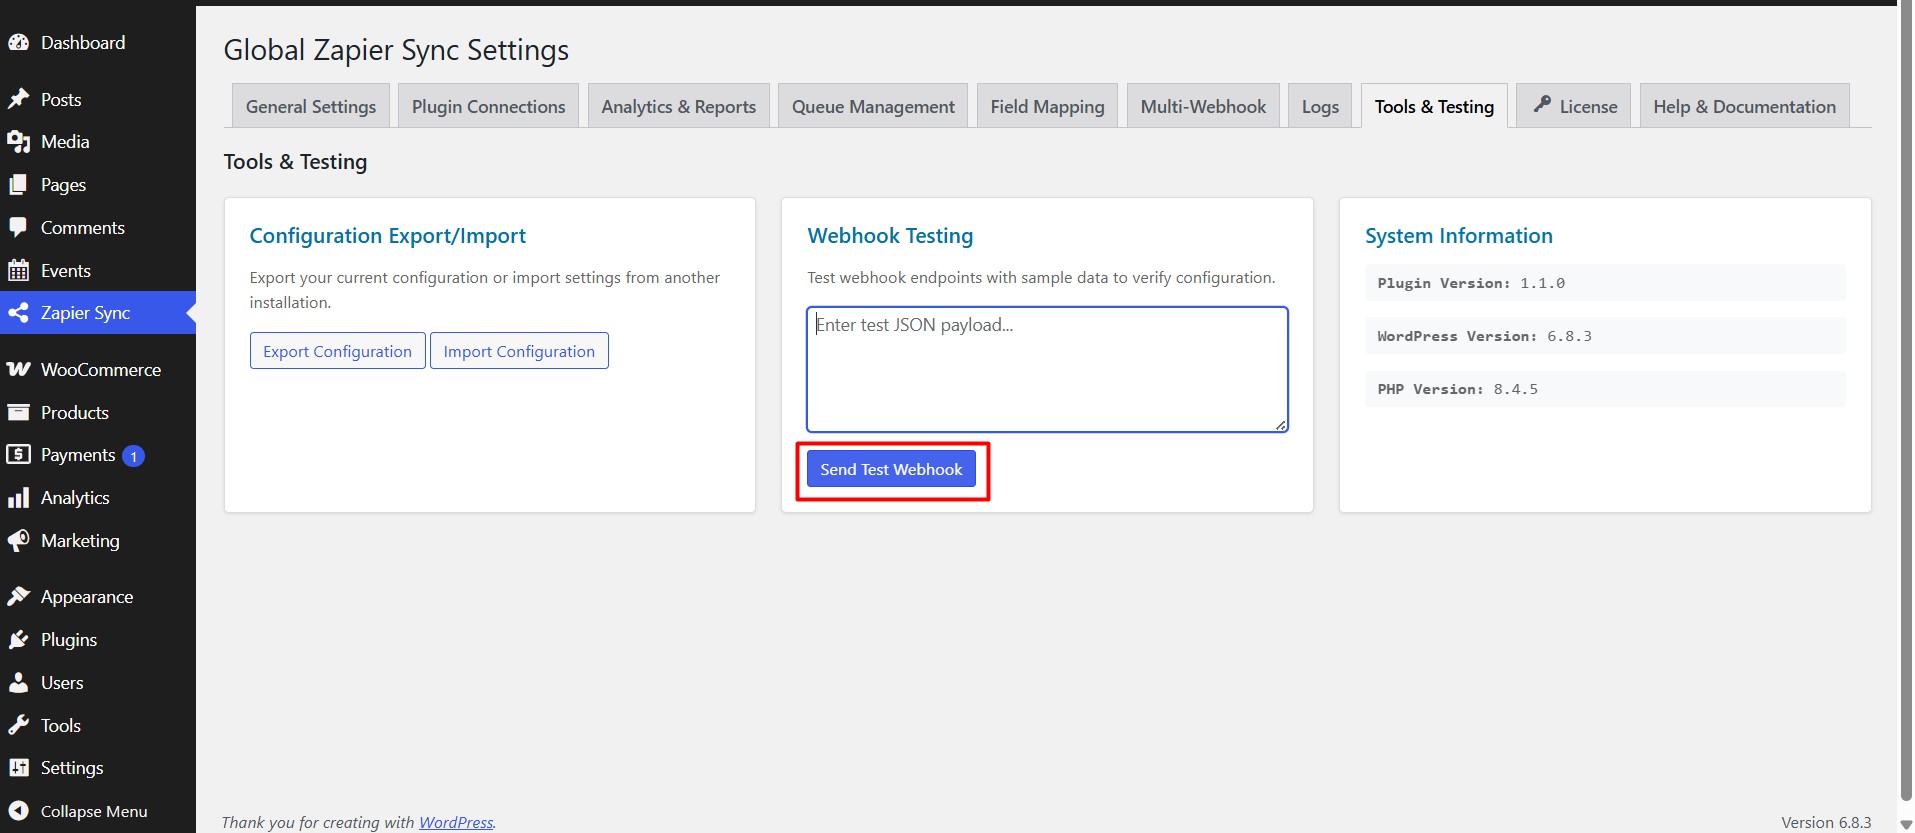
Open the Tools & Testing tab and click Send Test Webhook. This pushes a sample record through so Zapier can learn the field structure before a real booking exists.
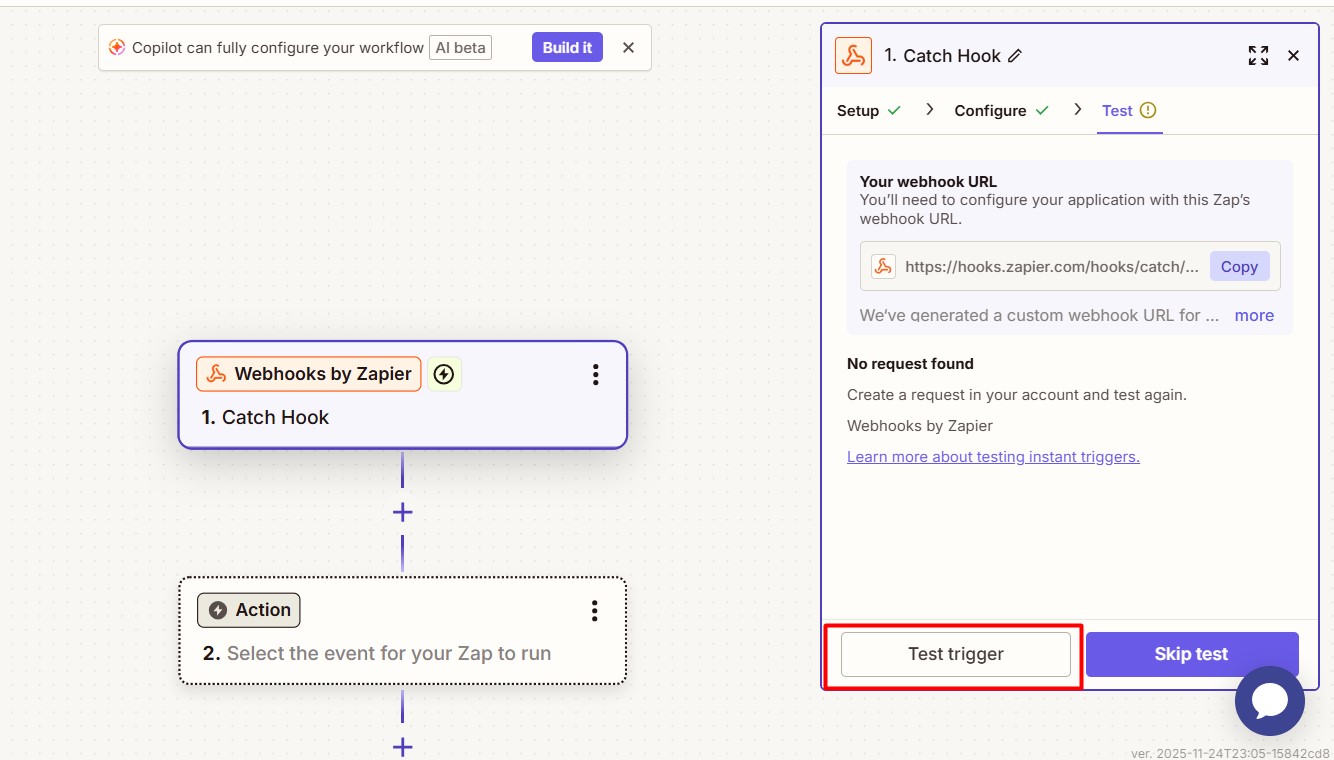
Back in Zapier, click Test trigger. If the connection is healthy, Zapier reports that it found a record and shows the field names and sample values. Those field names are what you will map in the action step.
Step 3: Create a Test Online Event and Place a Booking
Zapier can only map fields it has seen. Creating a real record proves the whole chain — checkout, payload, trigger — before you rely on it.
- In WpEvently, go to Events > Add New and create an event.
- Set the event type to Online Event so the meeting-link field is available.
- Add the title, date, start and end times, and any ticket or price settings.
- Publish the event.
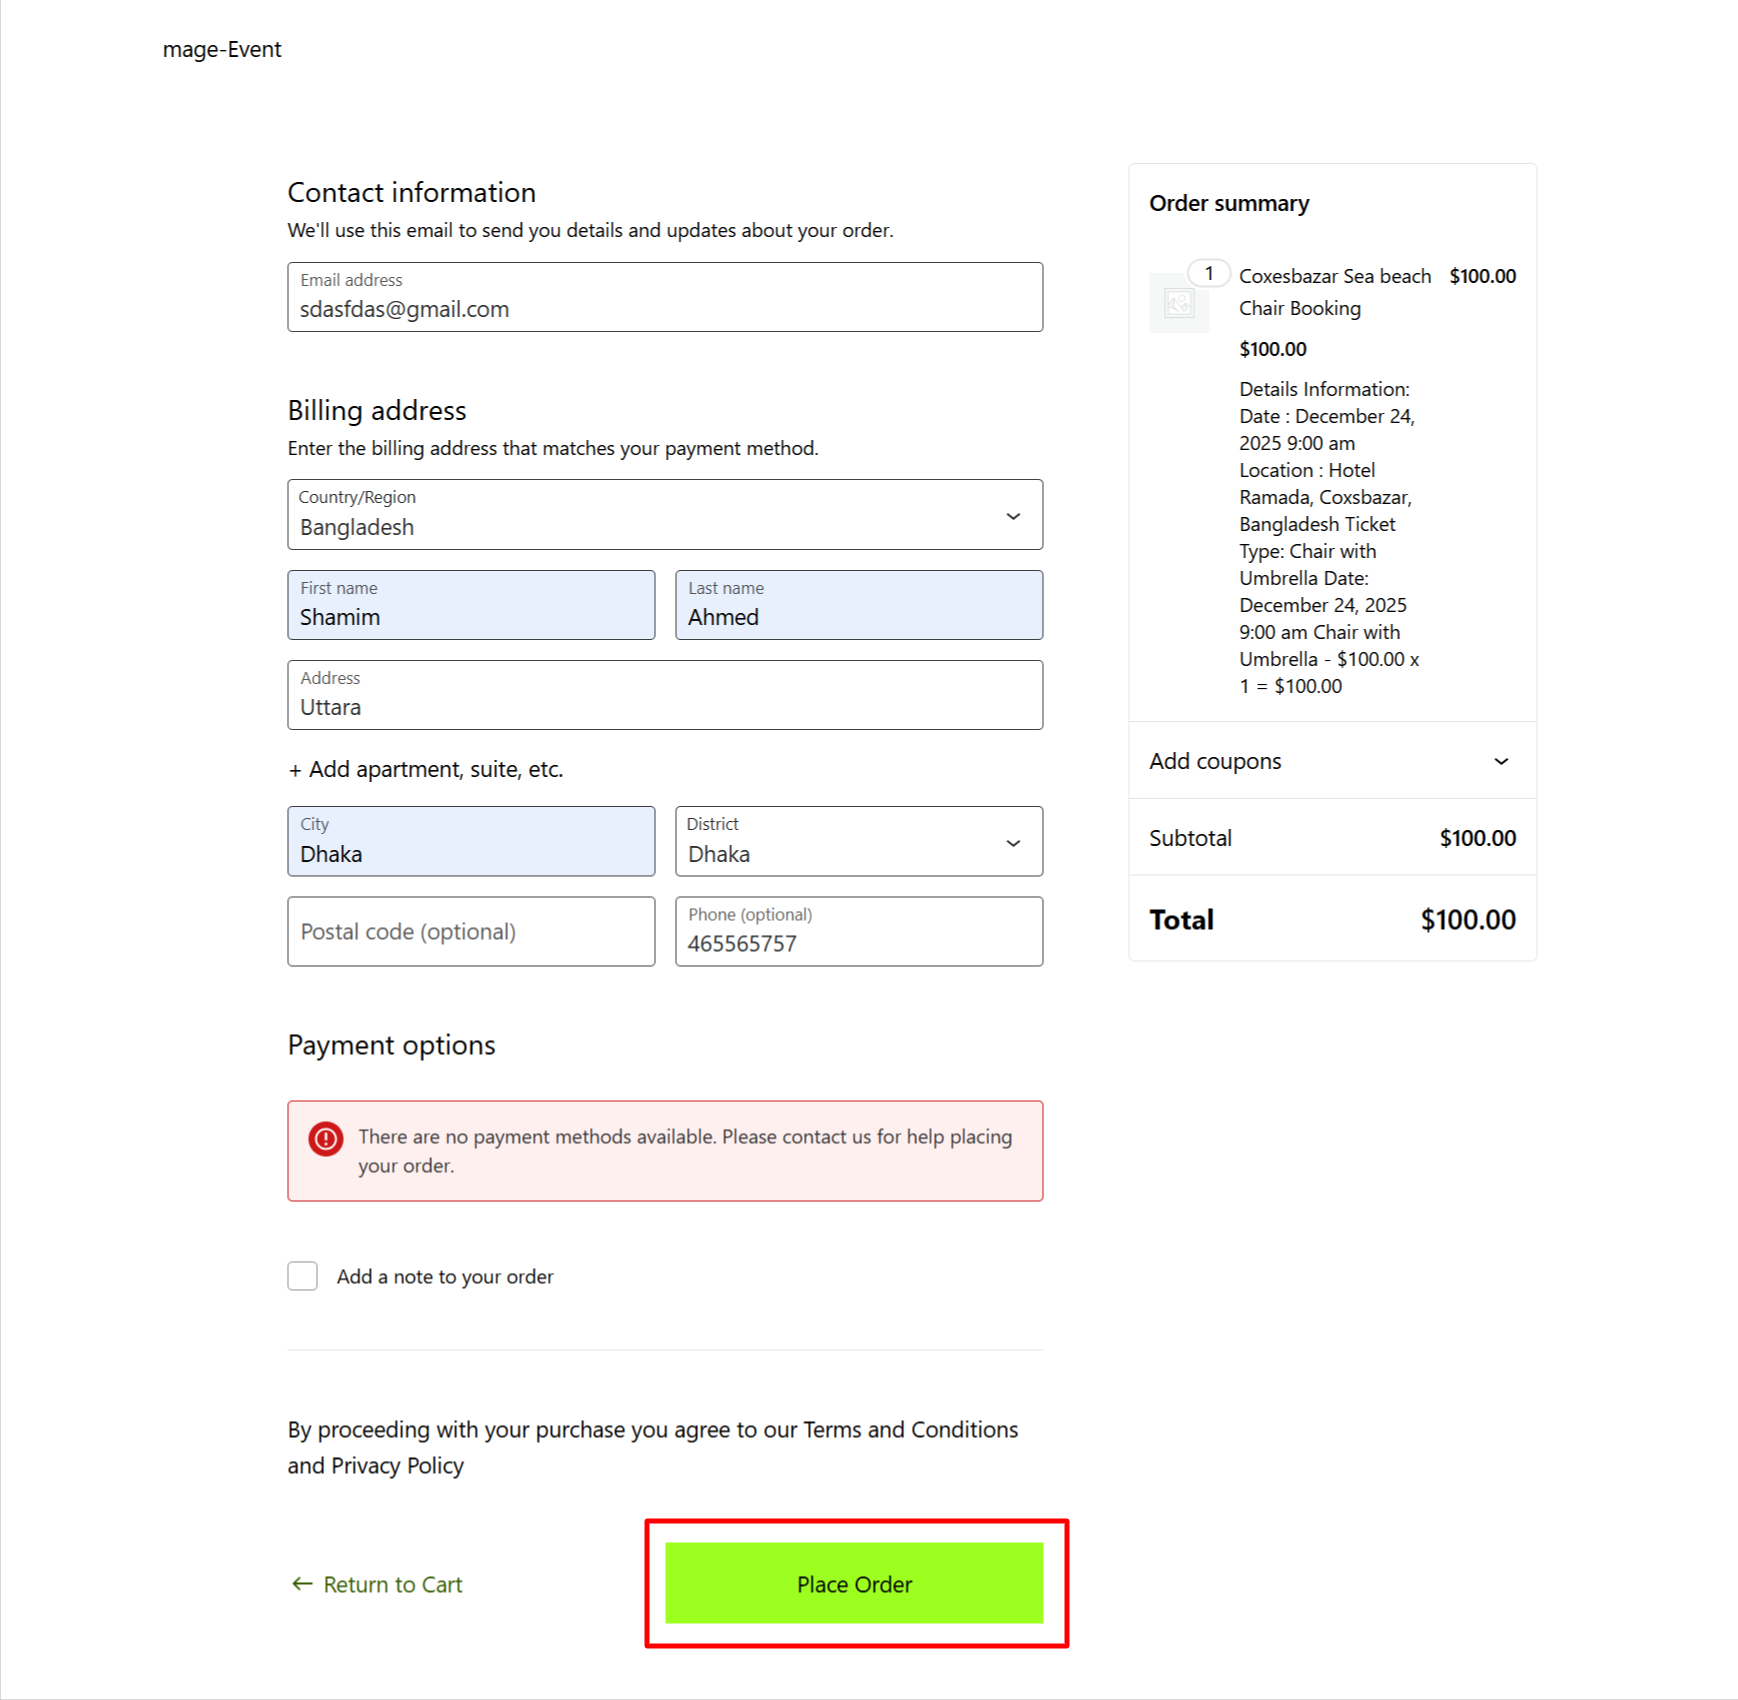
- Open the event in a private browser window and complete a test order, so you generate a genuine attendee record without touching your own admin session.
If this is your first time creating event content in the plugin, the step-by-step walkthrough for a seminar booking system built in WordPress shows the same event fields in more detail.
Step 4: Add the Google Meet Action
With a trigger that has data behind it, the action step becomes mostly mapping.
Select the app and the action event
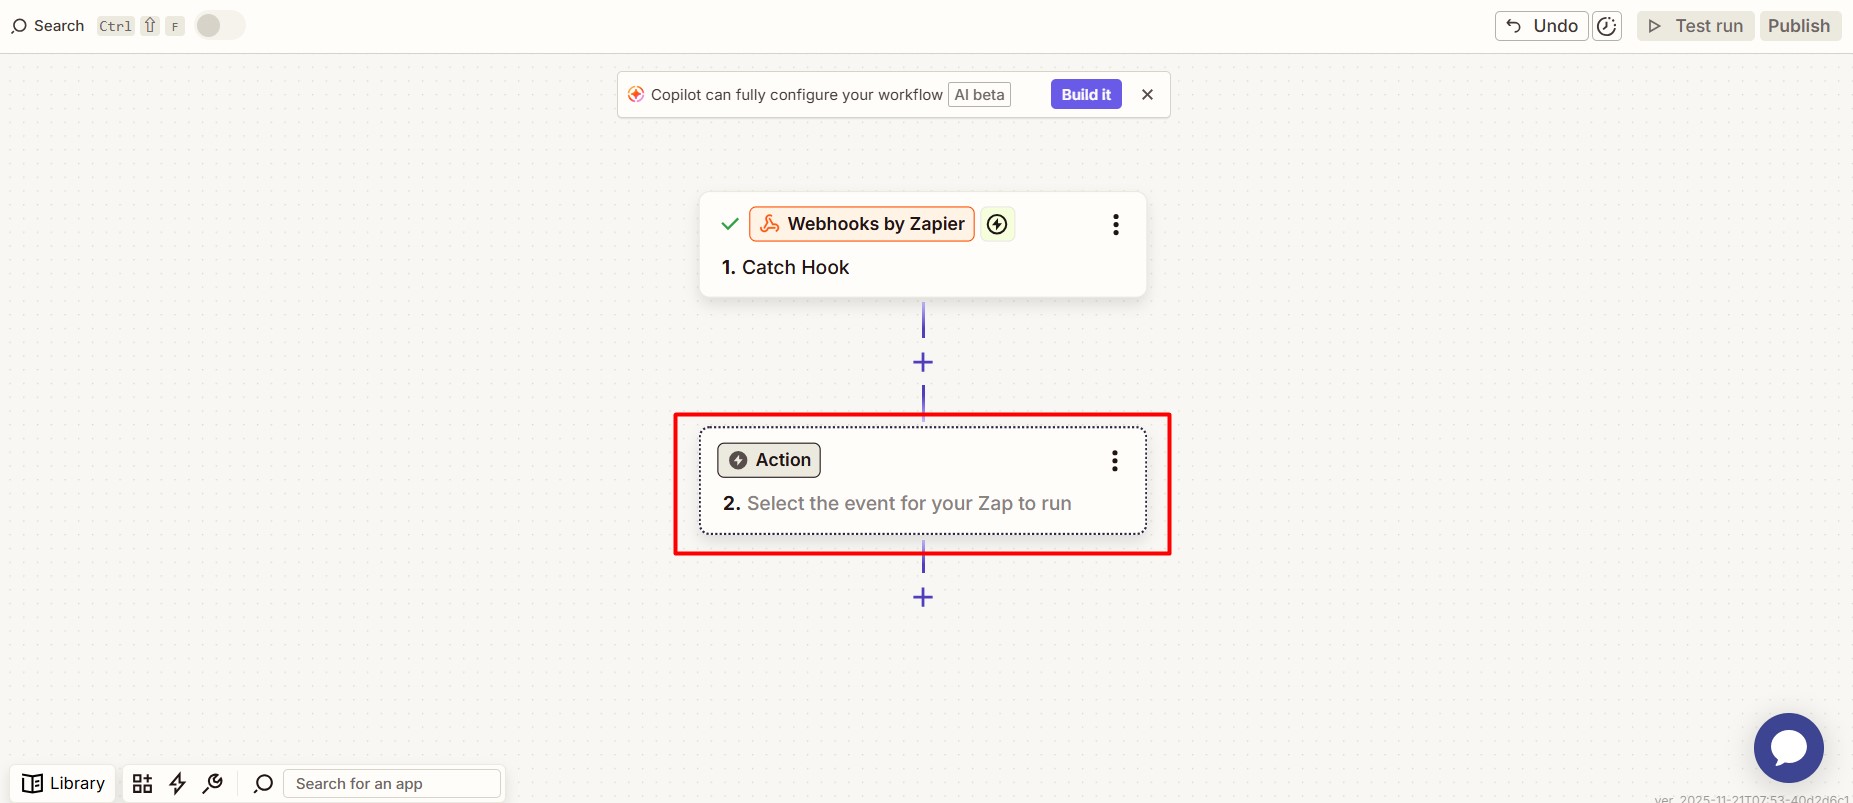
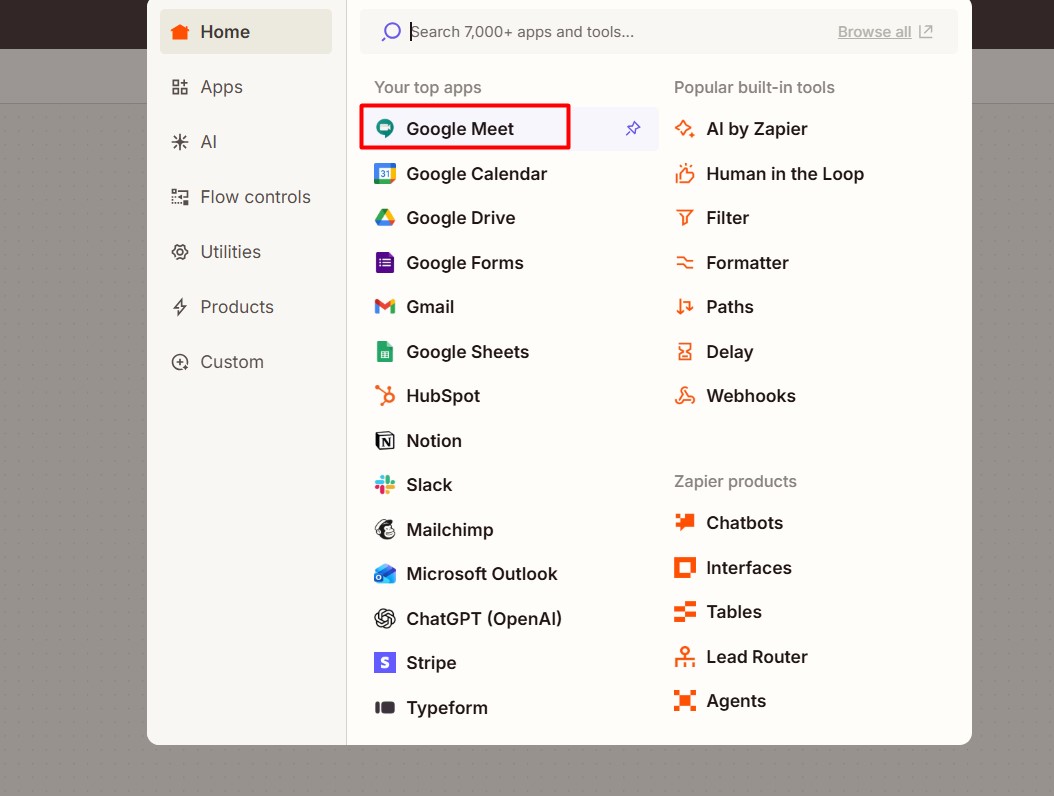
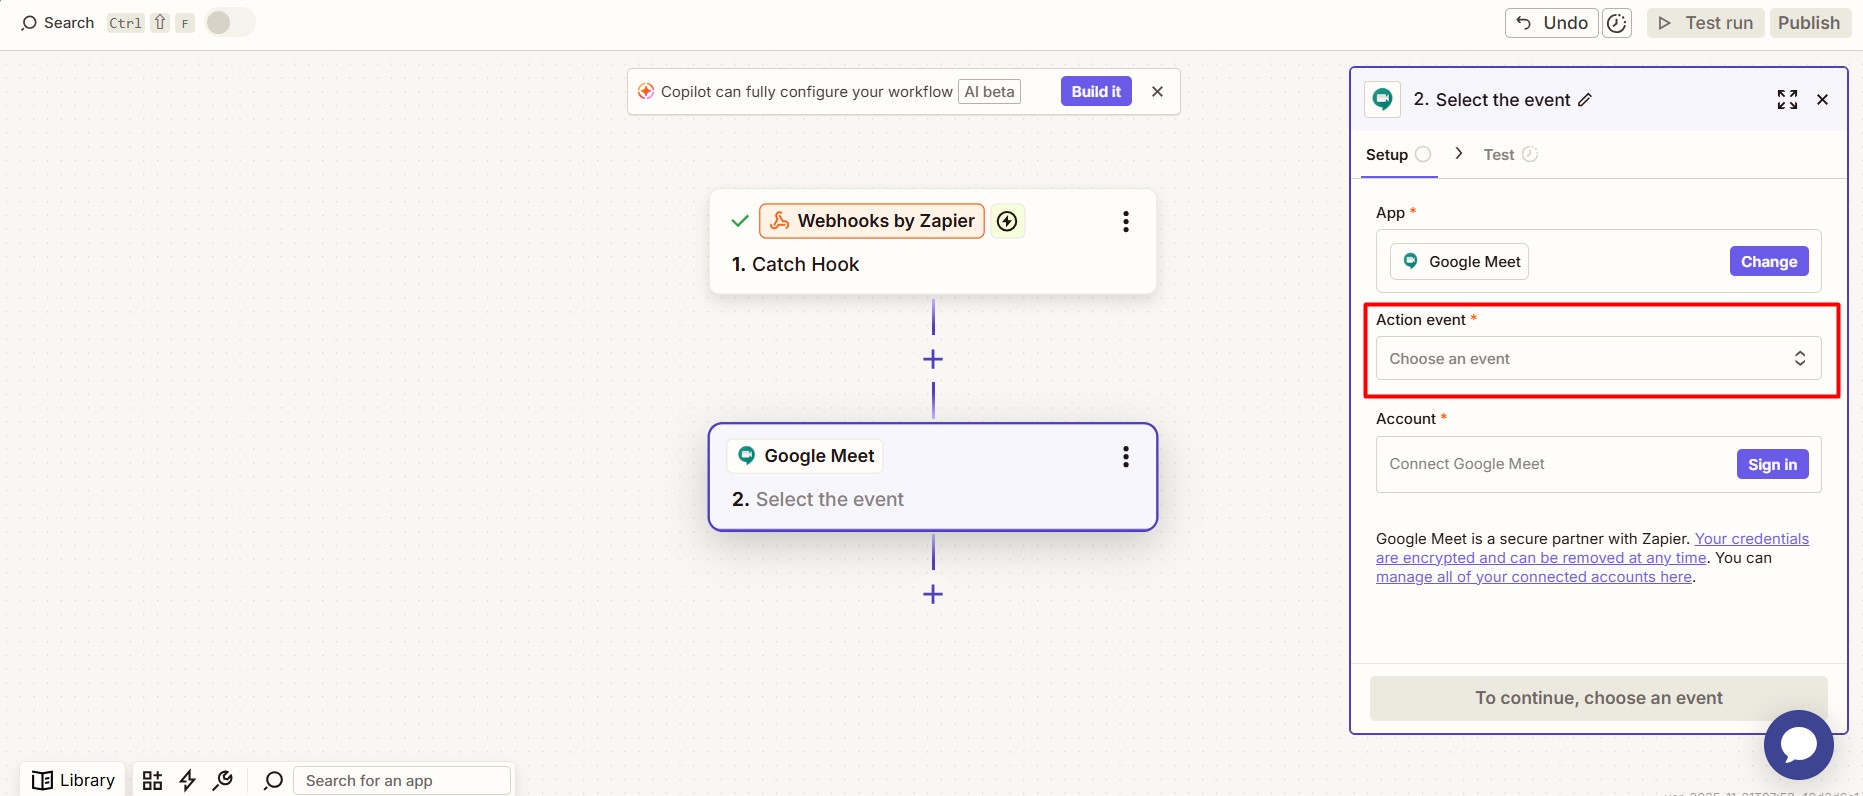
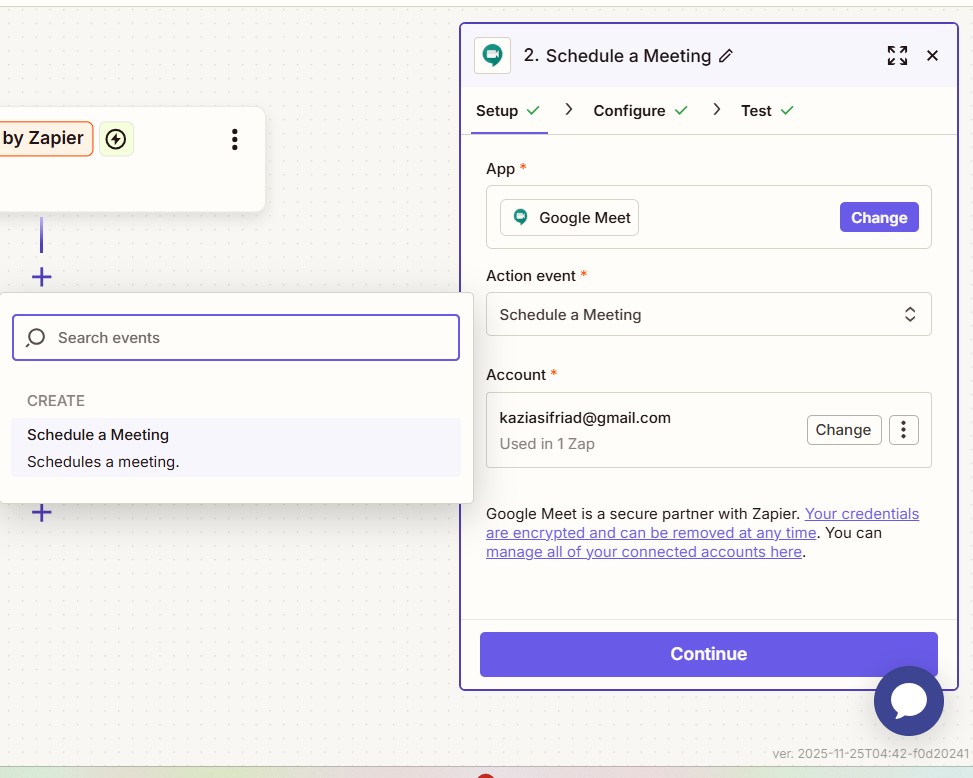
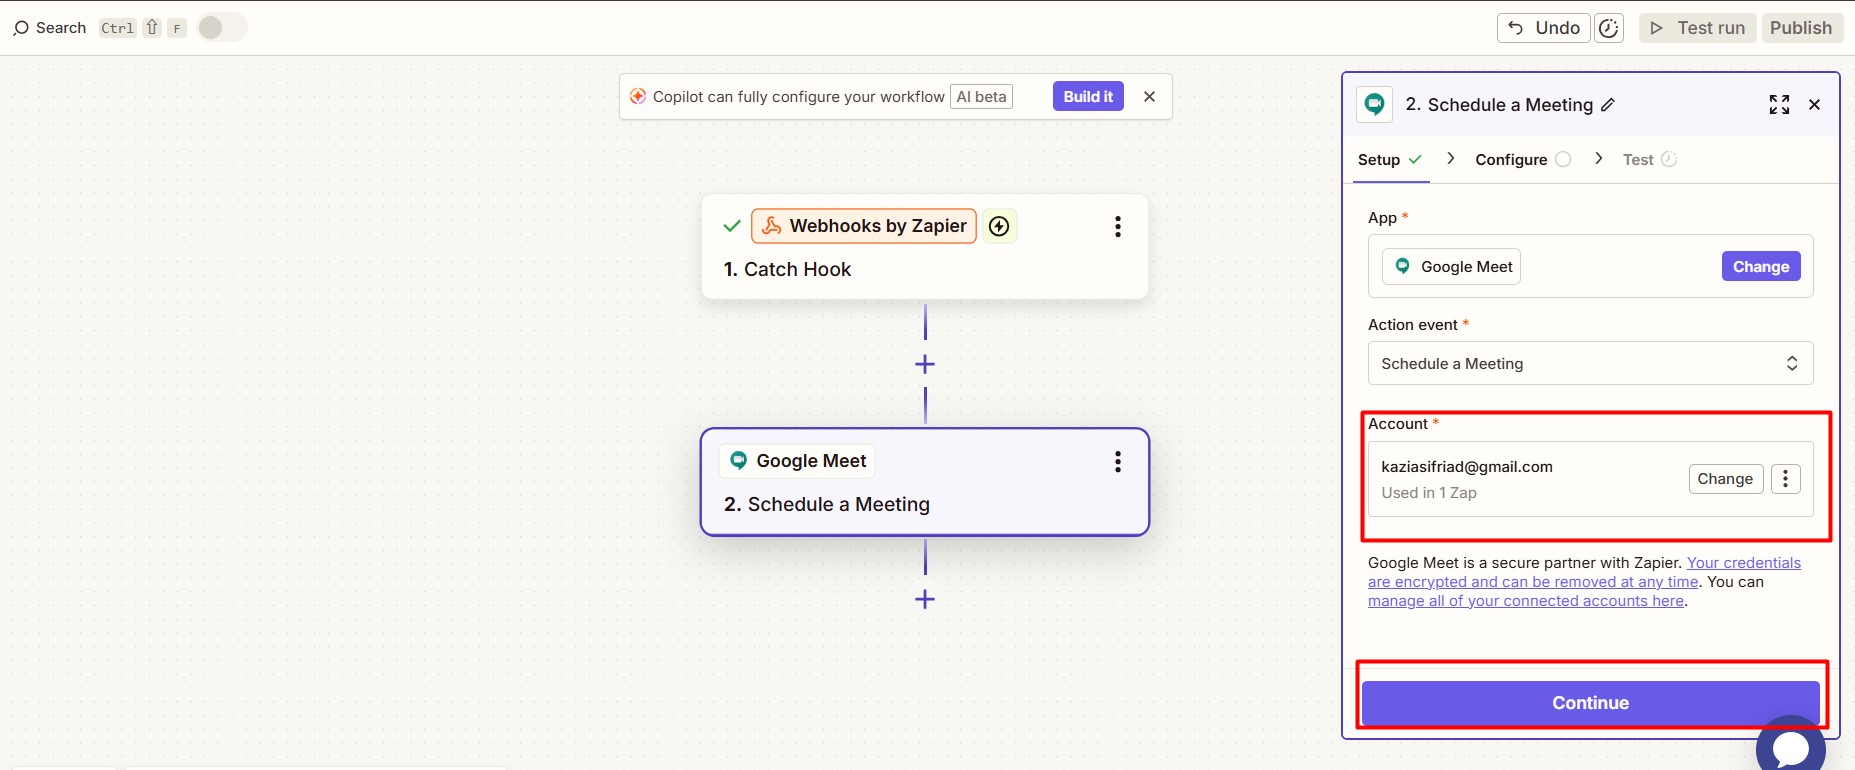
In Zapier, add an Action step and select Google Meet as the app. Connect the Google account that should own the meetings, then choose Schedule a Meeting as the action event.
Connect the account
Confirm the account email and click Continue. If your organisation restricts third-party access, have a workspace admin approve the connection rather than swapping accounts later — the meeting owner is tied to whichever account you authorise.
Map the fields
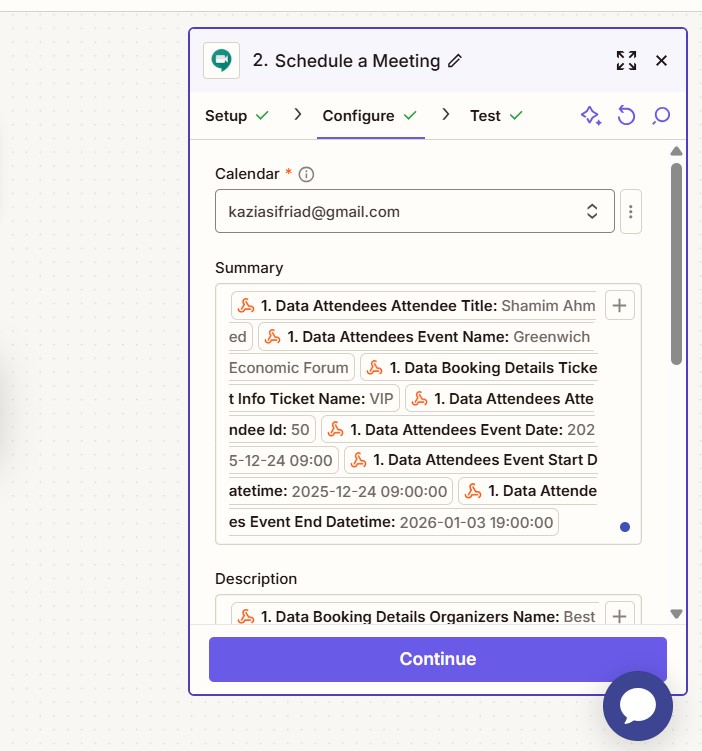
Click the + icon in each field to insert a value from the trigger.
- Summary — the event title, or a combination of title and attendee name if you want each entry distinguishable in the calendar.
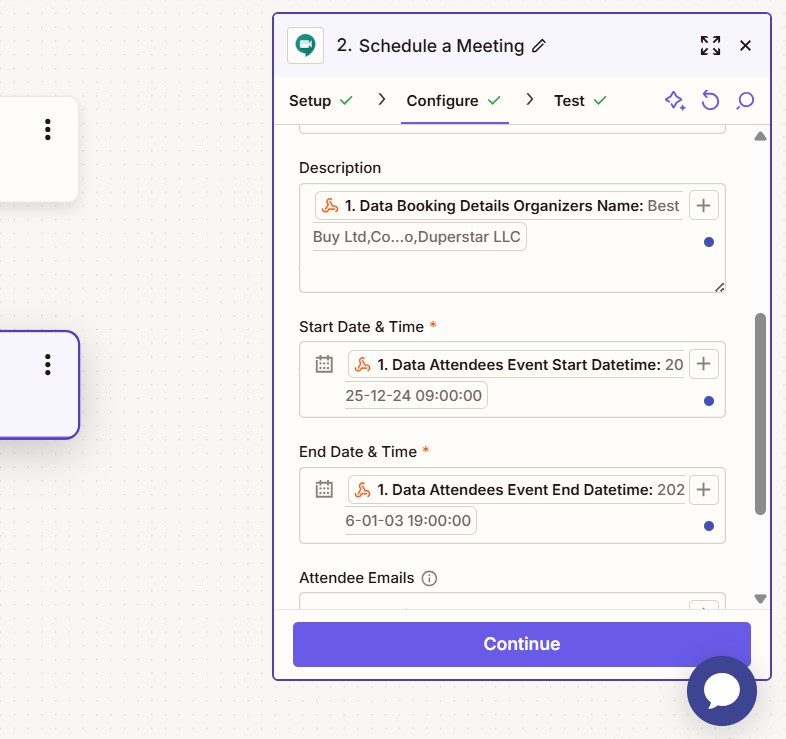
- Description — useful context such as the session topic or a joining note. Text you type here is fixed; mapped fields vary per registration.
- Start and end time — map these from the order rather than hard-coding a slot, otherwise a multi-session schedule will all collapse onto the same hour.
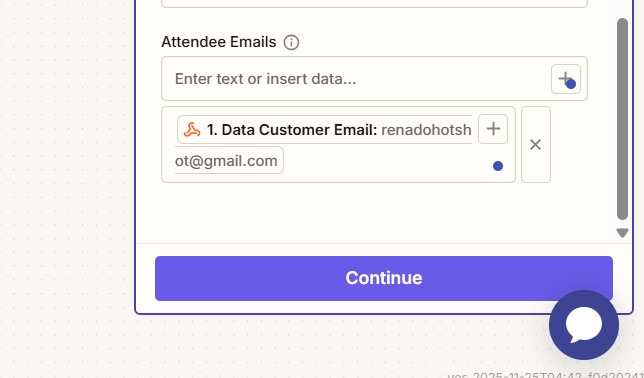
- Attendee email — the address captured at checkout. The invite and the Meet link go here.
Test the action and publish
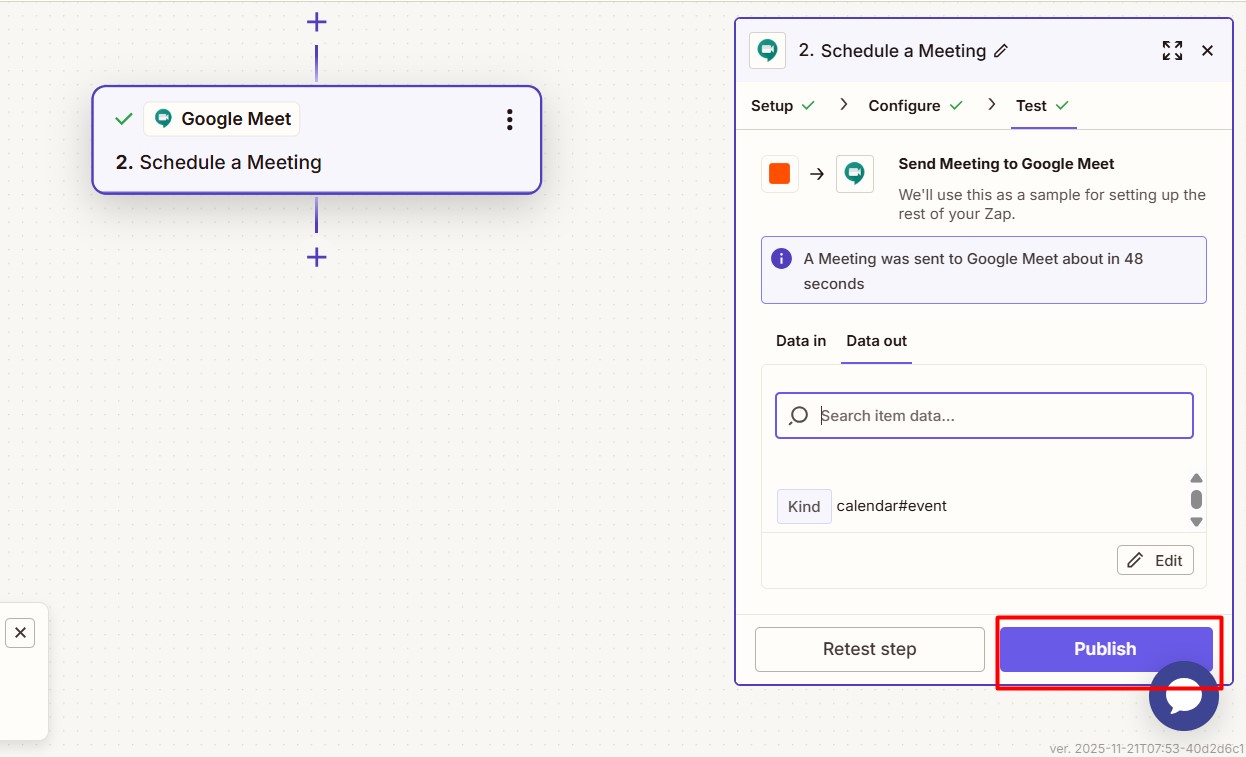
Click Test step. Zapier creates a sample meeting in the connected calendar and returns a link, which is your proof the mapping works. If a required field is empty, the test fails here rather than at 11pm before a session.
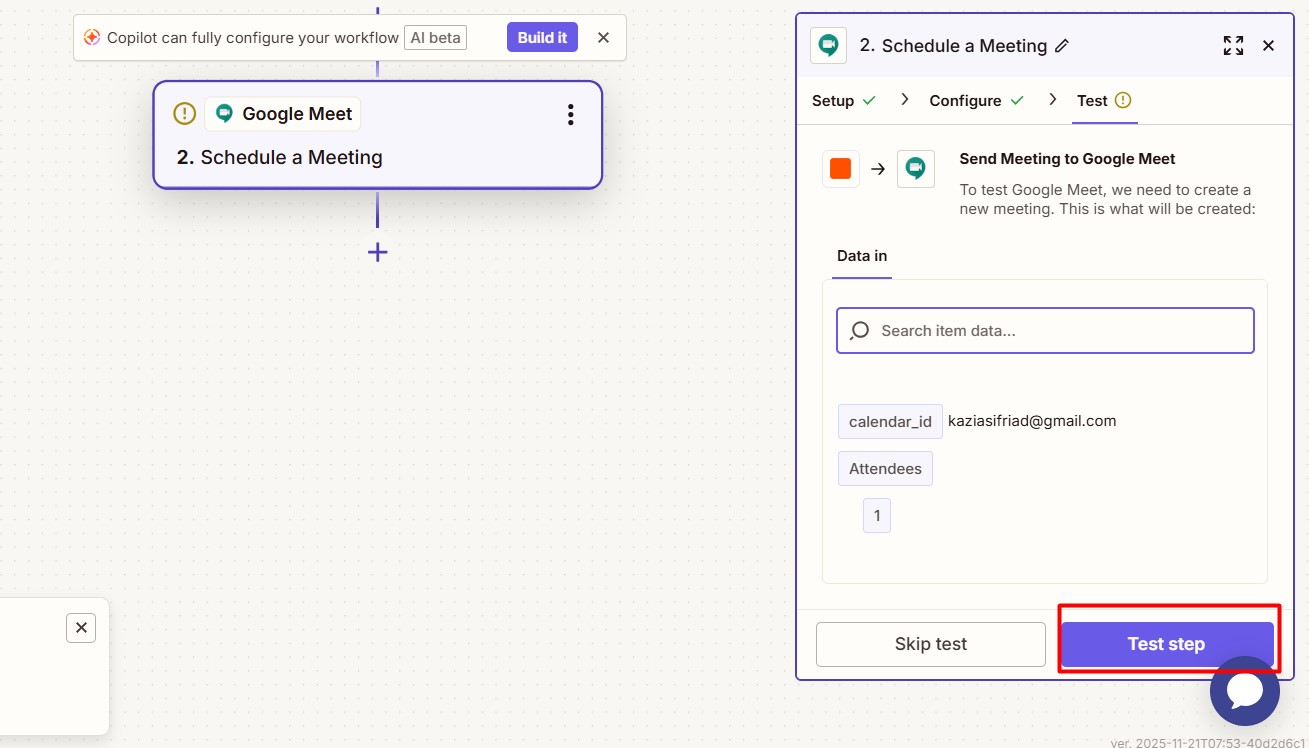
When the test passes, click Publish to turn the Zap on.
Step 5: Verify End to End
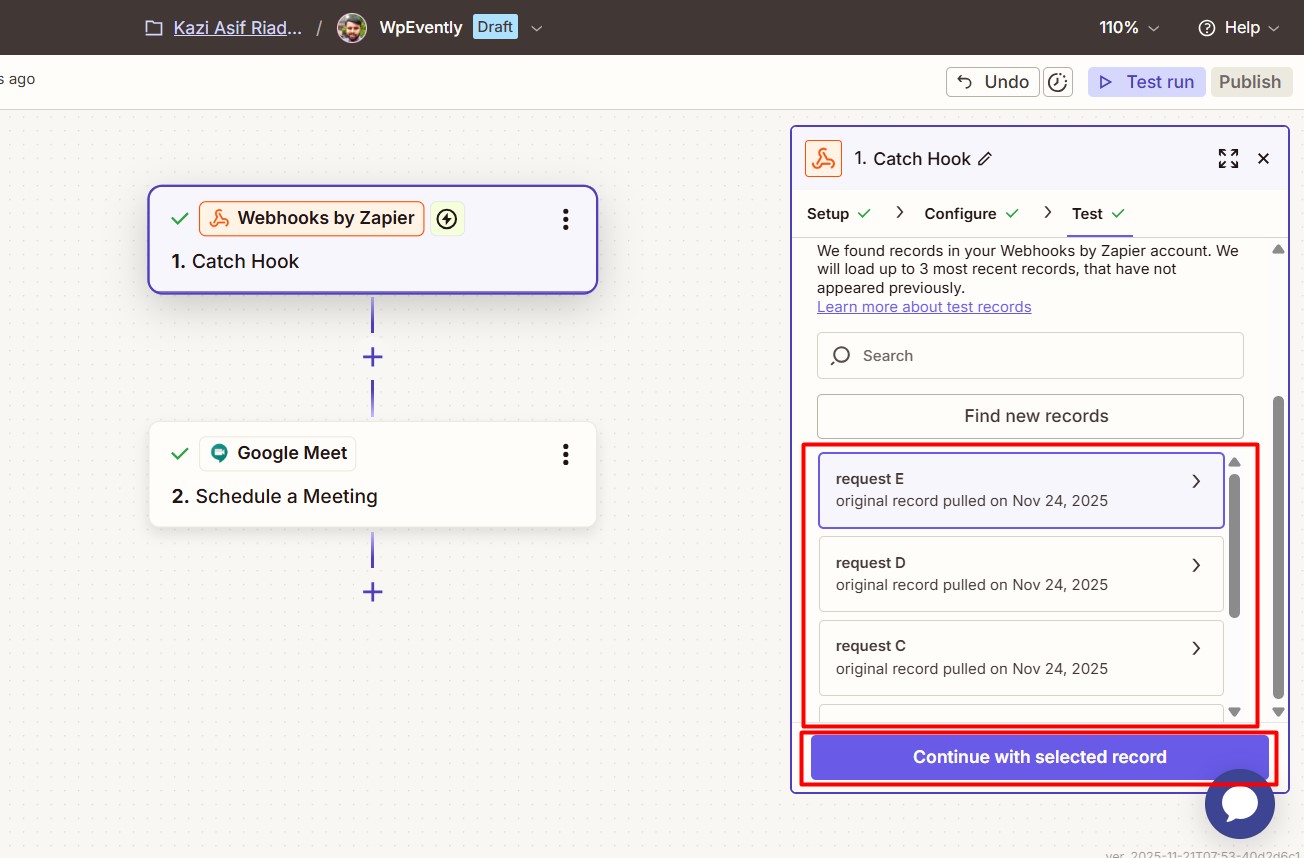
Place one more booking on the event site, then return to Zapier and open the action step’s test panel. Choose Webhook > Catch Hook > Test > Find new records and select the record that just arrived. Zapier runs the action against it and returns the meeting details.
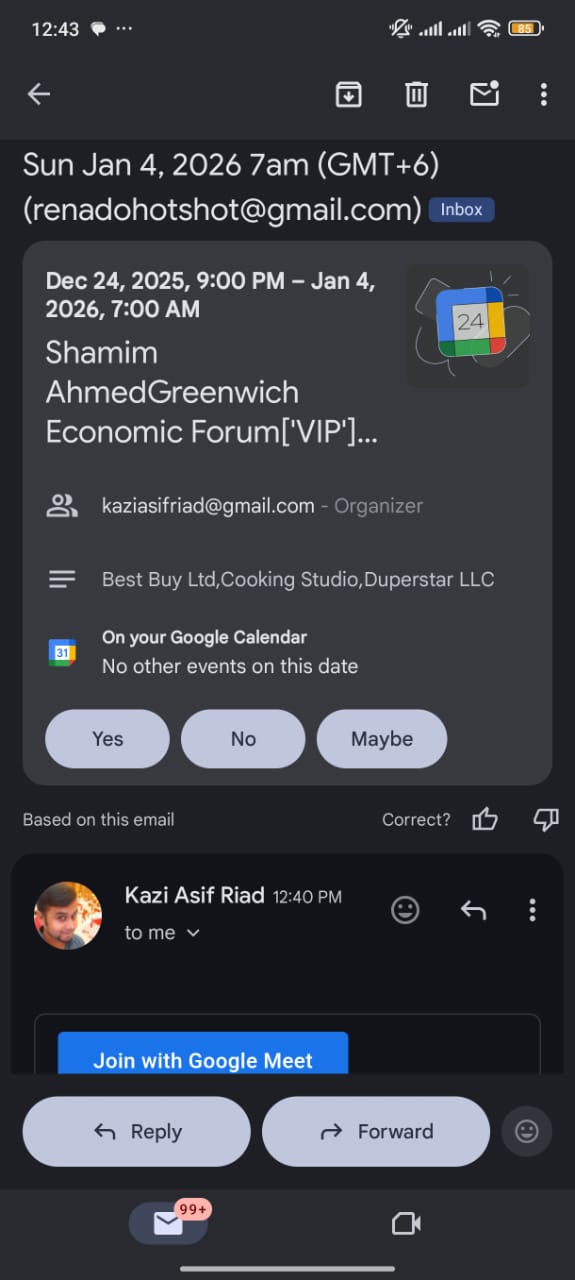
Check the attendee inbox: the confirmation containing the Meet link should arrive within moments of the order completing. If it does, the hybrid workflow is live.
What Else You Can Automate From the Same Trigger
The meeting link is one action. The same registration payload can feed a second action in the same Zap, or a separate Zap, once the first one is stable:
- Calendar entry without video — for in-person sessions, use Google Calendar’s create-event action and skip Meet entirely.
- Spreadsheet logging — append every attendee to a sheet for check-in, name badges or post-event follow-up.
- CRM or mailing list — add the registrant to the contact record your sales or community team actually reads.
- Team notifications — post a message to Slack or a similar channel when a seat is taken, useful for limited-capacity sessions.
Add these one at a time. A Zap with a single verified action is easier to debug than a five-step chain, and every added step consumes tasks when it runs.
Hybrid Events Need Booking Logic, Not Just Automation
The Zap assumes a clean registration record. For a true hybrid event, the plugin has to support the questions automation cannot answer: how many in-person seats exist alongside the online tier, whether the online tier is free or paid, and how the two audiences appear in the same attendee list.
Two things are worth checking before you scale this:
- Capacity per mode. If your venue holds 80 and the stream holds unlimited attendees, the event needs separate tracking, not one blended headcount. Automation will happily send 500 links; it will not stop you overselling the room.
- Waiting lists and transfers. A full session usually needs a queue, and cancellations need to free a seat for the next person. Our guide to adding a waitlist to your WordPress events and ticket-selling site covers that flow, which is a booking-side decision rather than an automation one.
There is also a calendar side to consider. If attendees rely on your site to see what is coming up, the display layer is handled in the guide to adding a calendar to a WooCommerce event management website. Automation and display are separate jobs, and confusing the two is how sites end up with meeting links nobody can find.
Testing Checklist Before You Rely on the Zap
| Check | Expected result |
|---|---|
| Test webhook from plugin | Zapier shows a record with readable field names |
| Real test order | Trigger fires within a minute or two of checkout |
| Action test | A meeting appears in the connected calendar |
| Attendee inbox | Confirmation with a working join link |
| Zapier task history | Runs show success, with errors visible if any |
| Free ticket type | Zero-value orders also trigger the Zap, if you sell free seats |
| Time zone | Meeting time matches the event time for remote attendees |
Troubleshooting: Five Things That Usually Go Wrong
The trigger finds no records
Almost always a connection issue: the webhook URL was pasted with a missing character, or WpEvently was not selected under Plugin Connections. Re-send the test webhook from the plugin and test the trigger again.
The Zap runs but the email address is empty
The attendee email field was mapped from the wrong source field. Republish the trigger data after a recent booking, then remap it — field lists are refreshed when Zapier sees new records.
Everyone gets the same meeting time
The start and end fields were typed in manually instead of mapped. Fixed values produce identical calendar entries for every attendee.
The link arrives after the session starts
Either the trigger is delayed or Google’s invite delivery is. For sessions with last-minute registration, consider sending the join link in your own confirmation email as well, so nobody depends on a single delivery path.
A Zap was switched off during a busy period
Registrations that occurred while the Zap was paused are not retroactively processed. Check recent orders after any outage and handle them manually.
Common Questions
Do I need the Zapier add-on for WpEvently specifically?
The add-on is what posts WpEvently registration data to a webhook. Without it, Zapier has no trigger to catch from the event plugin.
Do I need to know how to code?
No. The setup is point-and-click: install a plugin, copy a URL, choose an app, map fields.
Can I use the same approach for in-person events?
Yes, and it is often the more useful case. Swap the Meet action for a calendar entry, a sheet append or a CRM contact, and the trigger wiring stays the same.
Does the add-on work with MagePeople’s other plugins?
It is designed as a shared integration layer across MagePeople plugins, so the same webhook and settings screens serve more than one plugin once connections are enabled.
Where do I check pricing?
Check current pricing on the add-on’s product page and on Zapier’s pricing page. Plan limits and task allowances change, so a figure quoted in an older tutorial may no longer be accurate.
Final Thoughts
The real value of connecting Zapier to a WordPress event site is not the meeting link itself — it is removing a manual step that has to happen before every online session. Build one Zap, prove it with a real order, and add a second action only when the first has run cleanly through a full event.
Start with the Google Meet workflow described above, verify it end to end with a test booking, then expand into calendar syncing, attendee lists and team notifications as your hybrid calendar grows. The plugin handles registration; the automation handles everything that used to follow it.
