


You run a repair business — phones, appliances, HVAC, bikes, cars — and every booking currently arrives by phone, WhatsApp or a walk-in. A WordPress repair service booking plugin replaces that with a single form on your site that lets customers pick a repair type, choose a slot, and pay a deposit. This guide walks through the whole setup with WpBookingly, from installing the plugin to confirming your first completed repair order, plus the settings most people get wrong on their first attempt.
If you are still comparing options rather than building, the appliance repair booking plugin roundup covers which plugins suit which repair niches before you commit.
What a repair service booking plugin actually does
Booking a repair is not the same as booking a hotel room or a yoga class. A repair job has variables that most generic booking tools ignore: the device or item being repaired, the fault described by the customer, whether the visit happens at your workshop or at their address, and whether a spare part needs to be ordered first. A plugin built for services — rather than products — handles those variables as structured fields instead of a free-text comment box.
The core jobs it should do:
- Let a customer choose a repair type (screen replacement, compressor service, plumbing leak) with its own price and duration.
- Show only genuinely open slots, based on your working hours, break times, holidays and how many jobs you can take per session.
- Attach extra services — pickup and delivery, express turnaround, diagnostic fee — to the same order.
- Take payment online or at collection, whichever you prefer.
- Feed every confirmed job into an order dashboard you can update as the repair progresses.
Why this matters for search and sales
Customers who book a repair online rarely call first. They arrive from a search such as “laptop repair near me”, land on a page that shows availability, and either book in the next few minutes or leave. Removing the phone call from the funnel is usually the single biggest gain — followed by automated confirmation emails, which cut no-shows noticeably because the customer has a written record of the slot.
Is a booking plugin right for your repair business?
Yes, if you take more than a handful of jobs a week and want to stop double-booking. It is also worth it if you want to take a booking fee or full payment up front, since that filters out casual enquiries. It is probably overkill if you run a one-person workshop with a fixed daily schedule and fewer than five jobs a week.
Before you install: what you need in place
- WordPress installed on your own hosting, with an SSL certificate — payment details will be entered on your checkout.
- WooCommerce installed and set up. WpBookingly is a WooCommerce-based online service booking and reservation plugin, so WooCommerce handles checkout, taxes and order records while the booking plugin handles the calendar and service structure.
- Your price list and job durations written down. You will enter each repair type as a bookable service with a price and a time length, and guessing these mid-setup leads to unusable slots.
- Your real working pattern: opening and closing times per day, break window, days off, and how many jobs you can genuinely run per session.
How to use the WordPress repair service booking plugin, step by step
The walkthrough below uses WpBookingly, a free plugin from the WordPress plugin directory. Everything from installation to the first confirmed repair order is covered, and each screenshot sits under the step it illustrates.
Step 1 — Install and activate WpBookingly
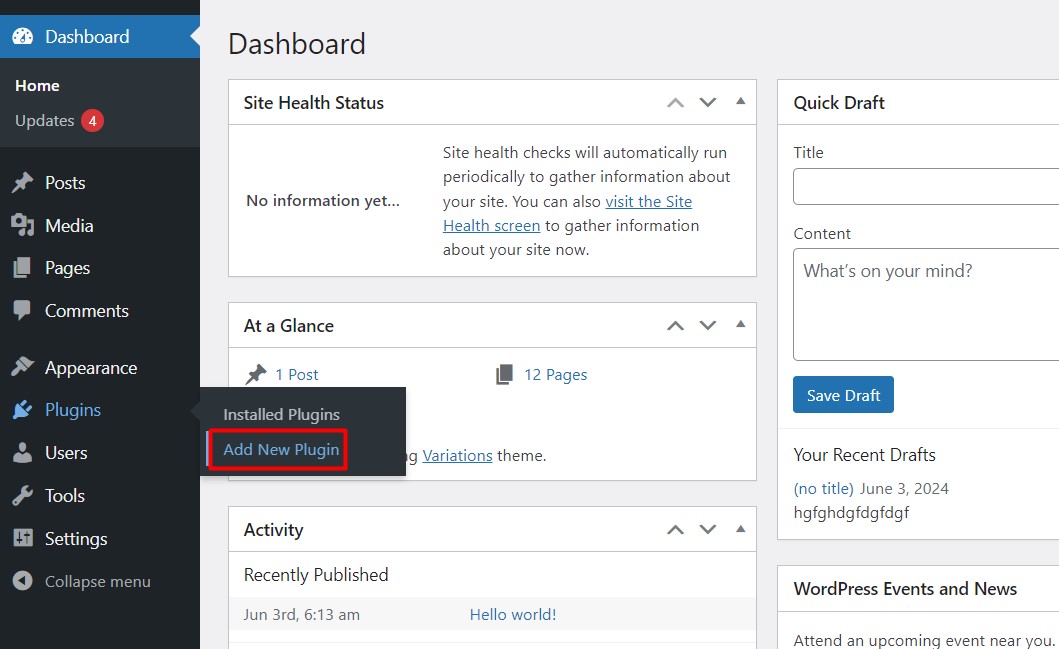
From your WordPress dashboard, go to Plugins → Add New Plugin and search for the plugin.
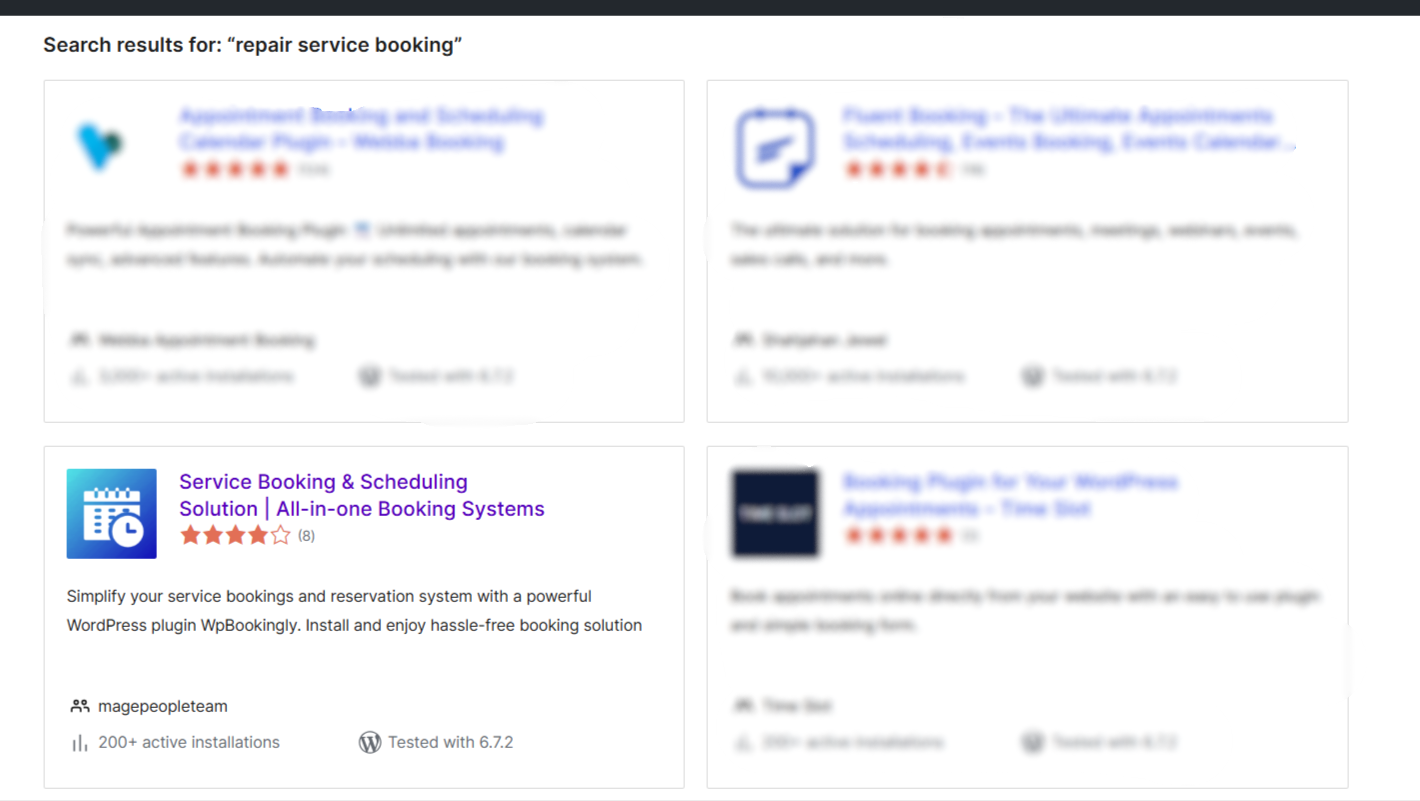
Type “Repair service booking” into the search field and WpBookingly appears in the results.
Step 2 — Connect WooCommerce
Click Install Now, then Activate. On activation the plugin opens a setup wizard and asks you to install WooCommerce if it is not already present.
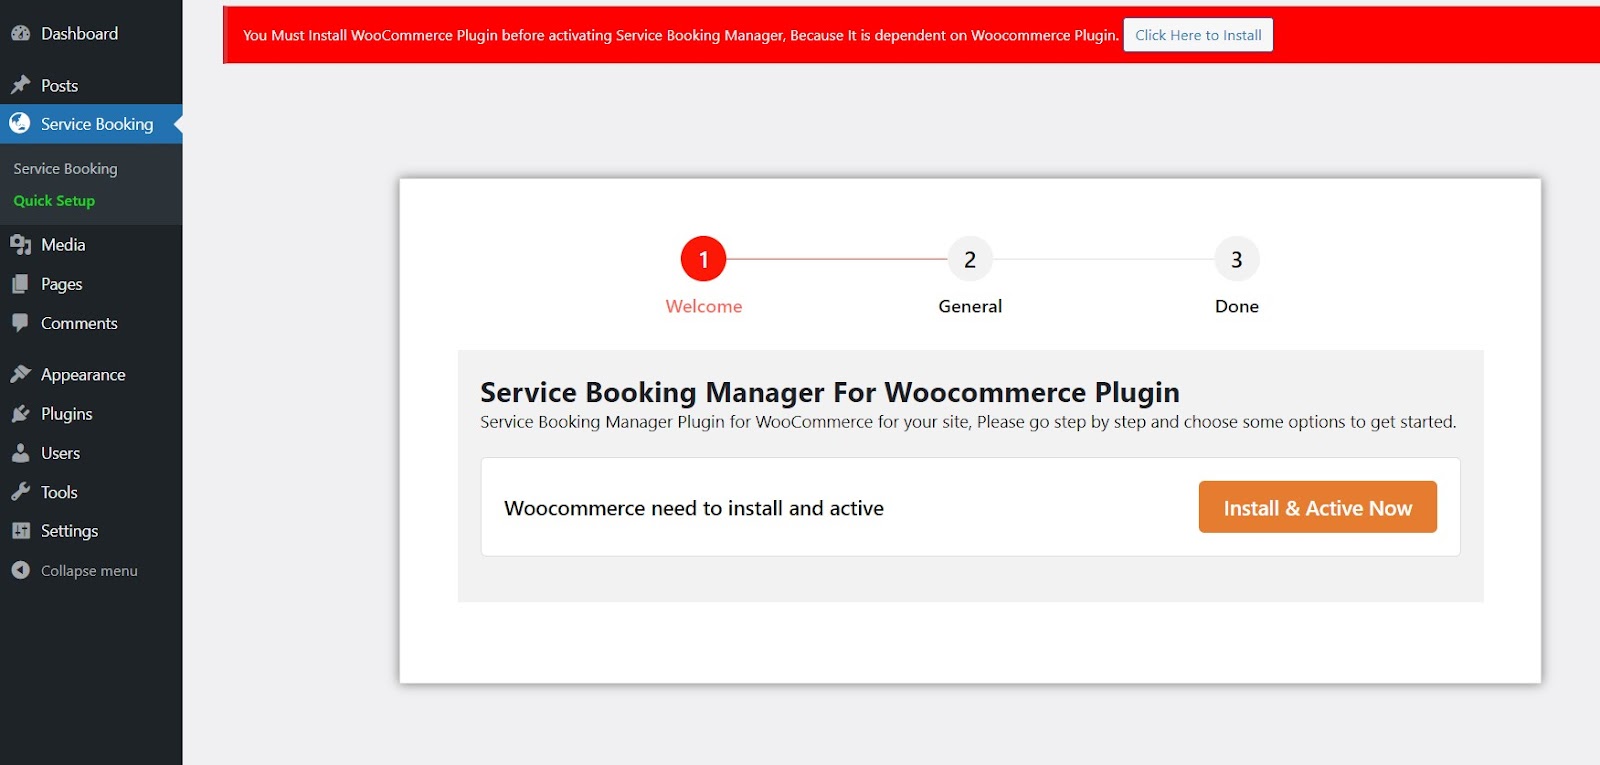
Install and activate WooCommerce — it is the engine behind your checkout, order emails and payment gateways.
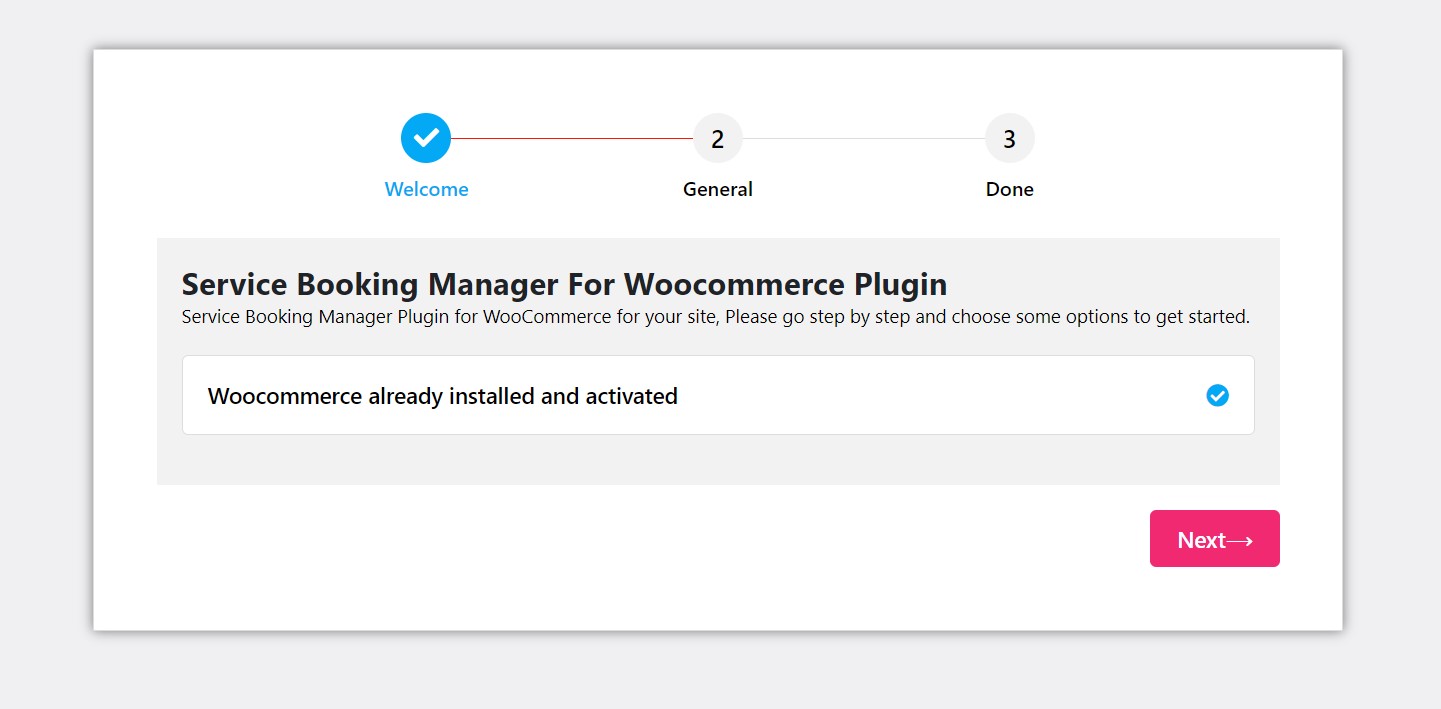
If WooCommerce was already running on the site, skip straight past with Next.

Step 3 — Set your service label and slug
The first wizard screen lets you rename the post type. This is the label your customers see, so use the words your market actually searches for — “Repair Booking”, “Service Appointment” or “Book a Repair” rather than the default. Keep the slug short and lower-case, such as /repair-booking/.

Finish the wizard and you land in the plugin’s dashboard.
Step 4 — Create your first repair service
You do not have to build a service from scratch. Open the All Service Booking tab and you will find a set of predefined service names, including Repair Service.

If you are setting up an automotive repair workshop, you can publish the predefined repair service and start taking bookings the same day — then edit the wording to match your actual repairs later.

Open the predefined service to edit it. You get fields for the service title and a description that displays above the booking form, so use that space for what is included, typical turnaround and whether parts are charged separately.
Step 5 — Configure General Information
The General Information tab is the control panel for the service page.

Here you set the repair service title and subtitle, and — importantly — copy the shortcode that renders the whole booking form on your site. You will paste that shortcode into a page later. This tab is also where you choose the service template, which controls how the form is laid out on the front end.
Return to this tab after every significant change: if you add a new service type or change the layout, re-copy the shortcode to be safe.
Step 6 — Set your dates, time slots and capacity
Move to the Date & Time tab. This is where most first-time setups go wrong, so take it slowly.

Key settings on this screen:
- Date type — repeated or particular. Choose repeated for an ongoing weekly schedule, or particular for specific one-off dates with their own start times.
- Repeat start date and repetition interval. Set when the recurring schedule begins and how many days or weeks apart it repeats. For a workshop open six days a week, a weekly repeat that covers your working days is usually enough.
- Maximum advanced day booking. The furthest ahead a customer may book. Cap it — a customer booking a repair three months out is usually a customer you cannot plan for.
- Time slot length. Match this to your typical job duration. If a screen replacement takes 45 minutes, slot lengths of 30 minutes will create gaps; 60 minutes will waste bench time.
- Capacity per session. How many repair jobs you accept in a single slot. Set this to your real bench or technician count, not to an optimistic number — overbooking is what destroys the trust the online form was meant to build.
Below those fields, define start time, end time and break time for each day to mirror your actual routine, then mark off-days and public holidays. Once holidays are set, the calendar stops offering those dates automatically, which removes a whole category of awkward phone calls.
Step 7 — Build your repair types and prices
With the schedule in place, move on to pricing.
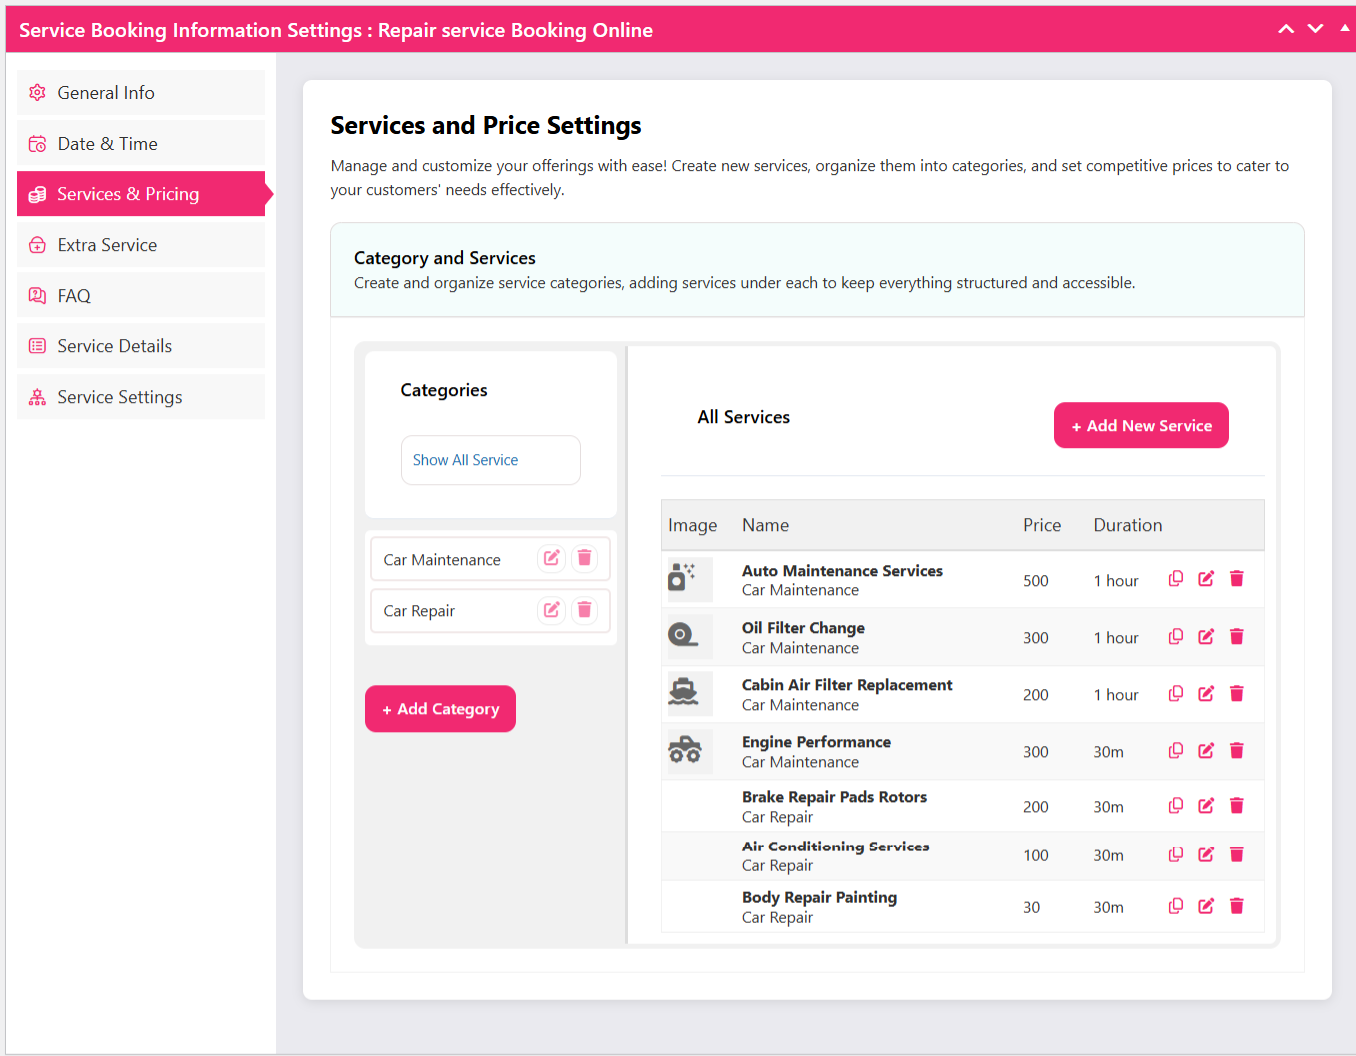
Enable the options you need: service type, sub-category, service details, duration, and allow multiple selections if customers should be able to combine repairs in one booking. Multiple selection is useful for a workshop — a customer bringing in a laptop with both a cracked screen and a failing keyboard can book both jobs in one visit.
Then add each repair as its own bookable line with an image, service title, price, duration and description. Realistic examples for a workshop:
- Diagnostic assessment — short duration, low fixed fee, often waived if the customer proceeds with the repair.
- Screen or display replacement — longer duration, priced per model.
- Board-level or component repair — longest duration, priced on inspection.
- Preventive service — fixed duration, sold as a recurring job.
Add a clear image to each line. For repair work, a photo of the actual device or component outperforms a generic icon because it confirms the customer has chosen the right job.
Step 8 — Add extra services
Still on the same tab, scroll to Extra Service and enable it. If extras should be booked together with a main repair rather than on their own, enable group service as well.

Give each extra a title, quantity, price, image and description. Typical extras for a repair shop include doorstep pickup and delivery, an express same-day slot, a replacement loan device, and a post-repair warranty extension. Extras are the easiest margin in the whole setup — they cost you little and they are offered at the exact moment the customer has already decided to spend money.
Step 9 — Publish and place the shortcode on a page
Click Publish to save the service. Then go back to General Info and copy the booking shortcode once more.

Now go to Pages → Add New and create the page that will hold your repair booking form. Something like “Book a Repair” in the title, and your repair keywords in the URL slug.
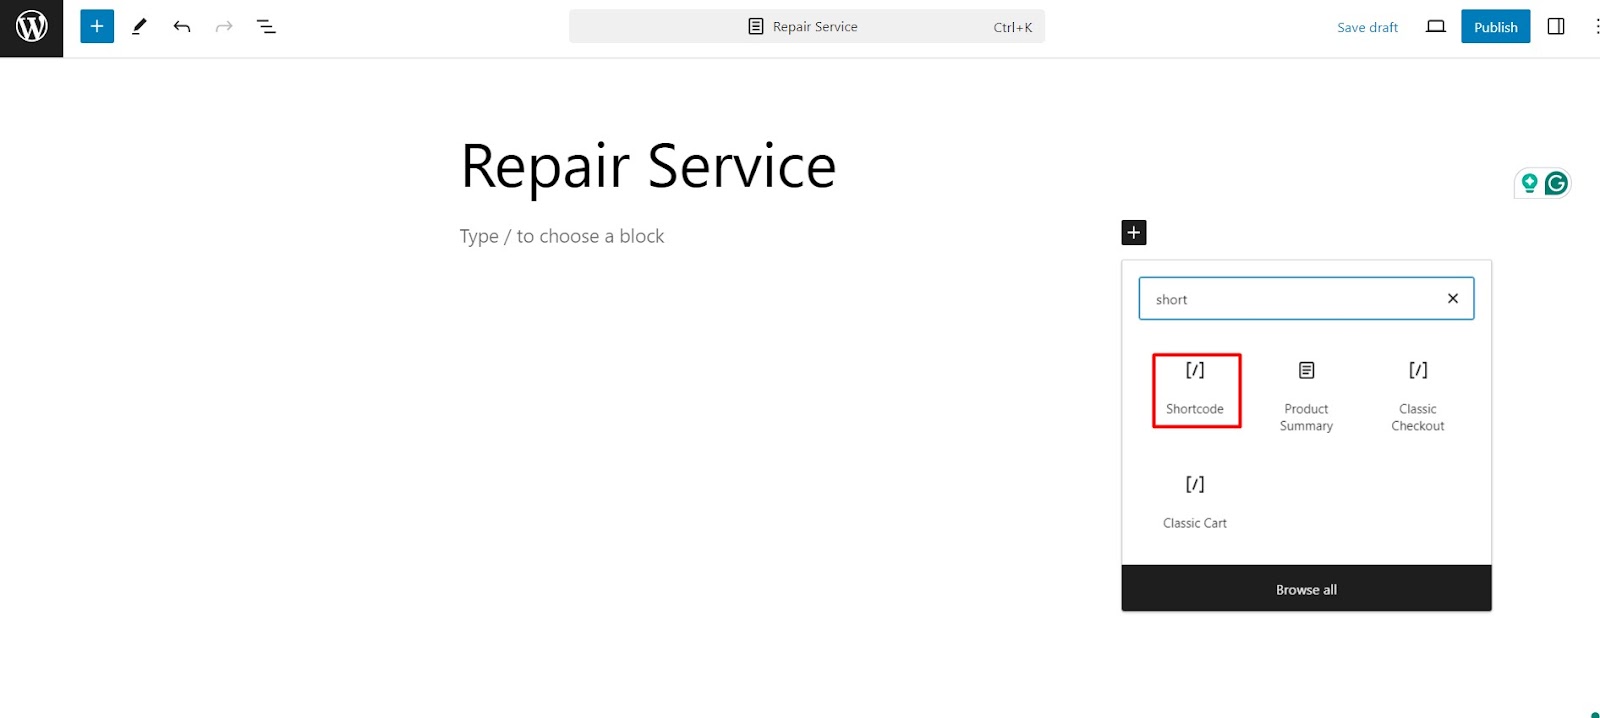
Click the + icon, search for the Shortcode block, insert it, and paste the shortcode inside. Publish the page.

Your repair booking manager is now live on the front end of the site. Add the page to your main menu, and link to it from your service pages and your contact page — buried booking pages do not get used.
Step 10 — Test it as a customer would
Before you send the link to anyone, run through the form as if you were a customer. Understanding this flow matters more than any backend setting, because this is where bookings are won or lost.
Select a service type from the dropdown and the form expands to show more details along with the price.

Choose one or more repairs and the selection summary updates with a running total. Add any extra service you want included.

Click Next: Date & Time to see available slots. Only times that respect your working hours, breaks and capacity appear here, so the customer cannot pick a slot you are unable to honour.

After choosing the date and time, continue to the summary, enter the customer details, select the payment method and click Place Order.

A thank-you page confirms the request and tells the customer to wait for confirmation. Check on your own phone that the page is readable and the confirmation email was not sent to spam — a booking confirmation that never arrives is the leading cause of no-shows on repair bookings.
Step 11 — Manage confirmed jobs from the dashboard
Every booking arrives as a WooCommerce order, so the whole repair queue lives in one place.

As the service provider you review the order, confirm the slot, and progress the job. Add internal notes for parts ordered or technician assigned, then move the order to Completed once the repair is done and payment received. Keeping the status accurate is what makes your reporting useful later, and it gives you a clean order history if a customer disputes a job.
You can also adjust front-end labels, colours and form wording from the plugin settings, so the booking page matches your brand without touching code.
Common setup mistakes to avoid
- Capacity set too high. Two slots per session on a one-technician bench looks efficient in the calendar and creates angry customers in real life.
- No buffer between jobs. A repair that runs long cascades through the whole day. Set your slot length slightly above the honest average duration.
- Diagnostic fees with no explanation. If you charge to inspect, say in the service description whether the fee is credited against the repair.
- Skipping extra services. Pickup and delivery, express slots and warranty extensions are free revenue once the form already exists.
- One generic “Repair” line. Specific repair types priced separately convert far better than a single vague option, and they help the page rank for the faults people actually search.
Extending the same setup to other service types
The example above is a workshop taking repair bookings, but the structure is identical for any service business with a calendar. The same service-type, schedule and capacity model works if you want to build a car wash appointment booking system, or a cleaning service booking system using WpBookingly — change the service lines and slot lengths, and the booking flow, extras and order management stay as they are.
If you need more than the free version offers, the WpBookingly premium addon extends the same plugin rather than replacing it. Check current pricing on the product page before upgrading, and confirm which features you actually need first.
Final thoughts
Using a WordPress repair service booking plugin is mostly a data-entry exercise with a clear payoff: you define your repair types, prices, durations and working hours once, and the calendar then refuses to sell slots you cannot serve. WpBookingly handles that on top of WooCommerce, so checkout, payments and order records come free with the platform you already run.
Start with the free plugin, configure one repair service properly, and test the form end to end before you announce it to customers. Once the first booking lands in your dashboard, expanding to extra services and additional repair types takes minutes rather than days.
