 Get Halloween 15% for Limited Time on Lifetime & Bundle Deal

Cleaning businesses run on repeat visits: weekly homes, fortnightly offices, one-off deep cleans. The fastest way to sell them is a website that lets a customer pick a date, choose extras and pay — without you answering the phone. This guide shows you how to create cleaning service booking using a WordPress plugin, from installation to a live order in your dashboard.
We use WpBookingly, a service booking plugin built for appointment and job-based businesses. It handles recurring schedules, service categories, add-ons and WooCommerce checkout, which covers everything a residential or commercial cleaning company needs. You do not need to write code at any stage.
By the end of this walkthrough you will have:
- A cleaning service that repeats automatically on the days you actually work
- Tiered services (standard, deep clean, move-out) with their own prices and durations
- Optional extras such as inside-oven or inside-fridge cleaning
- Online payment through your chosen WooCommerce gateway
- A front-end booking form on any page, via shortcode
What your cleaning booking form needs before you build it
A generic appointment plugin will break the moment a customer wants two bathrooms cleaned and a fridge added. Before choosing or configuring anything, decide how you sell. These are the capabilities worth insisting on.
| Requirement | Why it matters for cleaning |
|---|---|
| Recurring schedules | Fixed weekly or monthly clients are your most valuable customers; the calendar should repeat without manual rebooking. |
| Service + sub-service categories | Home, office, carpet and window cleaning are different jobs with different teams and prices. |
| Duration per service | A two-hour standard clean and a six-hour deep clean cannot share one time slot. |
| Add-ons and extras | Upgrades are the easiest revenue in this trade and should be a checkbox, not an email thread. |
| Capacity per day or session | Stops you from overselling slots when you only have two crews available. |
| Break times and off days | Protects your staff and stops bookings on days you cannot service. |
| Deposits and online payment | Cuts no-shows on large jobs and removes manual invoicing. |
| Automatic notifications | Reminders reduce missed appointments and rework. |
| Booking and revenue reports | Tells you which services and postcodes are worth marketing to. |
WpBookingly covers all of the above through its core settings and the WooCommerce layer that handles money. Only buy a competitor plugin if it does something here you genuinely cannot live without.
How to create cleaning service booking in WordPress: step by step
The setup follows a logical order: install the plugin, connect WooCommerce, configure general settings, create the service, define its schedule and pricing, then place the booking form on a page. Work through it in sequence and you will be finished in an hour or two.
Step 1: Install WpBookingly
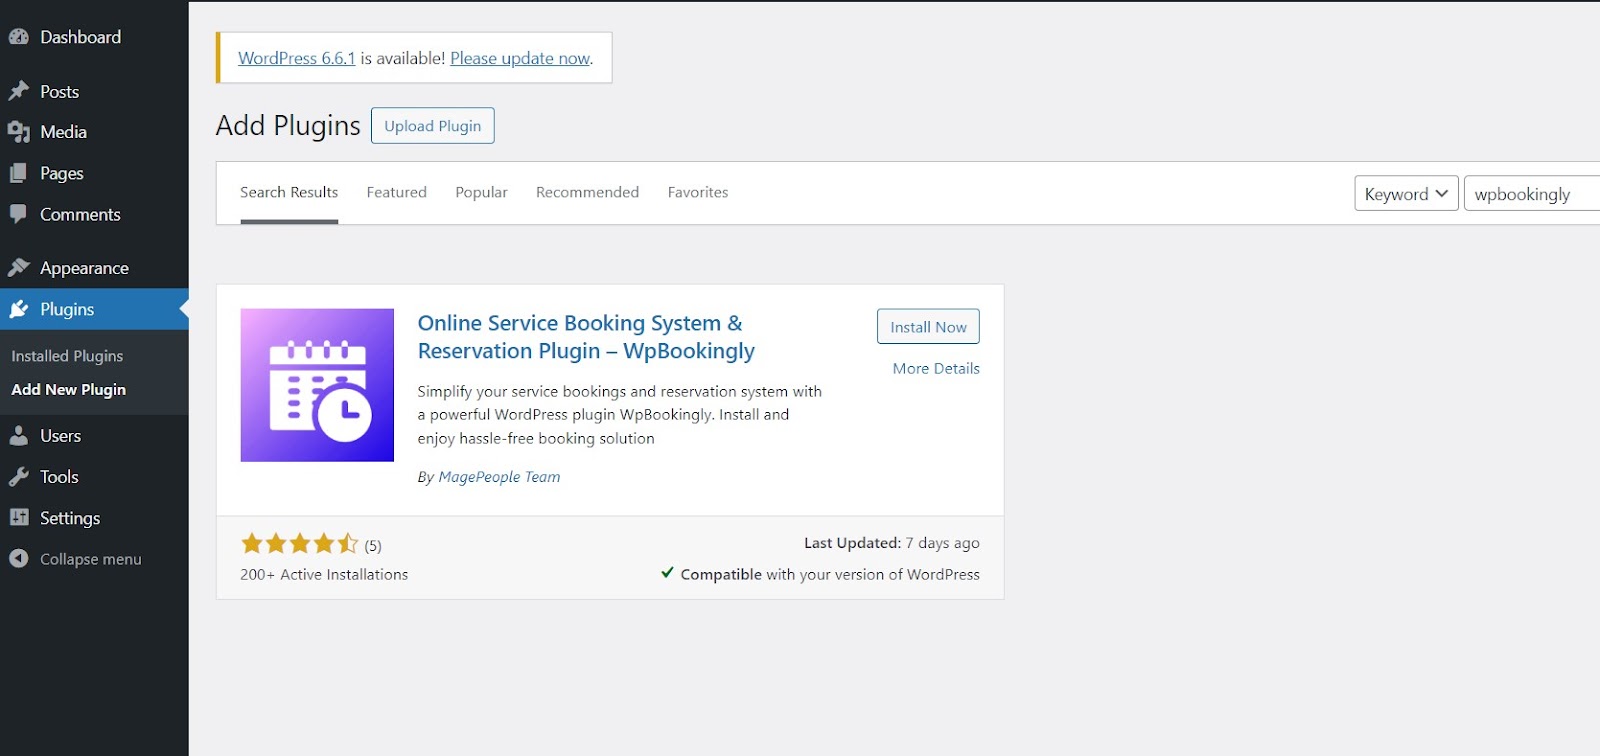
From your WordPress dashboard go to Plugins → Add New Plugin, search for WpBookingly and click Install Now, then Activate. The same flow works on any host; if your site is behind a caching layer, clear it after activation.
Step 2: Install and activate WooCommerce
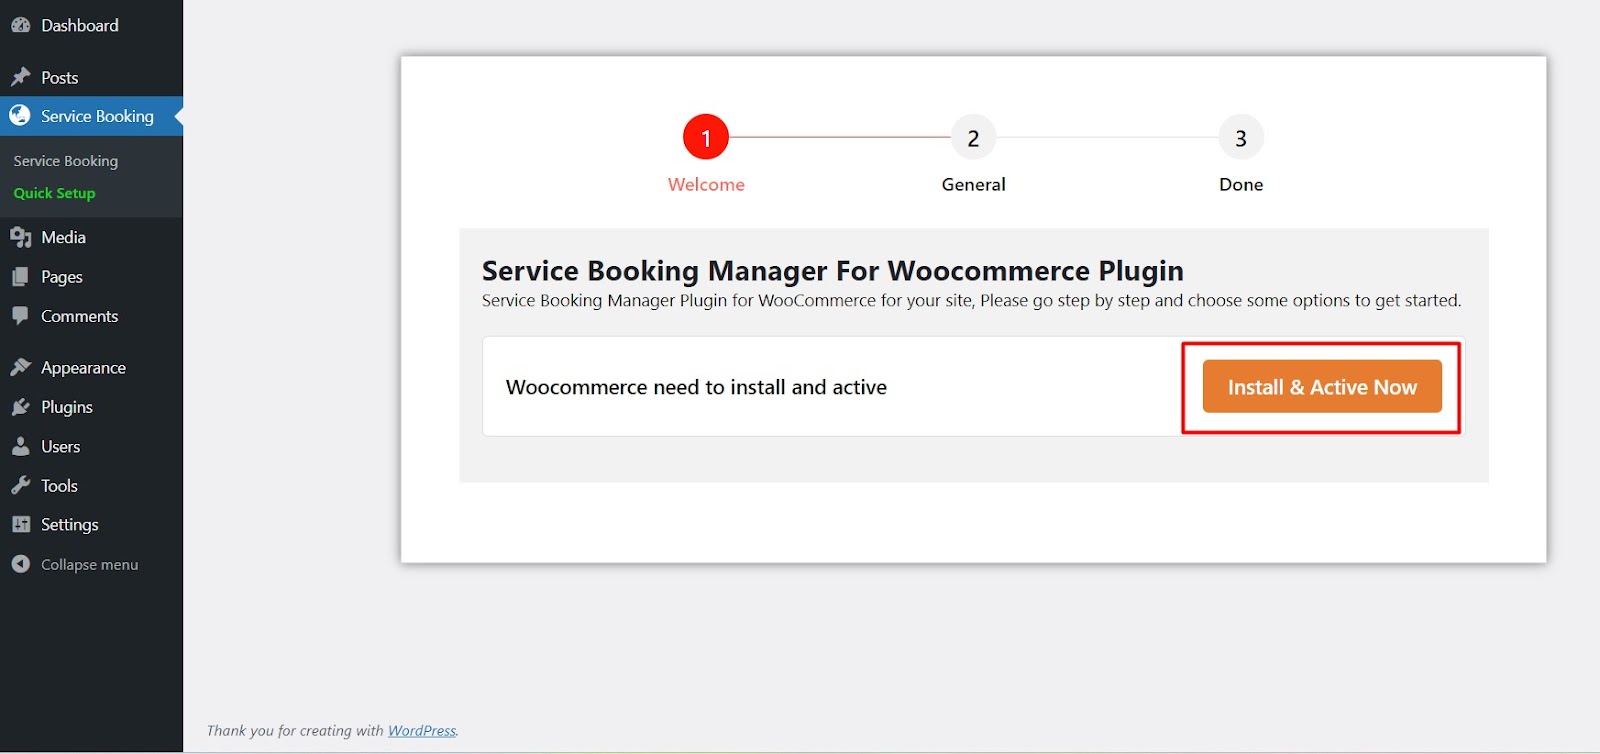
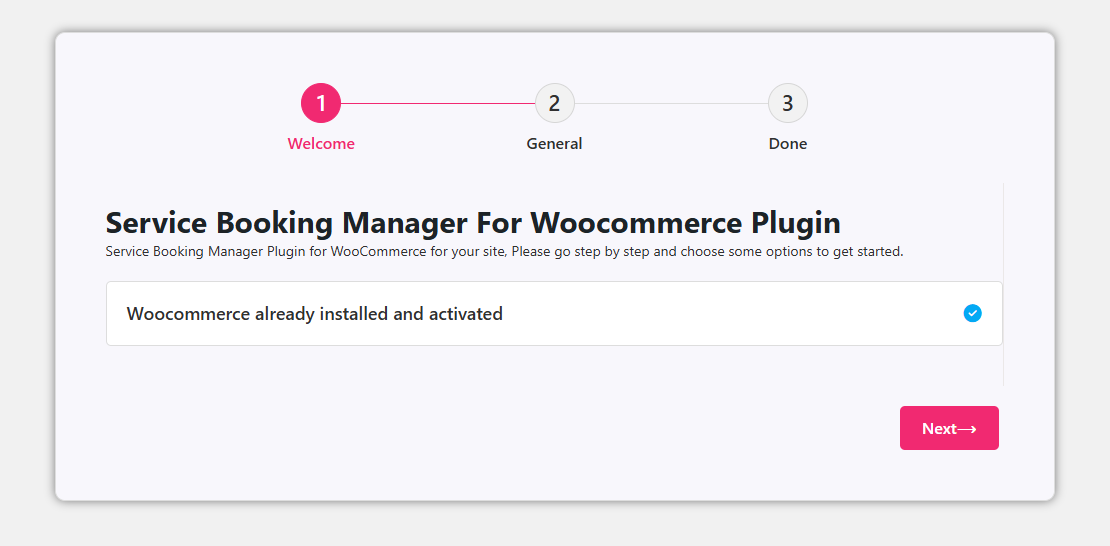
WpBookingly uses WooCommerce for pricing, tax and payment processing. Straight after activation it checks whether WooCommerce is present. If it is, click Next. If it is not, the prompt takes you to install it — accept, activate, then return to the plugin setup wizard.
Once WooCommerce is installed and active, click Next to continue.
Step 3: Configure general settings
Check the booking post-type name and slug. The slug appears in your service URLs, so choose something readable such as cleaning-services rather than the default. Change it now, before you publish anything, to avoid breaking live links later.
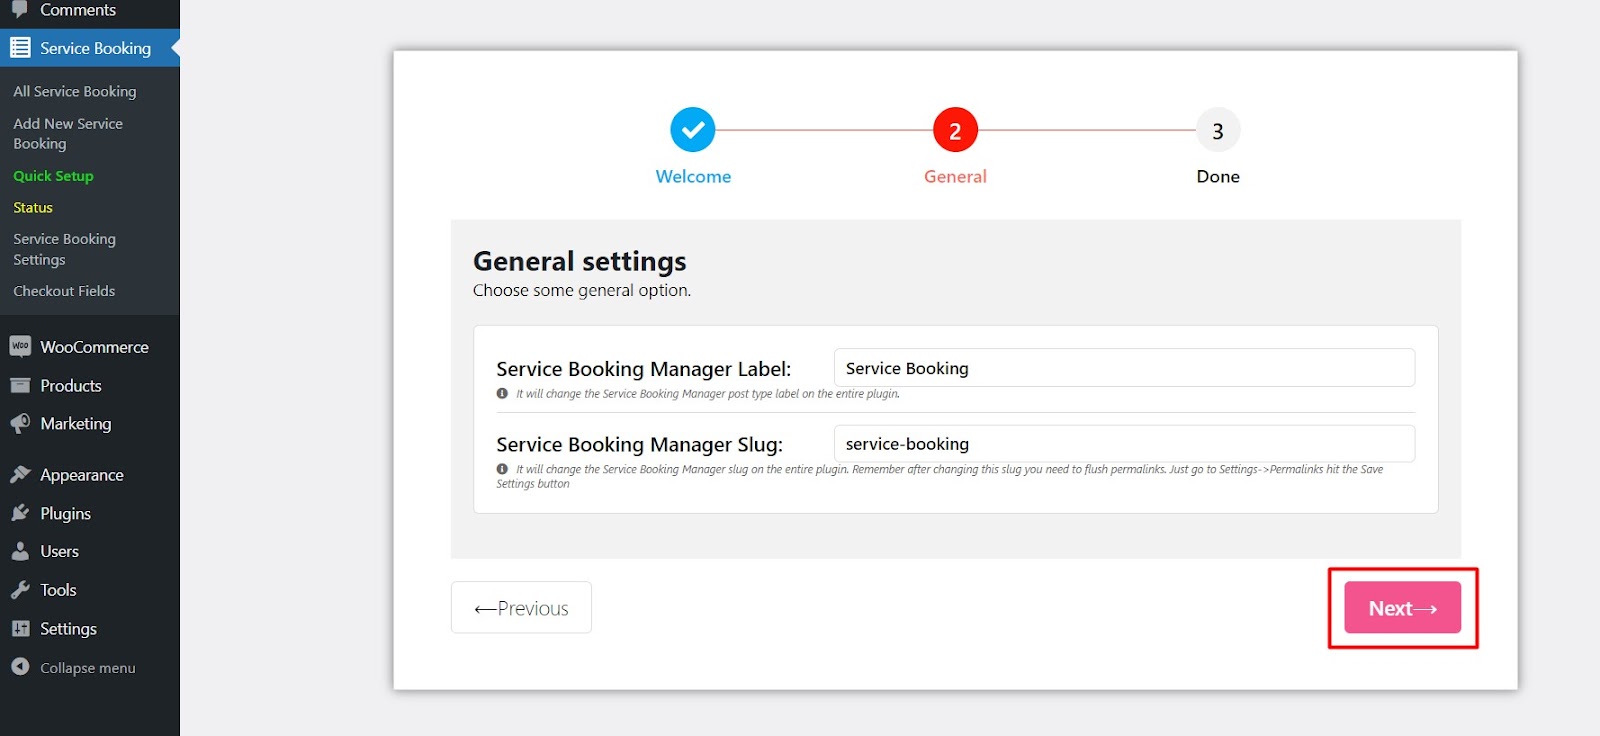
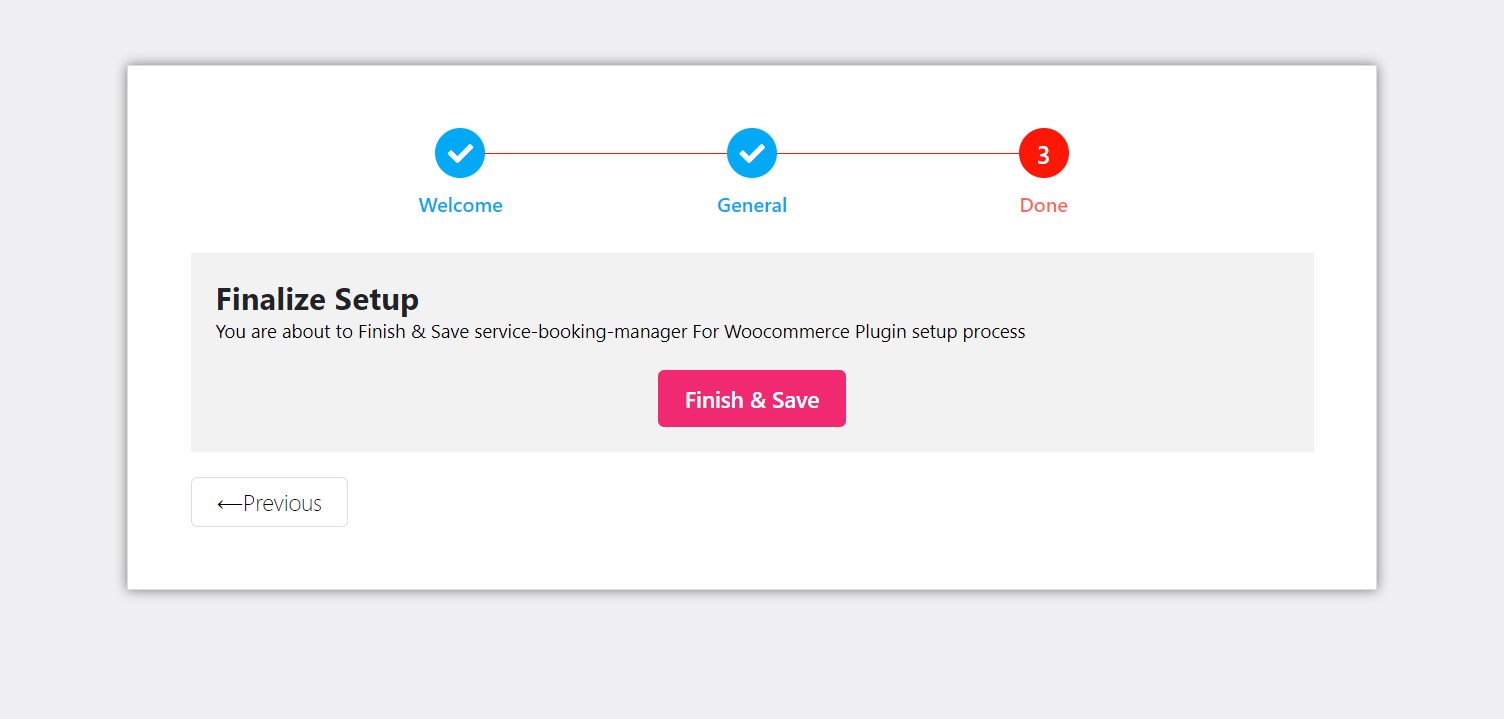
Save and finish the setup wizard.
Step 4: Create your cleaning service
WpBookingly ships with a set of ready-made service templates, including car wash, repair work and classes. Those are examples, not limits — the same engine handles any job-based business. If you want to see how the same settings produce a different vertical, the car wash appointment booking setup walks through a comparable walk-in workflow.
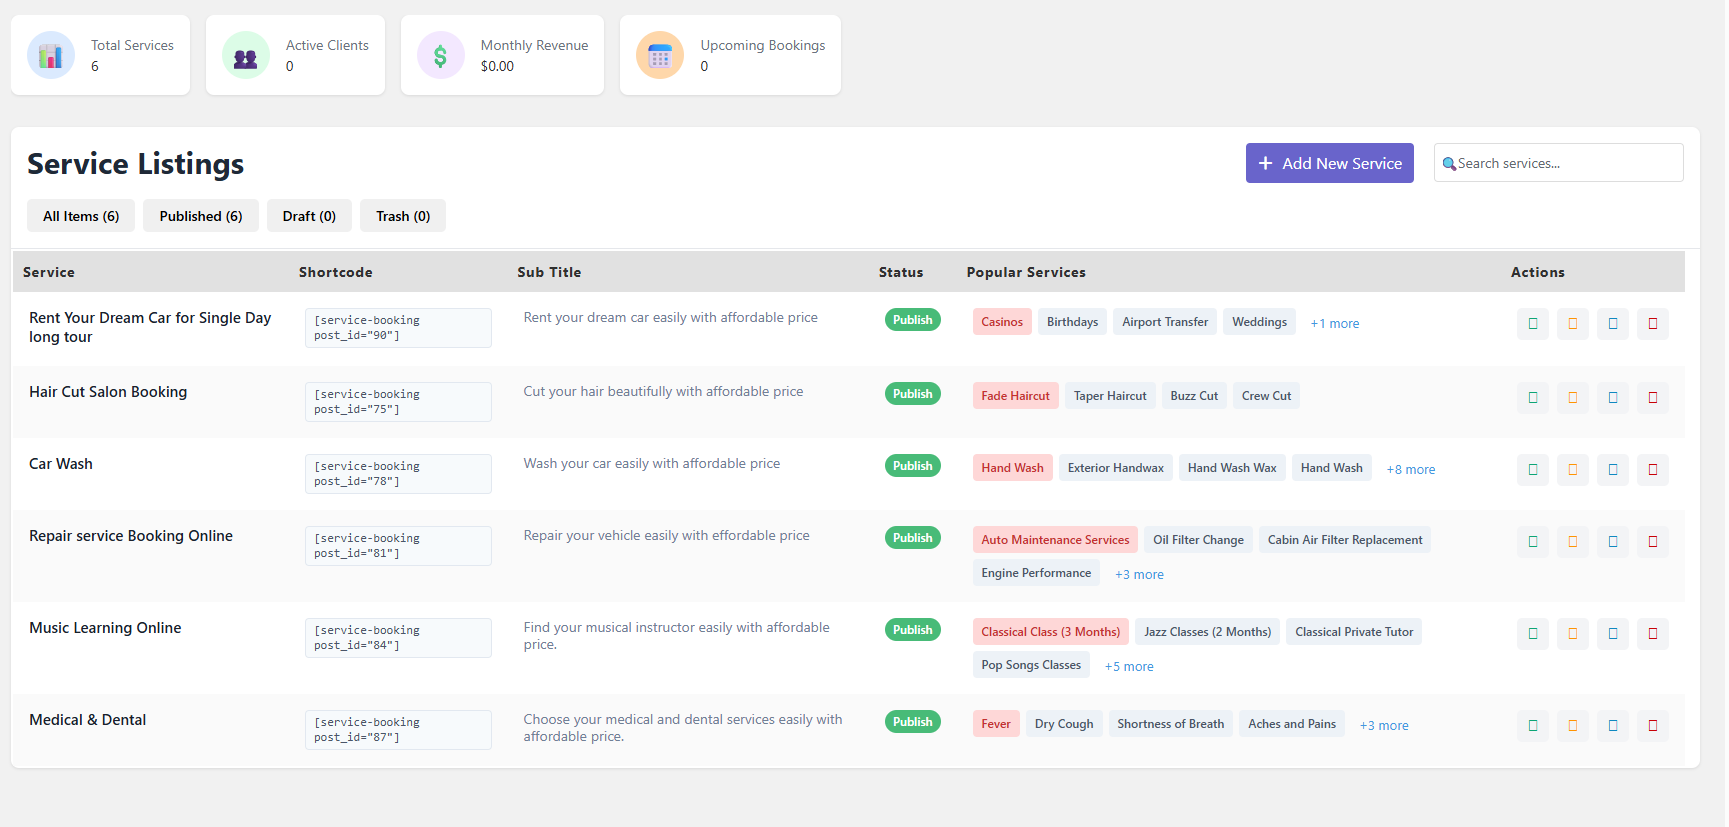
Click Add New Service Booking to start from scratch.
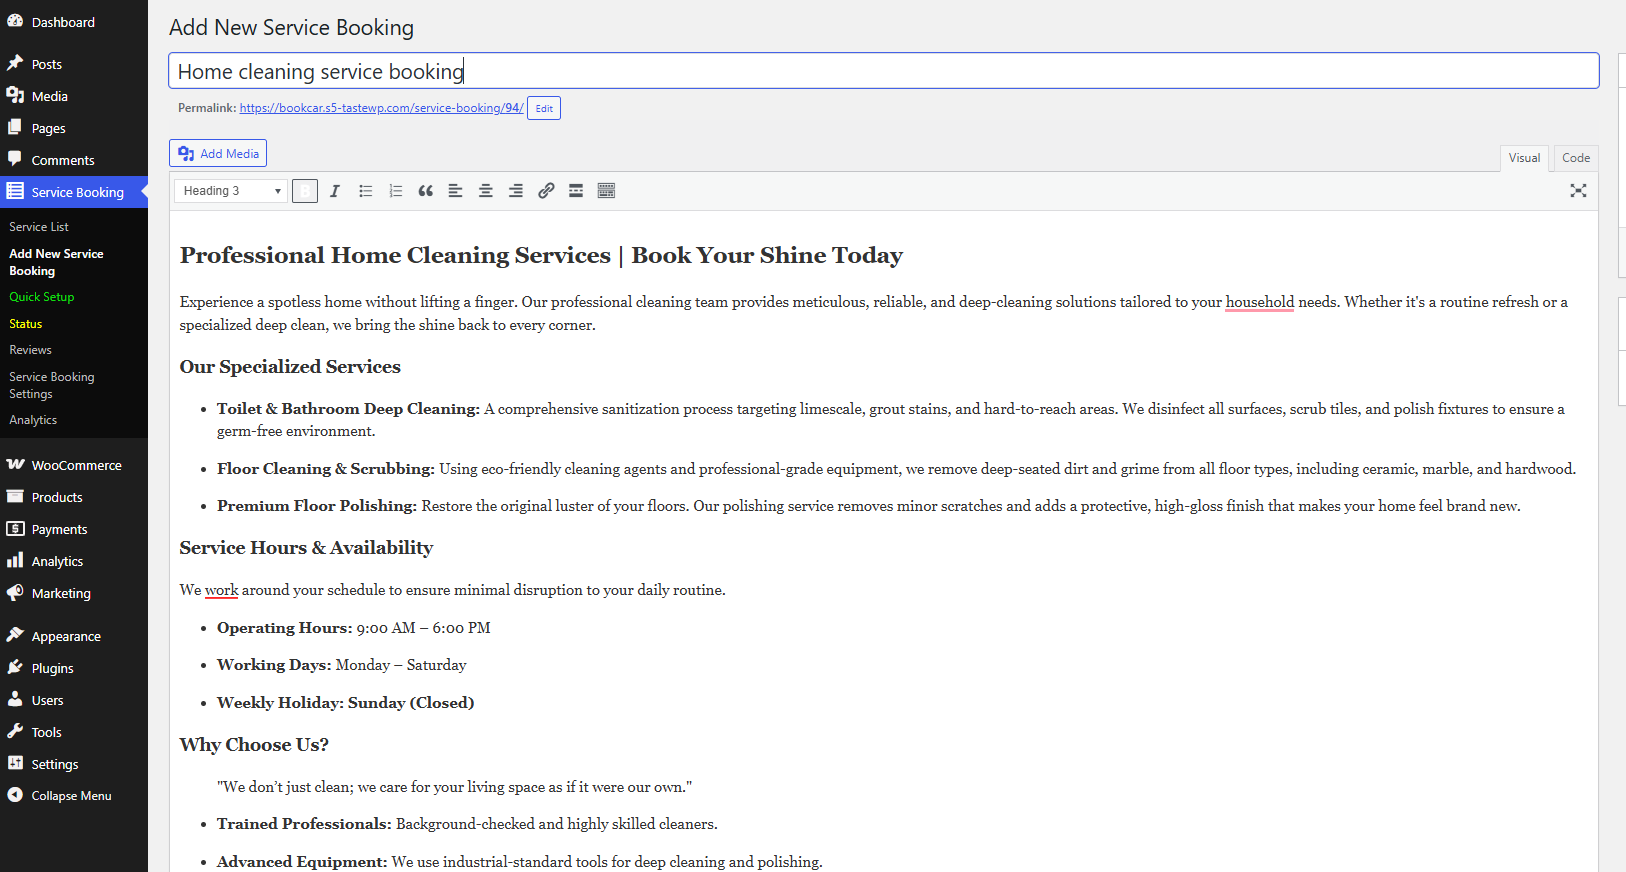
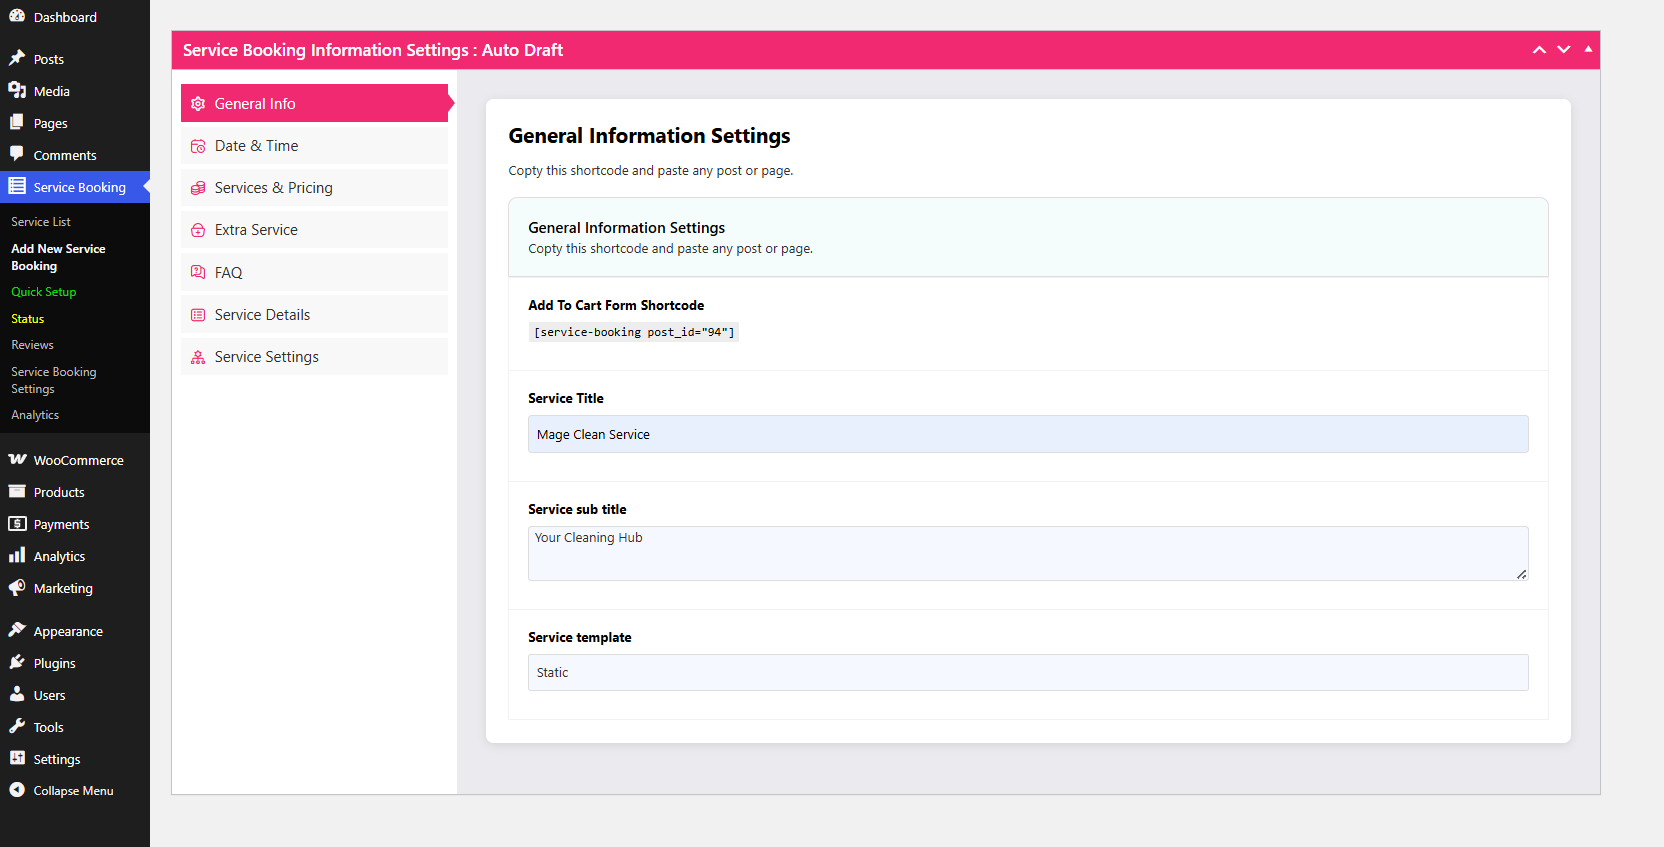
Enter a clear service title — for example, “Home Cleaning Service” — and write a description that sets expectations about team size, supplies and what is not included. Vague descriptions are the main cause of disputes in this industry, so be specific about scope here.
Step 5: Set dates, time slots and your working schedule
Open the Date & Time tab. Choose whether the service runs on repeated dates or a particular date. Repeated dates suit an ongoing service; a particular date suits a one-off promotion or an event clean.
For repeated services, set the repeat start date and the repeat interval, then define the maximum days in advance a customer may book, the length of each time slot, and the capacity for each slot. Capacity is the important one: if you can only dispatch two crews per slot, set it to two and the plugin will close the slot once it fills.
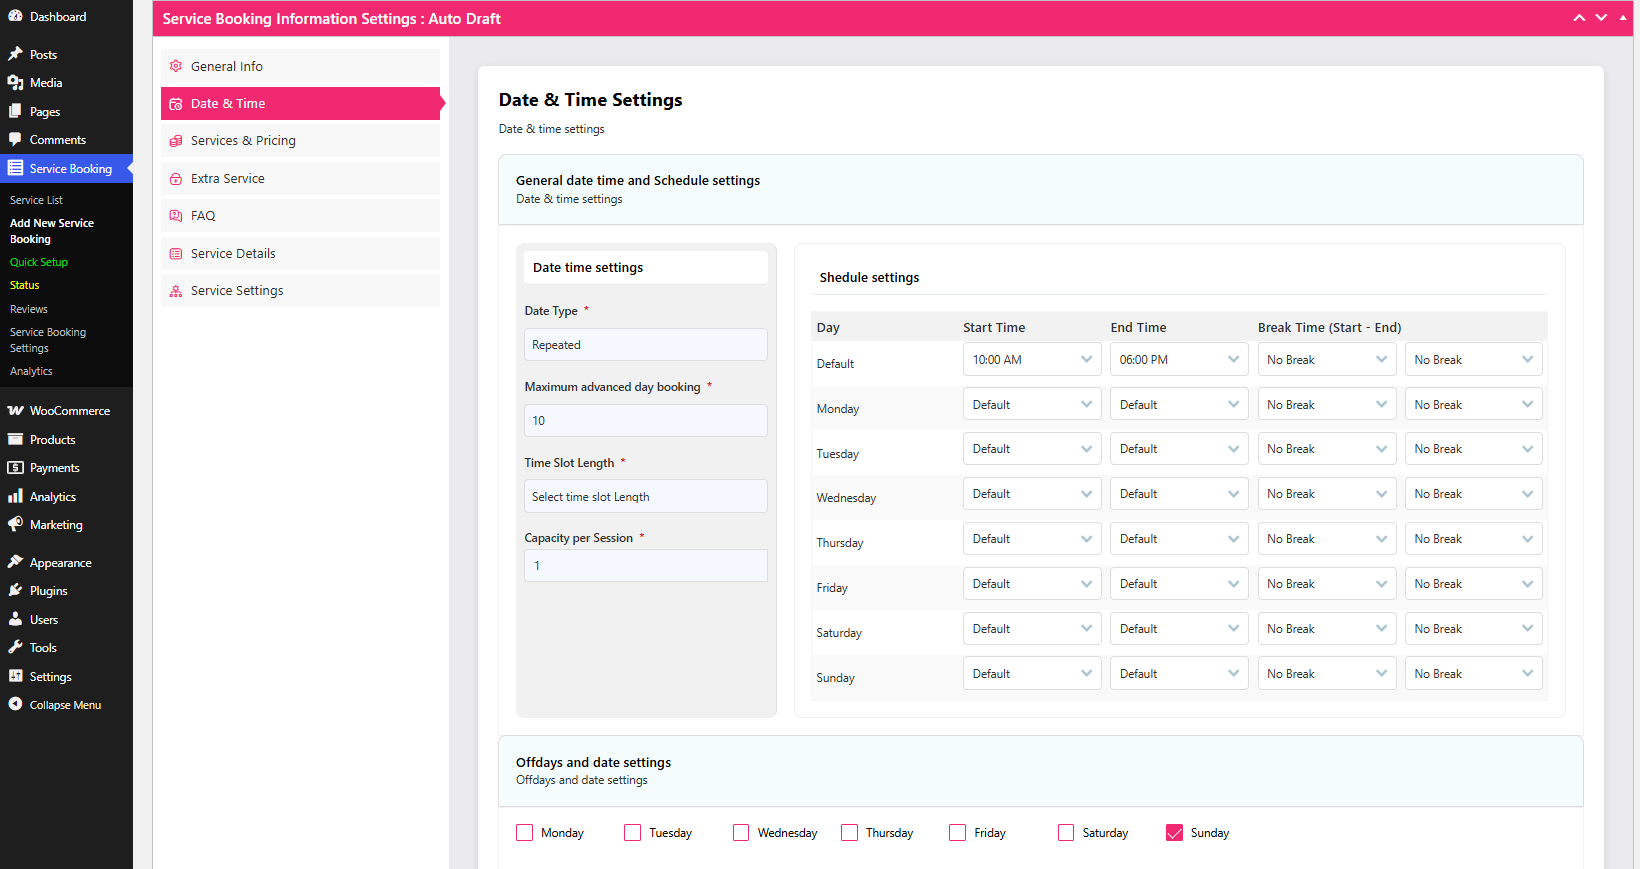
Next, define the working schedule. Add your break windows and mark your off days so customers are never offered a slot you cannot service. This is also where you keep weekends or public holidays out of the calendar.
Step 6: Add services, durations and prices
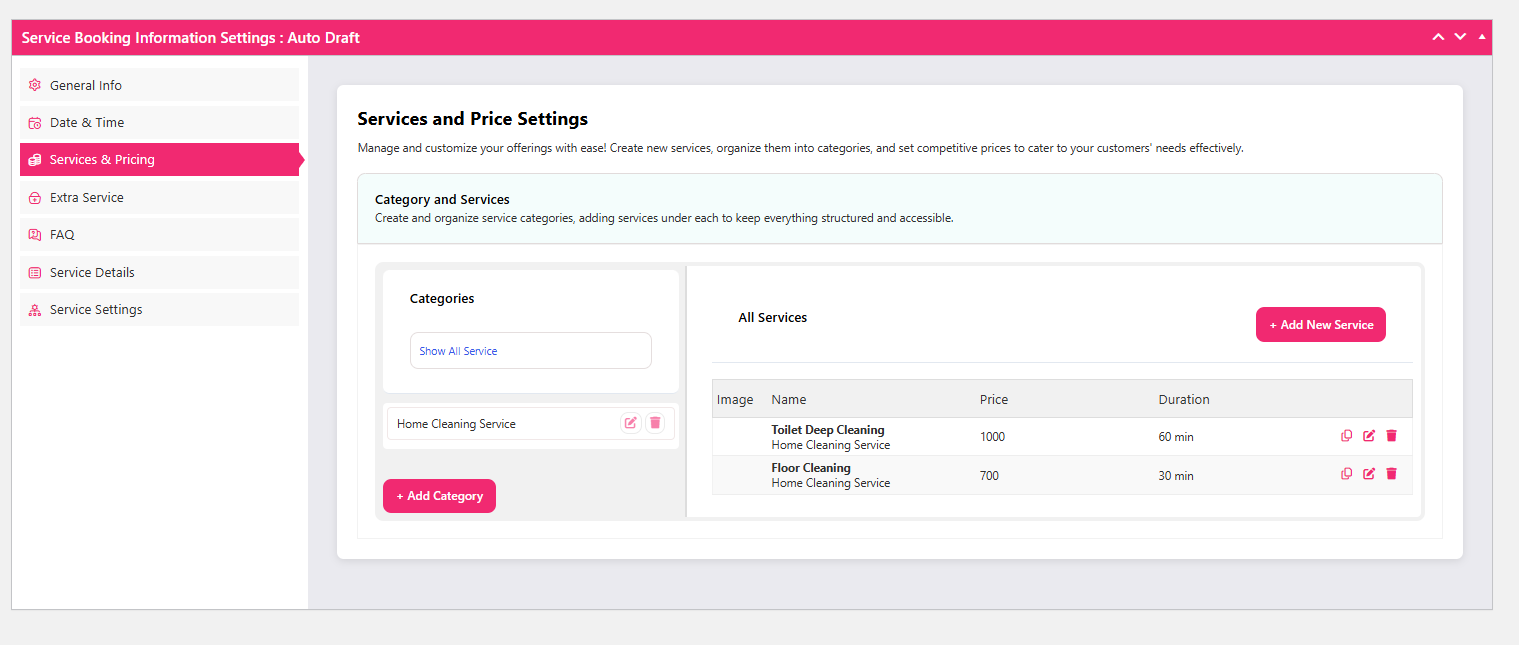
Go to the Pricing tab and enable the sections you need: category, sub-category, service duration and multiple selections. Then build your catalogue.
A structure that works well for cleaning companies:
- Category: Residential / Commercial
- Sub-category: Regular clean, Deep clean, Move-in or move-out
- Service: individual line items such as 2-bedroom standard clean, 3-bedroom standard clean, carpet steam clean
- Duration and price: set per service, since these jobs differ in both
Add an image and a short description to each service. Customers book faster when they can see what “deep clean” means in your business.
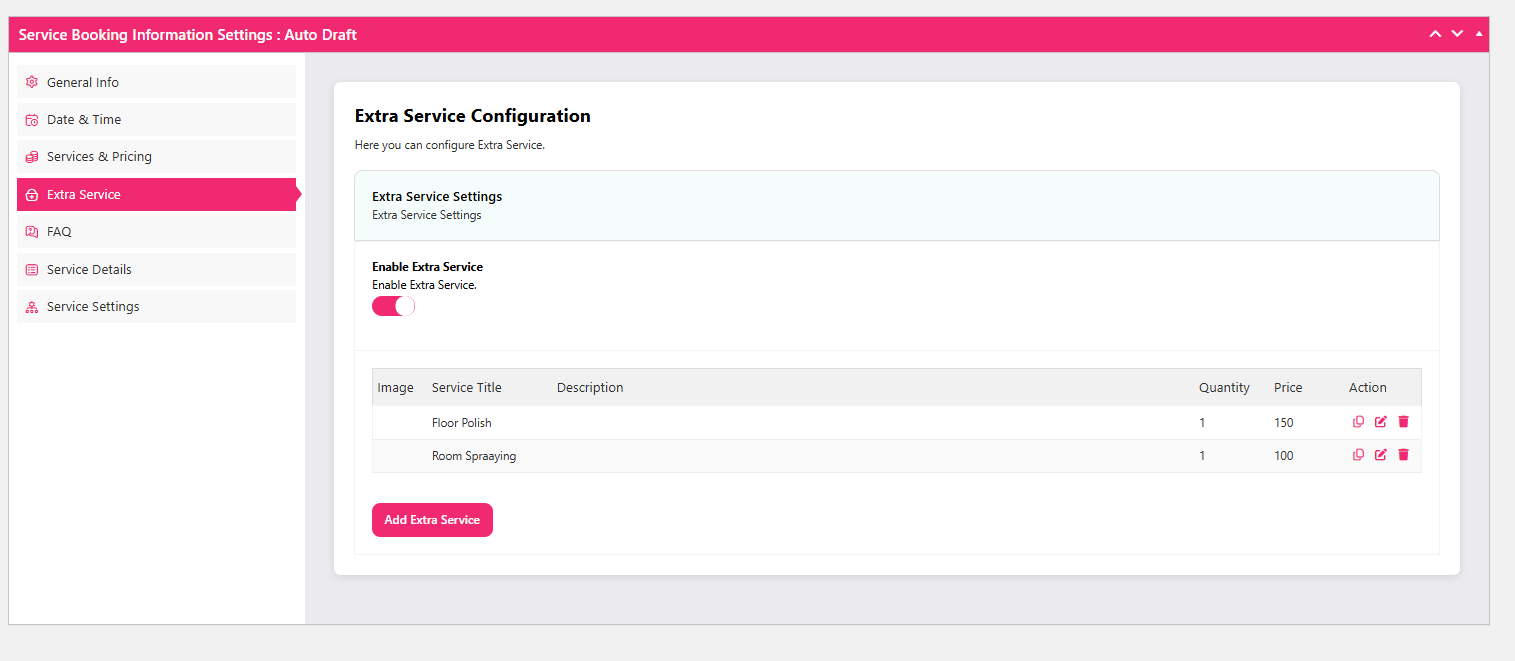
Now open the Extra Service tab and enable it. Add-ons such as inside-oven cleaning, inside-fridge cleaning, interior windows or laundry are where average order value grows. You can group related extras so the form stays tidy rather than turning into a long checklist.
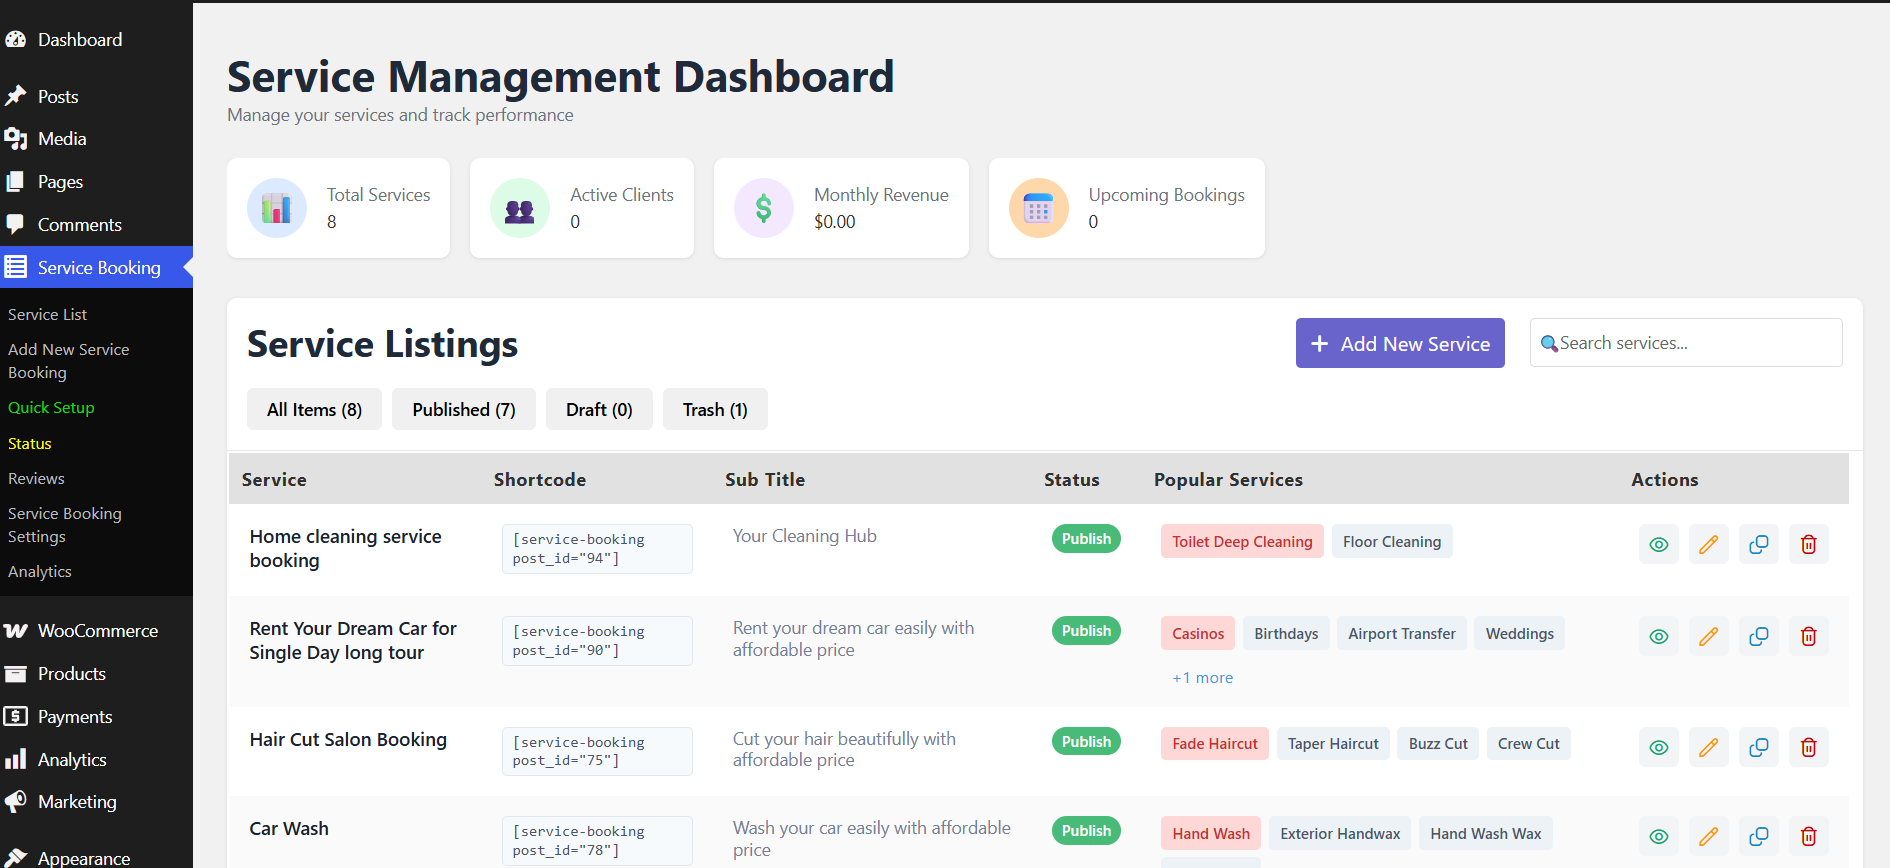
Click Publish. Your cleaning service now appears in the All Service Bookings list, ready to be displayed on the front end.
Step 7: Turn on your payment method
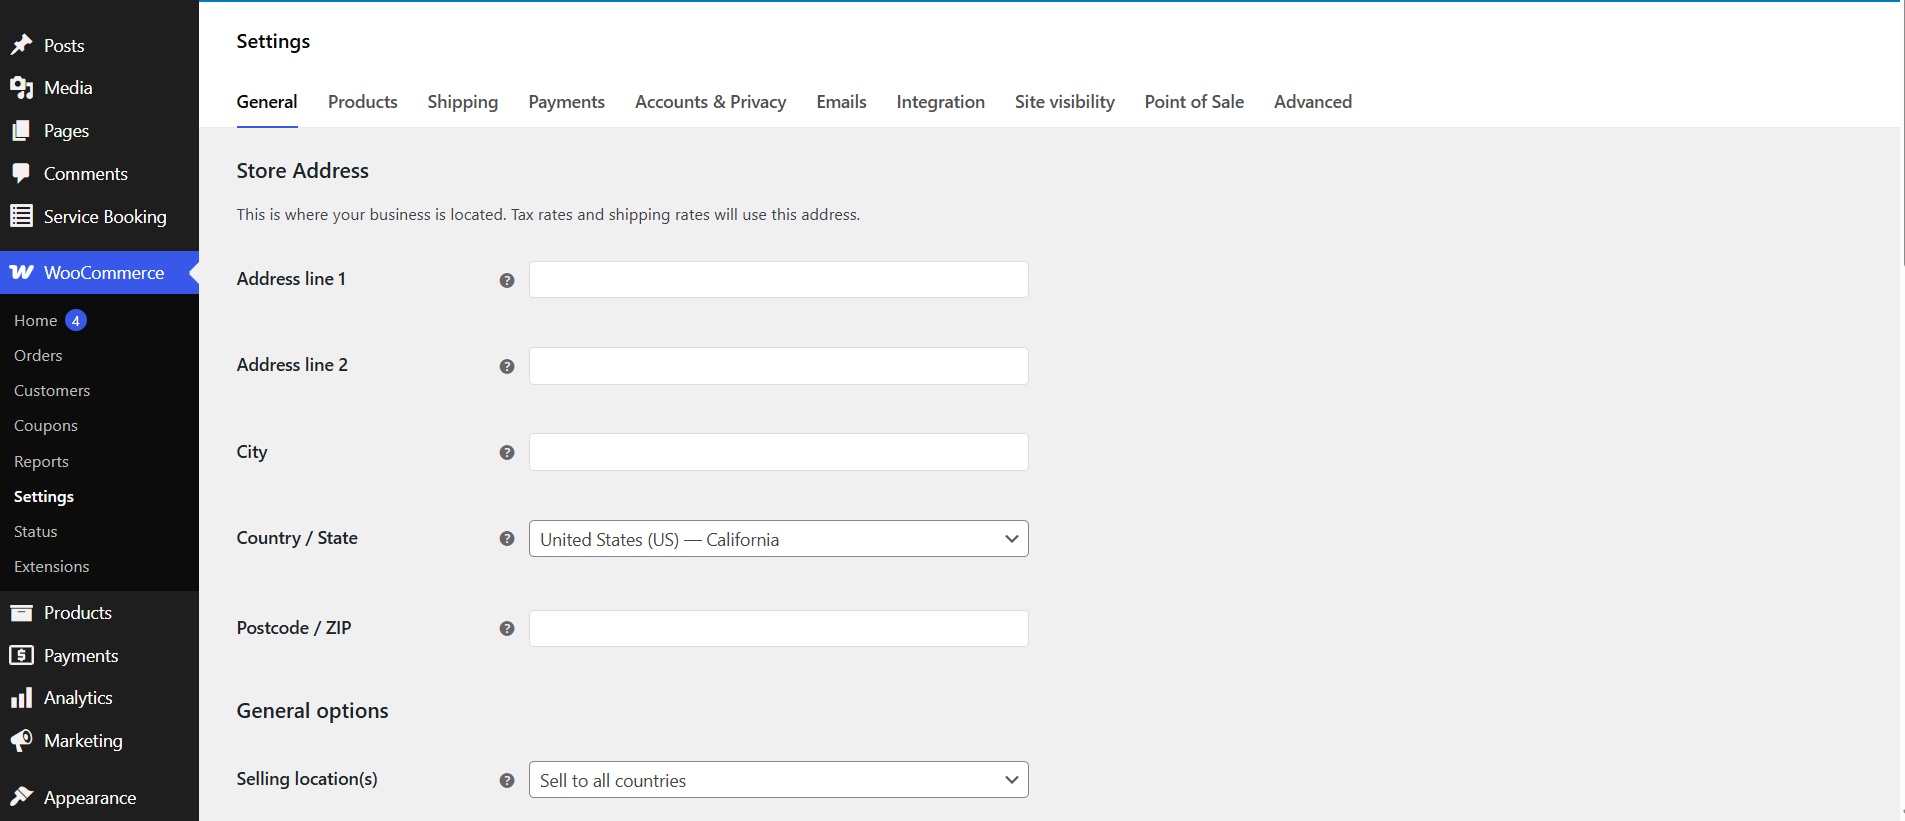
Pricing is configured, so switch on the money side. Go to WooCommerce → Settings in the dashboard.
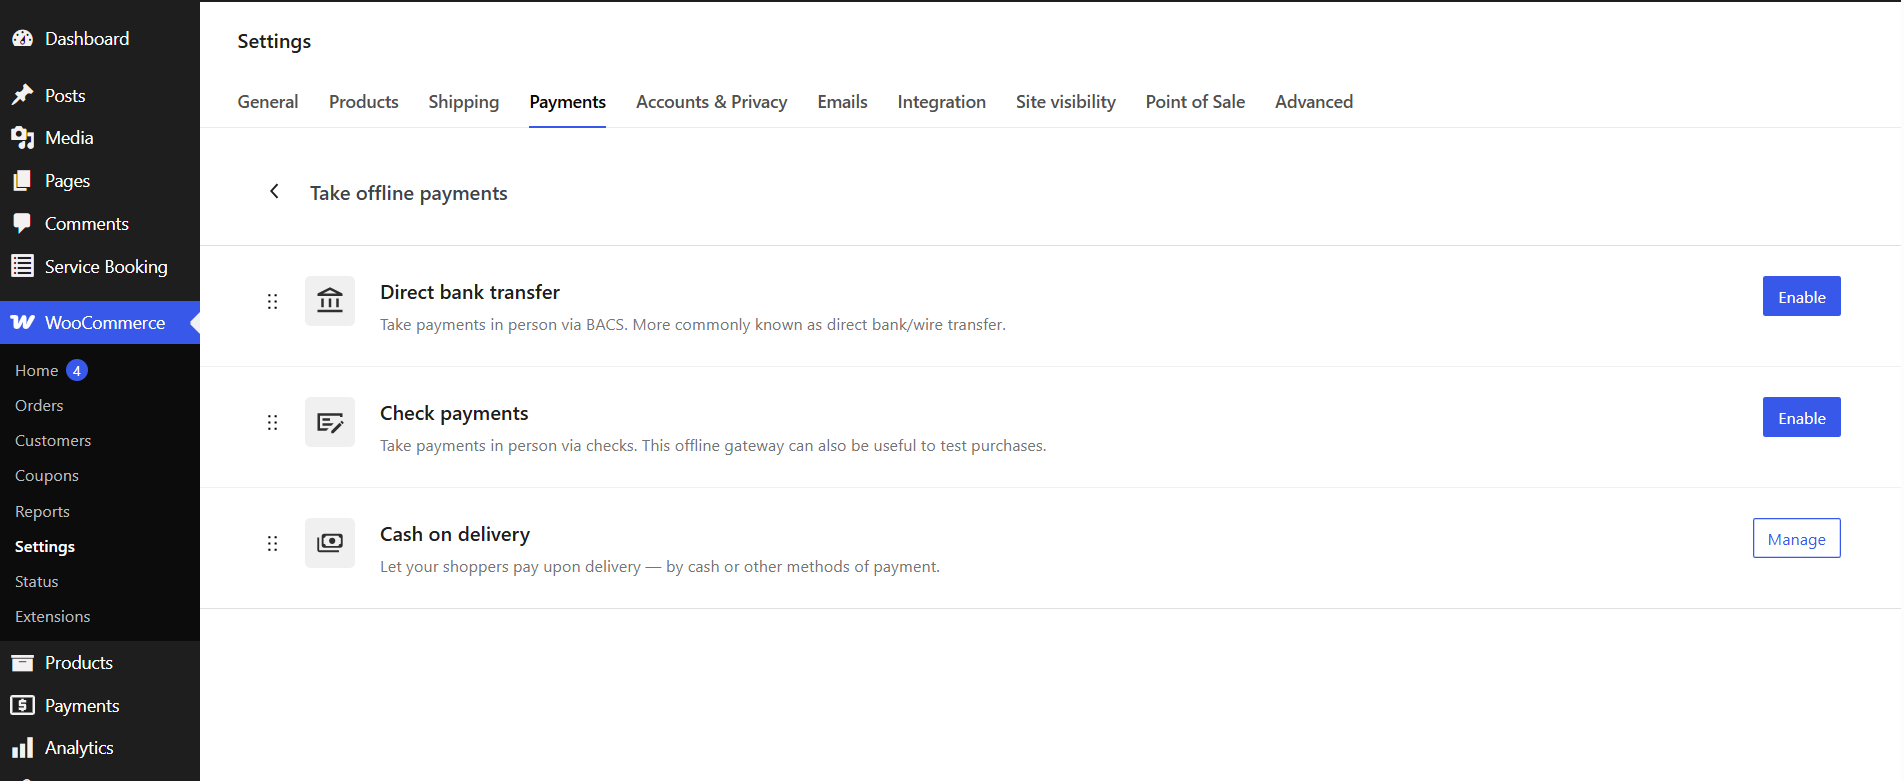
Open the Payments tab and enable the gateway you want — card, bank transfer, or whatever suits your market, including cash on completion if that is normal for local cleaning work. Note that WooCommerce tax settings apply to your service prices, so if you are registered for tax, configure rates before you go live. Check current pricing with your chosen gateway, as fees change.
Step 8: Display the booking form on your site
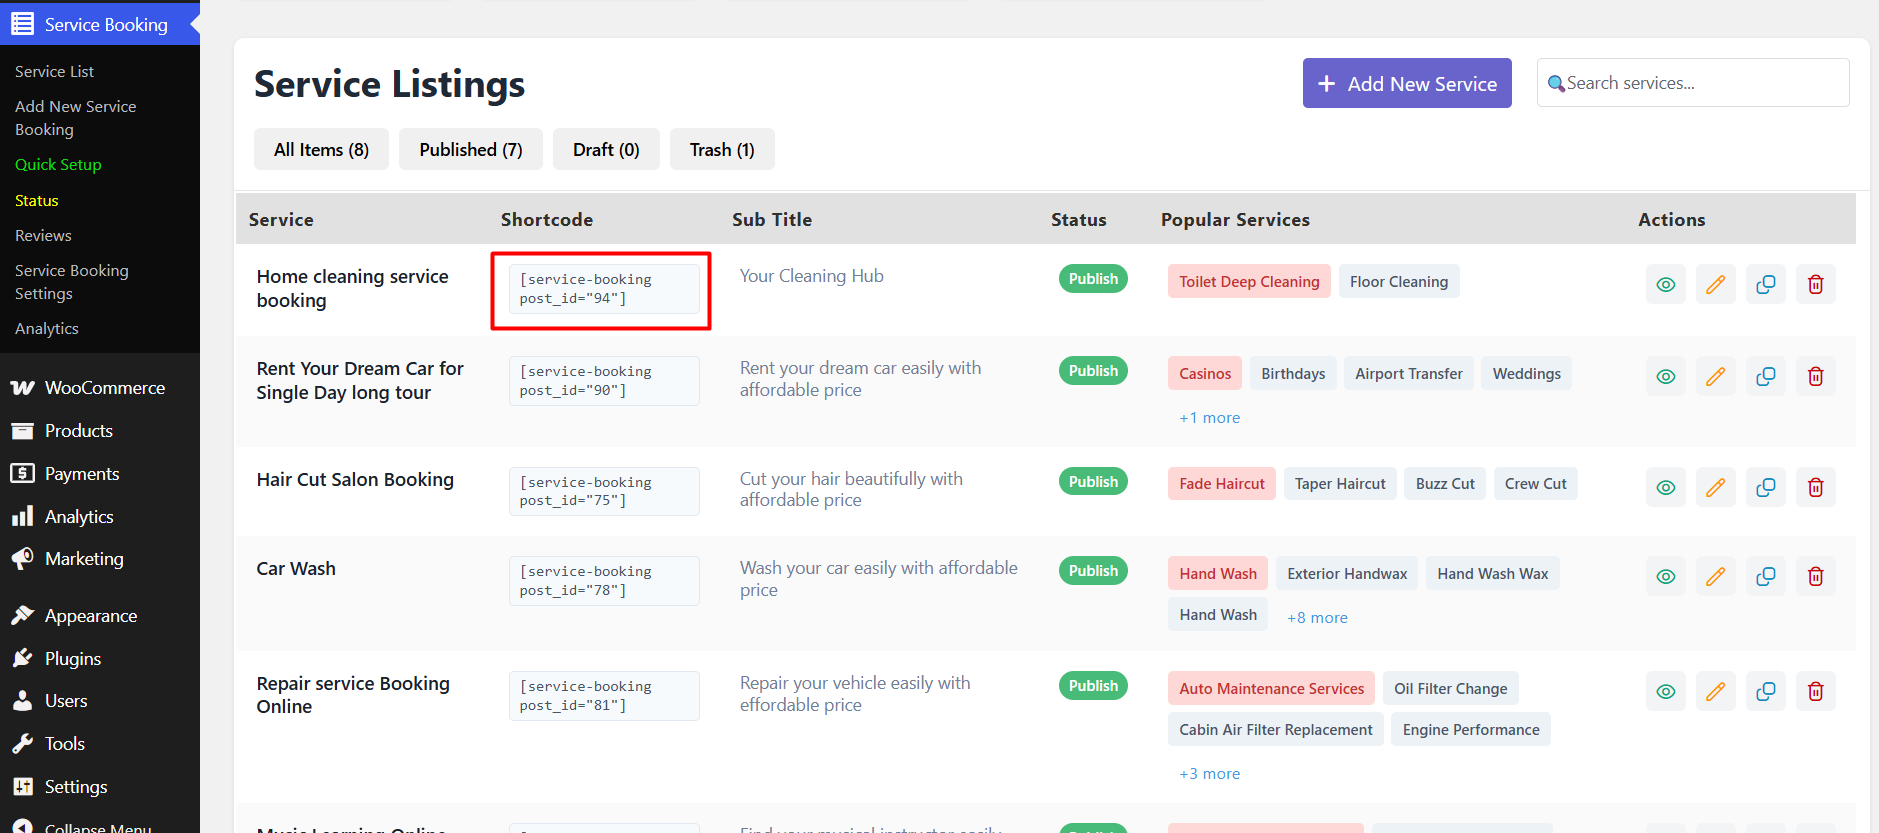
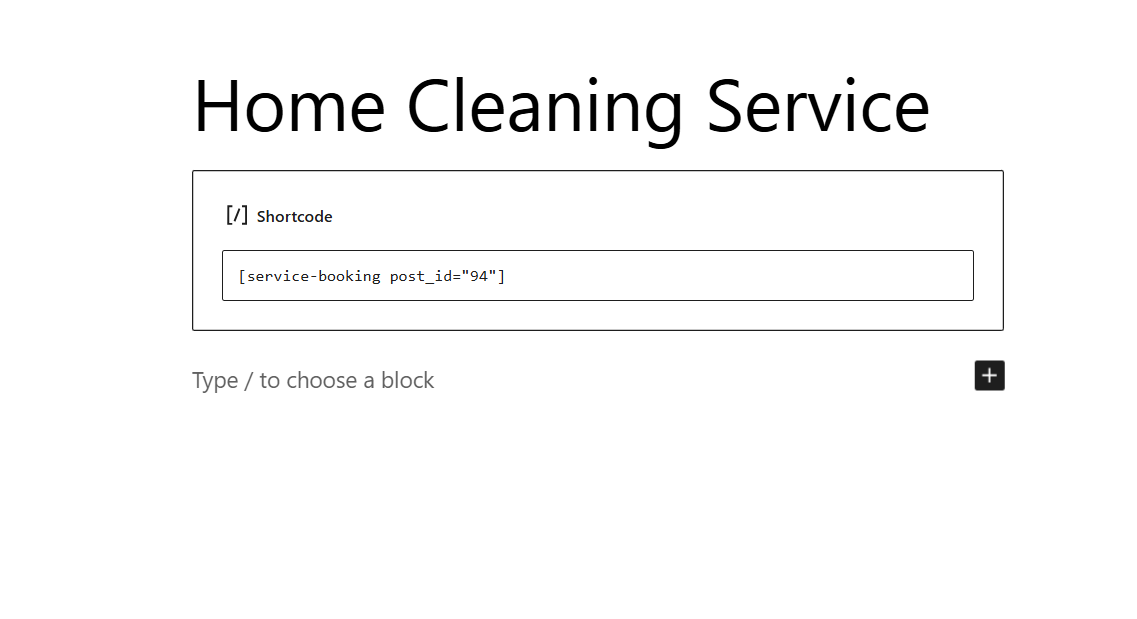
Copy the shortcode from the service list.
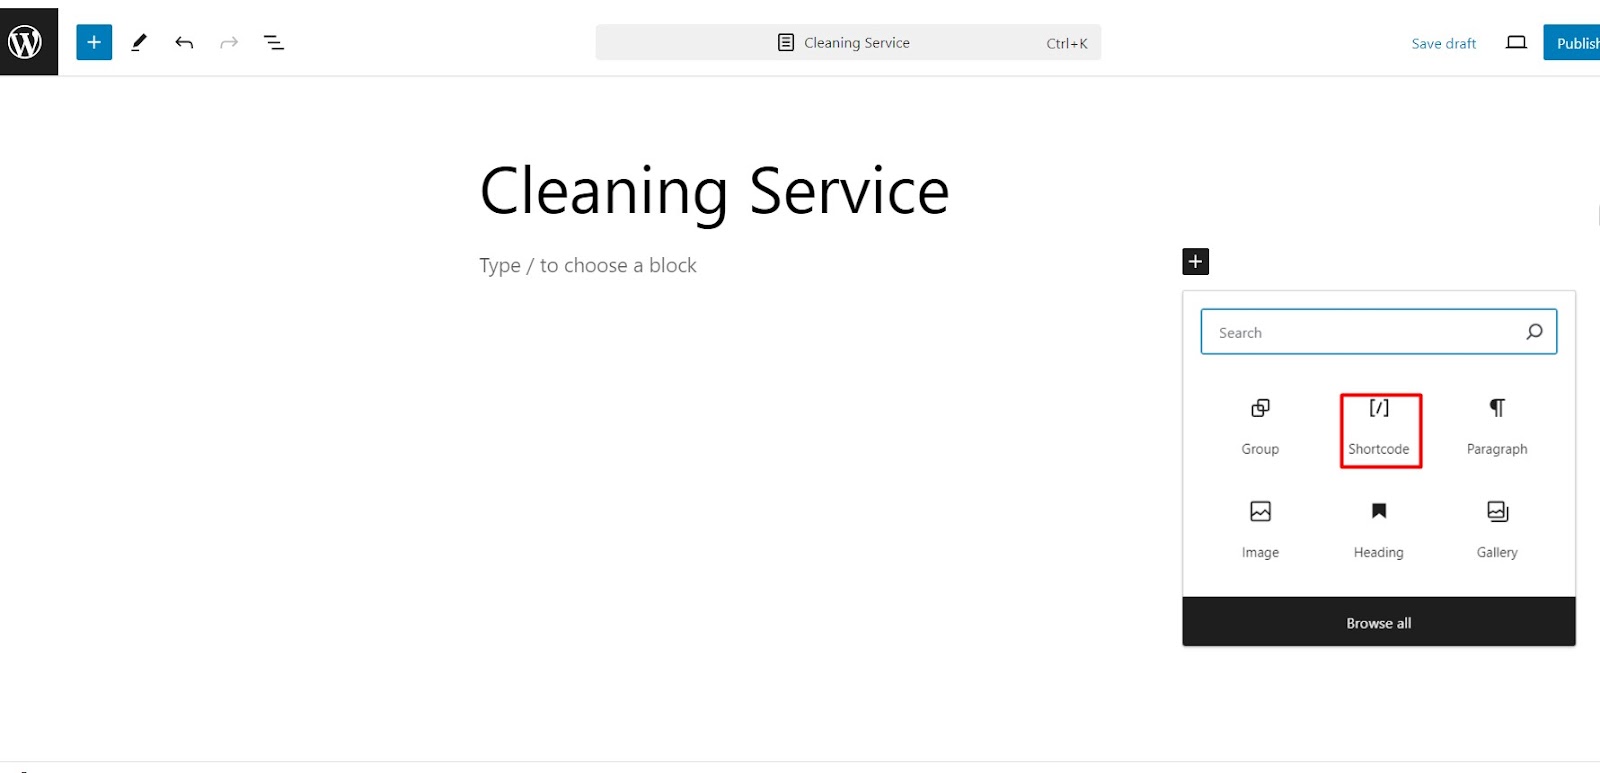
Create a new page, add a Shortcode block in the block editor, and paste the code.
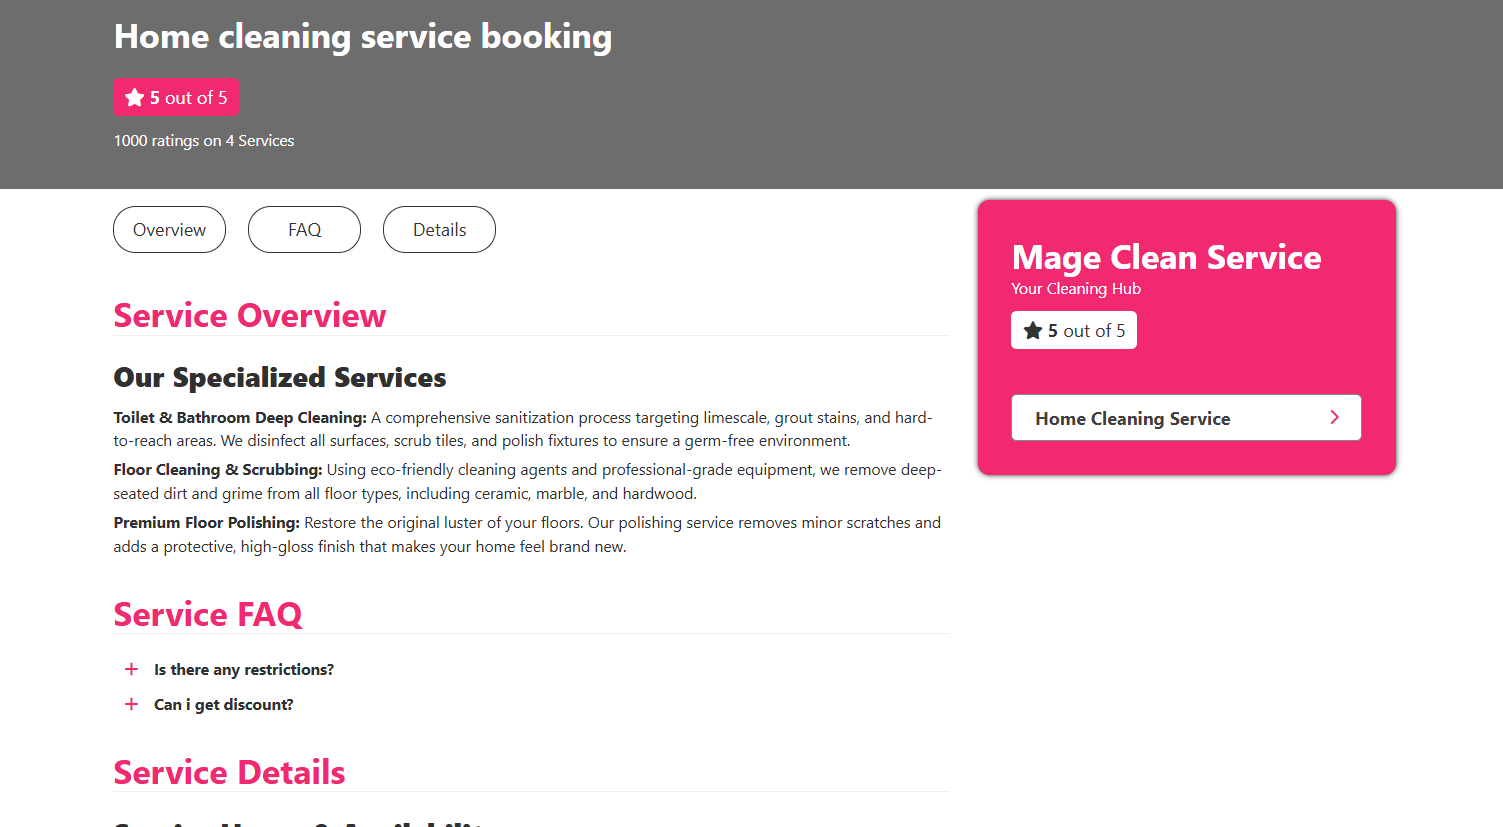
Publish the page and check the front end. You can place the same shortcode on a dedicated booking page, on a service landing page, or in two places on one site if you run separate residential and commercial funnels.
Step 9: Test the booking flow as a customer
Never launch without a test order. On the front end, select Home Cleaning Service and confirm the service list appears correctly.
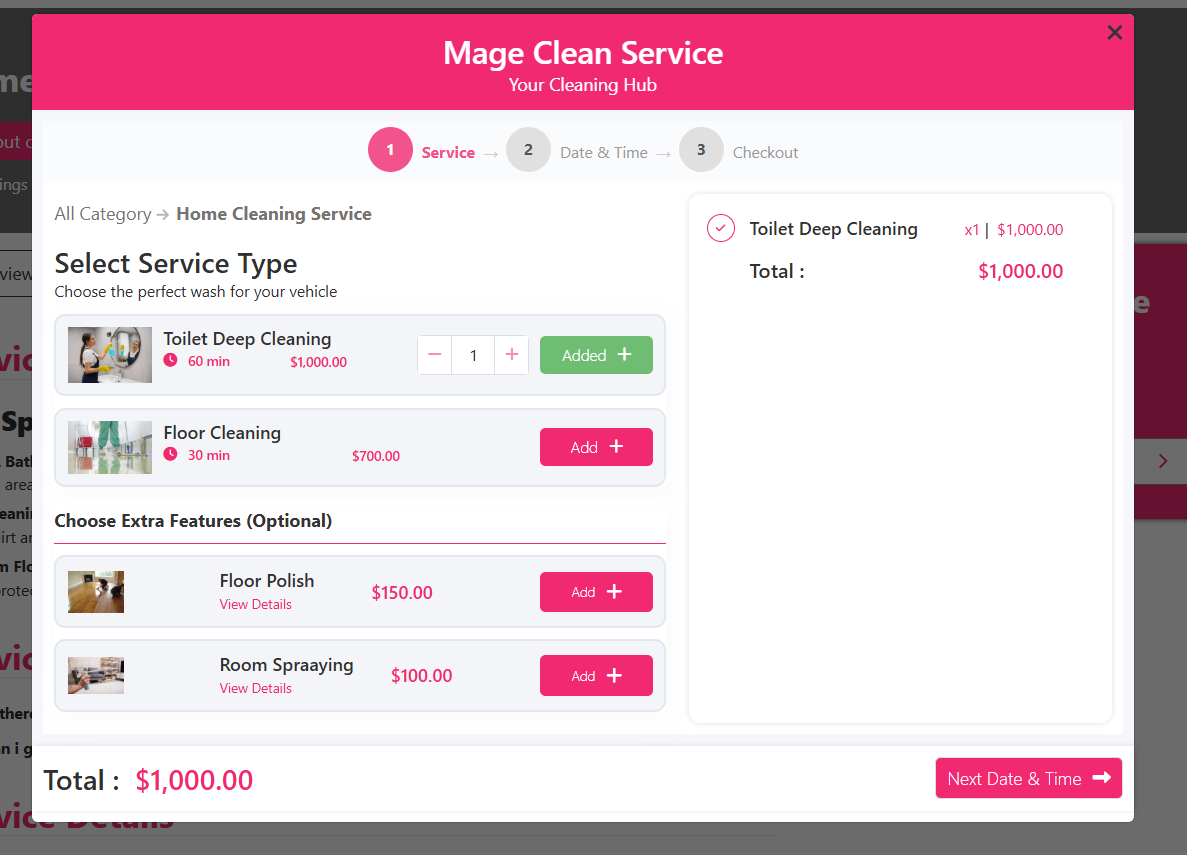
Choose a service, tick any extra services, and click Next.
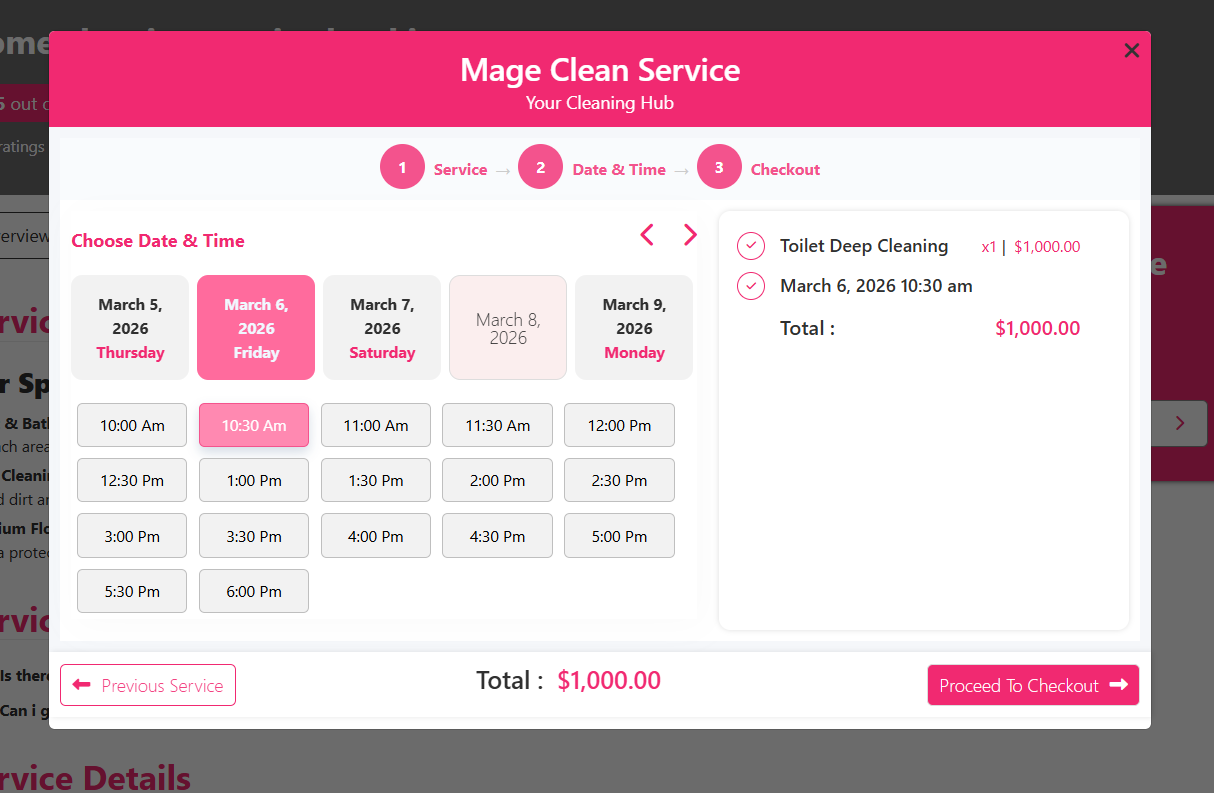
Pick a date and time slot, then continue to the summary and confirm the total matches your intended pricing.
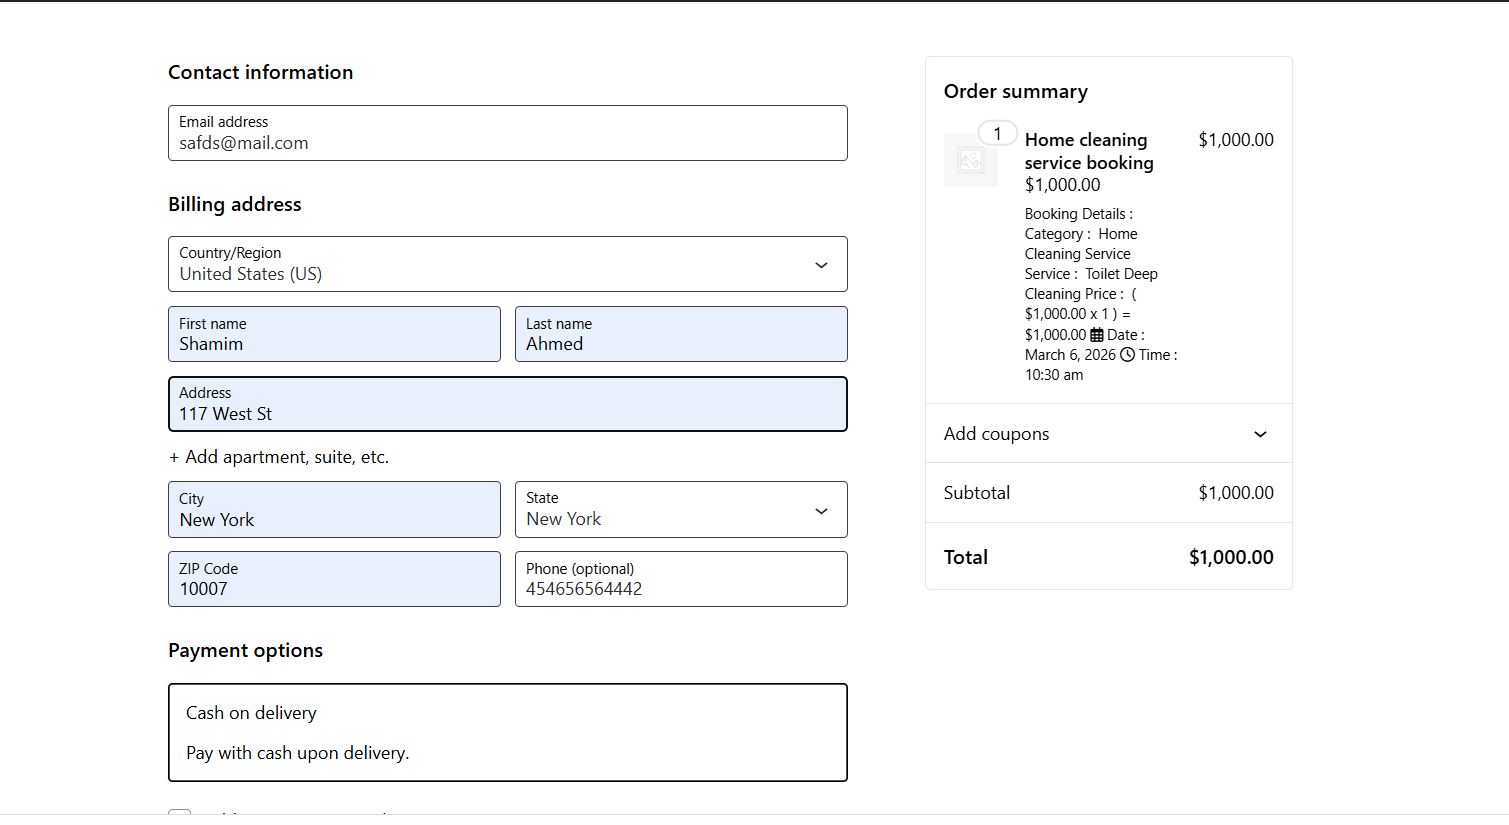
Enter the customer details and place the order. A thank-you message with the booking details confirms the form is working.
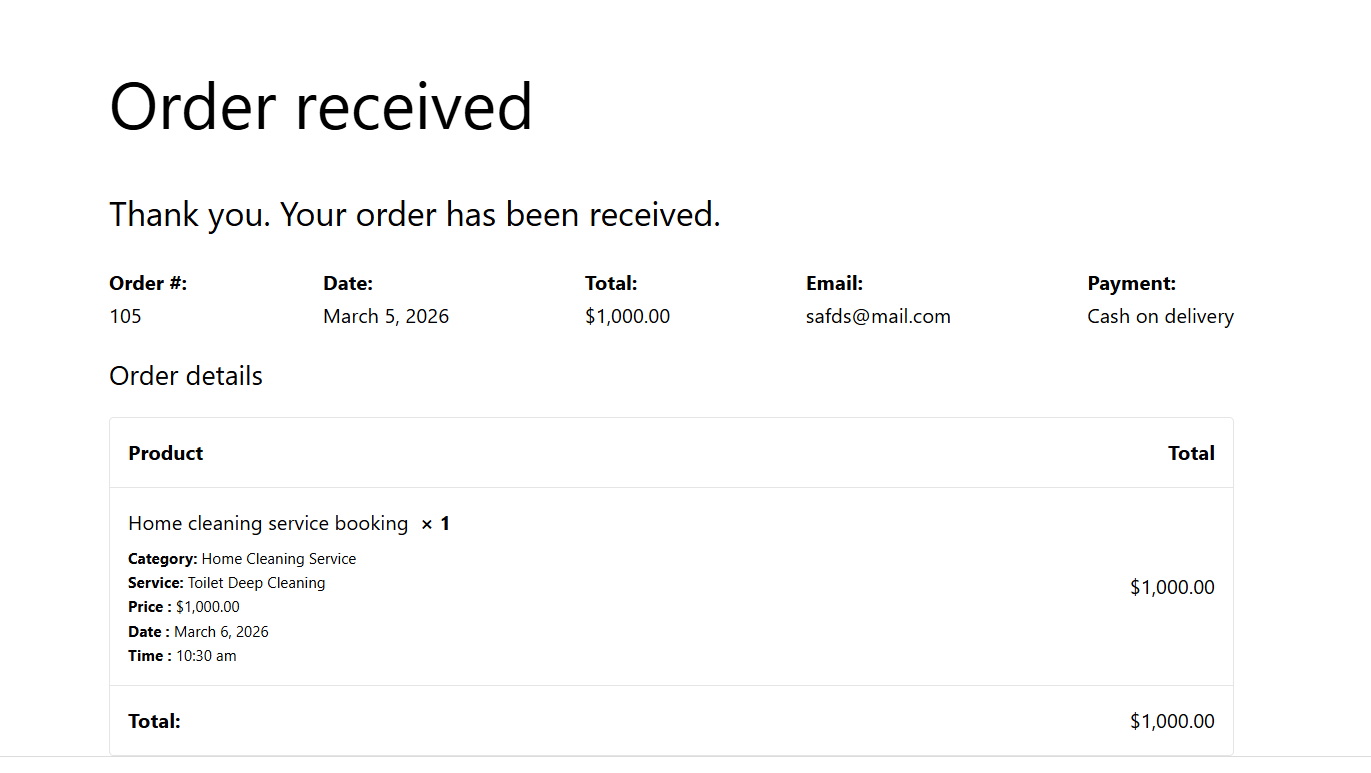
Step 10: Manage the booking from the backend
Your test order now appears under WooCommerce → Orders. From here you can view the chosen services, extras and schedule, and change the order status as the job progresses. Mark it completed once the clean is done.
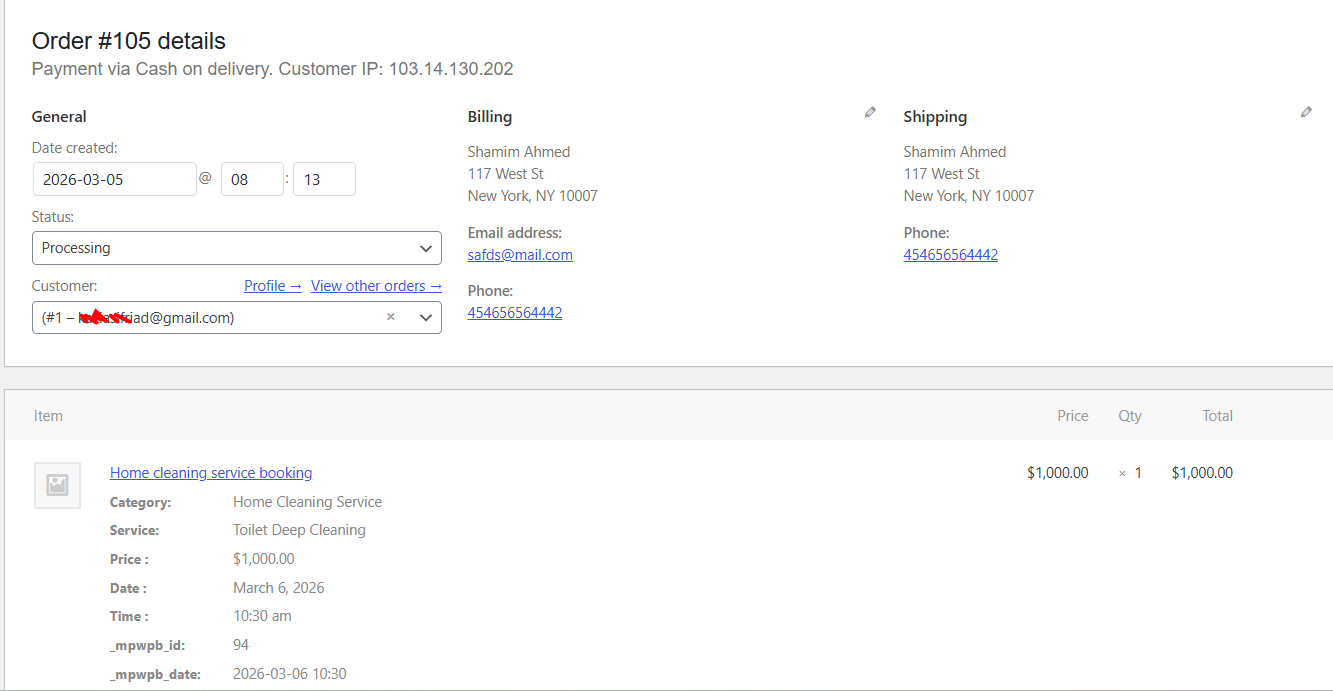
That is the full loop: booking in, payment captured, job tracked, order closed. Everything else is refinement.
Making the system work for a real cleaning business
Getting the form online is the easy part. These are the settings and habits that decide whether it actually earns.
Price by duration, not by flat rate
Enable service duration and give every service a realistic time estimate. A move-out clean priced the same as a fortnightly tidy-up will lose you money, and the calendar will double-book your team. Build duration into the service itself so the schedule stays honest.
Use capacity to protect your crews
Set capacity per slot to the number of teams you can realistically dispatch. Turning away a booking you cannot service costs far less than a failed job and a bad review.
Push add-ons at the right moment
Extras convert best when they appear next to the service choice, not after the customer has committed. Group them sensibly and keep the list short — three to five high-margin extras perform better than a long menu.
Keep recurring clients on a schedule
Recurring cleans are the backbone of a stable cleaning business. Use the repeated-date option and the advance-booking window together so a weekly client can book a block of visits in one session.
Watch the reports
Check booking and revenue reports monthly. If carpet cleaning sells in one area and deep cleans in another, your marketing should follow the data rather than your assumptions.
Set expectations on the service page
State what is included, whether supplies are provided, and how access works if the customer will not be home. Most cleaning complaints are expectation problems, not cleaning problems.
If you want to compare how the same plugin handles another service business before committing, the WpBookingly service booking system overview lists the add-ons available on the premium version, including advanced scheduling and notification options.
Frequently asked questions
Which cleaning businesses can use this plugin?
Any job-based cleaning operation: residential home cleaning, office and commercial contracts, carpet and upholstery cleaning, window cleaning, end-of-tenancy and post-construction cleans. The service and sub-category structure is flexible enough that you define the vertical yourself.
Can I offer recurring weekly or monthly cleans?
Yes. Set the service date type to repeated and choose your repeat interval. Customers can then book recurring visits in one go, and the recurring schedule appears in your booking calendar without manual re-entry.
Can I charge different prices for different size homes?
Yes. Create separate services for each size and assign its own price and duration. You can also enable multiple selection if a customer needs more than one service in a single visit.
How do customers pay?
Through WooCommerce. Enable the gateways you want in WooCommerce → Settings → Payments, and the booking is processed as an order. Deposits and full prepayment are both possible depending on how you configure the gateway.
Can I stop bookings on days I do not work?
Yes. The schedule settings let you define break times and off days, and each slot has a capacity limit, so customers are only offered times you can actually service.
Final thoughts
You now have the complete path to a working cleaning service booking website: install the plugin, connect WooCommerce, create the service, define recurring slots and working hours, build your service catalogue and extras, enable payments, then place the form on a page with a shortcode.
The mistake most cleaning businesses make is treating the booking form as a static enquiry page. Done properly, it is your scheduling system, your price list and your payment desk in one place — and it keeps selling while you are on a job. Configure capacity and duration carefully from day one, keep your service descriptions honest, and review your booking reports monthly.
If your next service line is exterior cleaning, the car wash and vehicle cleaning booking guide shows how the same shortcode-based setup handles that workflow too.
