 Get Halloween 15% for Limited Time on Lifetime & Bundle Deal

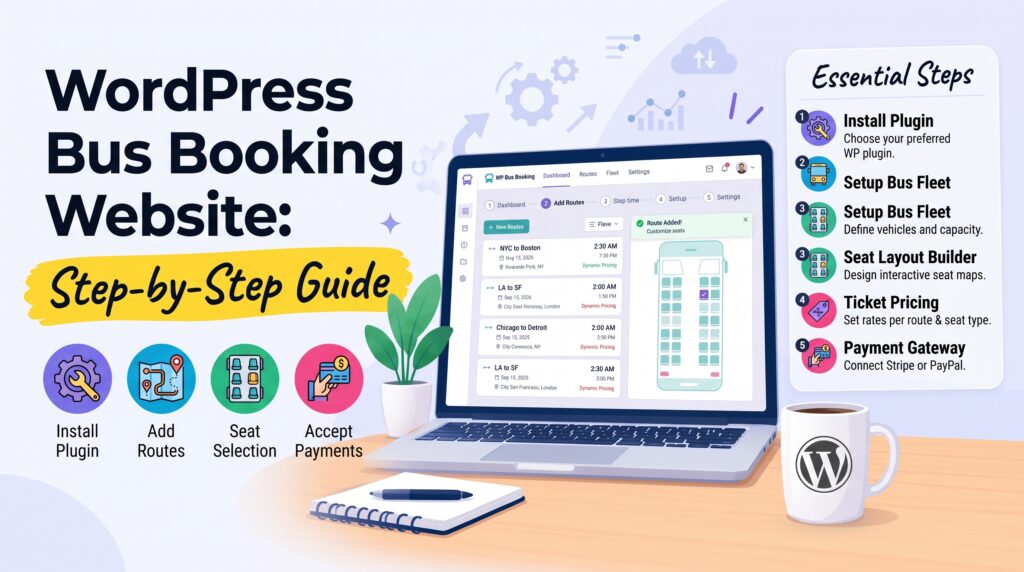
You can create a bus booking website on WordPress without writing code, and you can finish the core setup in an afternoon. This guide walks through the full build using the Bus Ticket Booking with Seat Reservation plugin, from installing the plugin to configuring routes, seat plans, fares and passenger forms, then publishing and testing the finished ticket booking system. No developer, no custom build, no monthly SaaS fee.
- What You Need Before You Start
- Free vs Pro: Which Version Do You Need?
- Step 1: Install and Activate the Plugin
- Step 2: Creating Bus Routes and Schedules
- Step 3: Publish and Preview
- Upgrading to WpBusTicketly PRO
- Choosing a Bus Booking Theme
- Pre-Launch Checklist
- Frequently Asked Questions
- Wrapping Up
What You Need Before You Start
Every step below assumes a working WordPress site on a host that supports WooCommerce. Set these up first and the rest goes smoothly:
- WordPress installed on your own domain, with admin access.
- WooCommerce installed and activated. The bus plugin uses WooCommerce to handle checkout, payments and order records, so it is a prerequisite rather than an optional extra.
- Your route data ready — stop names, departure and arrival timings, boarding and dropping points, and your fare table by point.
- Bus photos for the featured image and gallery, plus a logo if you want one shown on the ticket.
If you are still deciding whether WordPress is the right base for a reserved-seat transport business, the reasoning is covered in why WordPress suits bus ticket booking with seat reservation. This article assumes that decision is made and moves straight into the build.
Free vs Pro: Which Version Do You Need?
The plugin ships in two versions. The free version covers the essentials: bus listings, seat plans, routes and pricing. That is enough to accept real bookings.
The Pro version adds the operational pieces most running bus companies need:
- Intermediate (multi-leg) route booking
- Multiple seat types with separate pricing
- Custom seat icons, colours, labels and tooltips
- Custom seat categories, filters and booking limits
- Custom email templates
- QR code ticket add-on, seat plan rotation, passenger registration forms and sales reporting
Start with the free version to learn the interface, then upgrade when you need QR verification or intermediate stops. Check current pricing on the Bus Ticket Booking with Seat Reservation Pro addon page before you decide.
Step 1: Install and Activate the Plugin
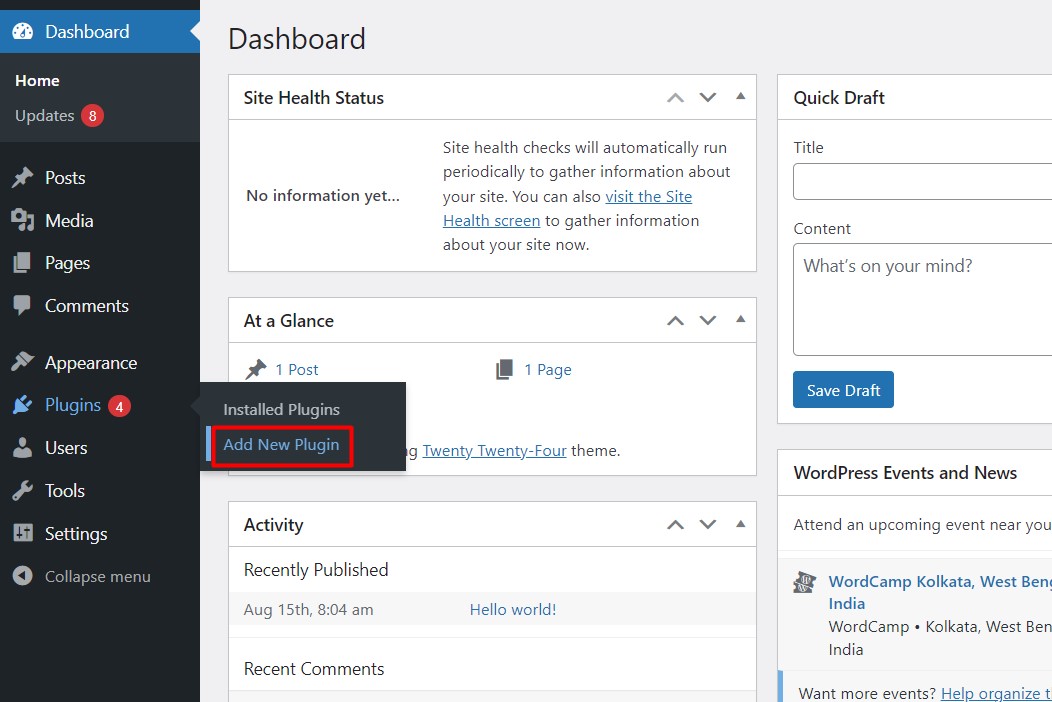
Log in to your WordPress dashboard and navigate to Plugins → Add New.
In the search field, type “Bus Ticket Booking with Seat Reservation” and wait a moment for the results to load. The plugin appears at the top of the list.
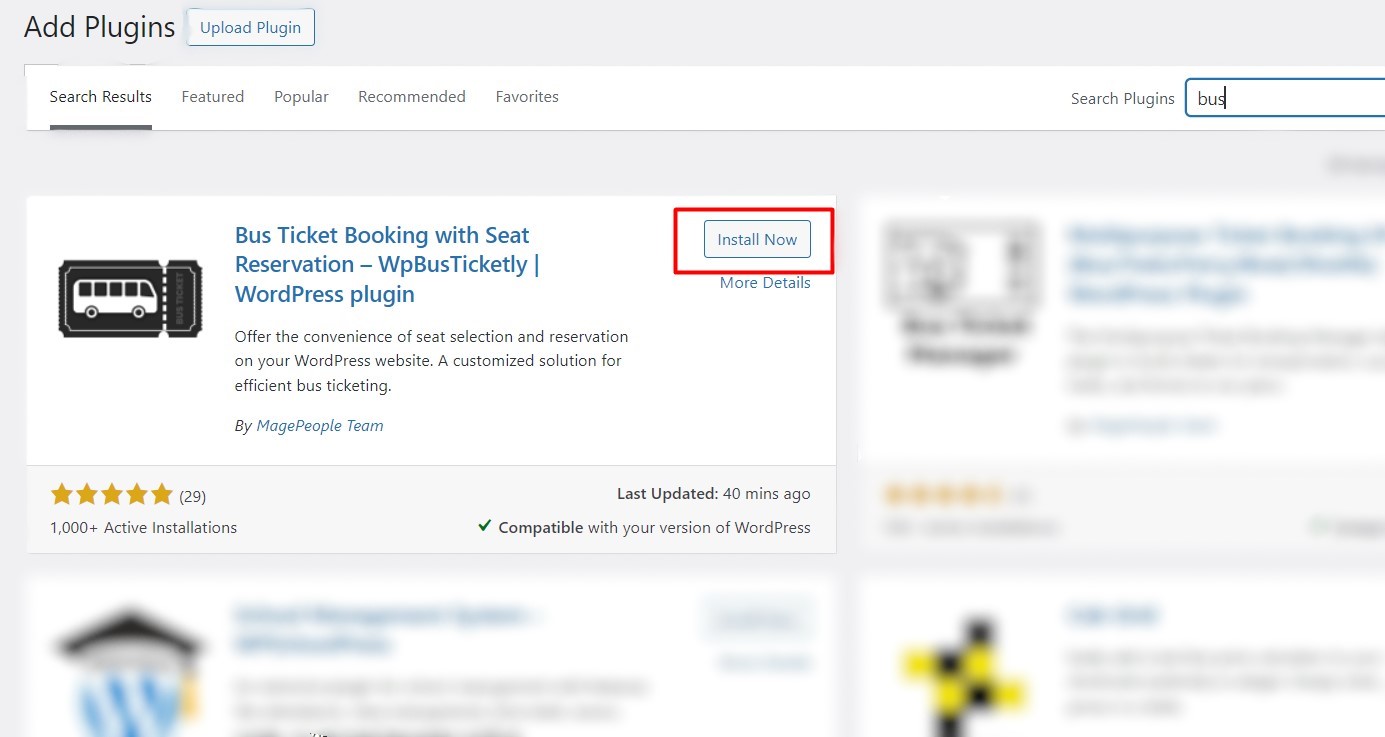
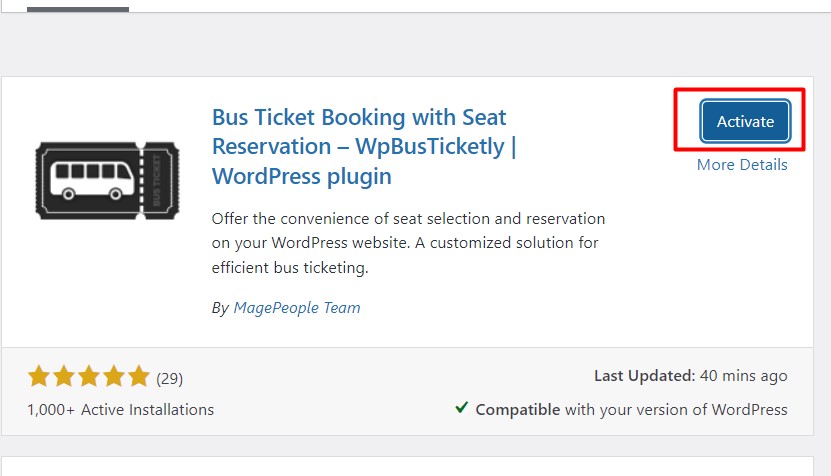
Click Install Now, then click Activate once installation finishes.
Next, install and activate WooCommerce if you have not already. The bus plugin depends on it for cart, checkout and payment handling.
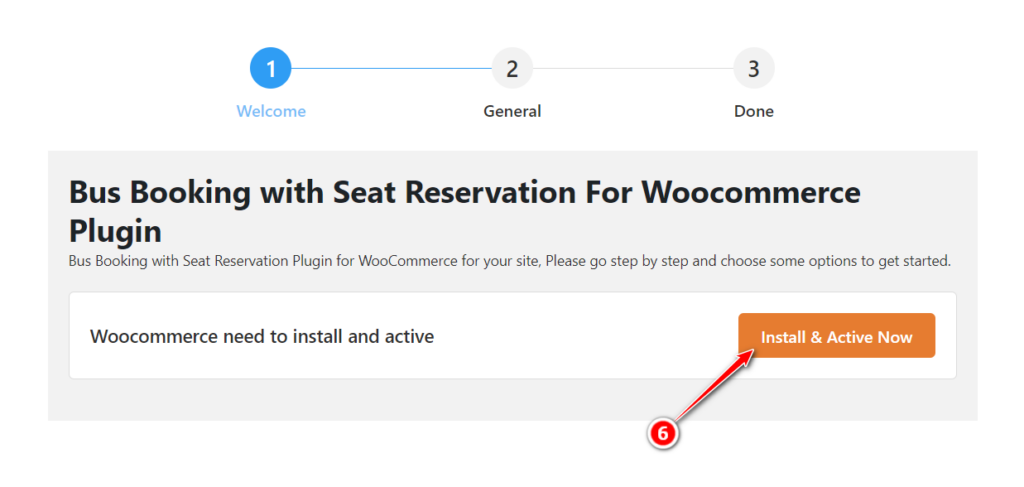
Once WooCommerce is active, the bus plugin’s setup options become available.
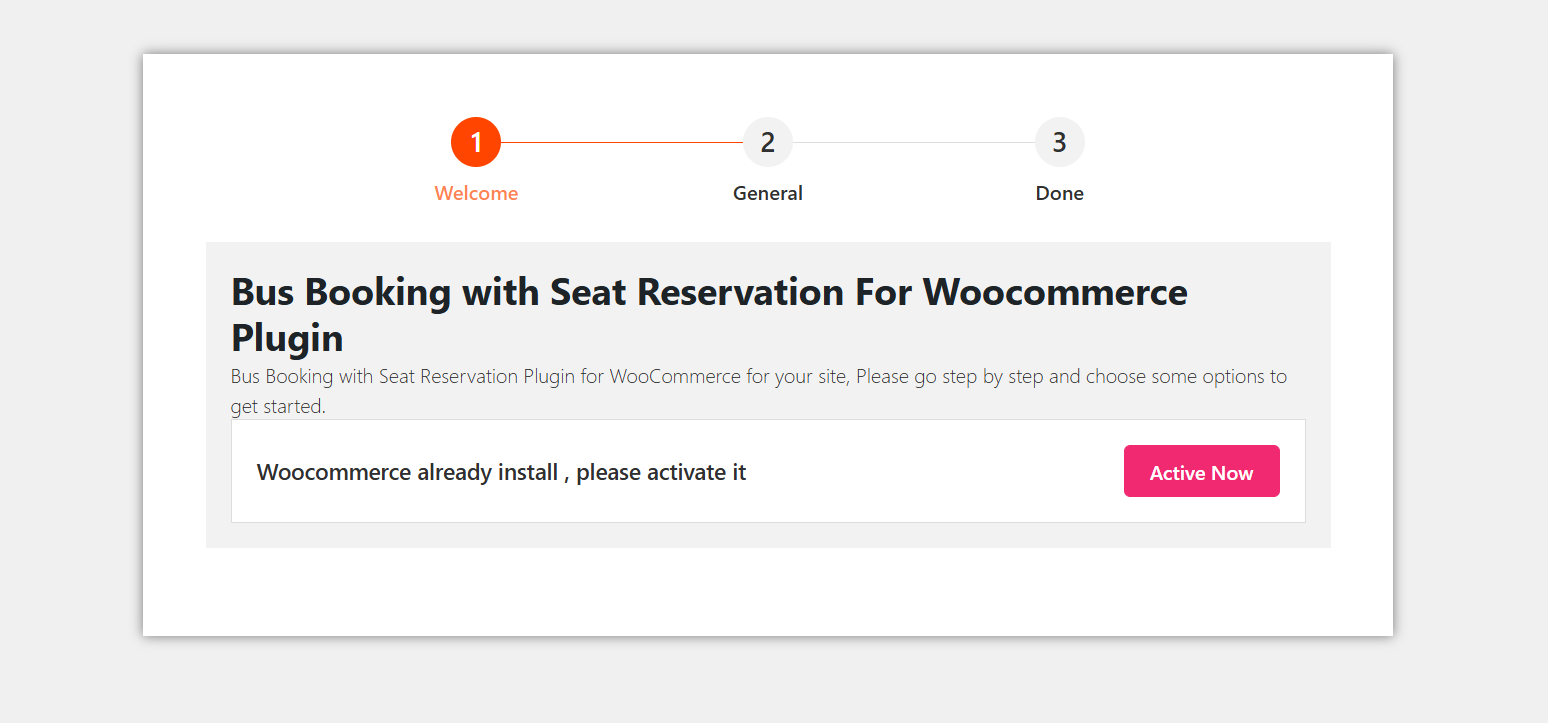
Run the WooCommerce setup wizard: click Next and fill in your store address and currency under General Settings.
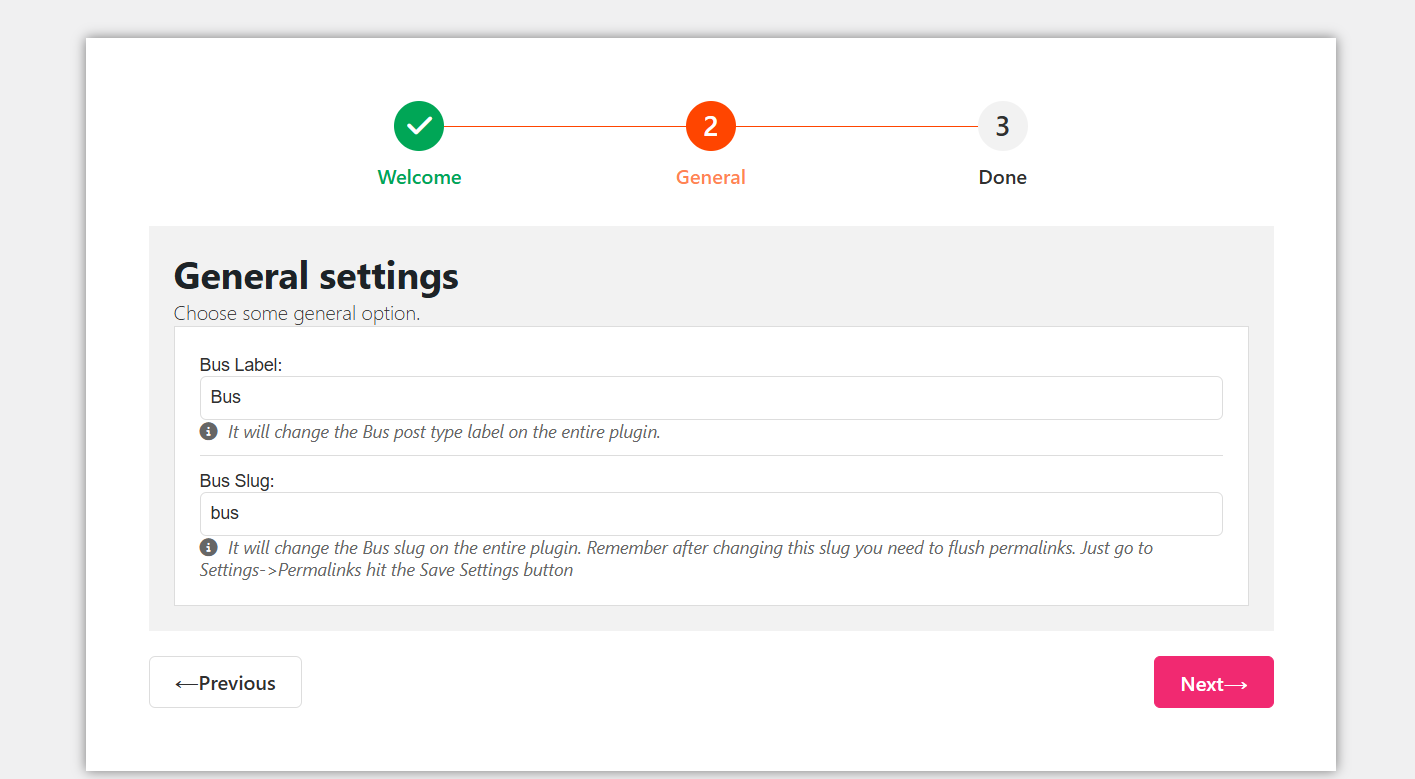
Provide the Bus label and Bus slug for your booking archive — for example “Bus” and bus. These control the URL of your bus listing pages, so choose them deliberately and keep them short.
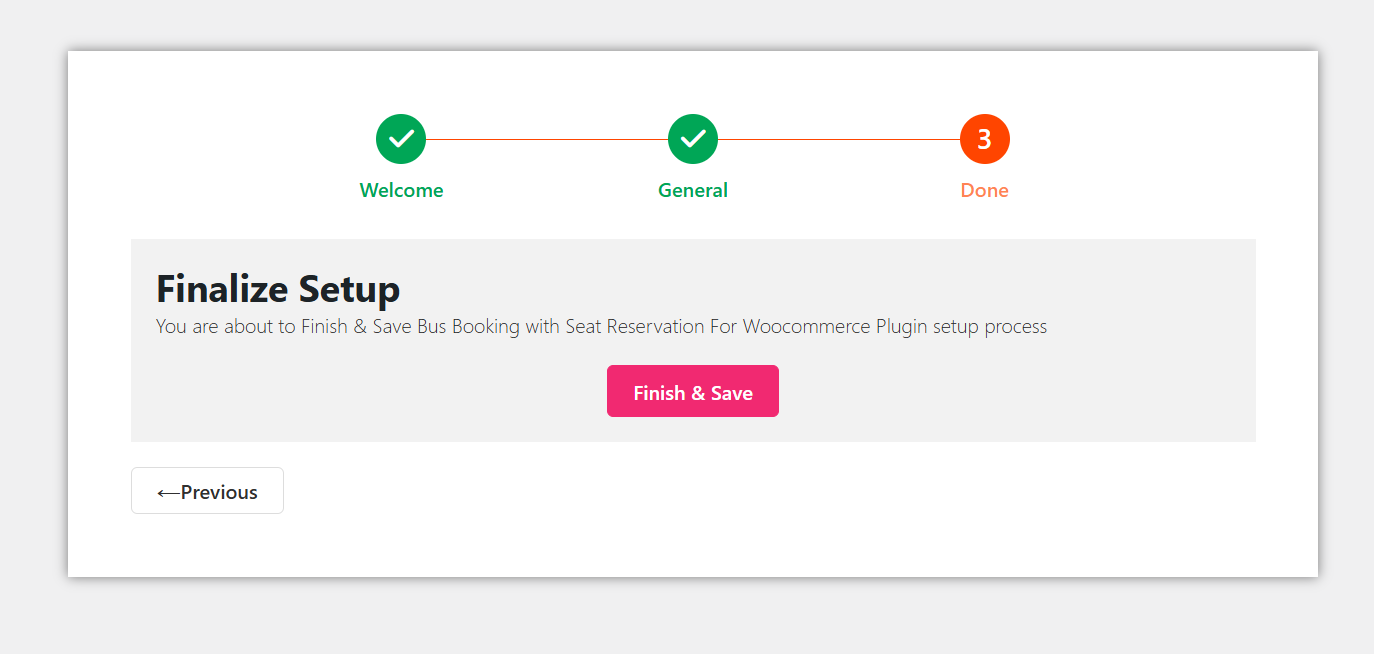
Click Finish & Save. The base setup is complete and you can move on to building routes.
Step 2: Creating Bus Routes and Schedules
This is the section that decides how good your booking experience feels. Work through the tabs in order — each one feeds the next.
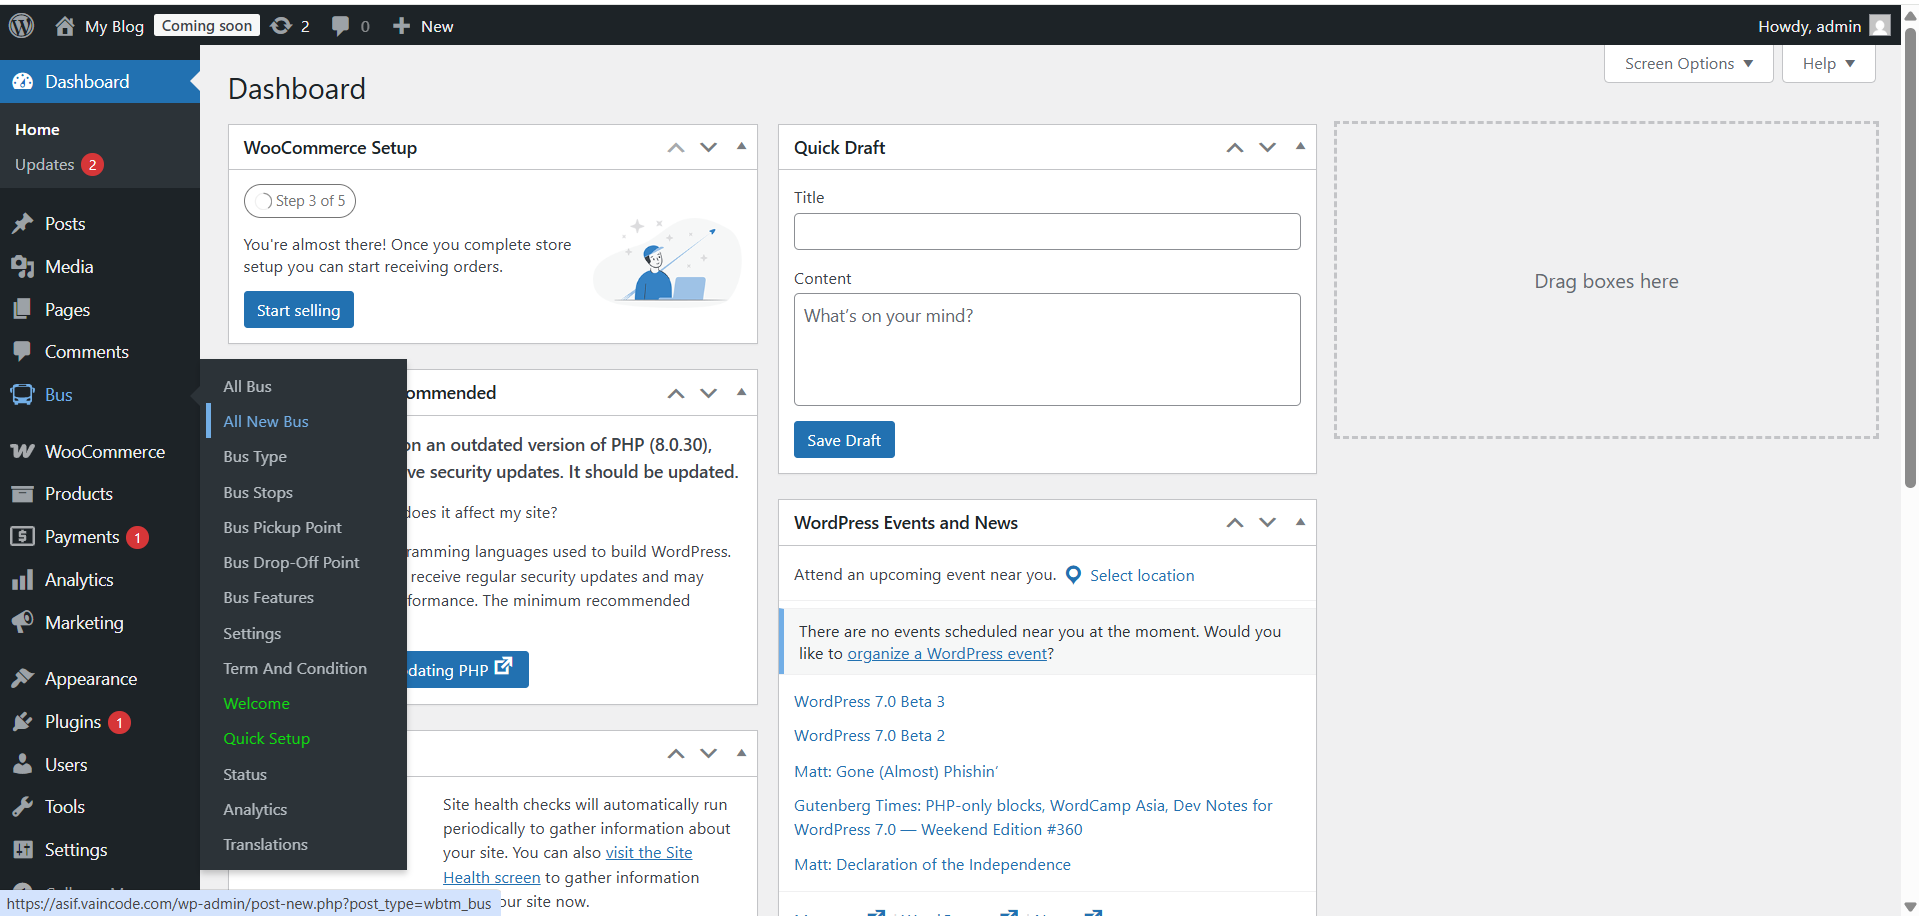
Bus Type
Go to Bus → Bus Type and add the categories of service you run: AC Sleeper, Non-AC, Business Class, or whatever matches your fleet. Types let customers filter and let you price differently.
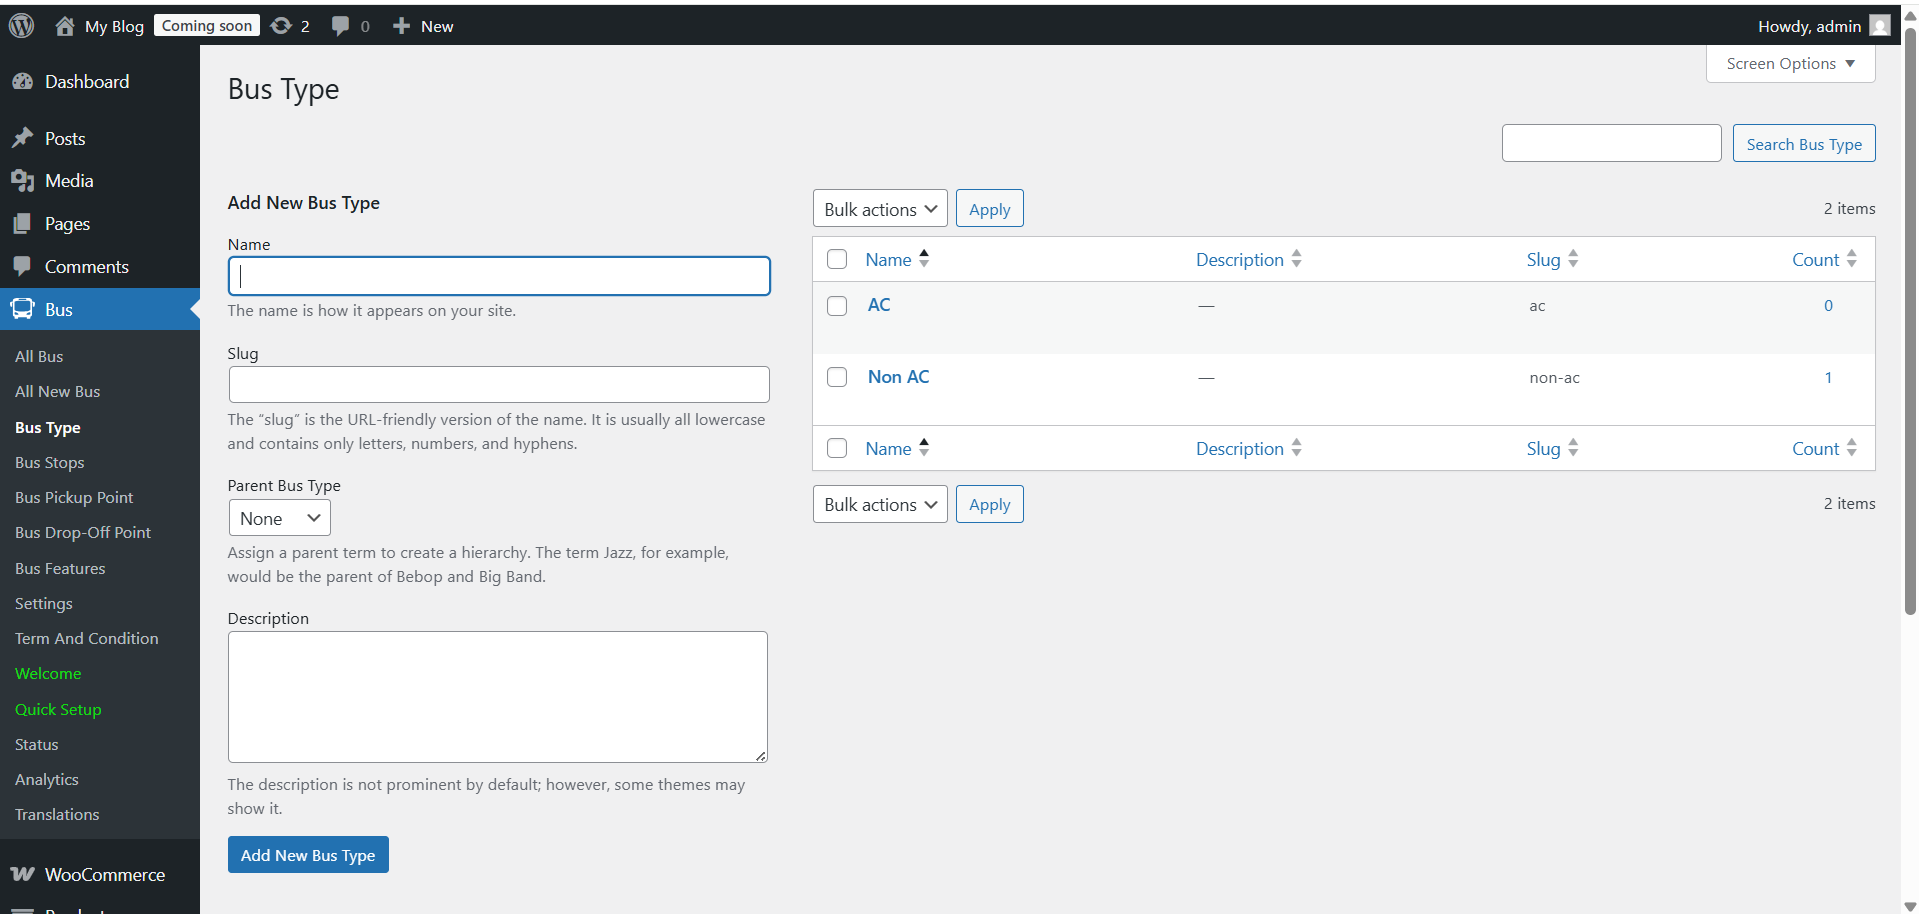
Bus Stops
Go to Bus → Bus Stops, enter the stop name and slug, and click Add Category. Add every stop across every route you operate — this list becomes your route builder’s vocabulary.
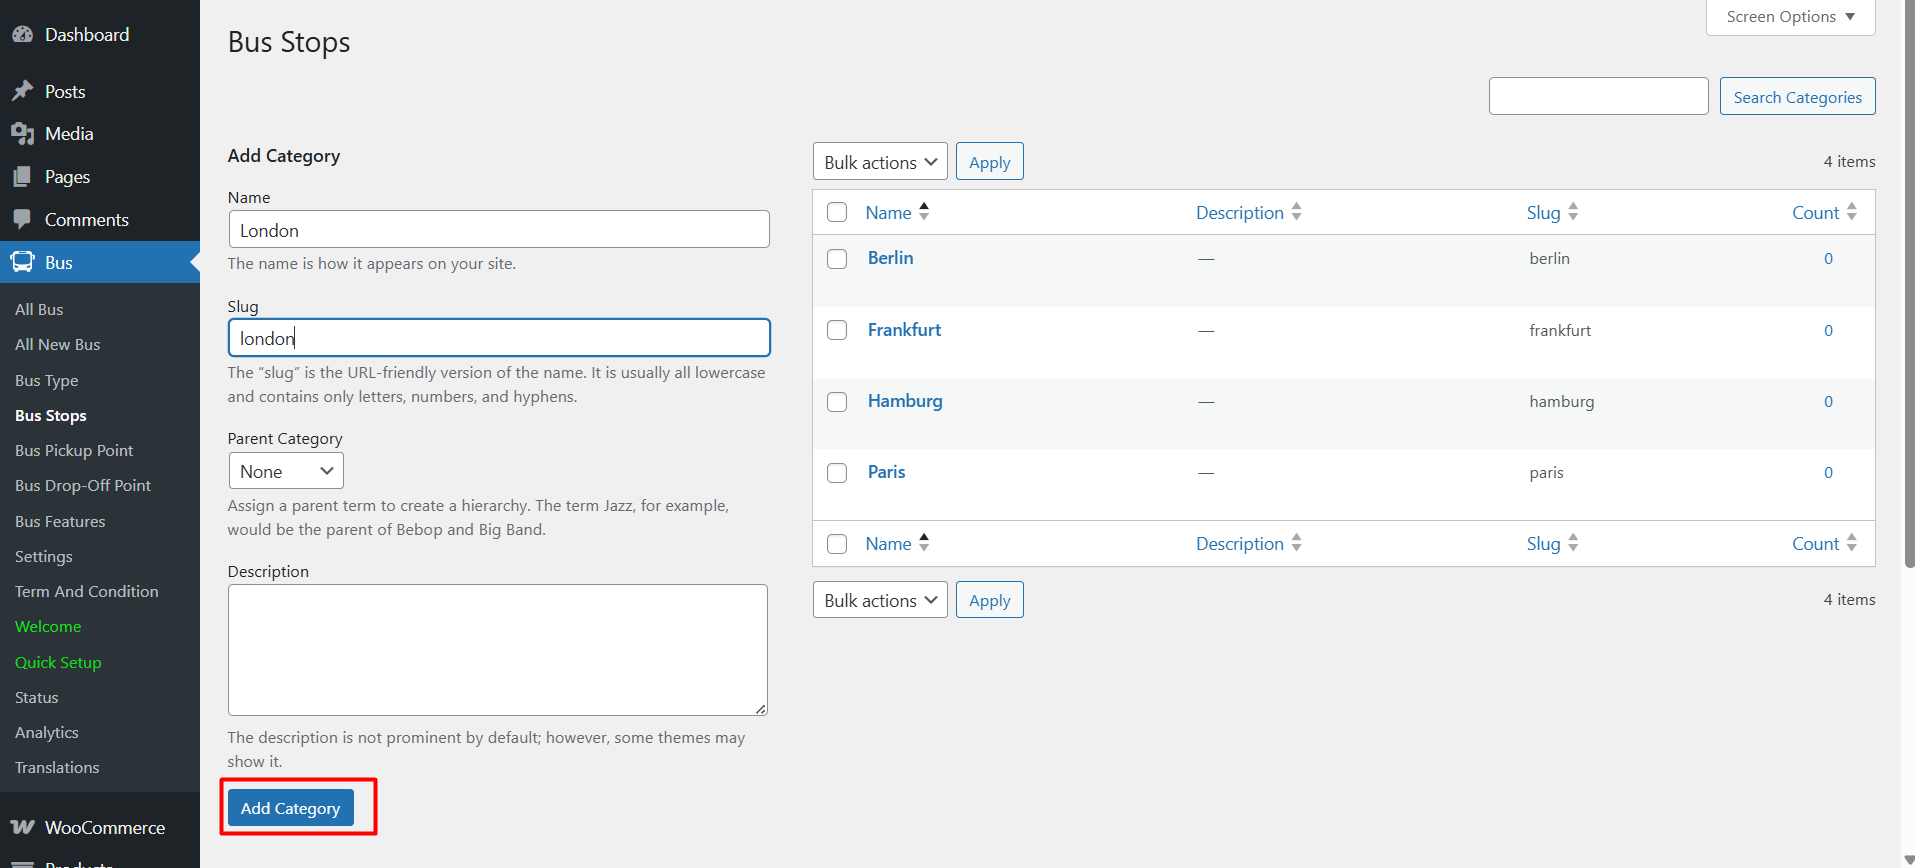
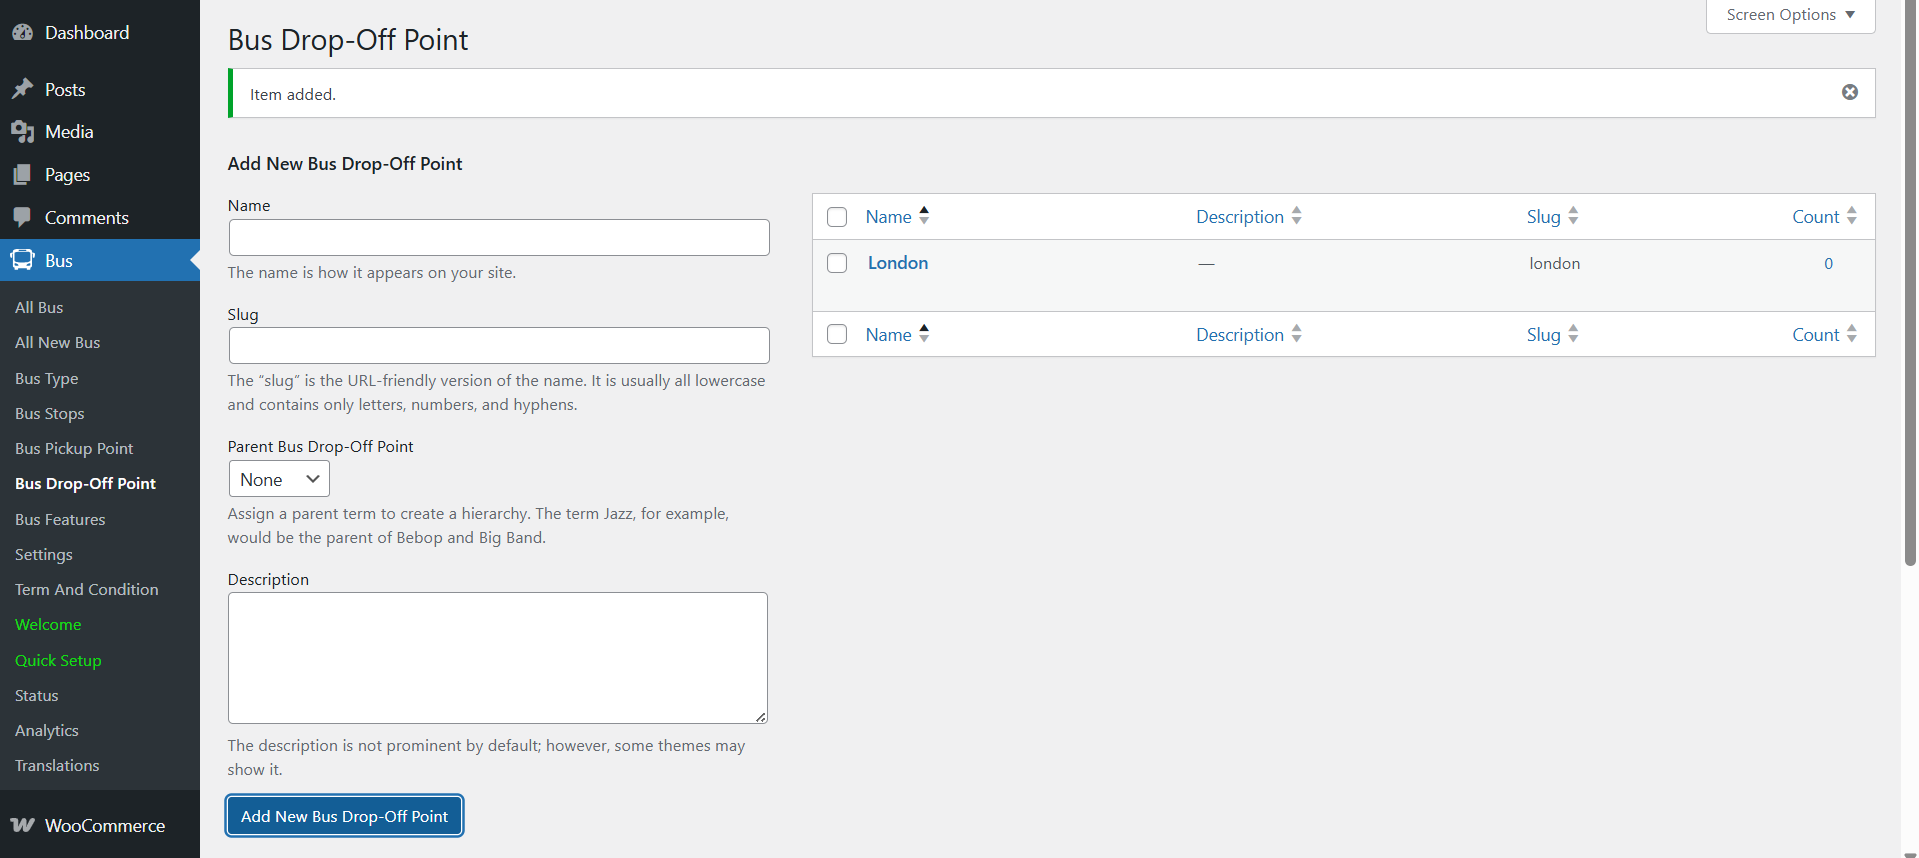
Pickup and Drop-off Points
Pickup points are where passengers actually board: a terminal, a named intersection, a hotel forecourt. Add them the same way, using the location name only.
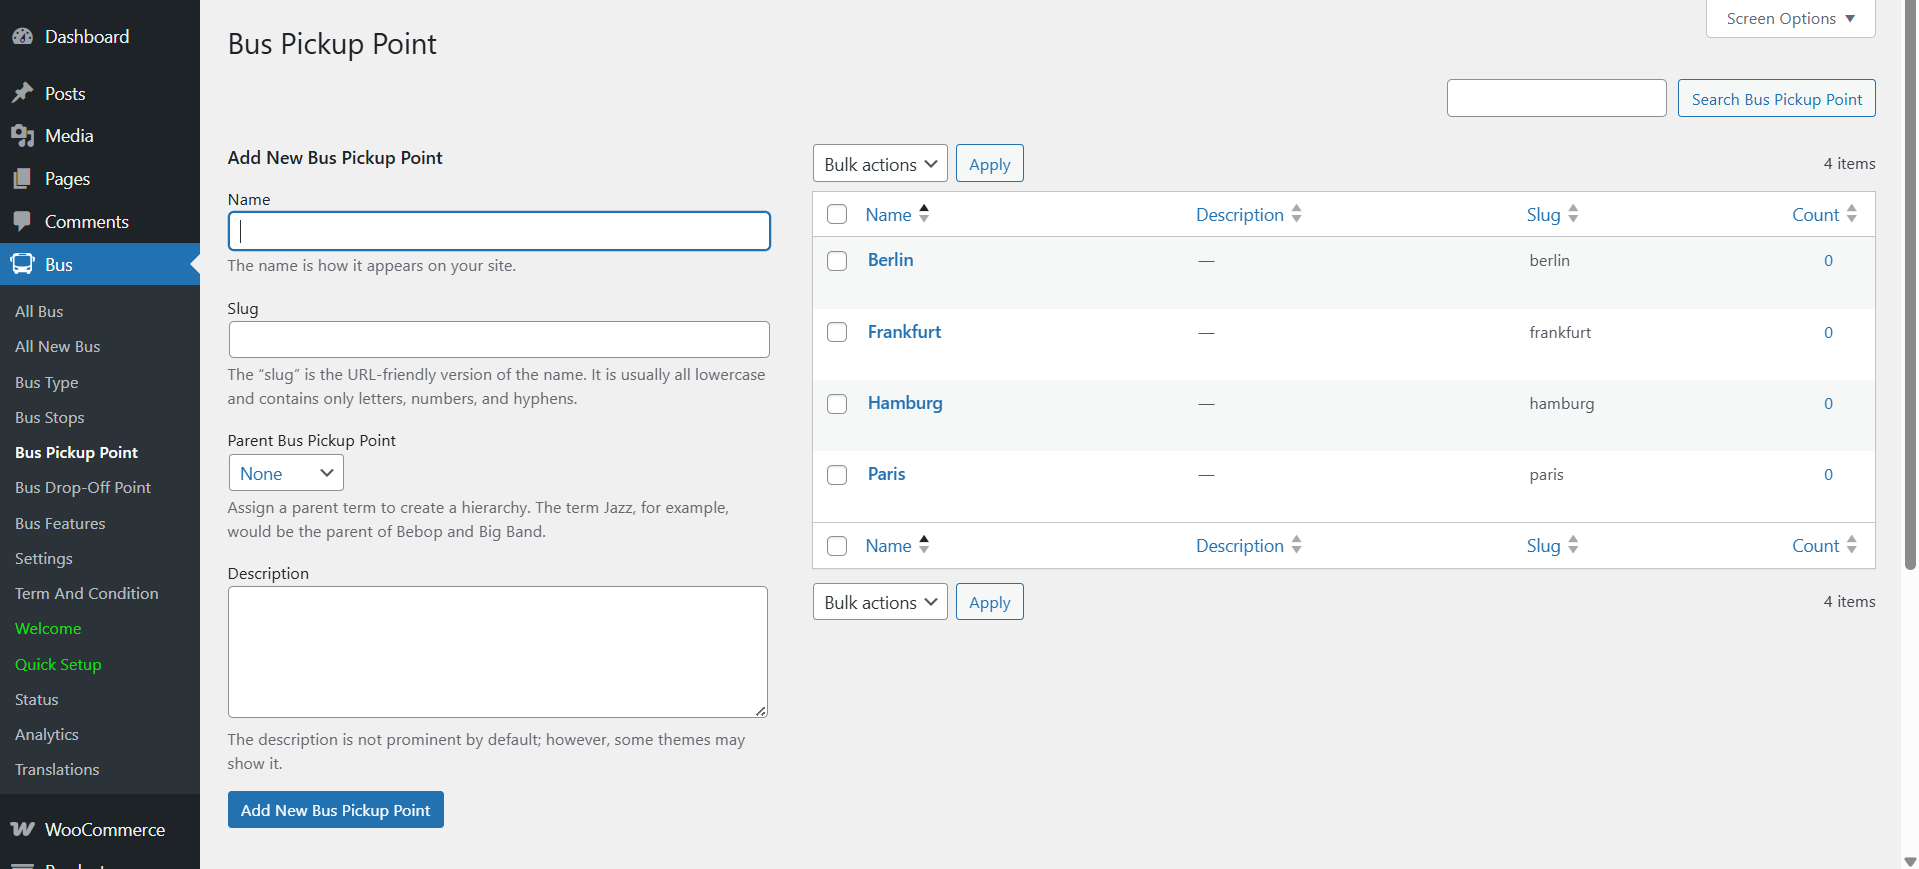
Add drop-off points in the same screen. Keeping pickup and drop-off separate from stops lets one route serve several boarding locations with different fares.
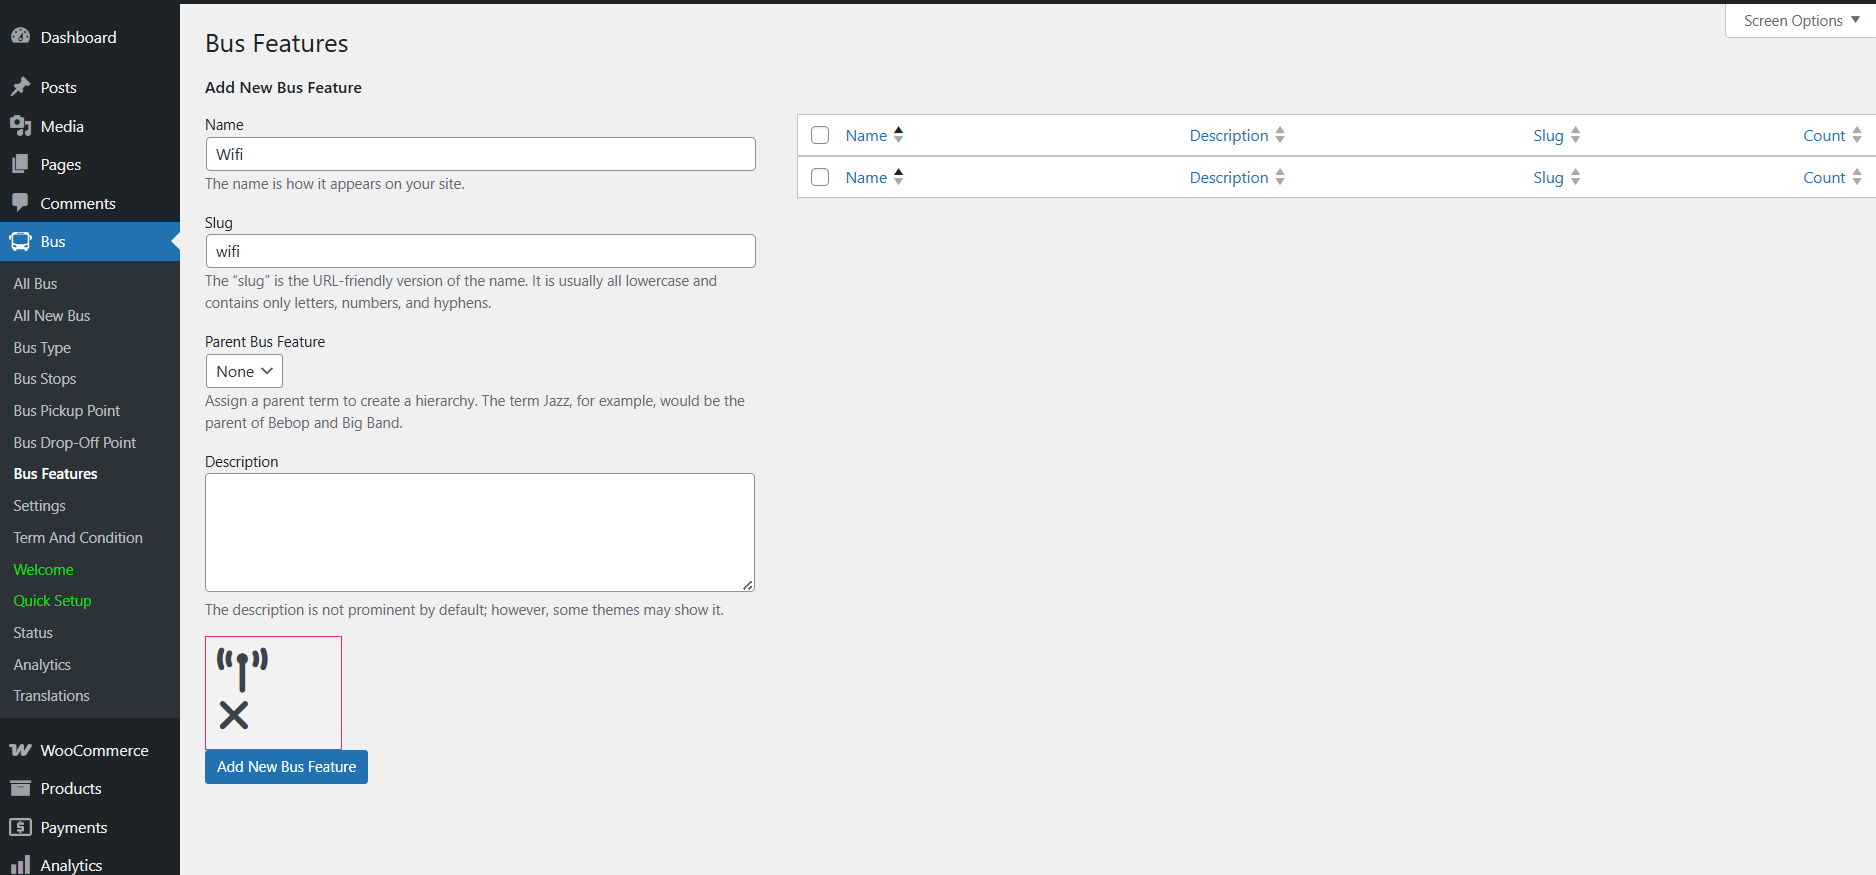
Features
Add amenities travellers care about — Wi-Fi, charging ports, water, reclining seats. Each feature takes a name, slug and icon, and displays on the bus listing.
Create a Bus
From the dashboard, open the Bus menu and go to All Bus → Add New.
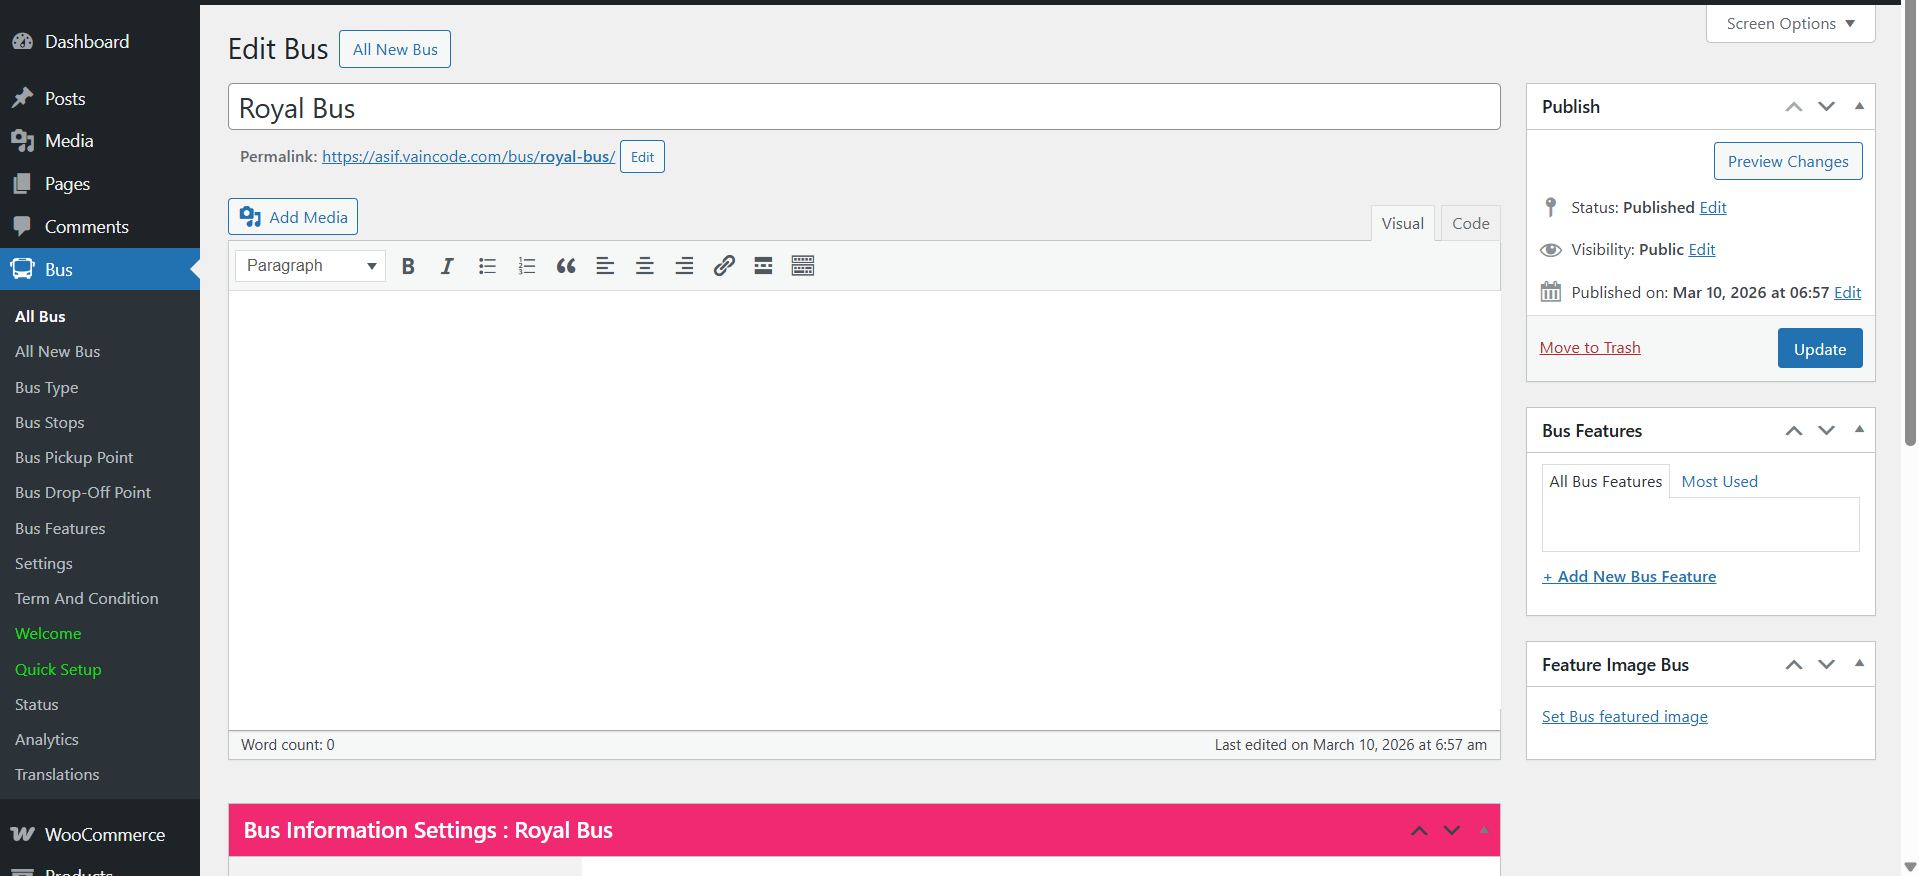
Give the bus a title that reflects the service, for example “Dhaka to Chattogram AC Sleeper”, then set a featured image. A clear, well-lit photo of the actual coach converts noticeably better than a stock image.
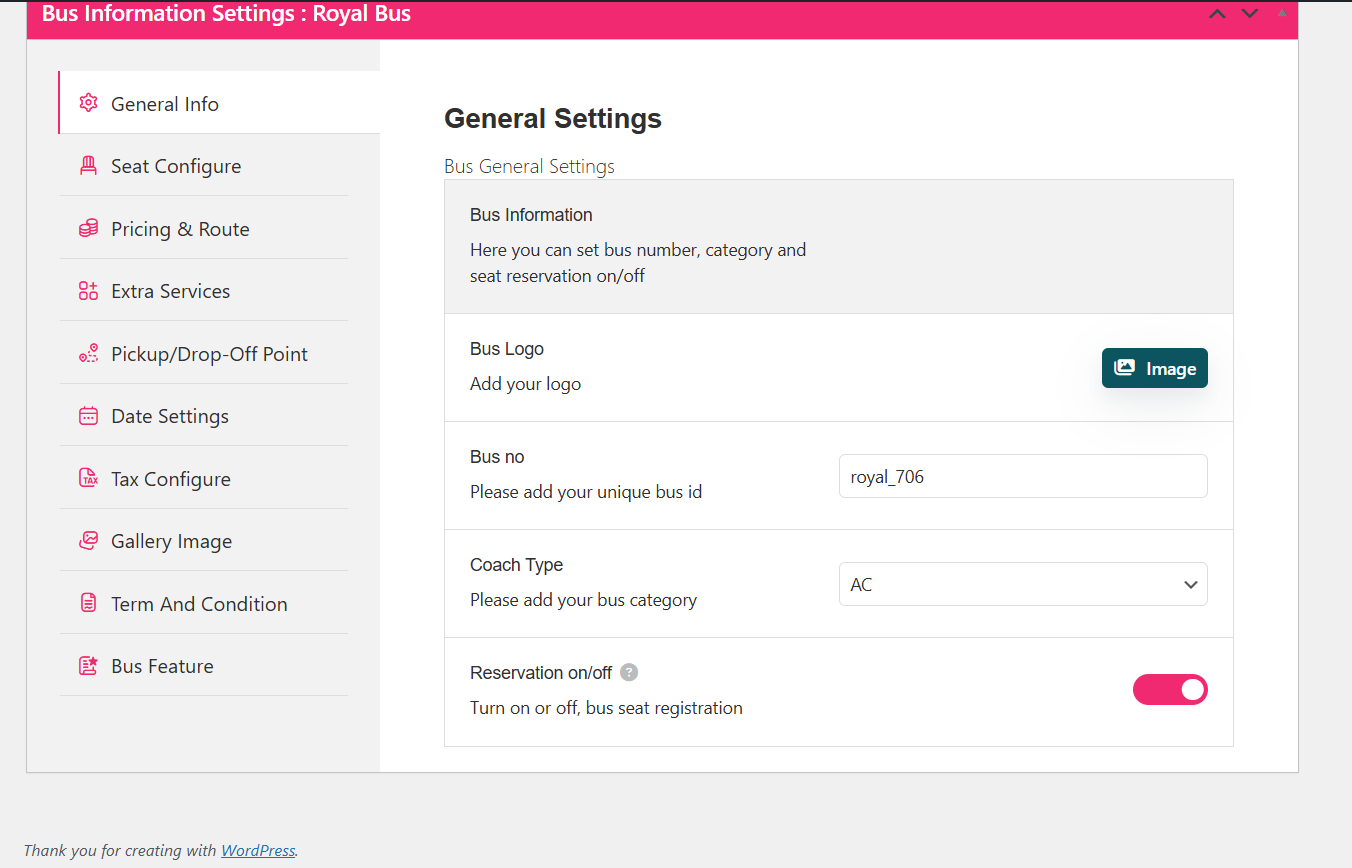
General Info
Add the bus logo, the bus ID or fleet number, the coach type, and enable reservations. The bus ID matters on multi-coach fleets — it is how staff identify which vehicle is running.
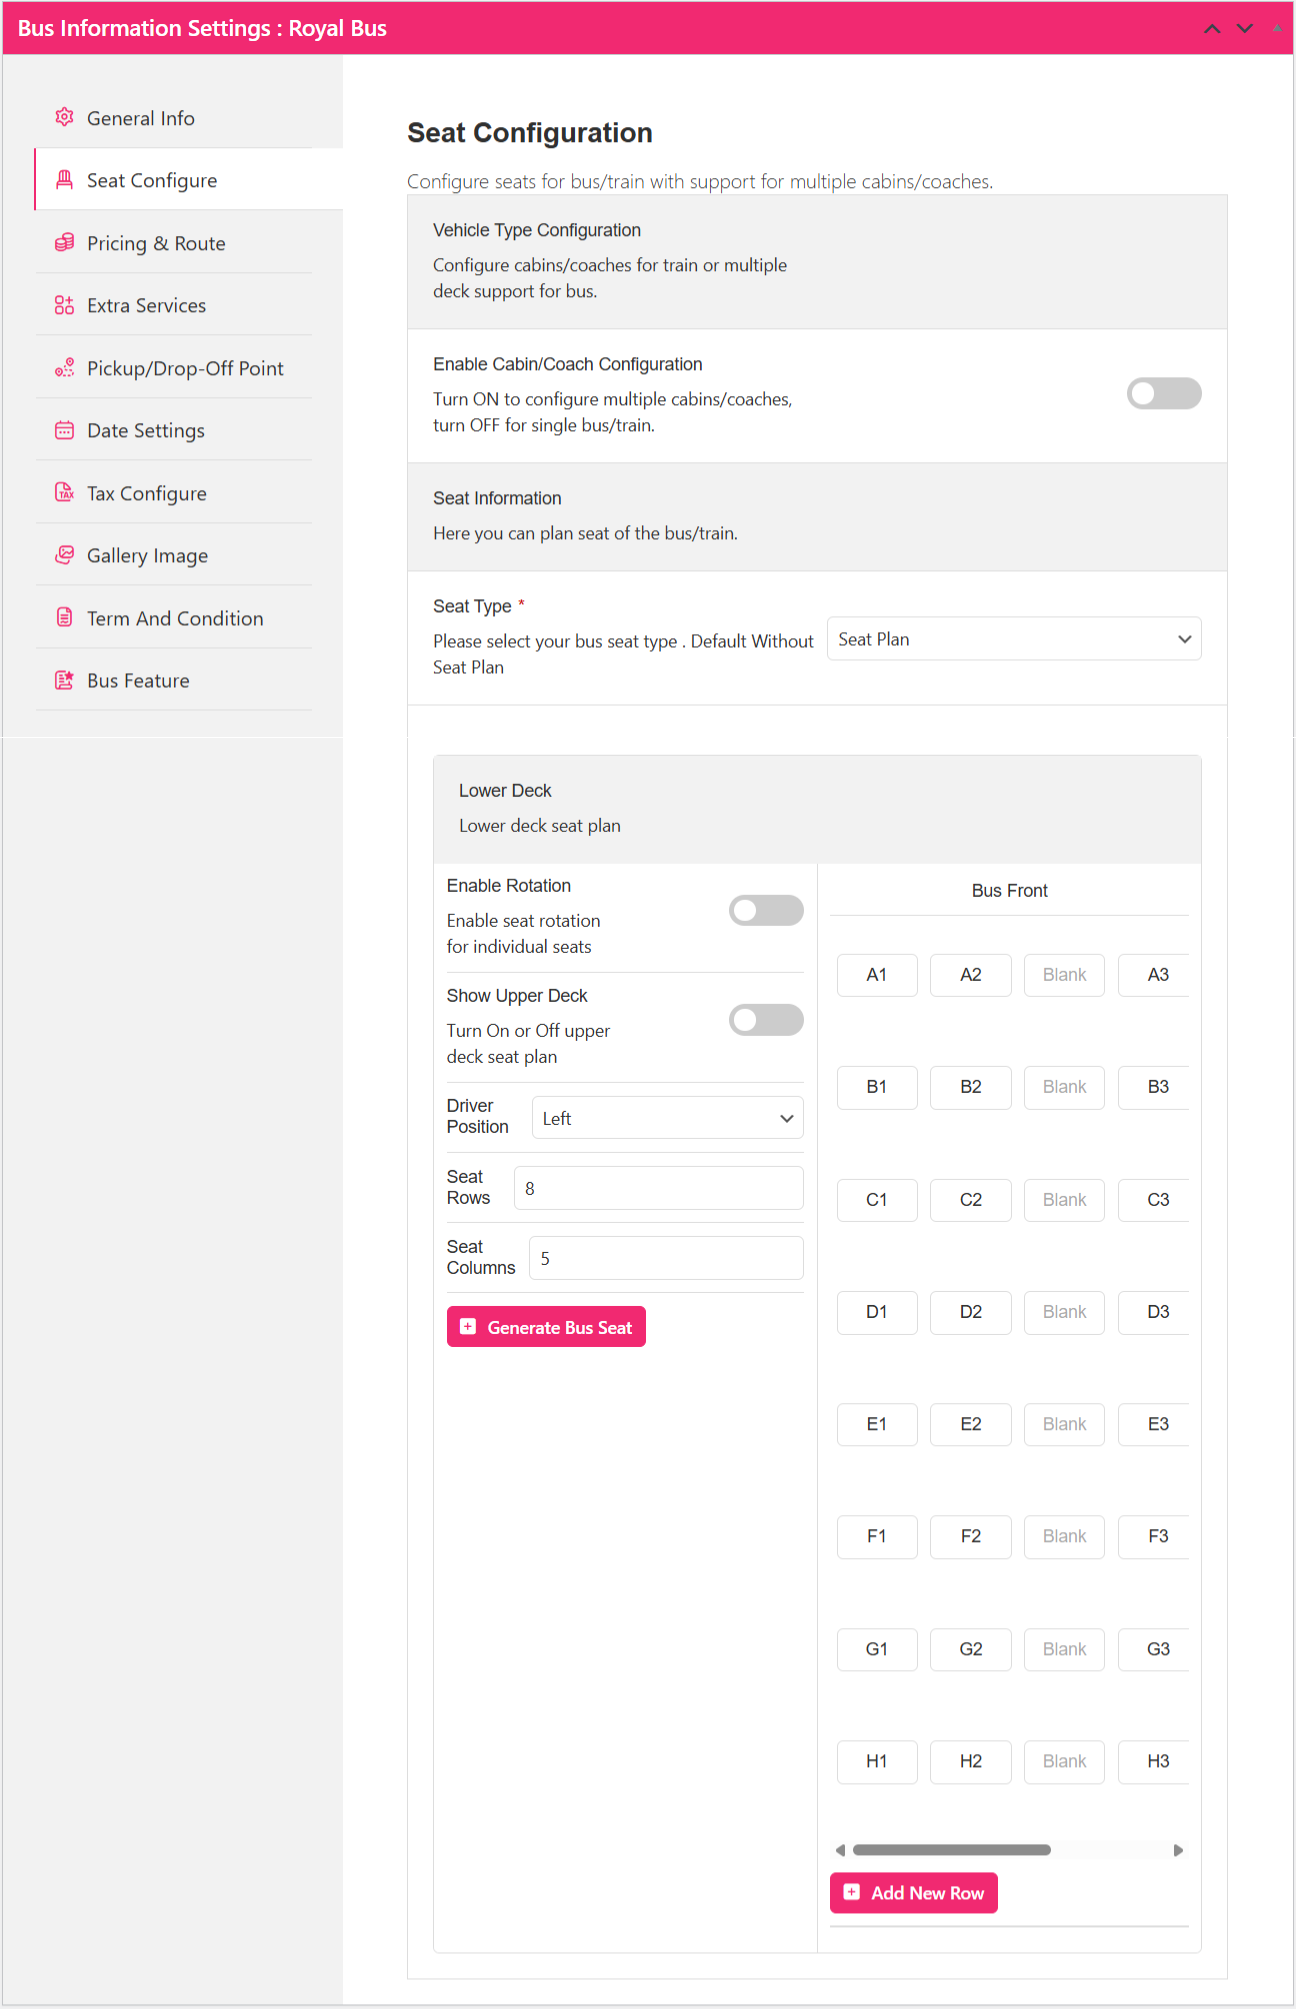
Seat Configuration
Add a seat type and define the seat plan: number of seats, rows, columns and driver position. Getting the layout right matters because customers pick specific seats at checkout, so the plan on screen must match the coach in the yard.
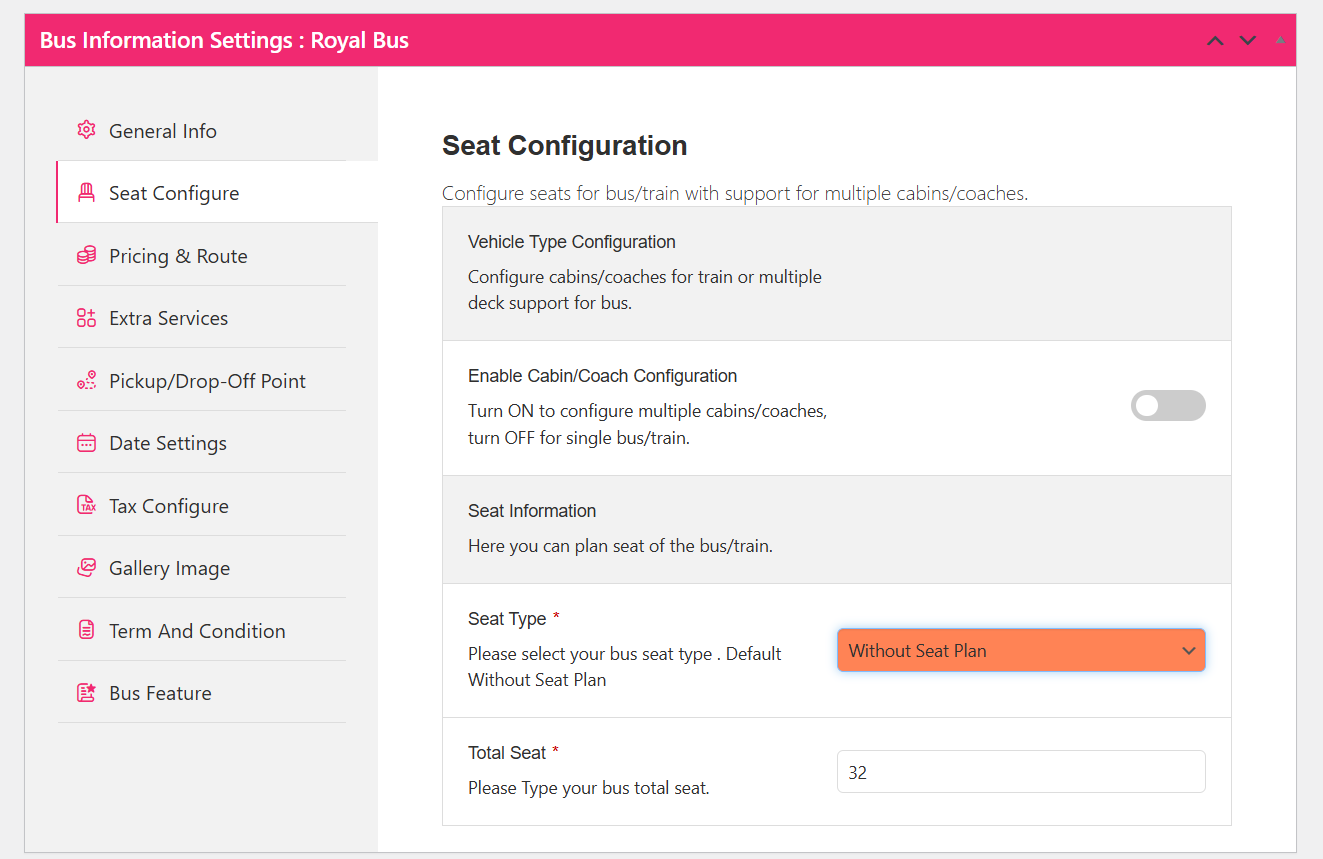
If you sell unreserved seating, you can skip the plan and simply enter the total seat count in the Seat Configure section.
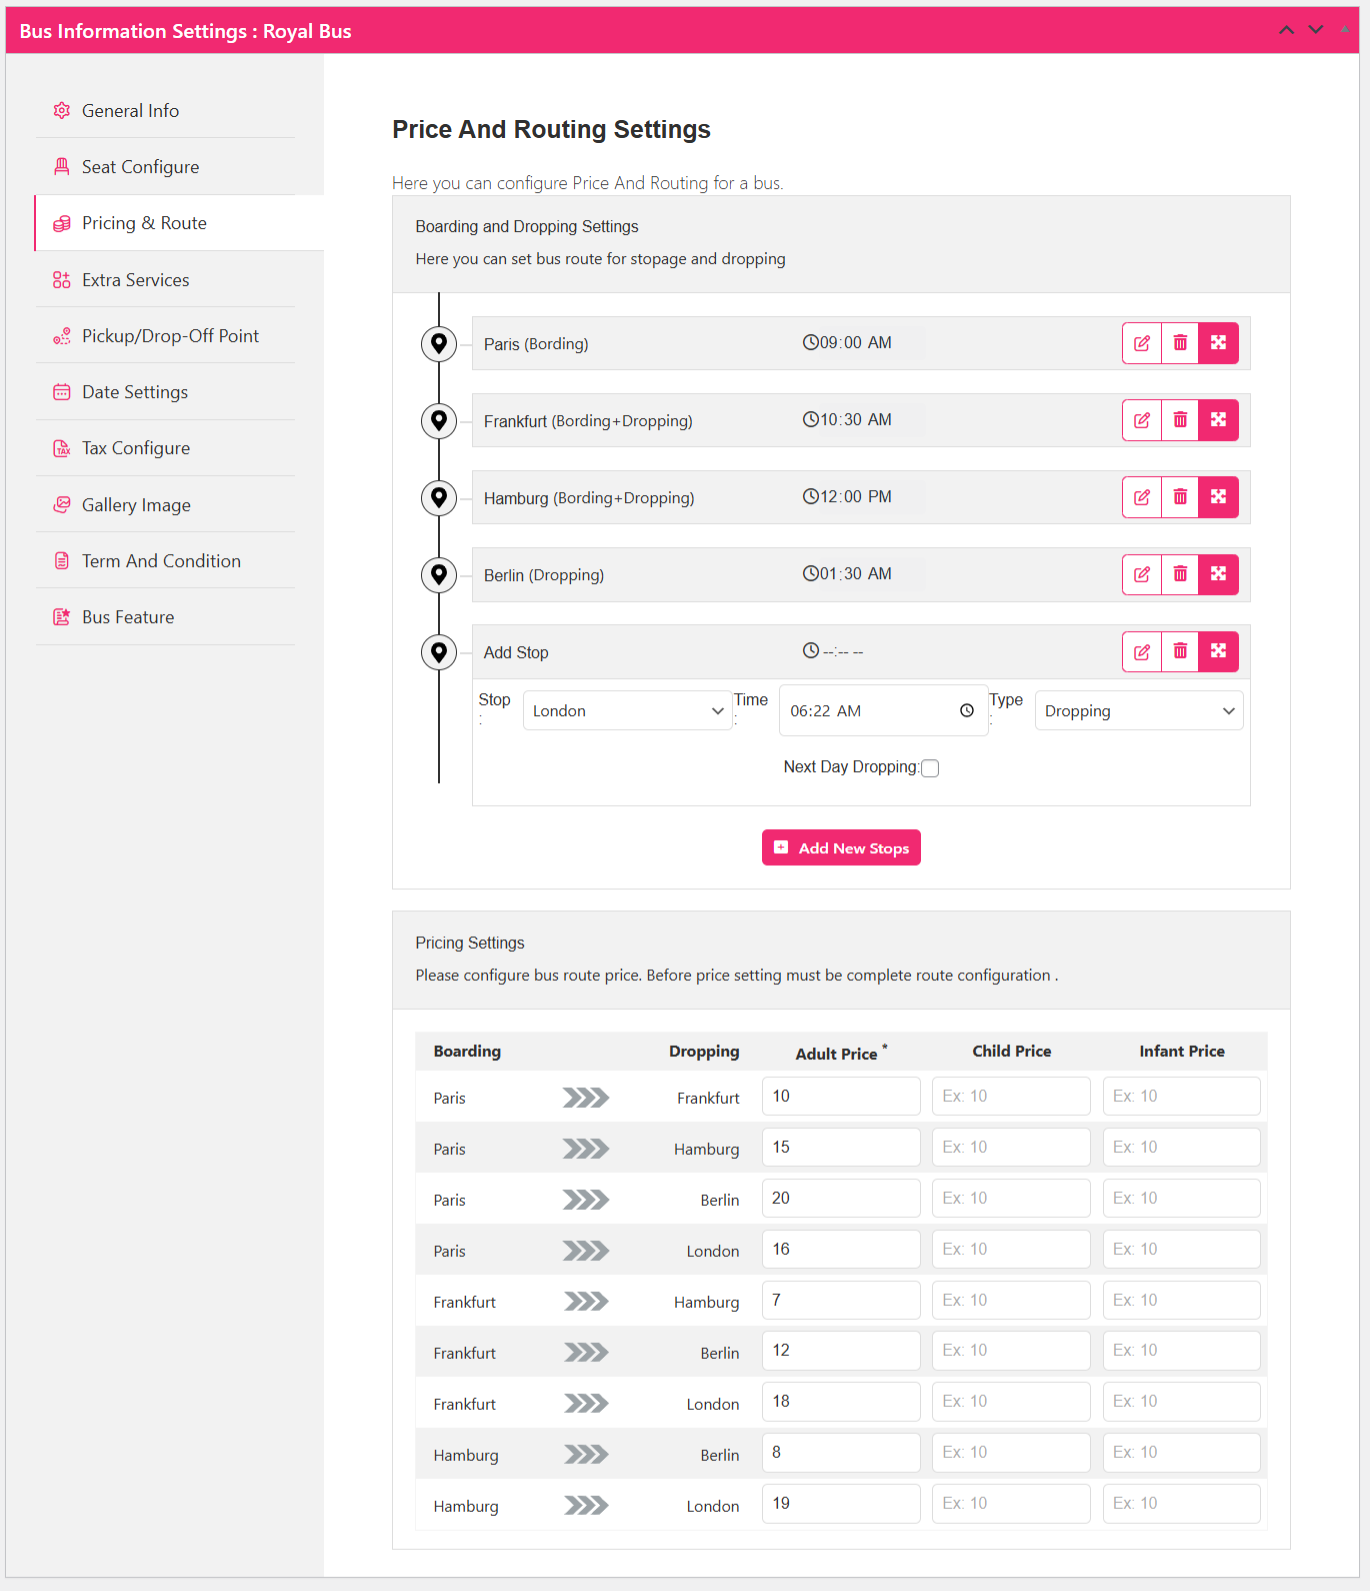
Pricing and Route
Now build the route itself: add each stop with its time and boarding type. The plugin supports both boarding and dropping entries, so you can model a trip that picks up in several places and sets down in several others.
Route and pricing are linked. Once the stops are in place, the pricing section activates and you set fares for adults, children and infants per boarding-to-dropping combination. This is what makes point-to-point pricing work — a short hop costs less than the full run without any manual intervention.
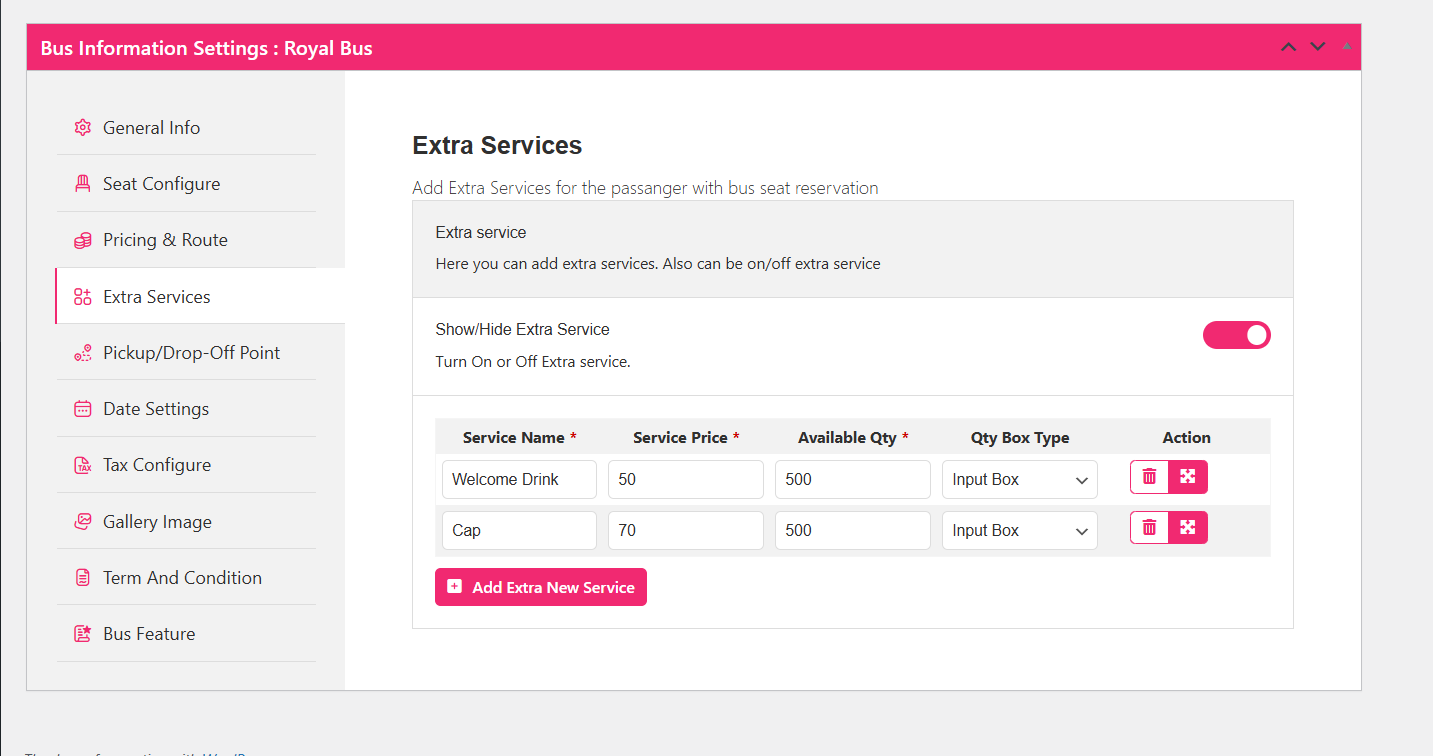
Extra Services
Add optional add-ons passengers can purchase with a ticket: drinks, snacks, blankets, priority boarding. They appear as selectable extras during booking.
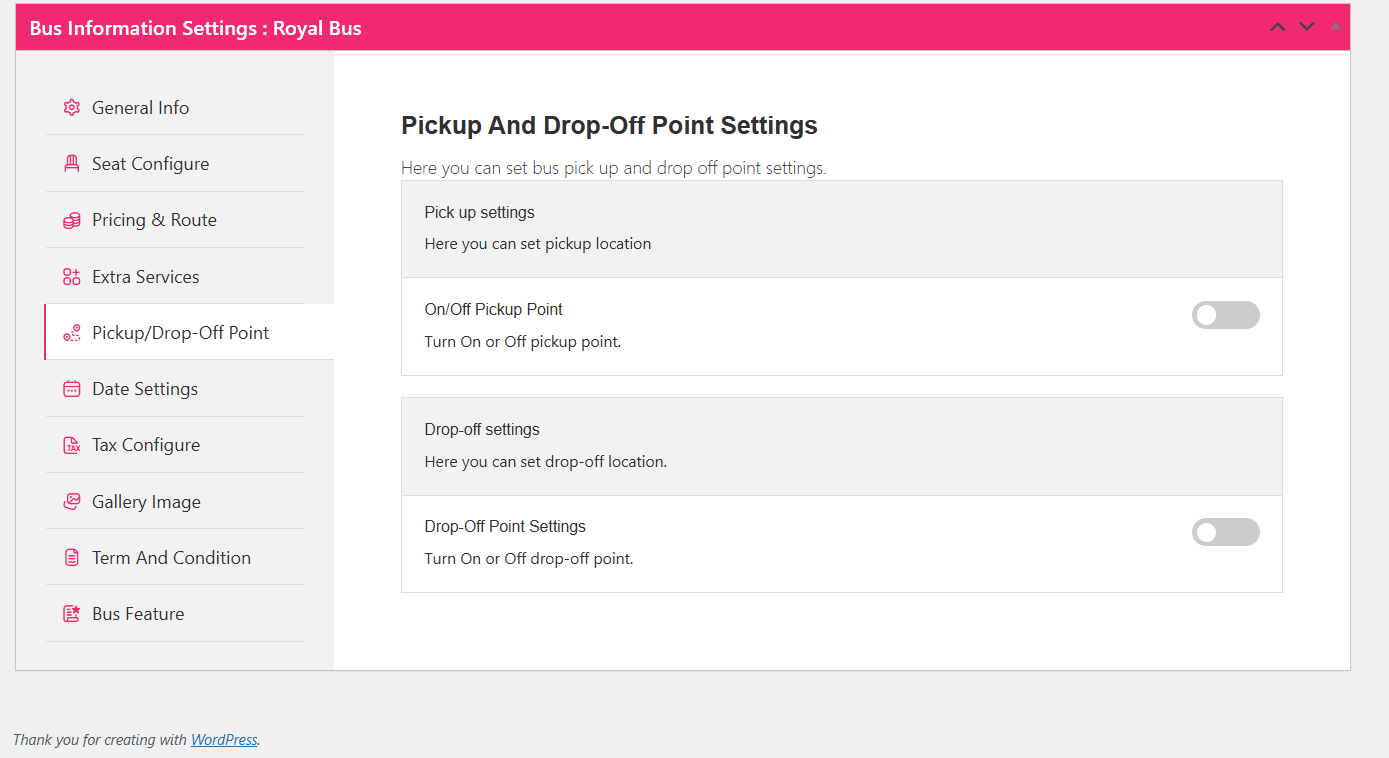
Pickup Point Settings
Attach boarding points and dropping points to this bus, with pickup instructions and timings. Precise timings reduce late arrivals and support calls.
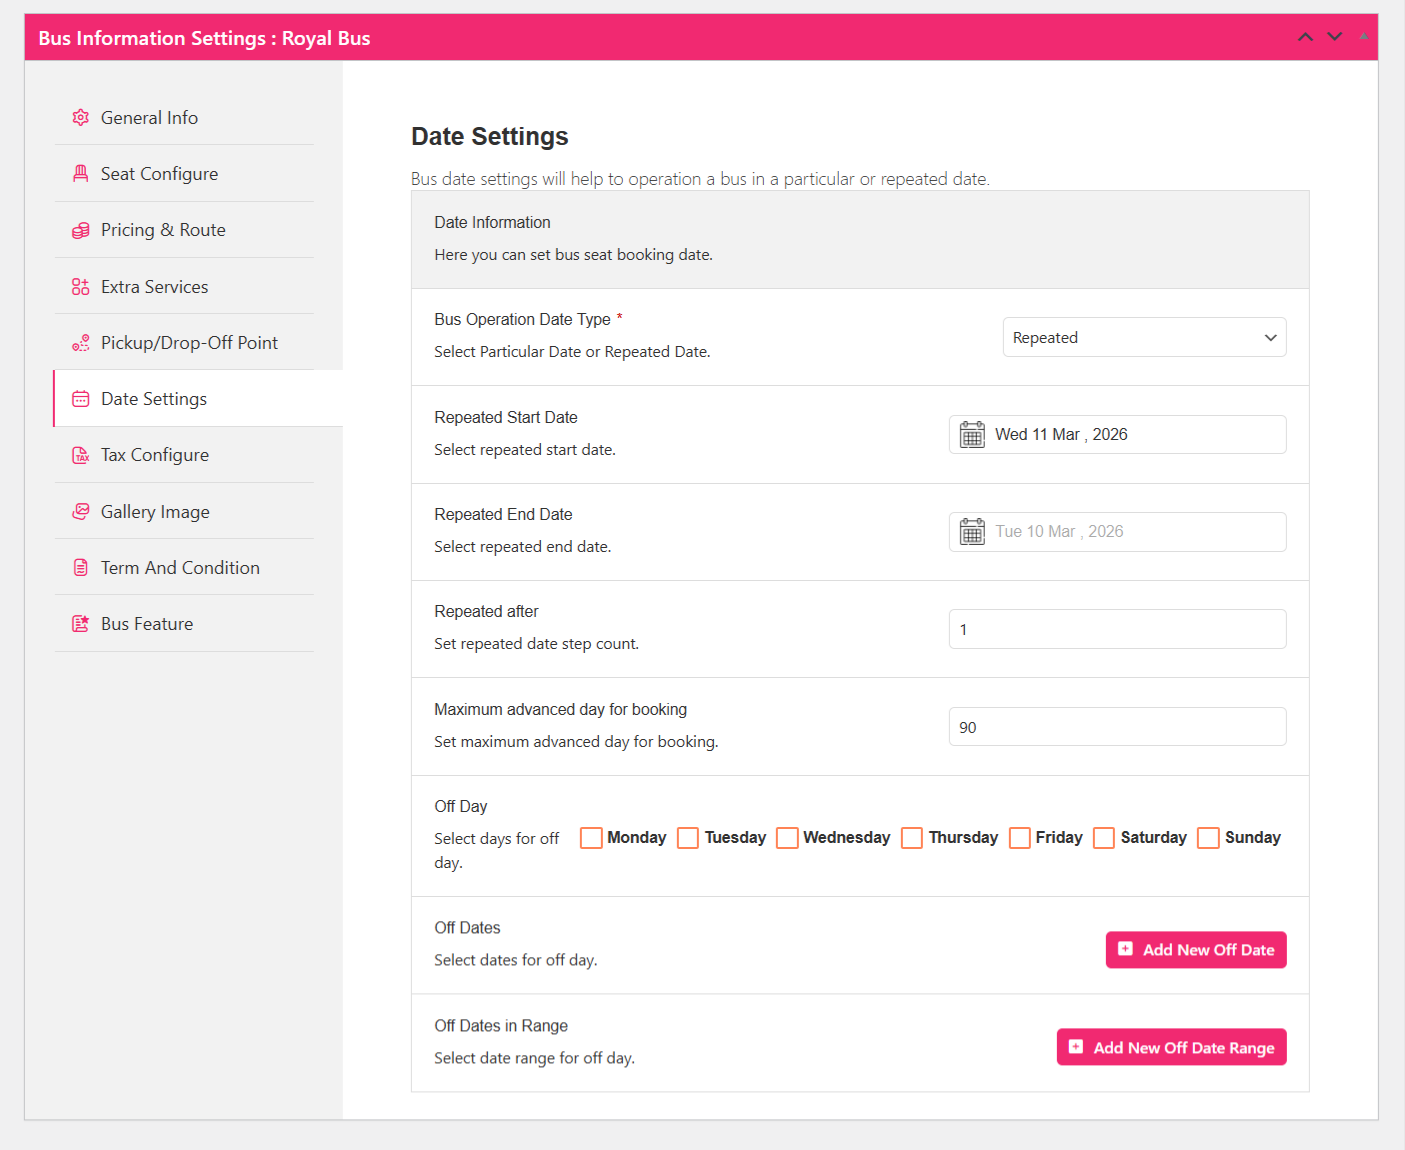
Date Settings
Set the operation date type, weekly off days, the minimum advance booking window, and any blackout date ranges. The minimum advance window is the setting that stops someone booking a seat for a departure in twenty minutes.
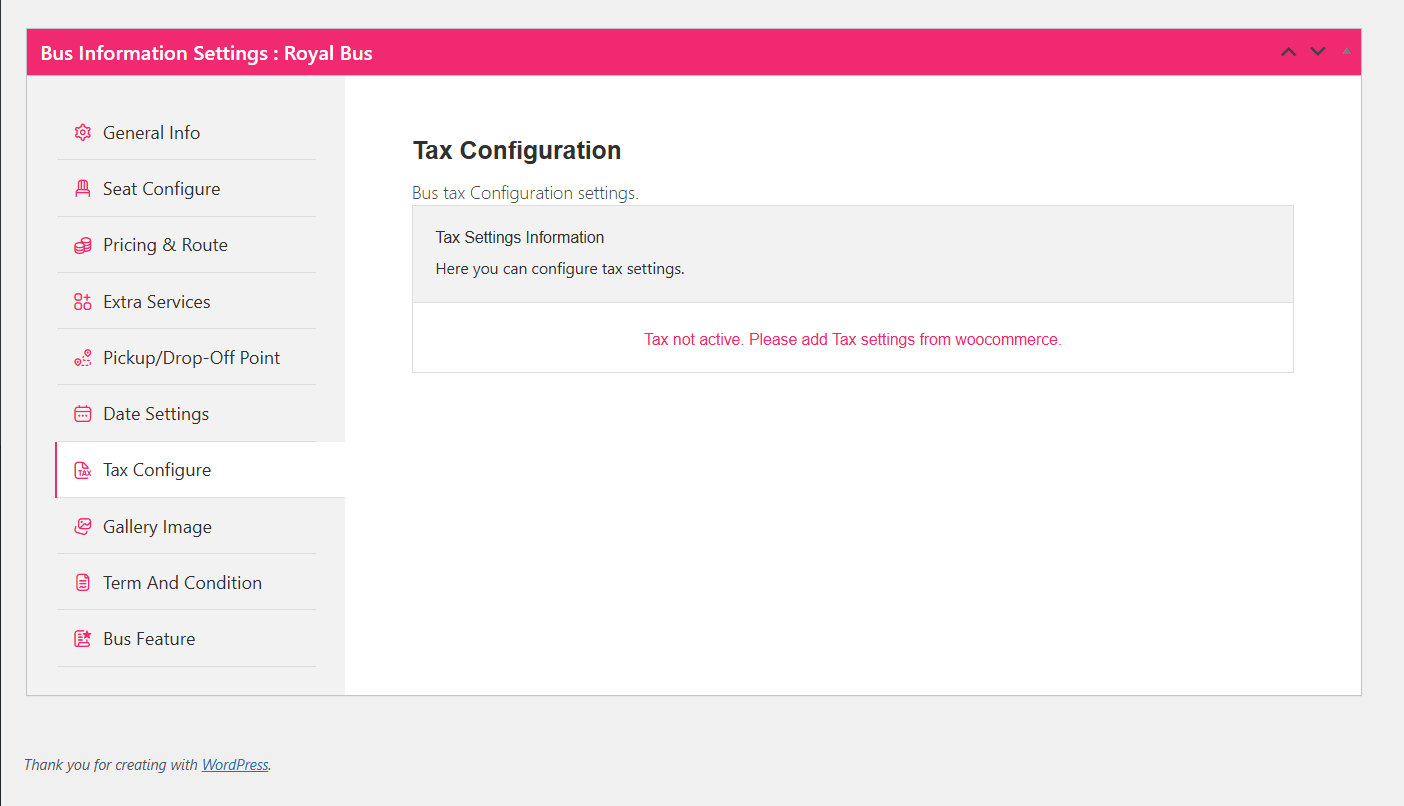
Tax Configuration
If your region requires tax on ticket sales, configure it here. If it does not, skip this tab.
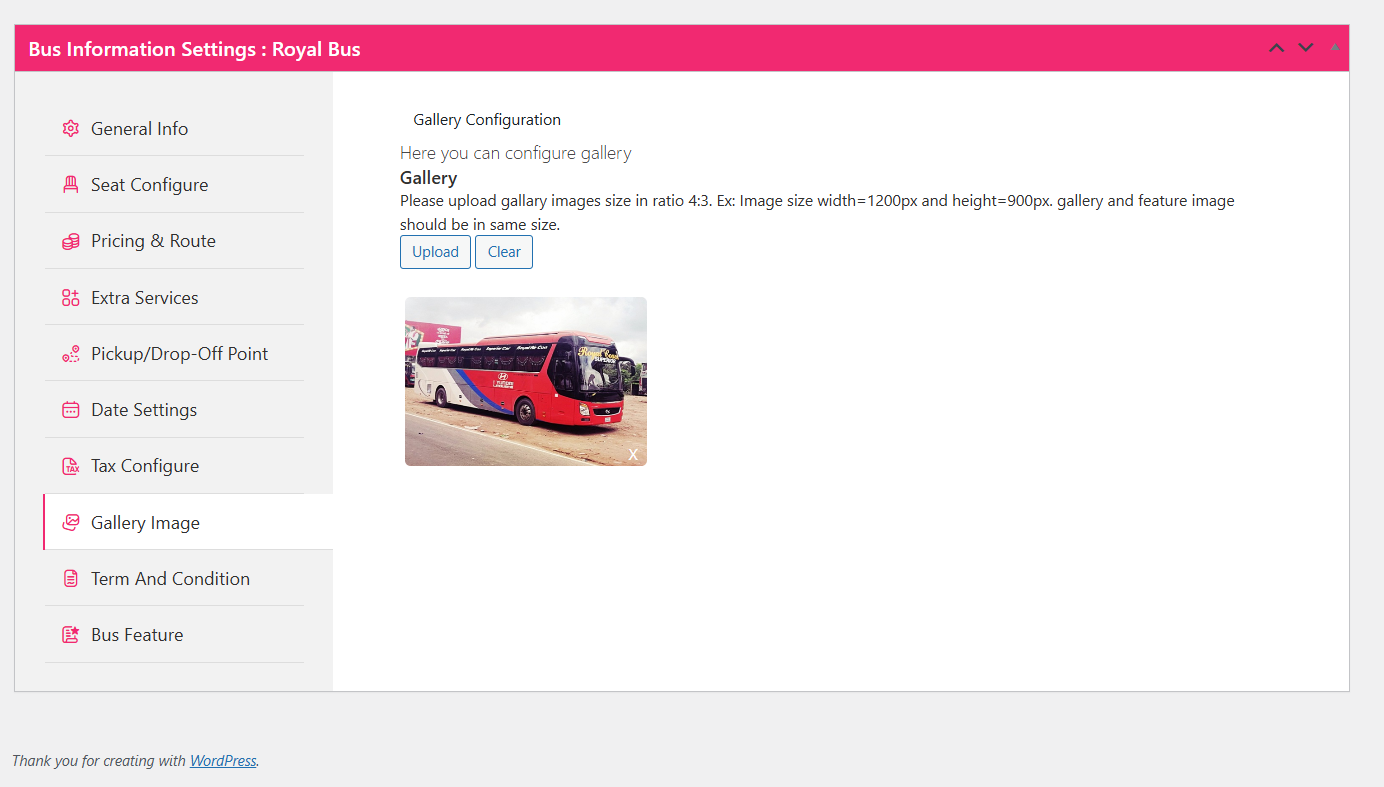
Gallery
Upload interior and exterior photos of the coach so passengers know exactly what they are boarding.
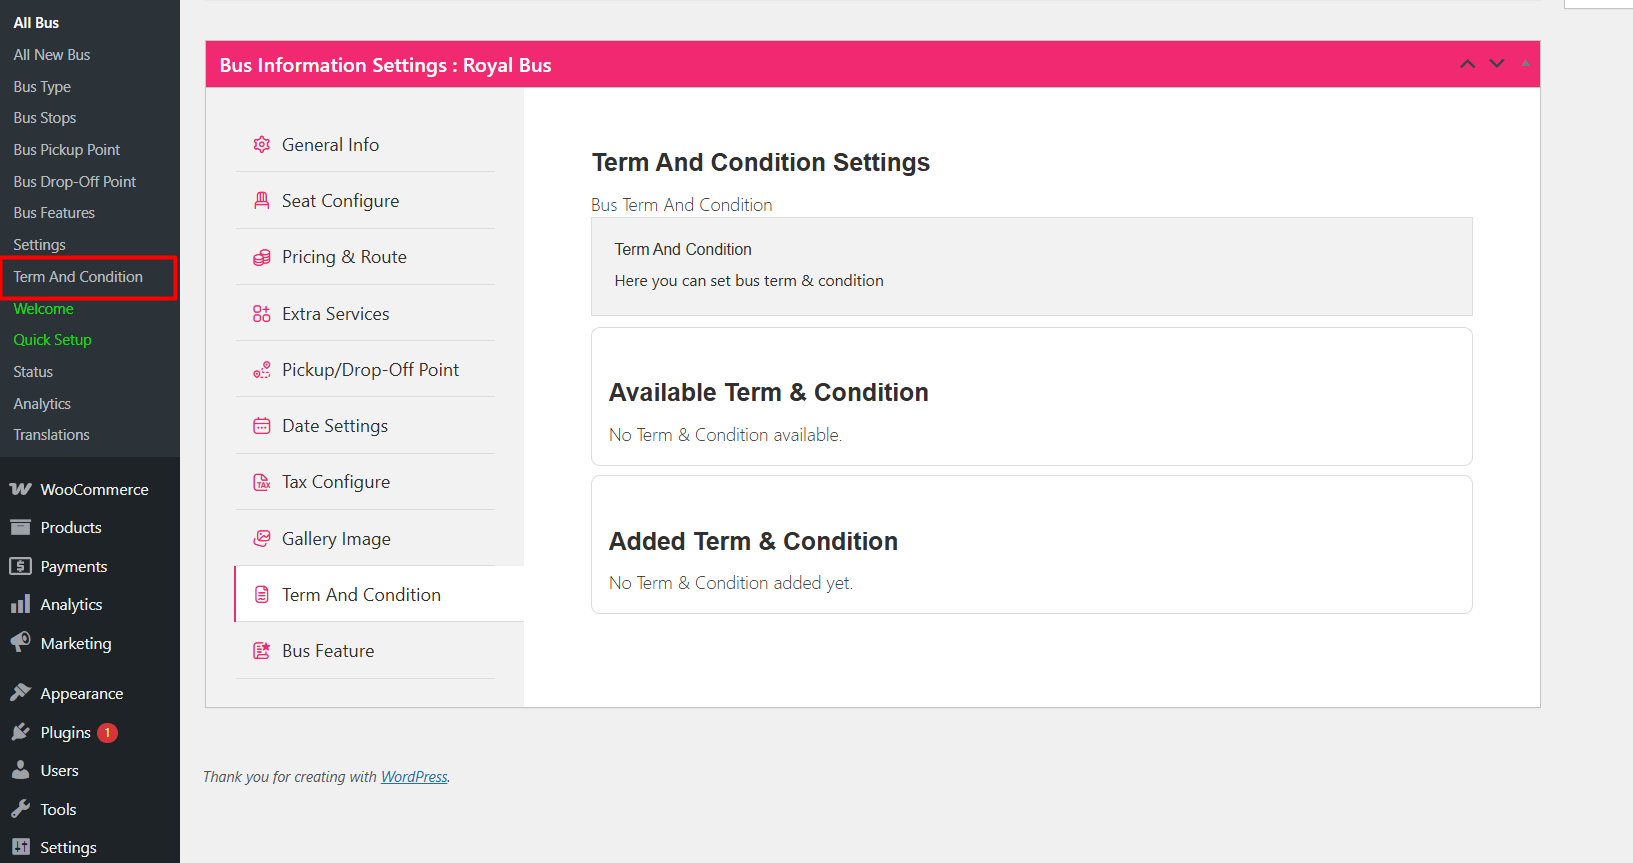
Terms and Conditions
Add your cancellation, refund and luggage policy. These terms display alongside the bus information and give you something concrete to point to when a dispute arises.
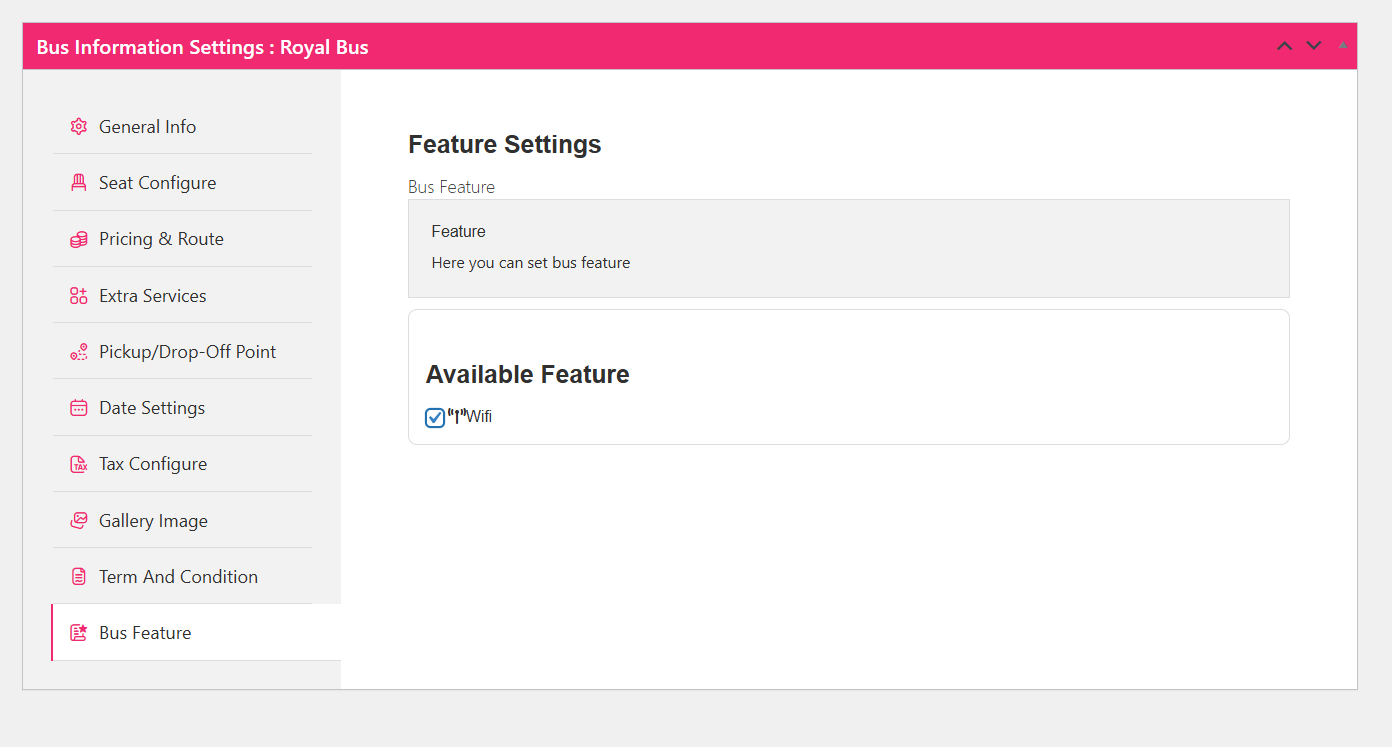
Features
Finally, tick the features that apply to this specific bus. Features added earlier at the category level become selectable here.
Step 3: Publish and Preview
Scroll to the top of the edit screen and click Publish. The bus is now live and bookable.
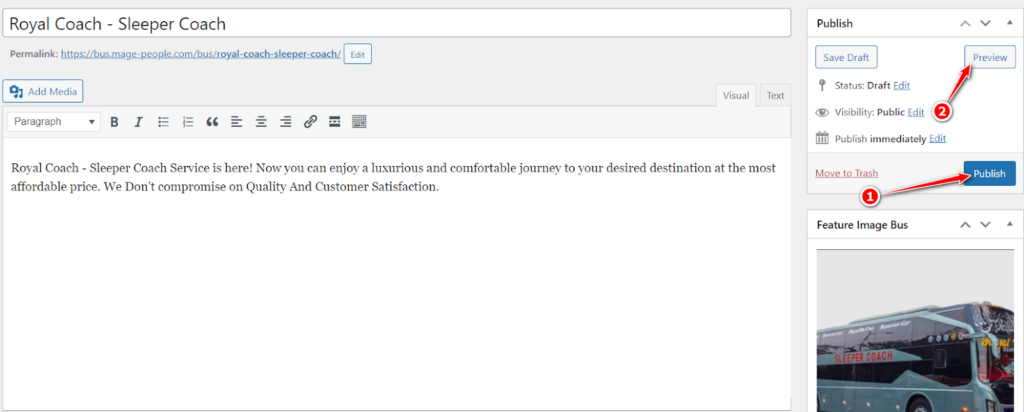
Click Preview and walk through the booking flow as a customer: search a route, open a date, pick seats, and continue to checkout. Test on a phone as well — most bus ticket buyers book on mobile.
Upgrading to WpBusTicketly PRO
Once the free setup works, the Pro plugin adds the tools that make a booking system run day to day. Installation is covered in the official plugin documentation.
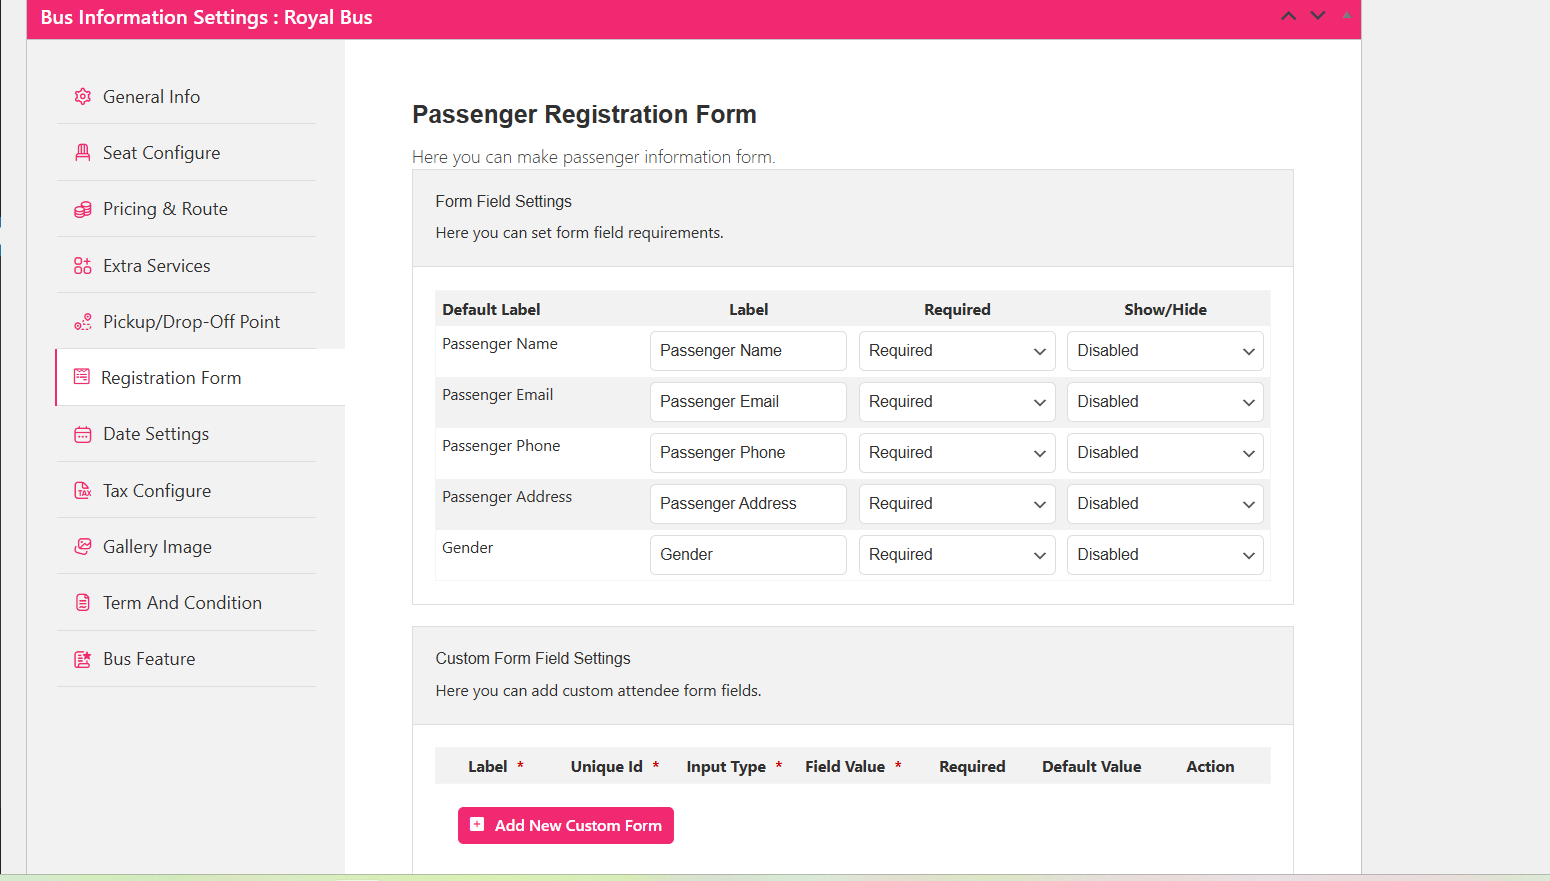
After activation you get extra tabs, starting with a passenger registration form. The default form collects name, email, phone, address and gender, and you can mark fields as required or build a custom form if you need passport numbers or company details.
You also get seat plan rotation, which matters on services where seats sold on one leg should become available again on the next.
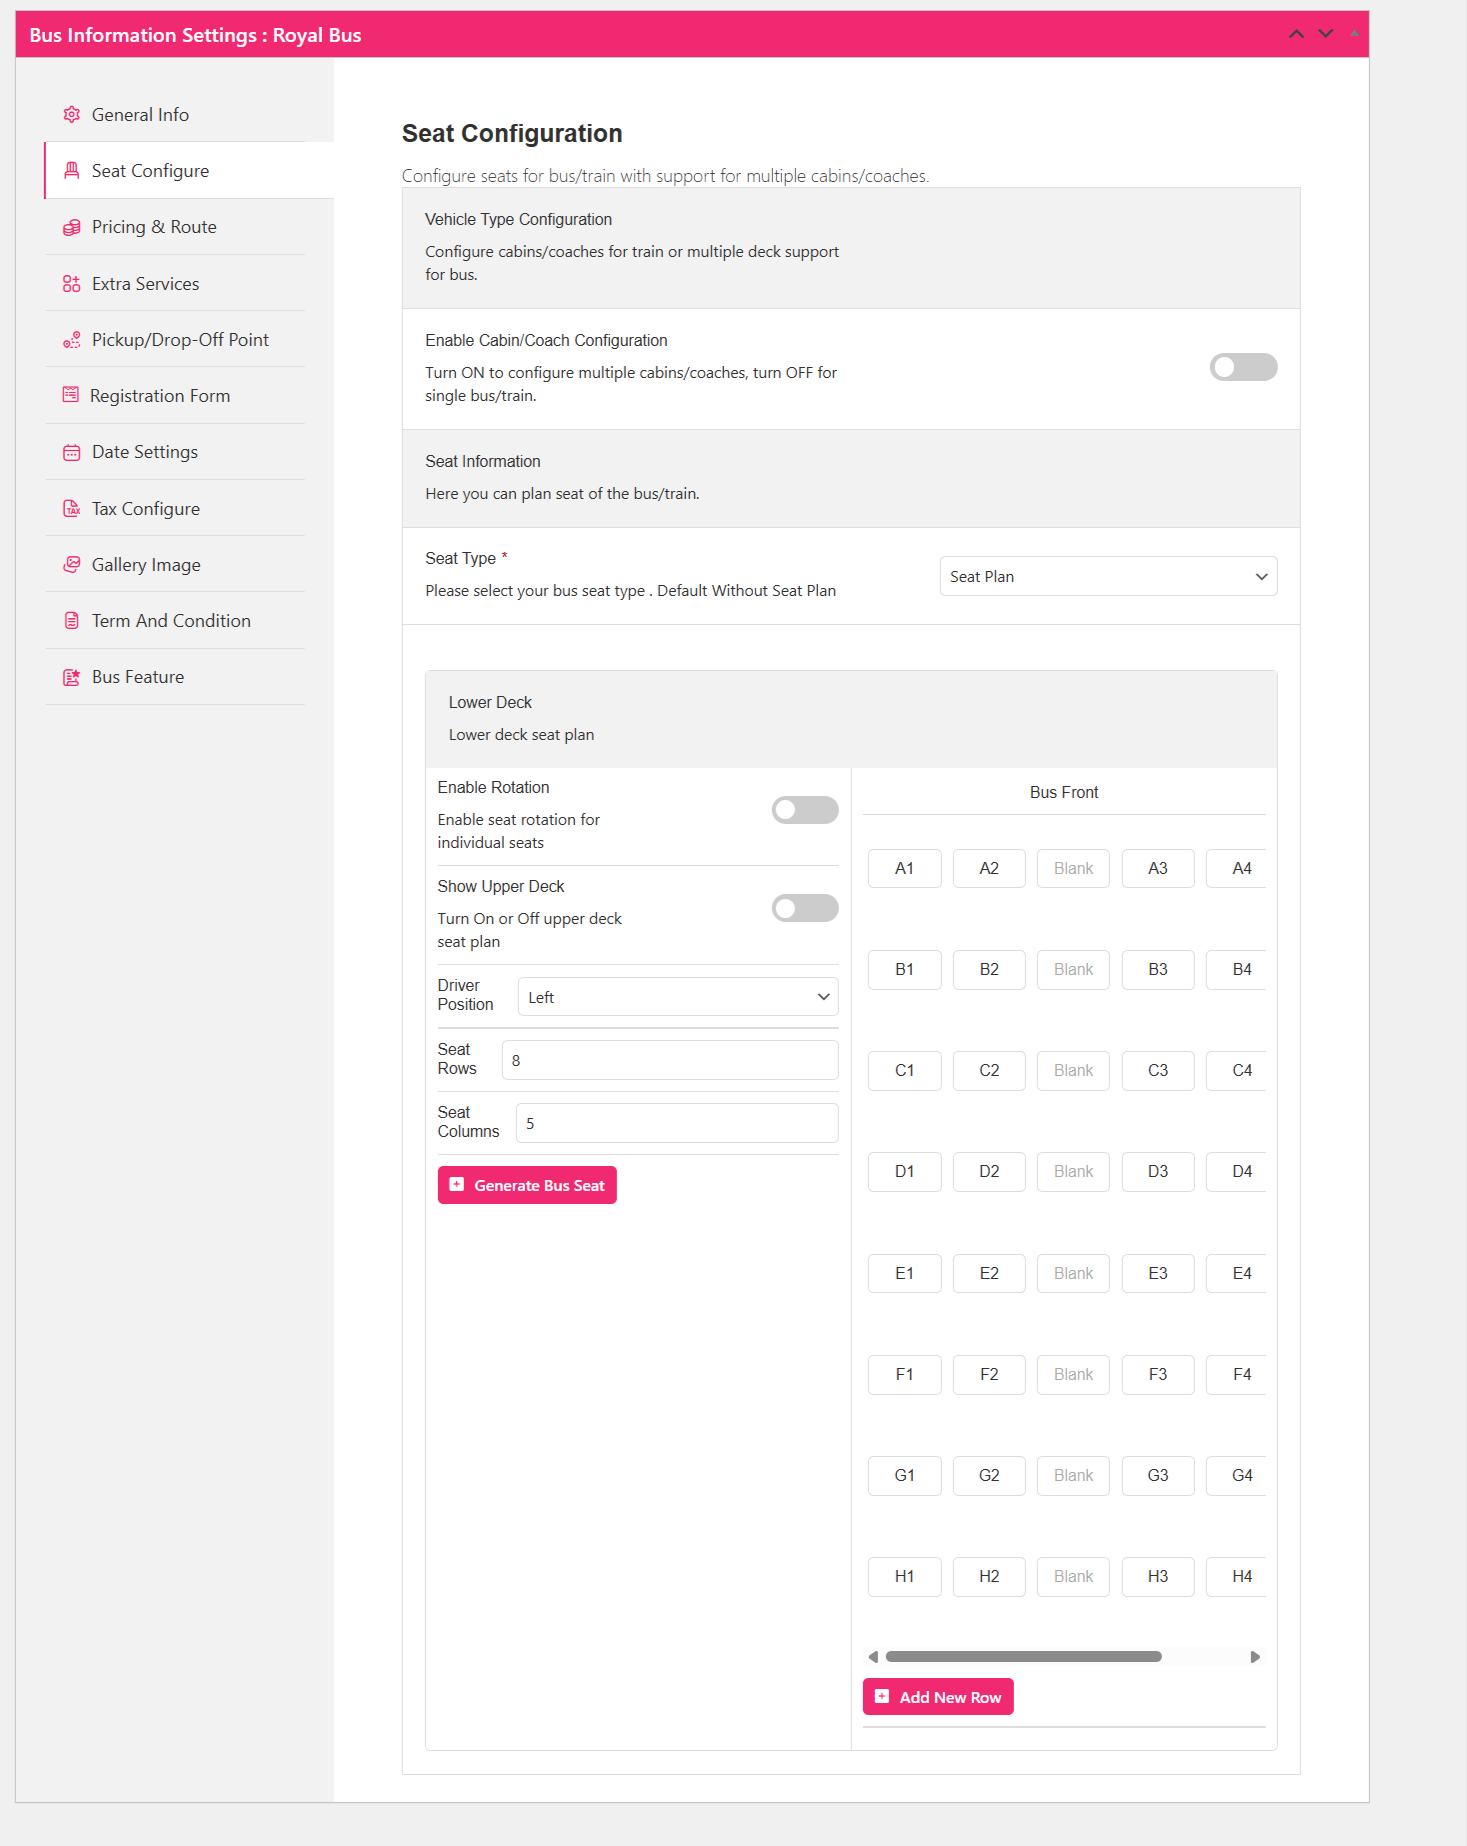
For how that works in practice, see how to configure bus seat plan rotation.
Selling Tickets From the Backend
Not every booking arrives online. The Purchase Ticket tab lets your counter staff sell seats directly — useful for walk-ins and phone bookings.
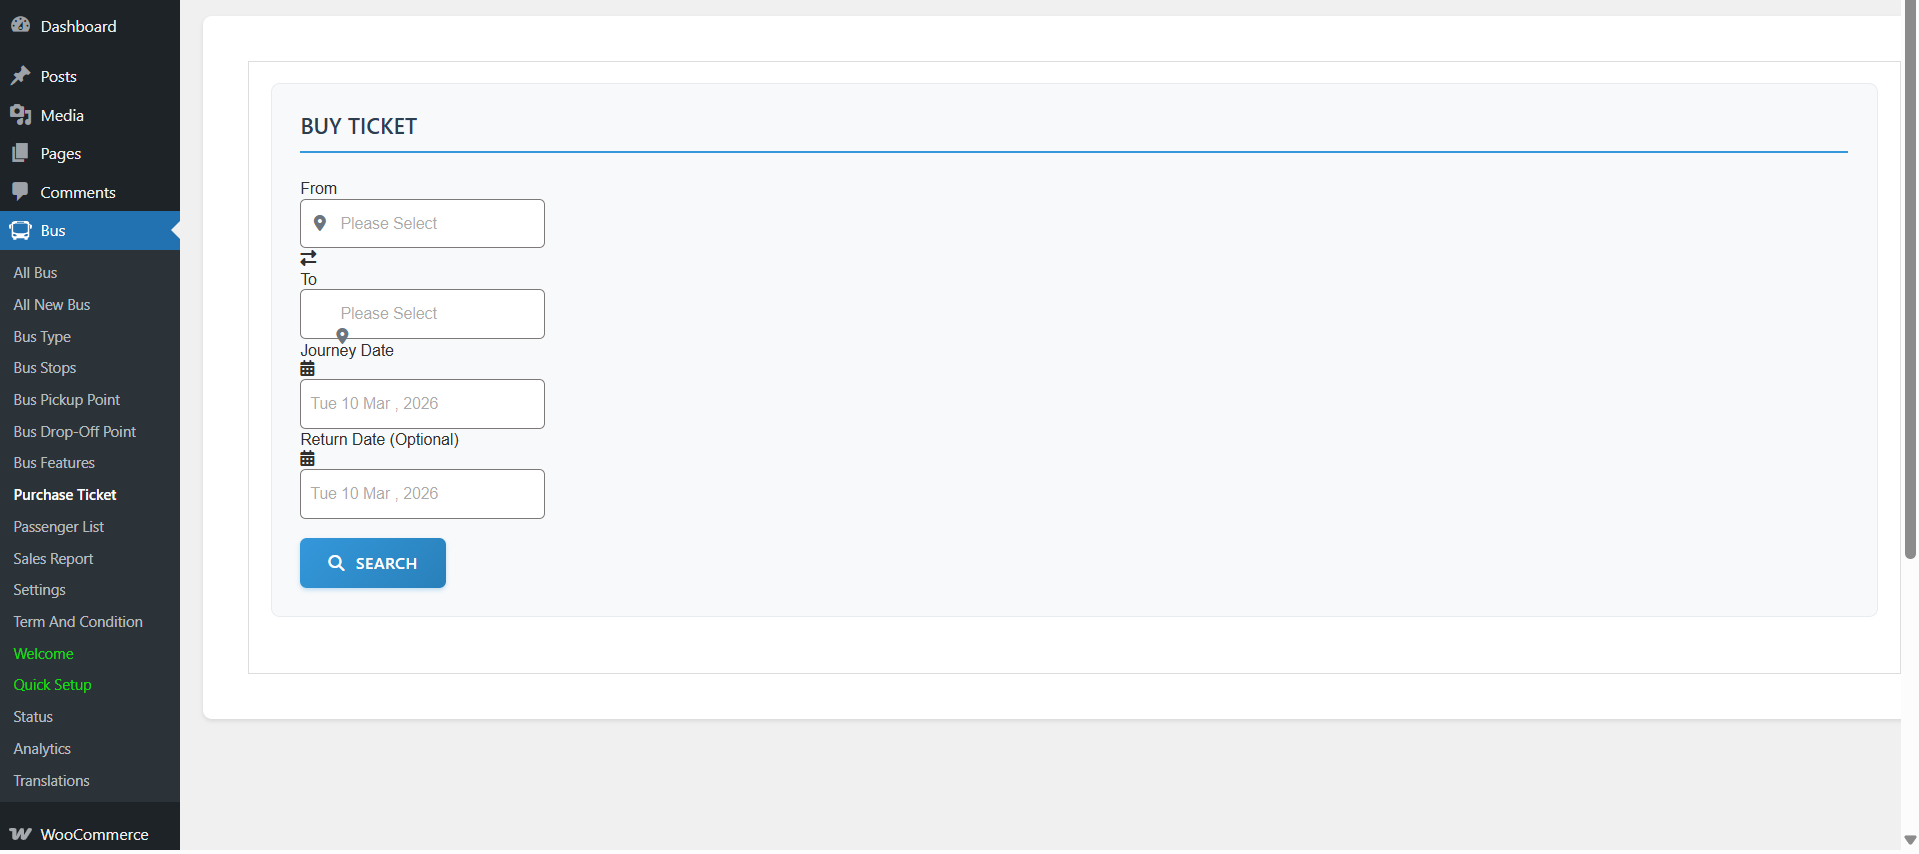
Select the route and date, then click search.
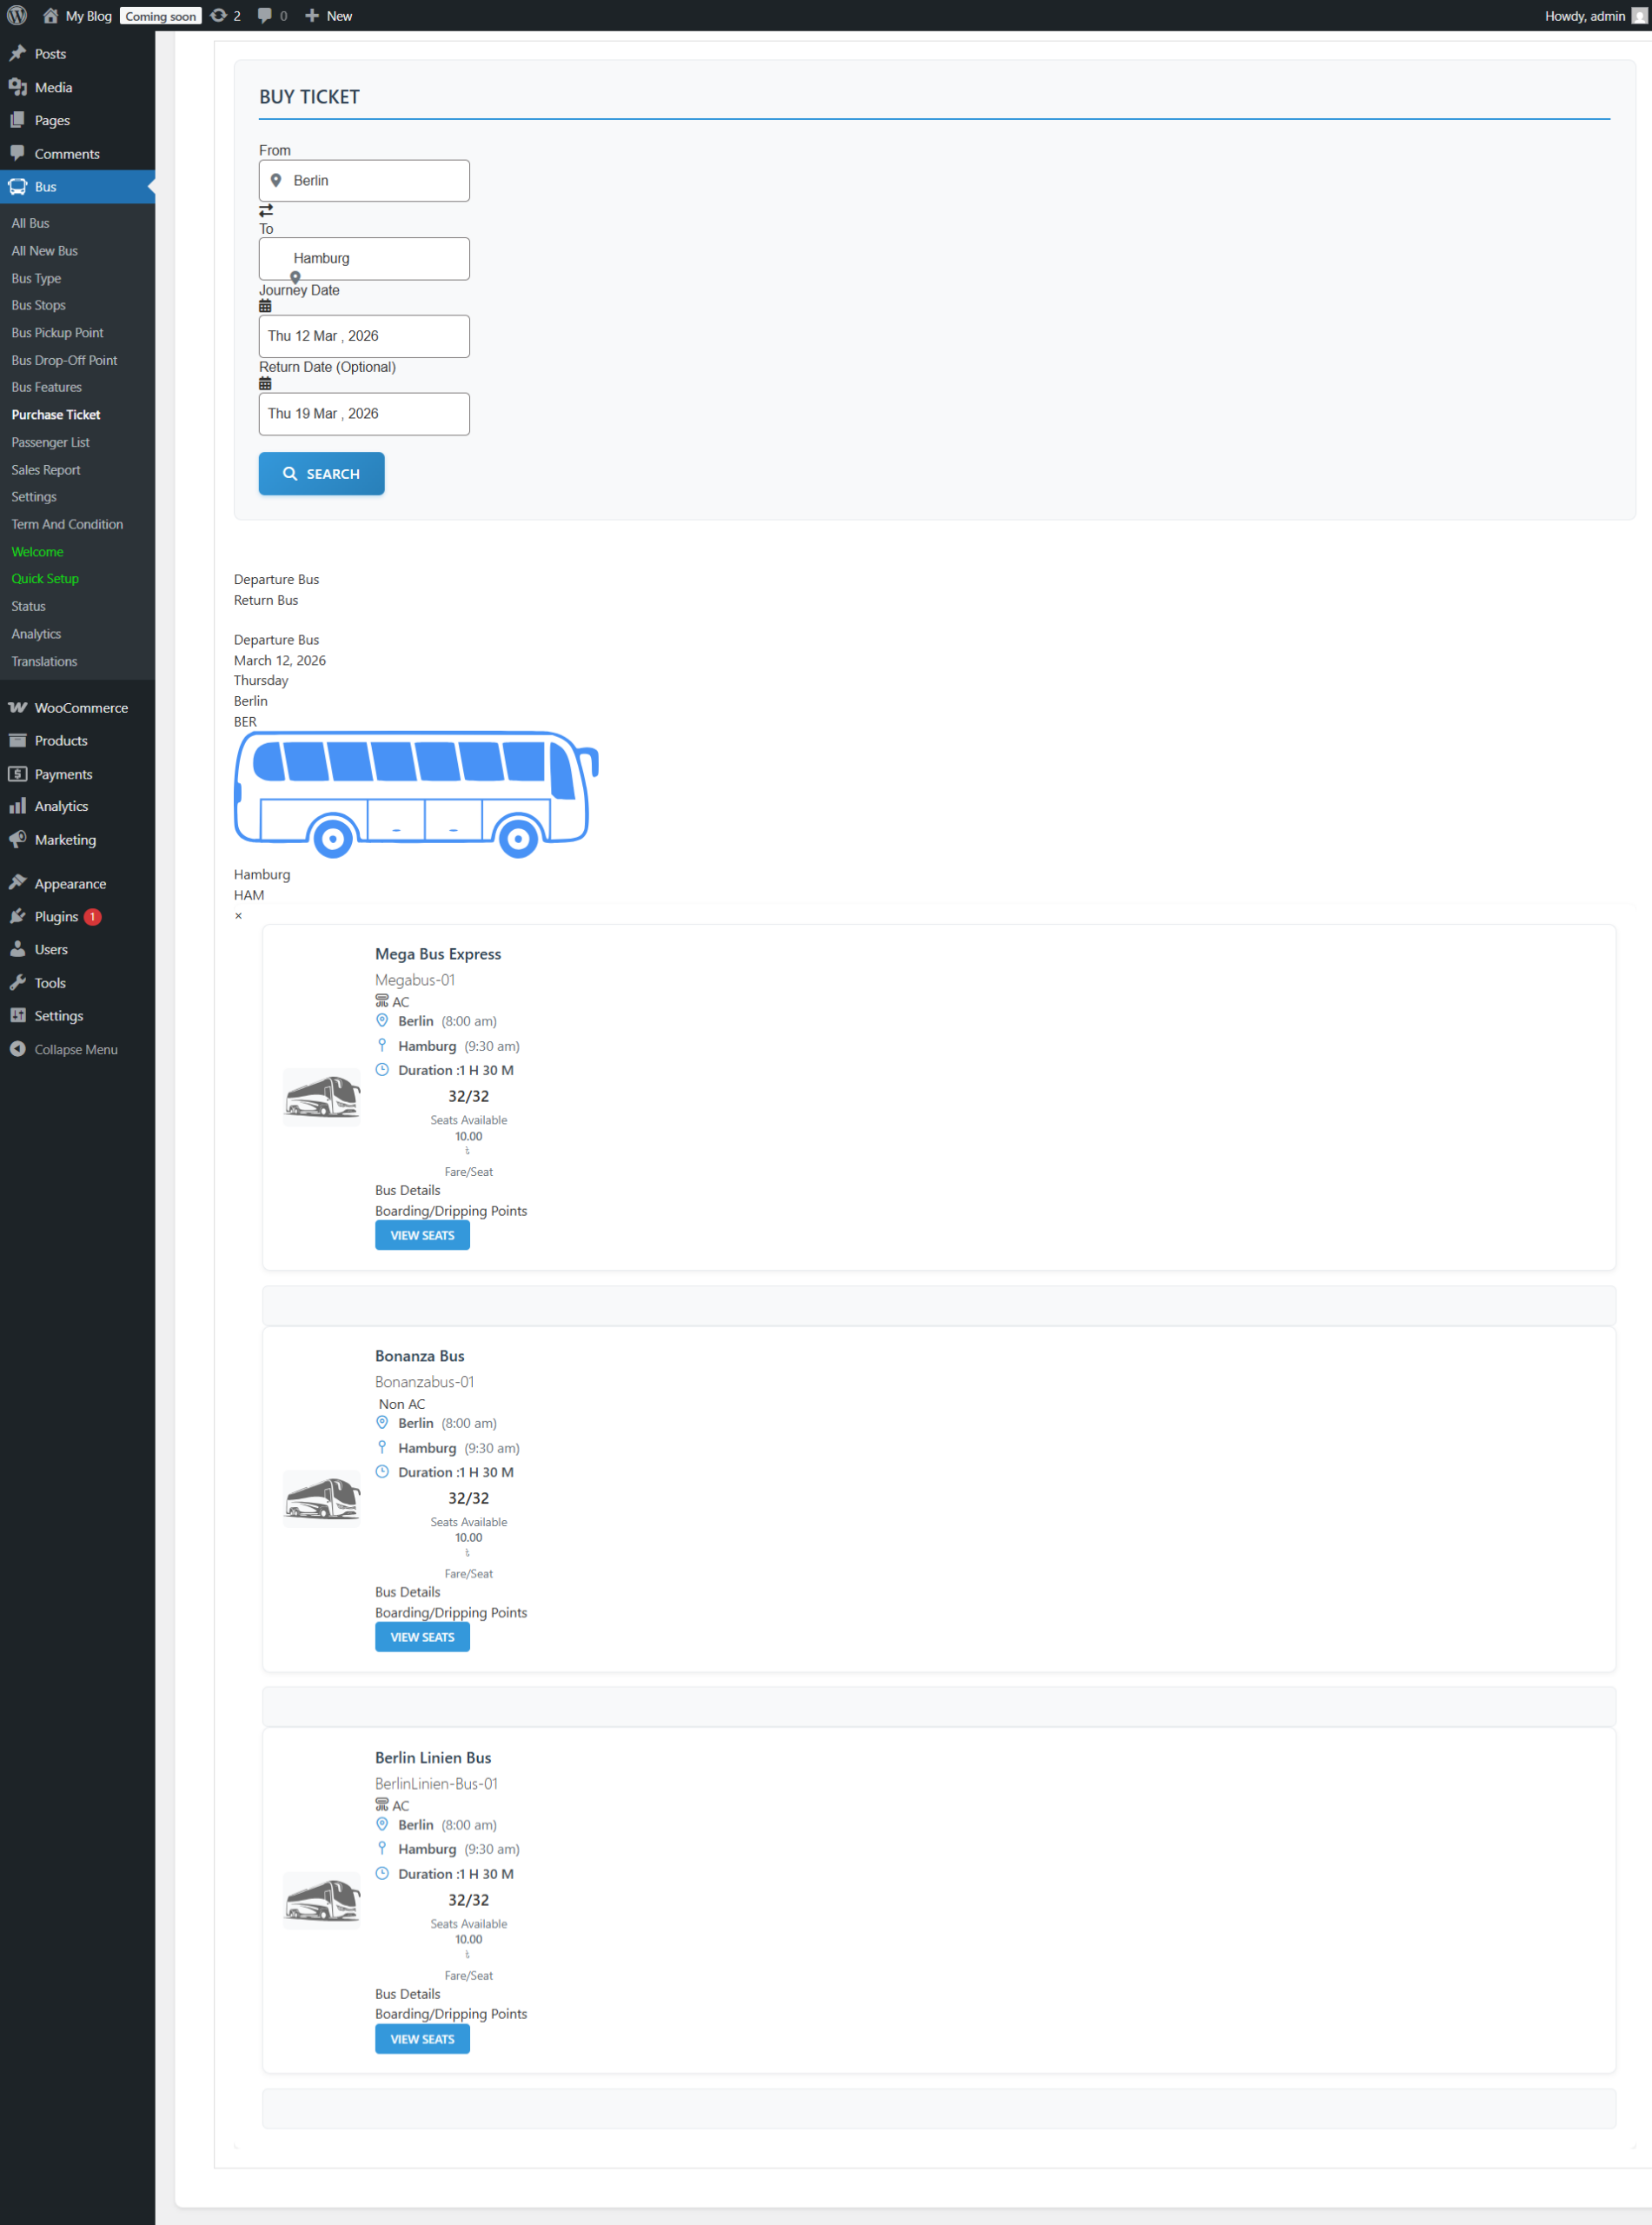
Choose a bus and click Book Now to complete the sale.
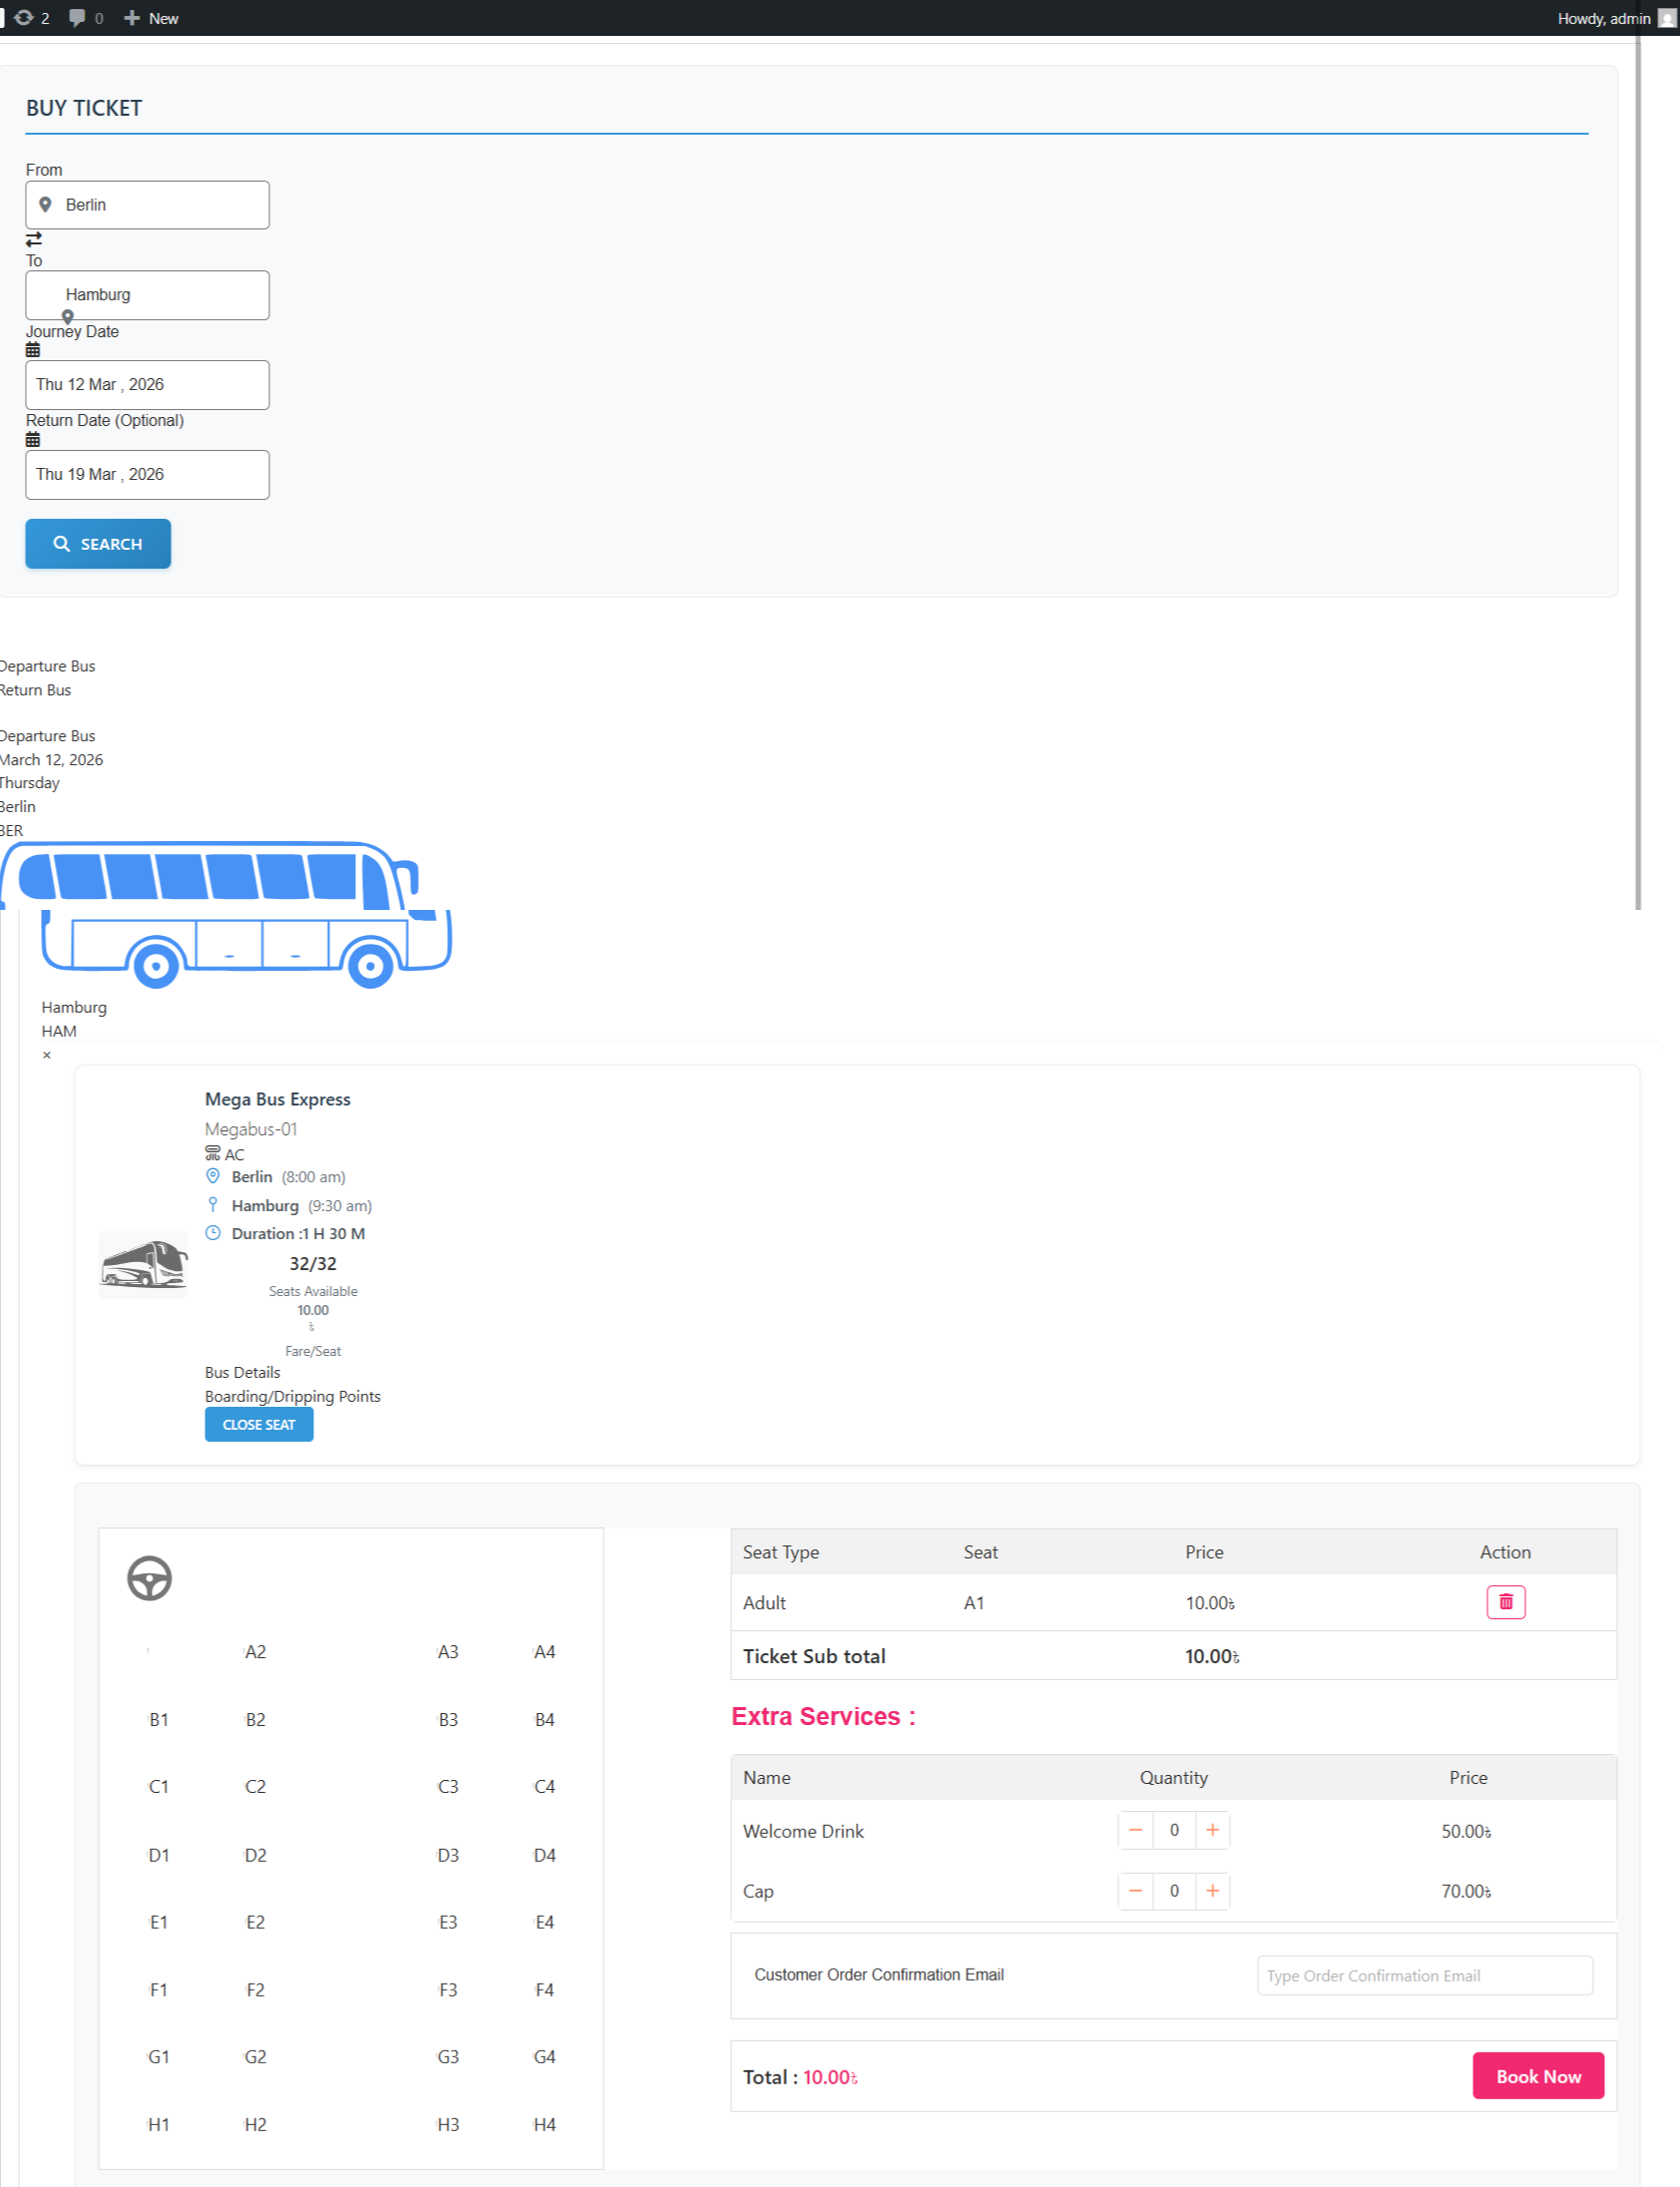
Passenger lists show who is travelling on each departure, and you can check tickets and approve bookings from the same screen.
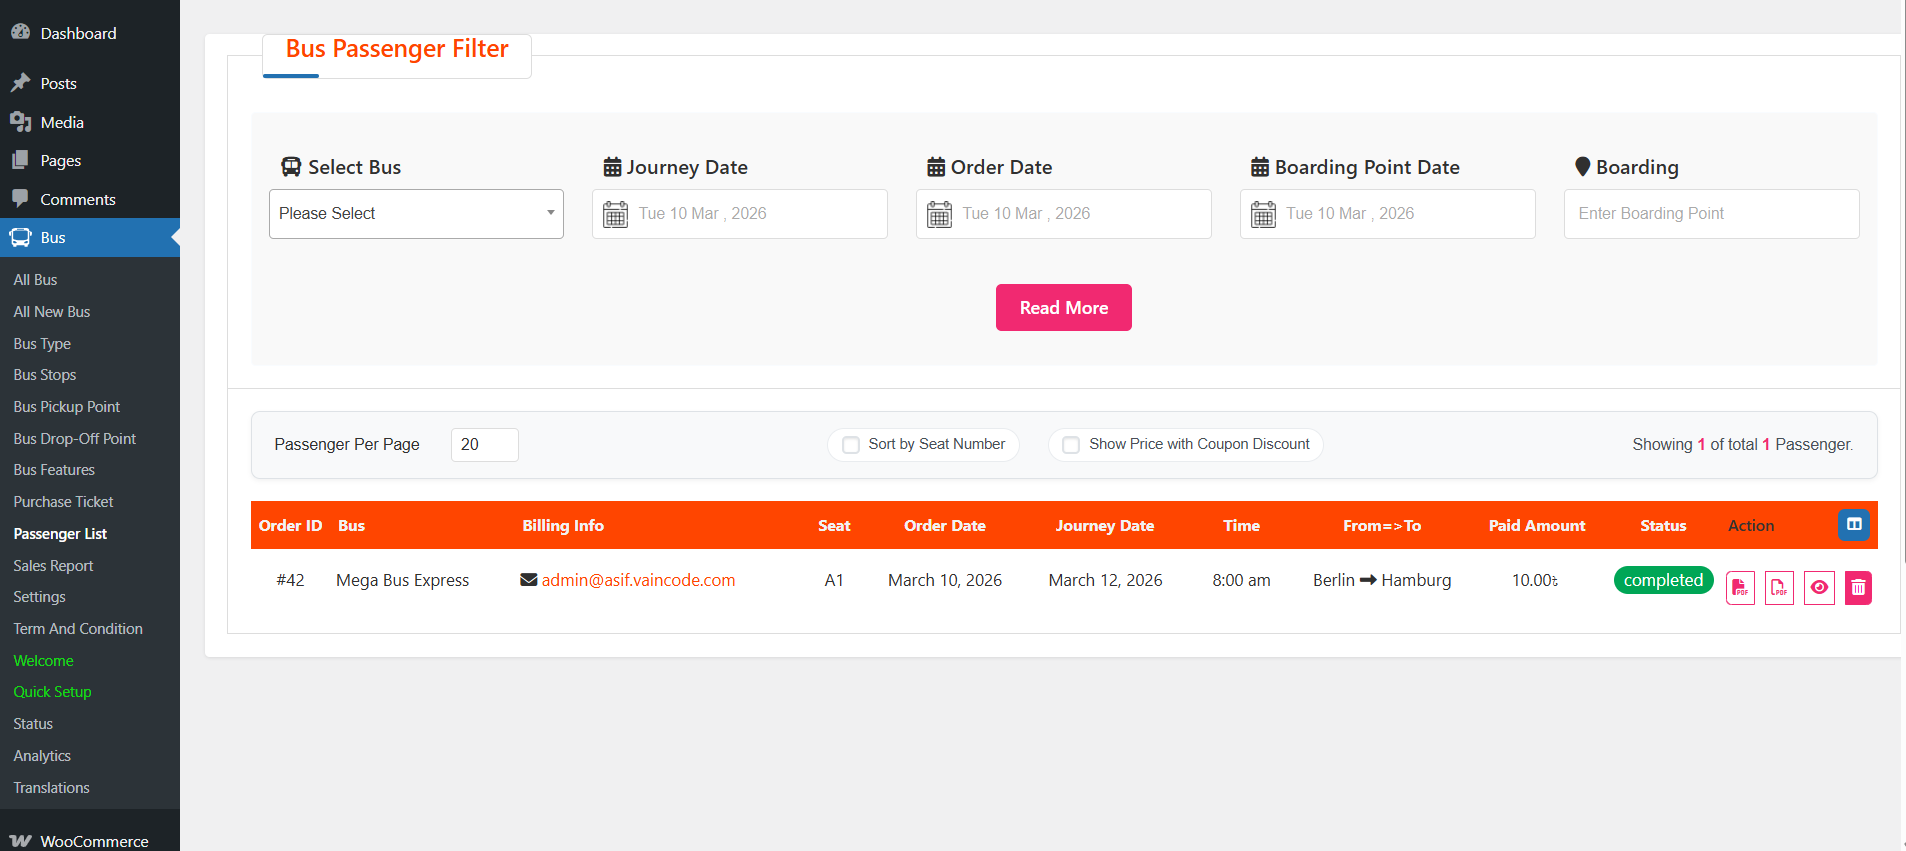
QR Code Tickets and Sales Reports
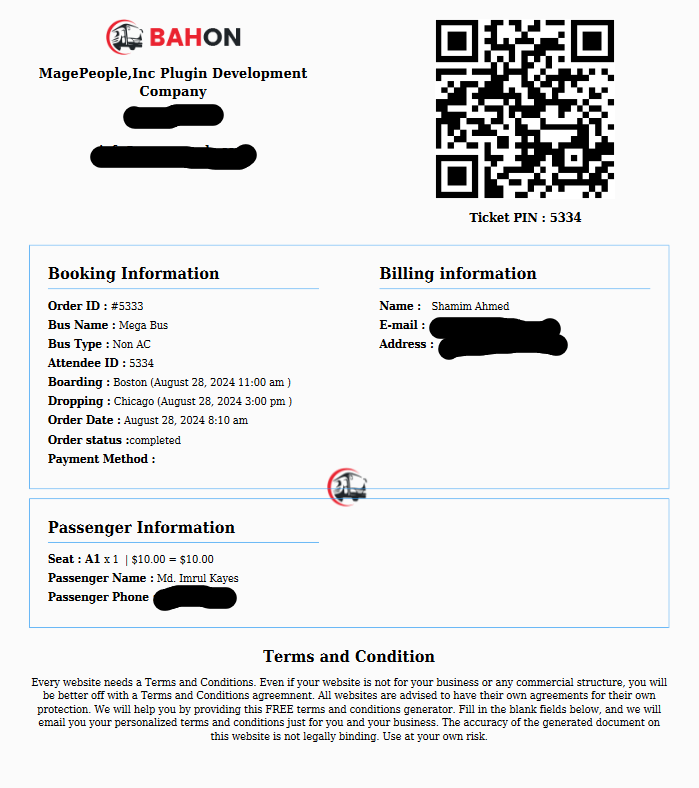
The QR Code add-on for WpBusTicketly issues each passenger a scannable ticket they can show from a phone at the gate. It removes manual name-checking at boarding and cuts down on duplicated or altered tickets.
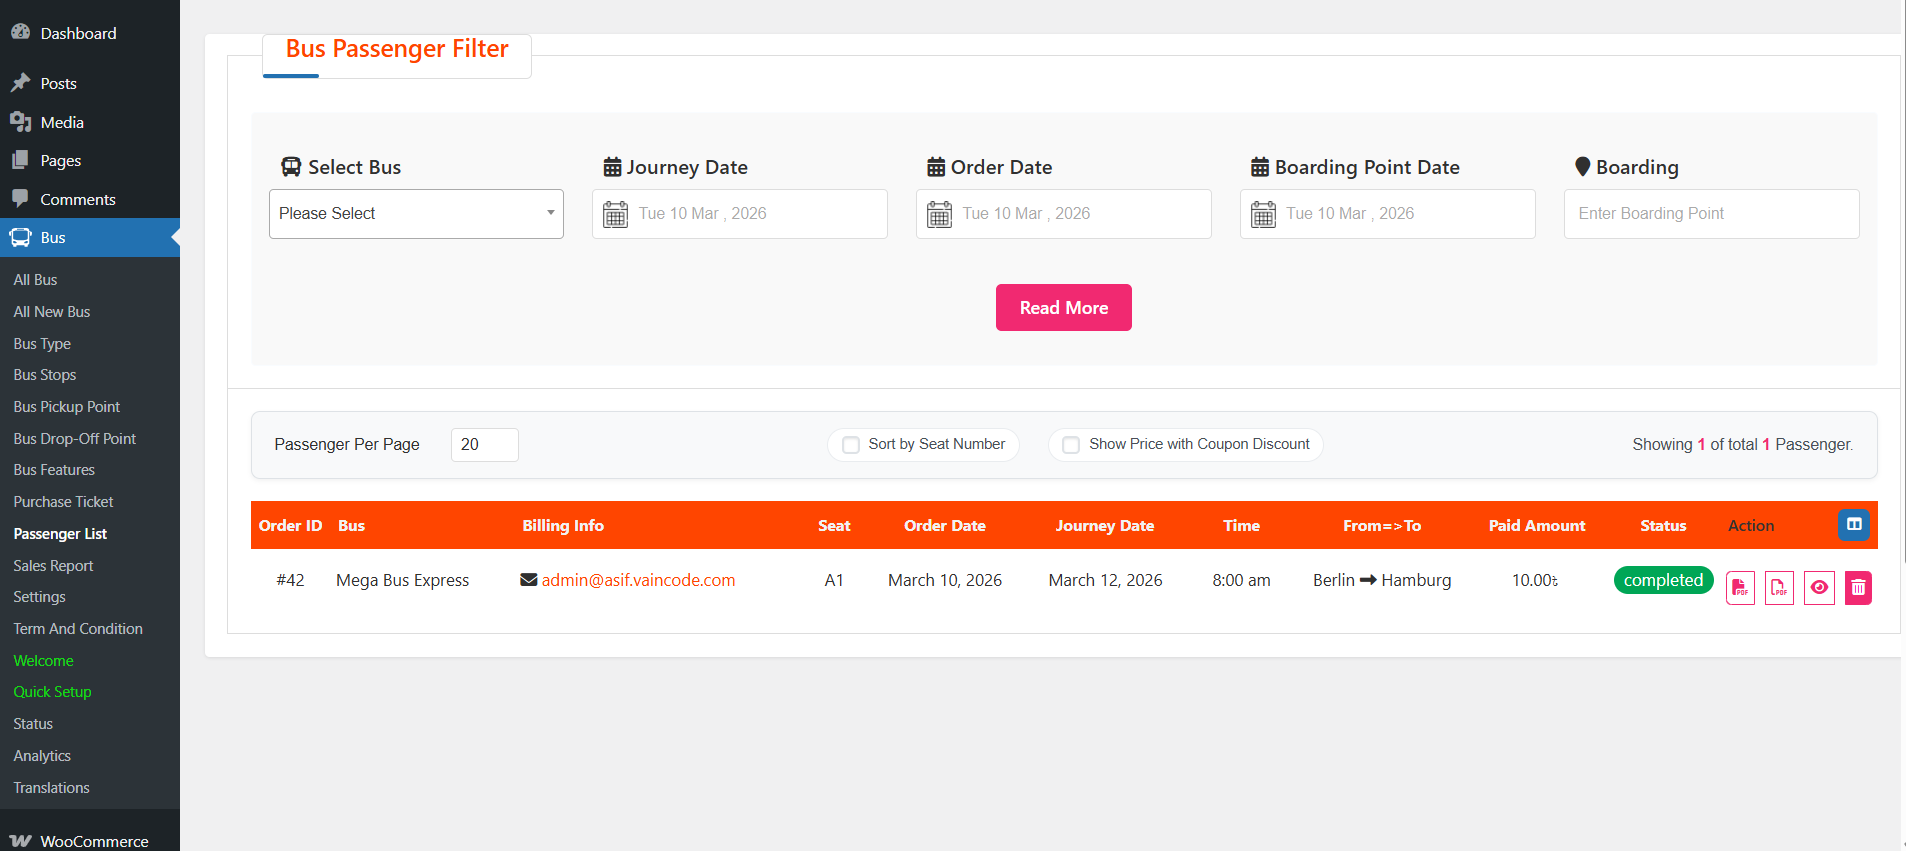
After ticket sales, the backend sales report shows revenue by bus, route and date, so you can see which departures are earning and which are running empty.
Choosing a Bus Booking Theme
The plugin controls the booking engine; the theme controls how the front end looks. For a transport site, use a theme built for this purpose rather than a general blog theme, so search forms, route listings and seat selection are styled correctly out of the box.
The official Bahon bus and transport booking WordPress theme is designed for bus, ferry and general transport services.
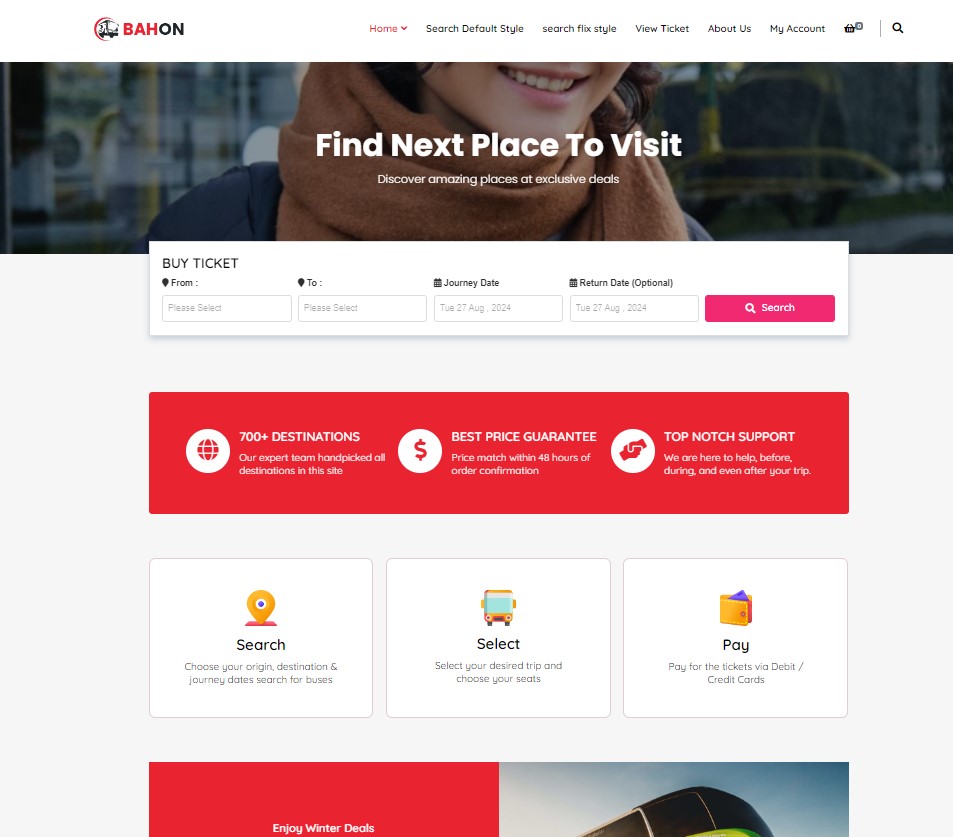
If you would rather set the theme up first, the install process is documented in how to install the Bahon theme.
Pre-Launch Checklist
Before announcing the site, verify these:
- Make a complete test booking and confirm the fare, seat availability and confirmation email are all correct.
- Run a test payment through your live gateway and confirm the order appears in WooCommerce with the right status.
- Check the seat plan against the real coach — rows, columns and driver position.
- Confirm pickup timings and instructions display correctly for every boarding point.
- Test the mobile flow end to end, including seat selection on a small screen.
- Confirm your cancellation and refund terms are visible before checkout.
Most failed setups trace back to a handful of avoidable configuration errors, which are collected in common mistakes when setting up a bus booking plugin — worth reading before you go live.
Frequently Asked Questions
Do I need WooCommerce for a WordPress bus booking plugin?
Yes for this plugin. WooCommerce handles the cart, checkout, payment gateways and order records, while the bus plugin adds routes, seat plans and schedules on top.
Can customers choose their own seats?
Yes. The seat plan you configure is what customers see at checkout, and they select specific seats before paying. Multi-leg operators should enable seat rotation so seats re-open for later legs.
Can I sell tickets for cash walk-in passengers?
Yes. The backend Purchase Ticket tab lets staff search a route and date, pick seats and issue tickets outside the online checkout.
Can I charge different fares for different stops?
Yes. Fares are set per boarding-to-dropping combination, so a partial route can cost less than the full journey without manual pricing.
Do I need to know how to code?
No. The whole build happens through WordPress admin screens. Customisation beyond the plugin settings is optional and needs CSS or a developer only if you want something unusual.
Wrapping Up
Creating a bus booking website with WordPress and a bus booking plugin comes down to four stages: install the plugin and WooCommerce, build your stops, routes, seat plans and fares, publish and test, then add Pro features such as passenger forms, QR tickets and sales reporting as you grow. The result is a ticketing system that takes reservations around the clock without a call centre, and gives you the revenue data to plan your fleet properly.
Start with the free plugin, get one route selling, and expand from there.