Max-Min Quantity Limiting Event function addon for WooCommerce Event Manager. By using this addon, the admin can enable events to sell with a limited quantity. He will be able to set limit to purchase for a customer when he creates an event. Customers will be able to purchase tickets according to the limit function that the admin set for that event. But remember one thing, this addon only works with our WooCommerce event manager plugin.
How to Install Max-Min Addon?
Before you install the Max-Min Quantity Limiting Addon, make sure that you have already installed “WooCommerce Event Manager” and WooCommerce Plugin. Firstly, you have to download the Min-Max Quantity limiting addon from our official site, it will just cost you 40 dollars. Once you have download the Event Max-Min Quantity Limiting Addon. -follow the step below to install it successfully-
I hope you guys know how to install an addon in the dashboard. But this instruction only for those guys who have little bit confusion about installation process about an addon.
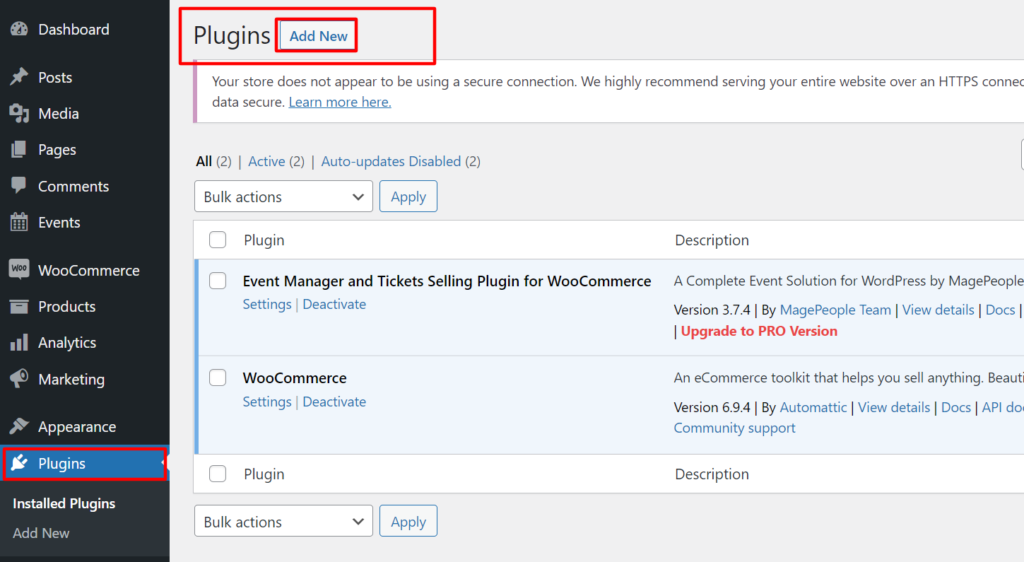
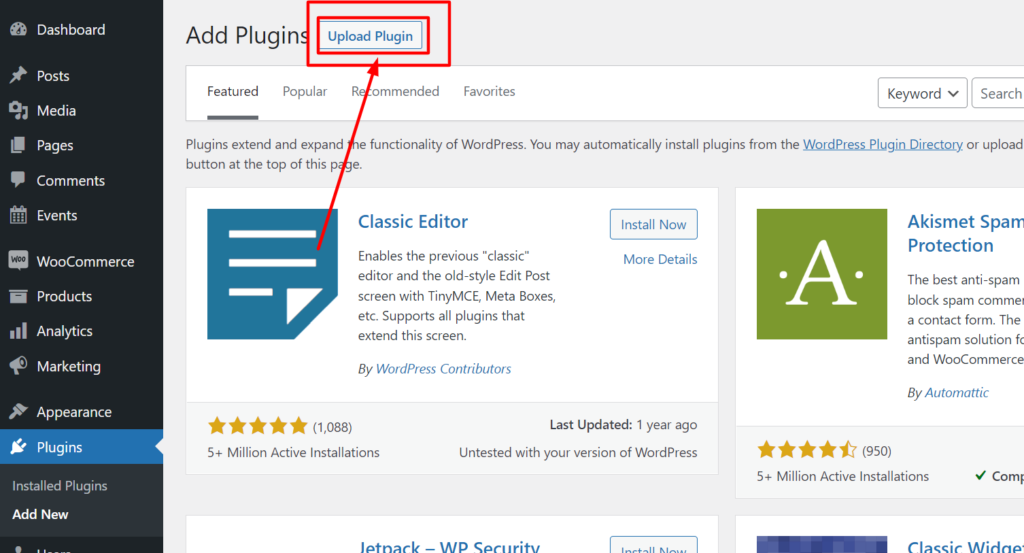
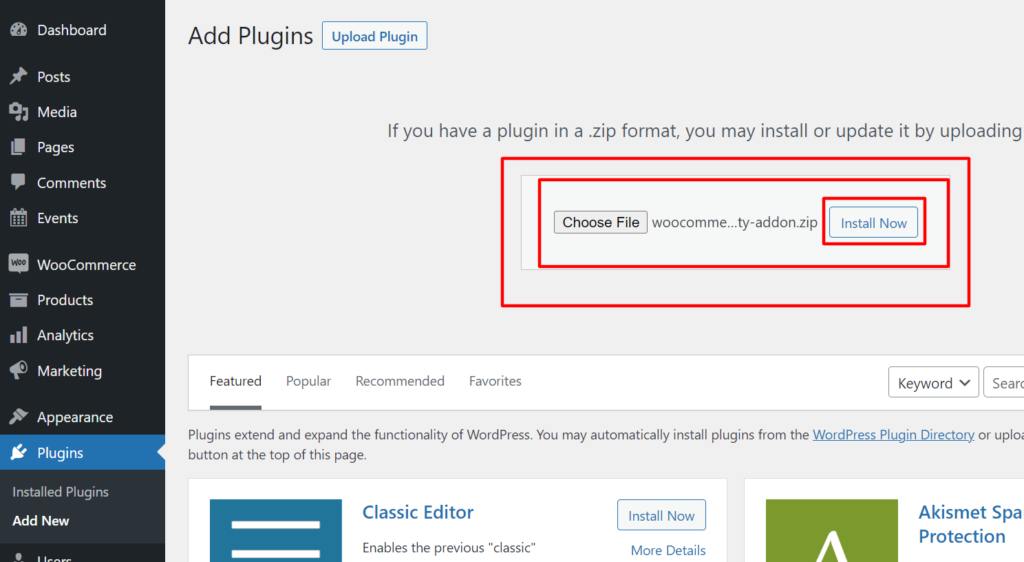
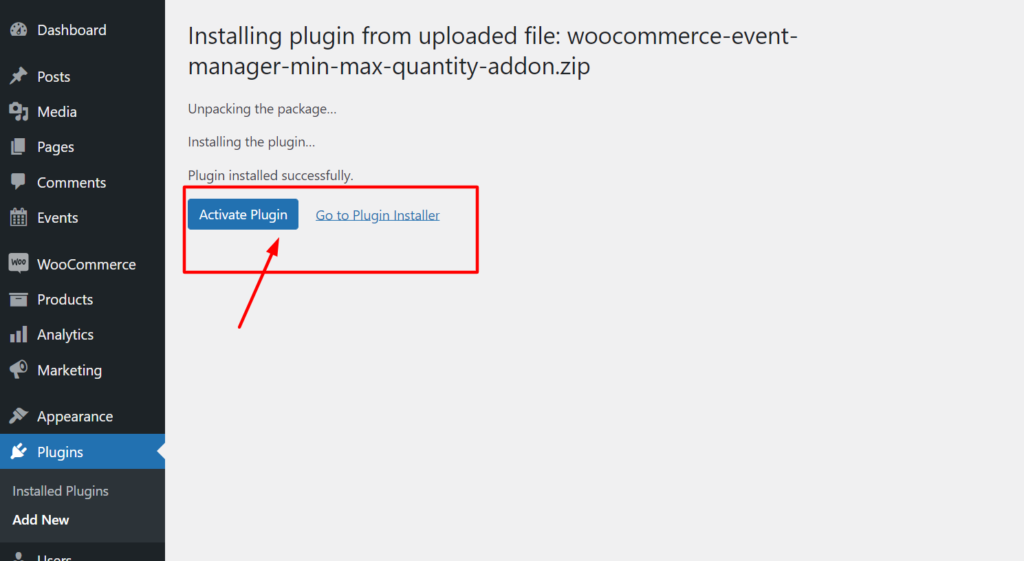
Login into your WordPress Dashboard, then you will find a “Plugin” as menu item on the left side, Click on it. Now you will able to see add new button, please click there and it will redirect a new page where you will find “Upload Plugin” button. After Clicking this button it will take you a new page where you will able to select you plugin file from your computer storage. Now please select Max-Min Quantity Limiting Addon and press “Install Now” Button. Your work almost done just you have to active now button.
[ I mentioned it above of the post, I am again going to repeat it, this addon only work with our Event Manager Tickets Selling Plugin for WooCommerce. You have have to install WooCommerce plugin and Event Manager Plugin Before install Min-Max Addon ]
Peoples who need more specific installation process, please check out bellow screenshots, I hope you guys understand it clearly.
How does it work?
After successfully install this addon you will get advantage of Max-min quantity limiting functionality on event event creating section.
When you will create an event and going to set pricing for this event then you will find an option for set up max-min quantity for customer. Please check below screenshot image for clear understanding.
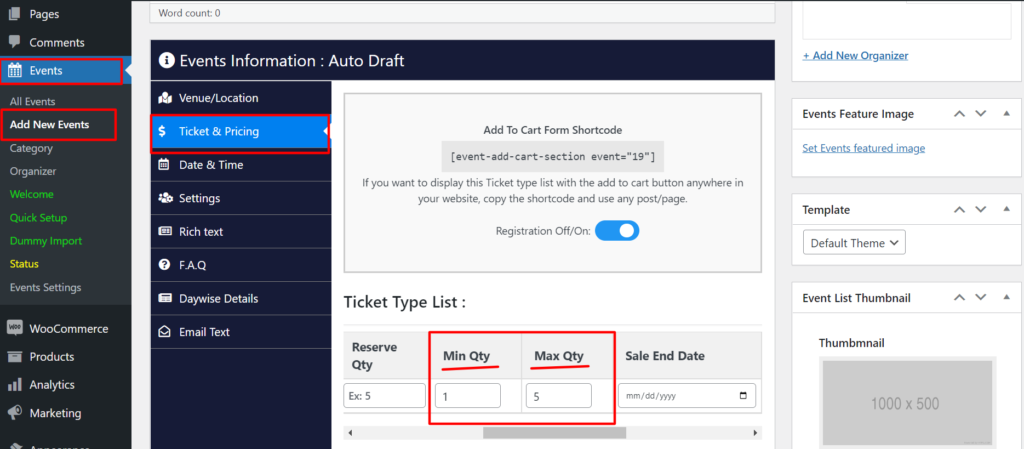
According to above image you can see i set up min quantity 1 for this ticket that mean customer must have to buy 1 ticket if she/he want to purchase ticket. If you set min quantity 3 then customer must have to purchase 3 tickets if she/she register for this event. You can force to customer to buy specific number of tickets if your event is demandable.
Now you can see i set up max quantity 5 ticket, that’s mean customer will be able to buy up to five tickets. Not more than it. you can set well balanced distribution for selling ticket on online.
Max-Min Setting
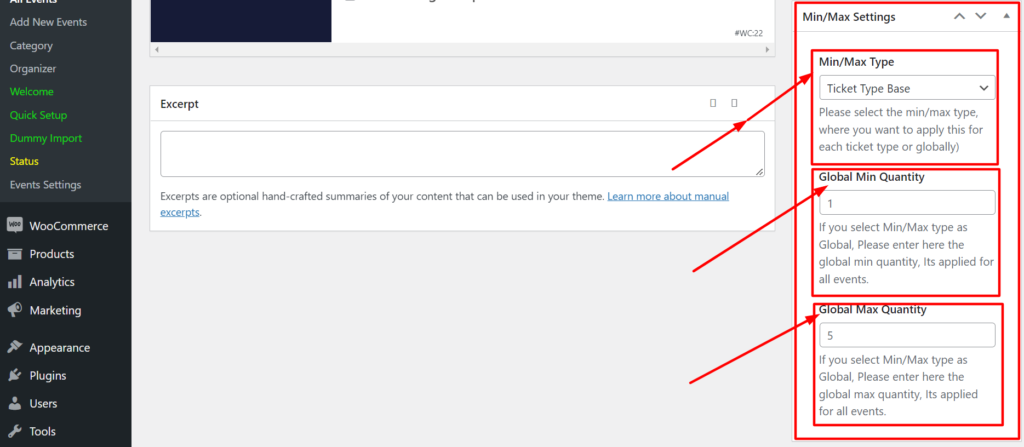
According to screenshot indicator you can see you will able to set up min-max based on ticket type. You can set min-max functionality according to ticket type. Suppose you have adult type in five events. If you set value for adult ticket type then it will work with adult tickets type for every five post.
You also can set Min-Max quantity globally. if you set it globally then it will work for every events. If you want to use min-max for particular event then ignore this settings manually set min-max functionality for particular that i mention above of the post.


