 Get Halloween 15% for Limited Time on Lifetime & Bundle Deal

An early bird discount is one of the simplest ways to turn “I might come” into a paid ticket. If you run events on WordPress, you can automate the whole thing: WpEvently handles the event and ticket structure, WooCommerce processes the payment, and the MagePeople Early Bird Ticketing Addon applies the discounted price only inside the dates you choose.
This guide shows you how to add early bird discount using WpEvently, step by step — from installing the addon to configuring discount windows per ticket type, testing the price switch, and promoting the offer. Expect to spend around 20–30 minutes on setup for a single event.
What Is an Early Bird Ticket (and Why It Works)
An early bird ticket is a limited-time discount for people who commit early. The mechanic is simple, but the business benefits go further than filling seats:
- Better cash flow: Early sales give you working capital before the event, which helps cover venue deposits, printing, and vendor payments.
- Predictive planning: Real headcount numbers early means more accurate catering, staffing, and seating decisions.
- Social proof: Visible early sales create momentum — people are more likely to buy when they see others already have.
- Sharper marketing deadlines: A fixed expiry date gives your emails and social posts a reason to be sent now rather than later.
Research published by Eventbrite suggests that a clear limited-time discount motivates a large share of buyers to purchase earlier — and in practice, the bigger driver is the deadline itself, not just the lower price. For a deeper look at how WooCommerce powers this checkout flow, see how to use WooCommerce for event registration.
What You Need Before You Start
- A WordPress site with WpEvently installed and active.
- WooCommerce installed, since WpEvently uses it for payments and order records.
- The MagePeople Early Bird Pricing Addon for Event Manager — check current pricing and license terms on the product page.
- One event created, with at least one ticket type (for example General Admission or VIP).
How to Add Early Bird Discount Using WpEvently
Step 1: Install and Activate WpEvently
Start from your WordPress dashboard.
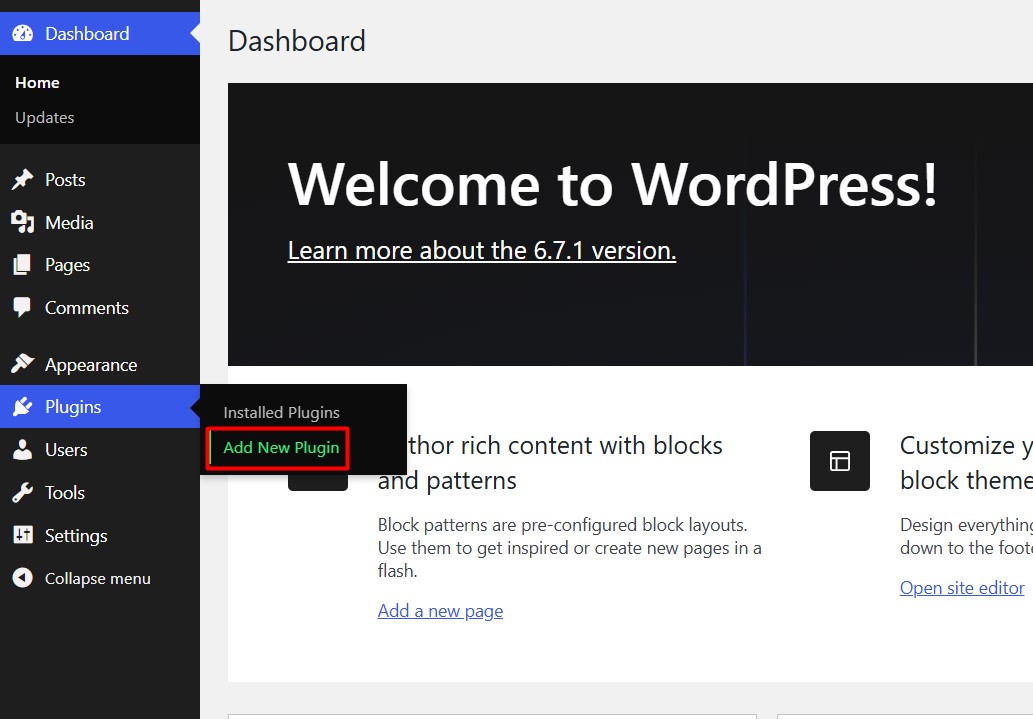
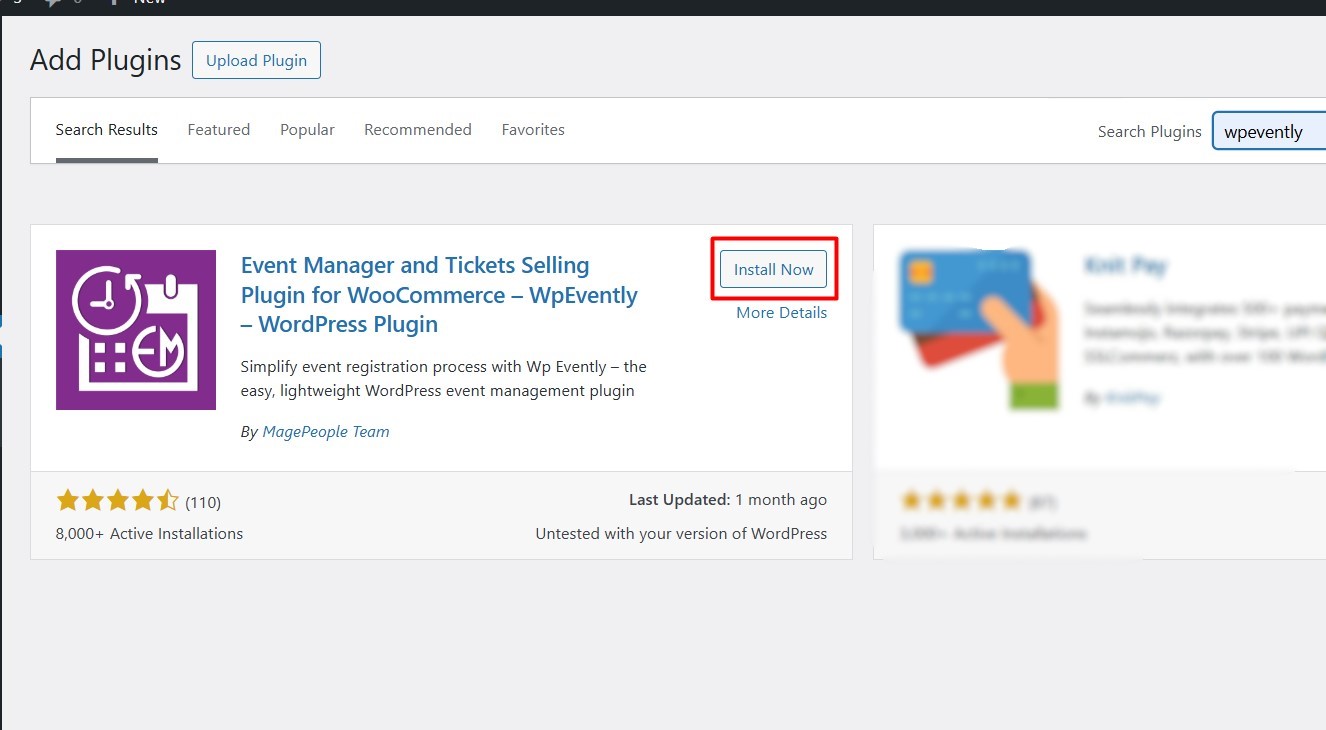
Go to Plugins → Add New Plugin, then search for WpEvently in the plugin search box. Click Install Now and then Activate.
On activation, WpEvently opens its setup wizard. Because it is a WooCommerce-based event booking plugin, the wizard asks you to install WooCommerce first.
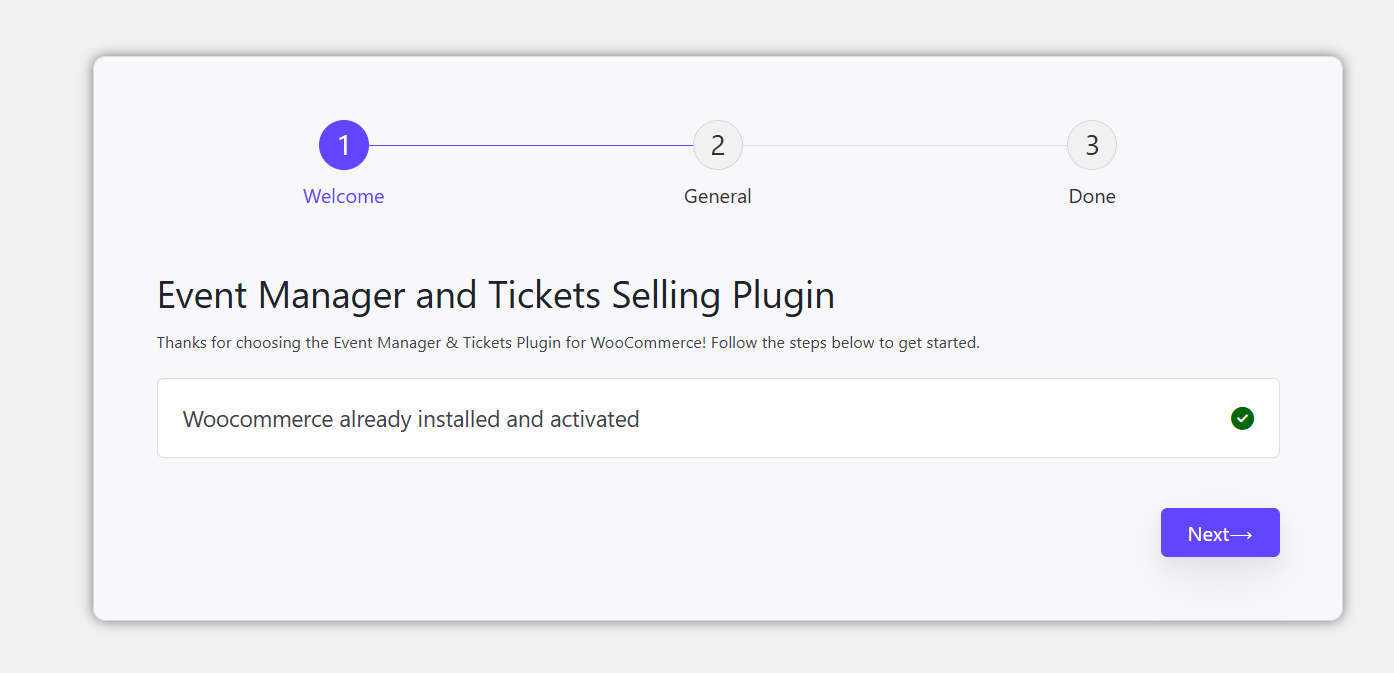
Click Install & Activate Now, then work through the wizard with Next → Next → Finish. If you already run WooCommerce, you can skip straight past that step.
When the wizard finishes, take two minutes to open the WpEvently settings and confirm your currency, pages, and email notifications are correct. These global settings affect every event and every price you will configure later.
Step 2: Install and Activate the Early Bird Pricing Addon
The discount controls are not part of the core plugin — they come from MagePeople’s Early Bird Ticketing Addon. Purchase it, download the .zip file, and keep your license key handy, since you will need it for updates.
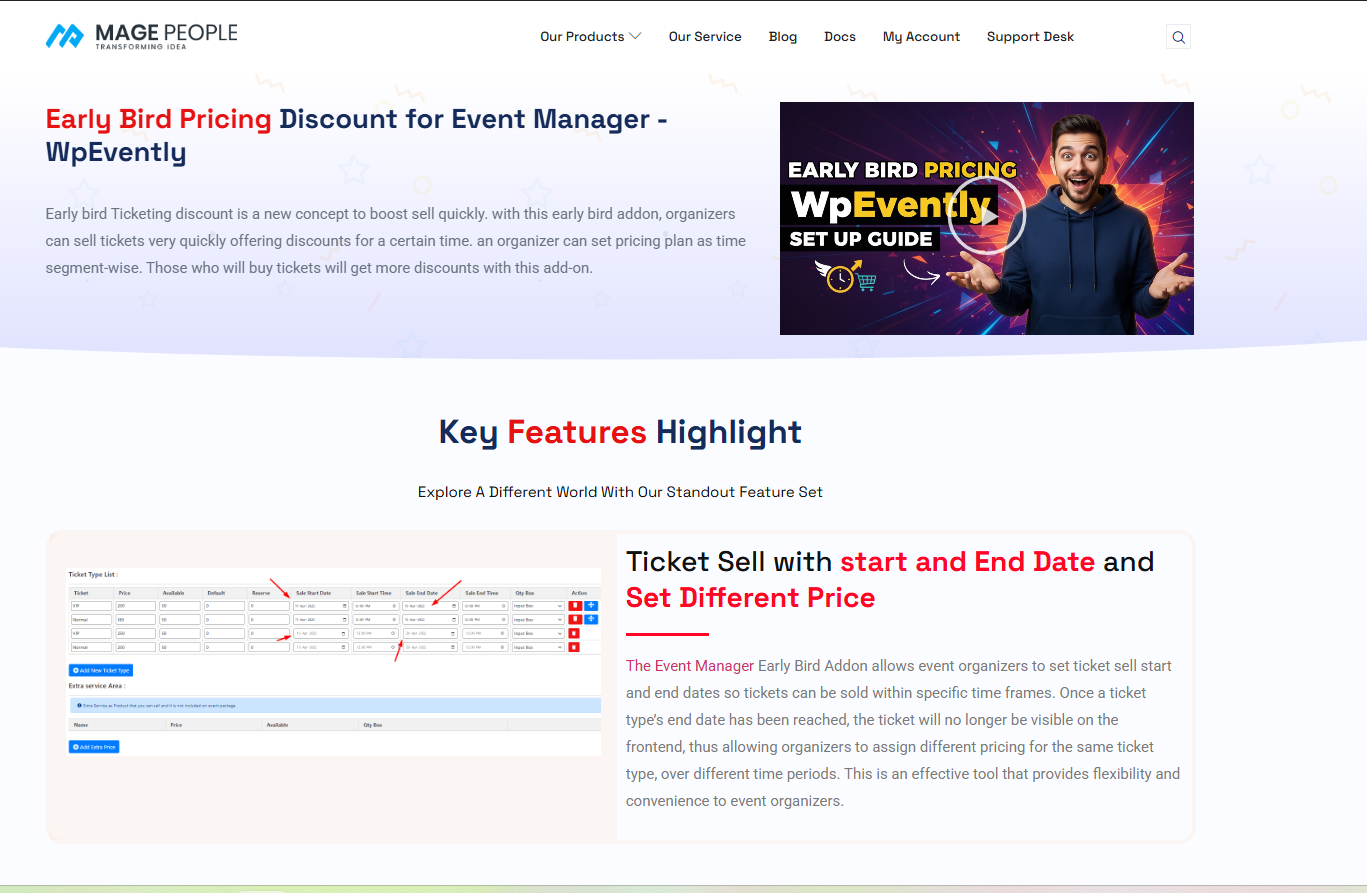
Once the addon file is on your computer, upload it to WordPress.
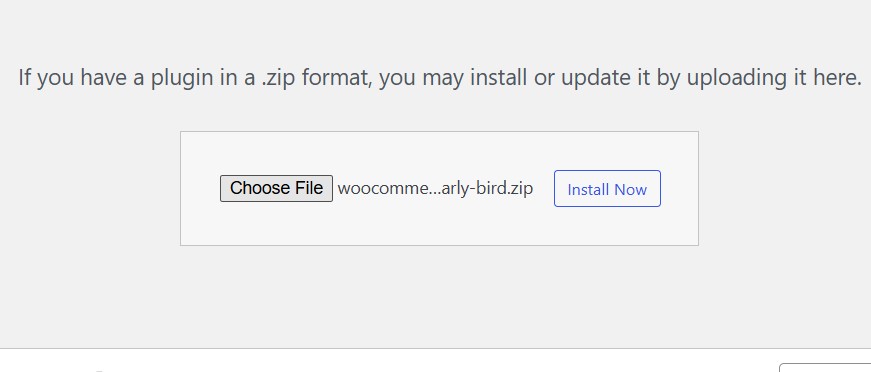
- Upload the addon: Go to Plugins → Add New → Upload Plugin and choose the addon’s .zip file.
- Activate it: Click Activate Plugin once the upload finishes.
- Verify the installation: Return to the WpEvently settings panel and check that the addon appears in the list of active addons. If it does not show up, deactivate and reactivate the core plugin to refresh the addon list.
Step 3: Create Your Event in WpEvently
If your event already exists, confirm it has the ticket types you want to discount and move on to Step 4.
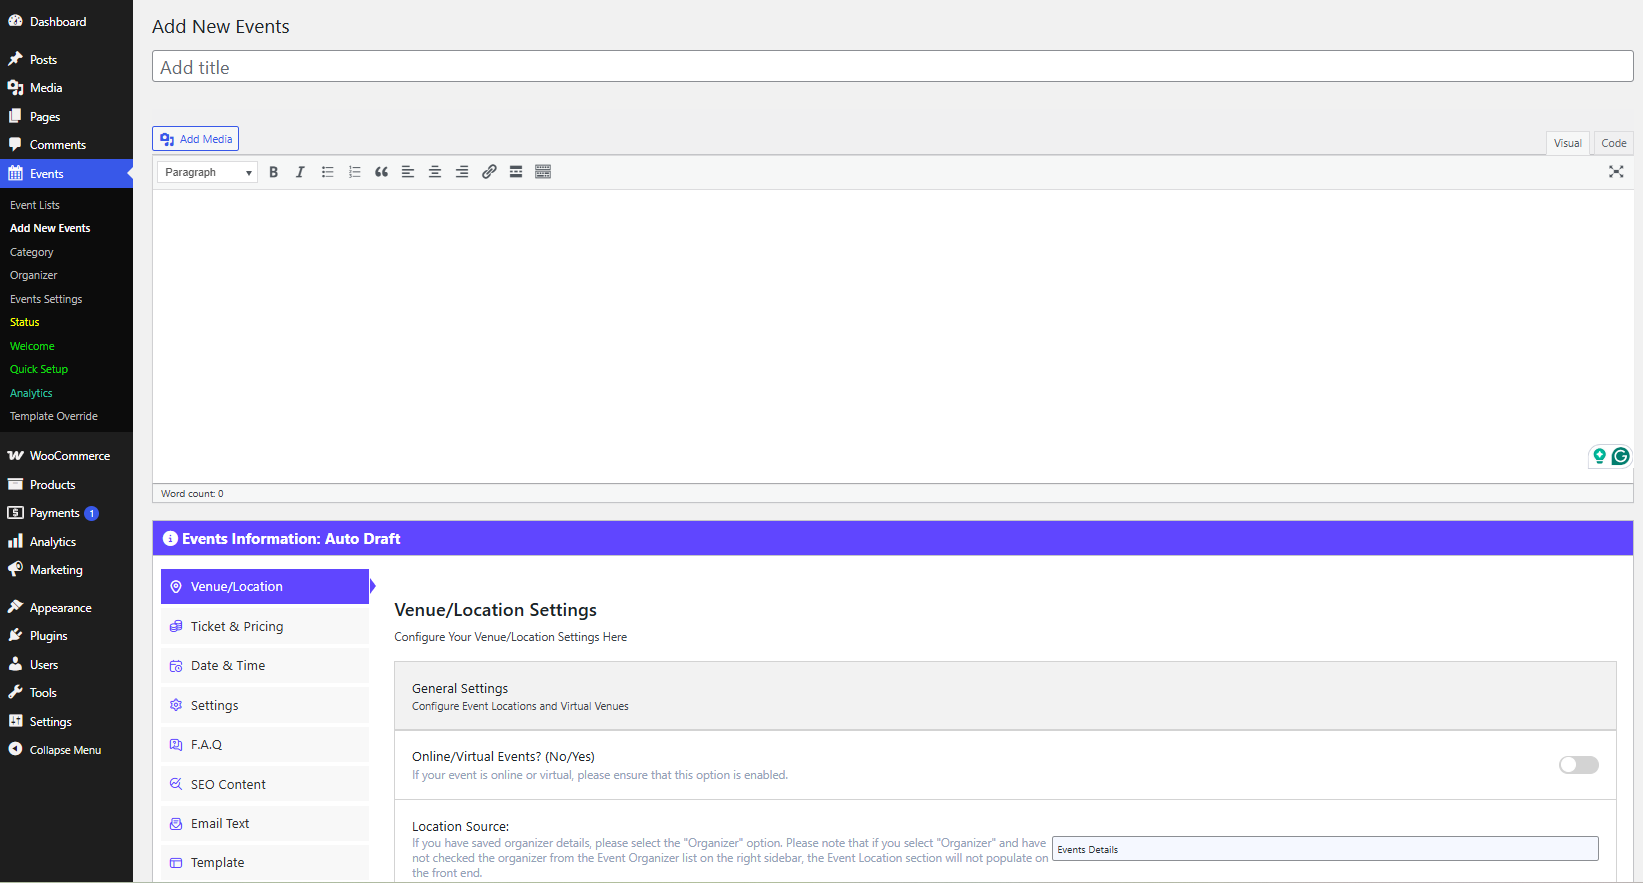
To create a new one, go to WpEvently → Add New Event and fill in:
- Event name, description, and featured image
- Start and end date, plus time zone
- Venue or online location
- Ticket types — for example General Admission and VIP — with their standard (regular) prices
Click Publish to save. The regular price you enter here is the price buyers will pay after the early bird window closes, so set it correctly before you go further.
Step 4: Configure Early Bird Pricing
Now attach the discount to a specific ticket type. Open WpEvently → All Events and select the event you want to discount, or go to the Tickets section and choose the ticket type directly.
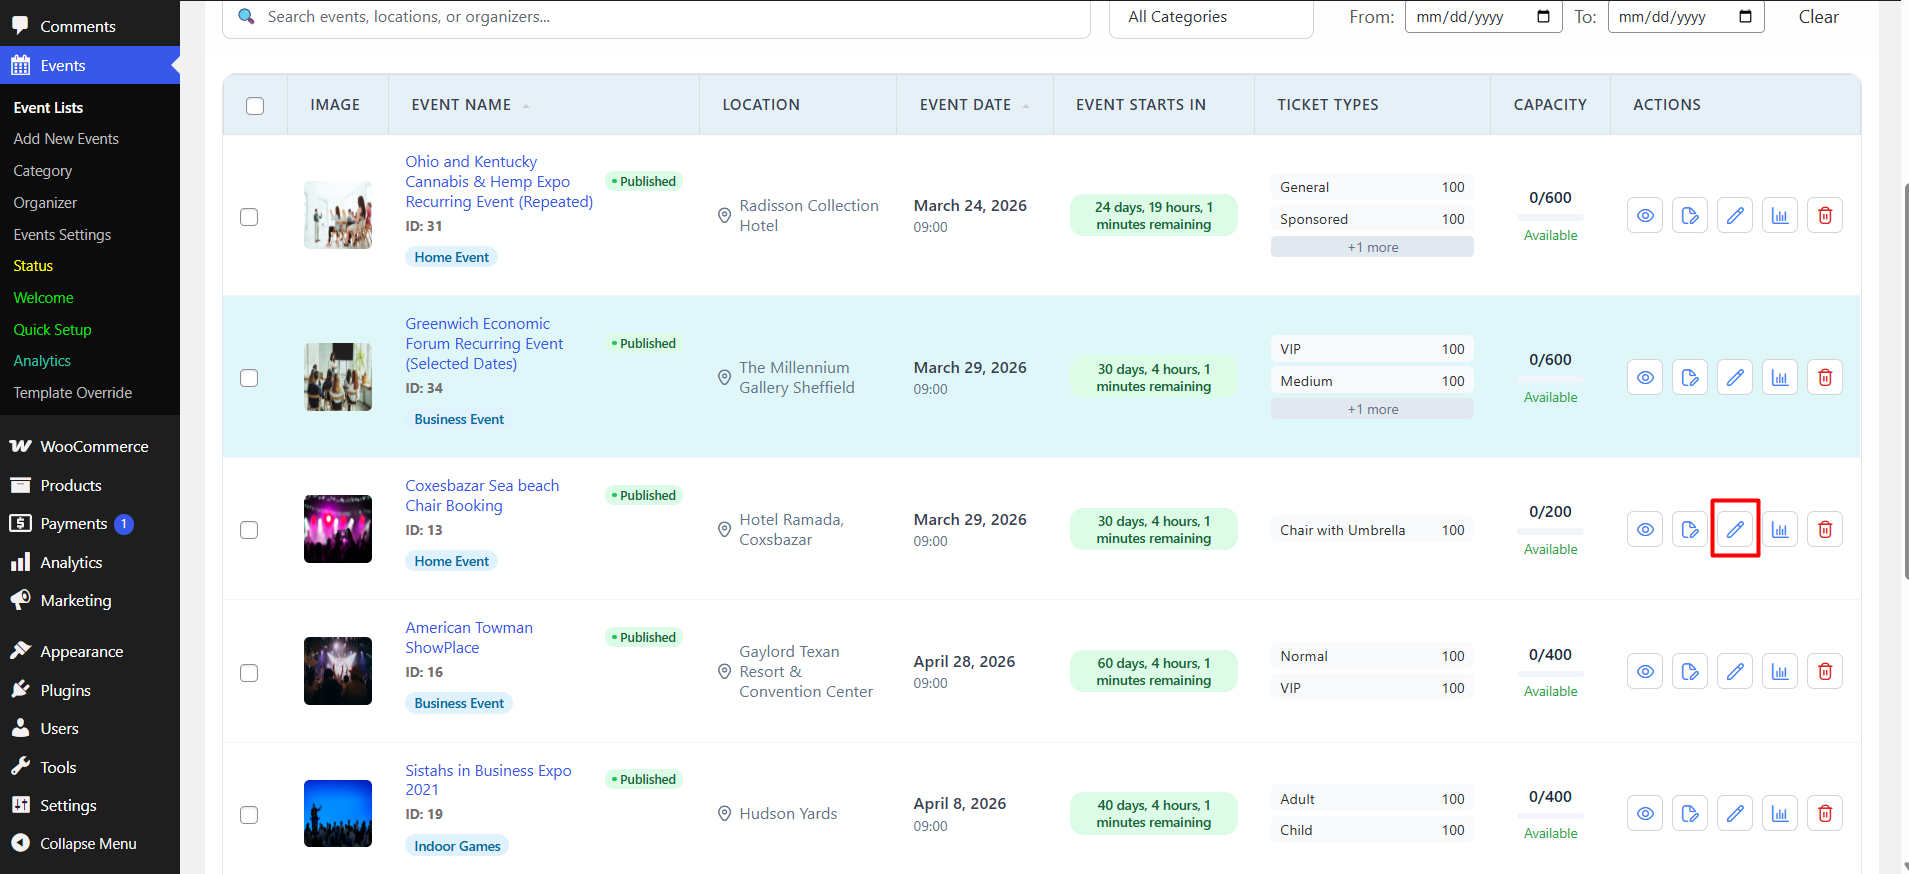
Edit the event so the ticket settings are editable.
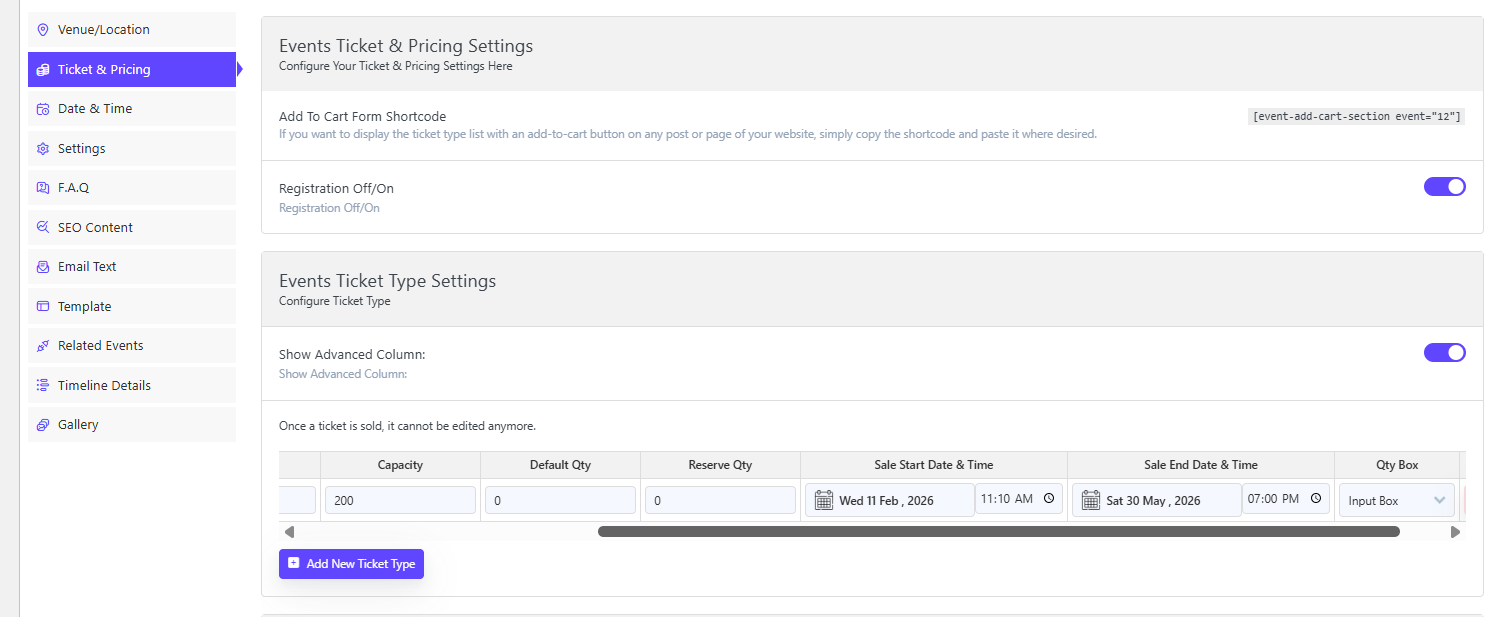
Inside the ticket panel you will see an Early Bird Pricing section added by the MagePeople addon. Configure it like this:
- Enable early bird pricing for that ticket type with the toggle or checkbox.
- Set the discount start date — when the discounted price should go live. If you want it active immediately, set this to today.
- Set the discount end date — the exact moment the offer expires.
- Enter the discounted price for that tier — for example 100 instead of 200 in your store currency.
- Save your changes and repeat for each ticket type you want to discount.
A few practical rules that save rework later:
- Use a specific time, not just a date. “Ends Friday at 11:59 pm” is unambiguous; “ends Friday” creates disputes with buyers who order at 12:05 am.
- Confirm WooCommerce taxes and currency are already set. The discounted price is stored the way the ticket price is stored, so tax settings apply consistently to both.
- Discount ticket types independently. You can run an early bird on General Admission only, or offer VIP buyers a smaller discount — each ticket type is configured on its own.
Optional: Build Multiple Early Bird Tiers
For longer campaigns, tiered deadlines usually outperform a single discount window. Create an additional ticket type for each tier and repeat the steps above:
- Super Early Bird: shortest window, deepest discount
- Early Bird: middle window, moderate discount
- Regular: the standard price that remains after both windows close
Show all three options on the event page with their dates so buyers can see exactly when each price disappears.
Step 5: Test the Discount Before You Promote It
Never launch a paid campaign on an untested discount. Open your event page in a private browser window and check:
- The discounted price displays correctly and matches the figure you entered.
- The discount applies only to the ticket type you configured — other tickets still show the full price.
- Add a ticket to the cart and reach the WooCommerce checkout to confirm the cart total reflects the discounted price, including any taxes or fees.
- After the end date passes, the price reverts to the standard rate automatically, with no manual edit needed.
If you are selling multiple ticket types and want to sell them from the backend as well, the WpEvently backend order addon guide covers creating orders from your dashboard for phone and walk-in buyers.
Step 6: Promote Your Early Bird Tickets
Setting up the price is half the job. The other half is making sure people know it expires.
- State the deadline everywhere: event page, email subject lines, social captions, and the checkout page description.
- Add a countdown: a visible timer on the landing page turns an abstract deadline into a ticking clock.
- Send a last-chance email: a 48-hour and a final-hours reminder to your list typically produce the strongest single-day sales.
- Sweeten the tier: early buyers respond to extras as well as price — priority seating, a recording, or a small digital resource.
- Publish tier deadlines: if you use Super Early Bird and Early Bird tiers, list the exact cut-off for each so buyers can choose their moment.
If your event also needs assigned seats, plan that alongside the ticket structure — see how to add an event seating plan using the Seat Plan addon. And if a tier sells out before its deadline, a waitlist for your WordPress event site lets you capture demand instead of turning it away.
Worked Example: A Three-Tier Ticket Ladder
Say you are running a Digital Marketing Conference with a standard ticket price of 50 in your store currency. A simple ladder looks like this:
| Ticket type | Window | Price |
|---|---|---|
| Super Early Bird | Weeks 1–2 | 30 |
| Early Bird | Weeks 3–5 | 40 |
| Regular | Week 6 onward | 50 |
Each row is its own ticket type in WpEvently with its own early bird window. Buyers who arrive late still see a valid offer, and you keep a clear headline price for last-minute marketing.
Why the MagePeople Early Bird Addon Fits WpEvently
- Native integration: the discount fields appear inside the existing WpEvently ticket settings, so there is no separate pricing system to maintain.
- Per-ticket control: you decide which ticket types get a discount and which keep their full price.
- Automatic price switching: prices revert to standard when the end date passes, so no one has to remember to change them.
- WooCommerce checkout: orders, invoices, refunds, and reports all continue to run through WooCommerce, which most store owners already know.
Check the product page for the current feature list and license details before you buy, since addon capabilities and plans change over time.
Common Early Bird Setup Mistakes
- Overlapping discount windows. Two tiers active at once confuse buyers and can undercut your own revenue. Keep the windows sequential.
- Discounting too deeply. If the early bird price barely covers your per-head cost, extra volume does not help. Work out your break-even price first.
- No deadline in the copy. A discount without an expiry date removes the urgency that makes early bird pricing work.
- Testing only the event page. Always complete checkout in test mode; tax and fee settings can change the final total.
- Forgetting to tell past attendees. Your previous buyers are the highest-converting audience for an early bird offer — email them first.
Conclusion
Adding an early bird discount in WpEvently comes down to four moves: install the core plugin and WooCommerce, activate the MagePeople Early Bird Pricing Addon, build your event with the correct standard ticket prices, then set the discount start date, end date, and discounted price for each ticket type you want to discount. Test the price change in checkout, promote the deadline hard, and the system handles the switch back to full price for you.
Ready to set it up? Review the Early Bird Pricing Addon for your license and pricing details, and pair it with this WpEvently early bird discount walkthrough as your reference while you configure your first event.
Frequently Asked Questions
Can I limit how many early bird tickets are sold?
Yes. Set a quantity cap on the discounted ticket type in WpEvently’s ticket settings. When the cap is reached, the ticket shows as unavailable while the date window — and your regular tickets — continue to run.
What happens when the early bird period ends?
When the end date you configured passes, the plugin reverts that ticket type to its standard price automatically. You do not need to edit the event manually at midnight.
Can I offer early bird pricing on VIP tickets only?
Yes. Early bird settings live on each ticket type, so you can discount General Admission, VIP, or any other tier independently — including offering no discount on some tiers at all.
Do I need WooCommerce to use early bird pricing?
Yes. WpEvently uses WooCommerce to process payments and generate order records, and the discounted price flows into the WooCommerce cart total at checkout.
Can I run early bird pricing on recurring events?
You can, but each occurrence needs its own discount window to stay accurate. If your event repeats on a schedule, start with the guide on creating recurring events in WordPress with WpEvently and then set the date range for each occurrence.
Why is my discounted price not showing on the event page?
Check three things: that the current date falls between your start and end dates, that early bird is enabled on the specific ticket type you are viewing rather than another tier, and that the plugin is still activated. Browser caching on your event page is also worth clearing before you assume the settings failed.
