 Get Halloween 15% for Limited Time on Lifetime & Bundle Deal

A taxi booking site built on eCab is ready to launch when a stranger can complete a booking on a phone in under ninety seconds, a driver can accept and complete that job, and the money lands in the right account. Get there by configuring things in this order: operation areas and zone pricing first, then vehicle categories and pricing models, then extra charges, then payments, then drivers, then notifications, then test the whole chain end to end before you open bookings publicly.
If you have already installed the eCab taxi plugin and are staring at a half-configured dashboard, this checklist is for you. Going live before you check these twelve items is the most common reason taxi websites fail in their first month: riders get confusing fares, drivers can’t accept jobs, and support tickets pile up faster than bookings. Below is the pre-launch sequence we walk clients through, in the order that avoids rework.
What Counts as “Ready to Launch” for an eCab Taxi Site?
A taxi booking site is ready when a stranger can complete a booking on a phone in under ninety seconds, a driver can accept and complete that job, and the money lands in the right account. Everything in this checklist serves one of those three outcomes. Configuration that does not affect them can wait until after launch.
Get your eCab Taxi from WordPress.
The 12-Step eCab Taxi Pre-Launch Checklist
Work through these in order. Steps one to four are structural; if you change them later, you will have to re-test pricing and driver assignments.
1. Decide your operating model before touching settings
Most eCab setups run as a single operator you own the fleet, and the drivers you add through the Drivers & Fleet Assignment module are your own staff or contractors, mapped directly to your own vehicles. If your specific setup also supports a multi-vendor or partner-fleet model with commission rules, confirm the exact configuration with your plugin version before building around it; the core dashboard is built around a single fleet operator managing their own drivers and vehicles. Getting this decided early matters either way, since it determines how many driver accounts you need before launch and how much rework a later change causes.
Find out more about single operation area from how to use single operation areas.
2. Set up operation areas and zone pricing correctly
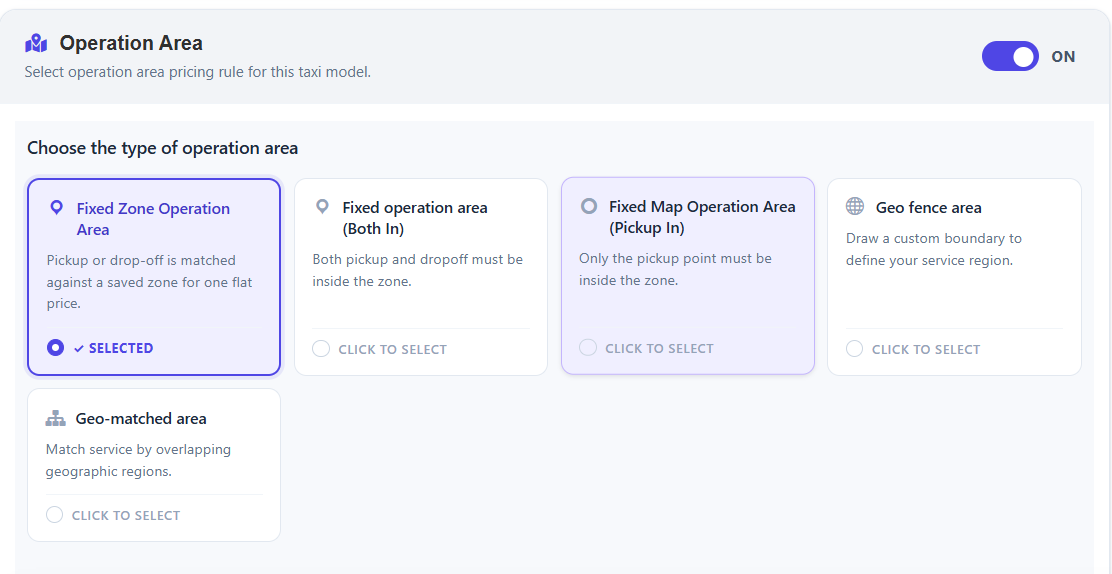
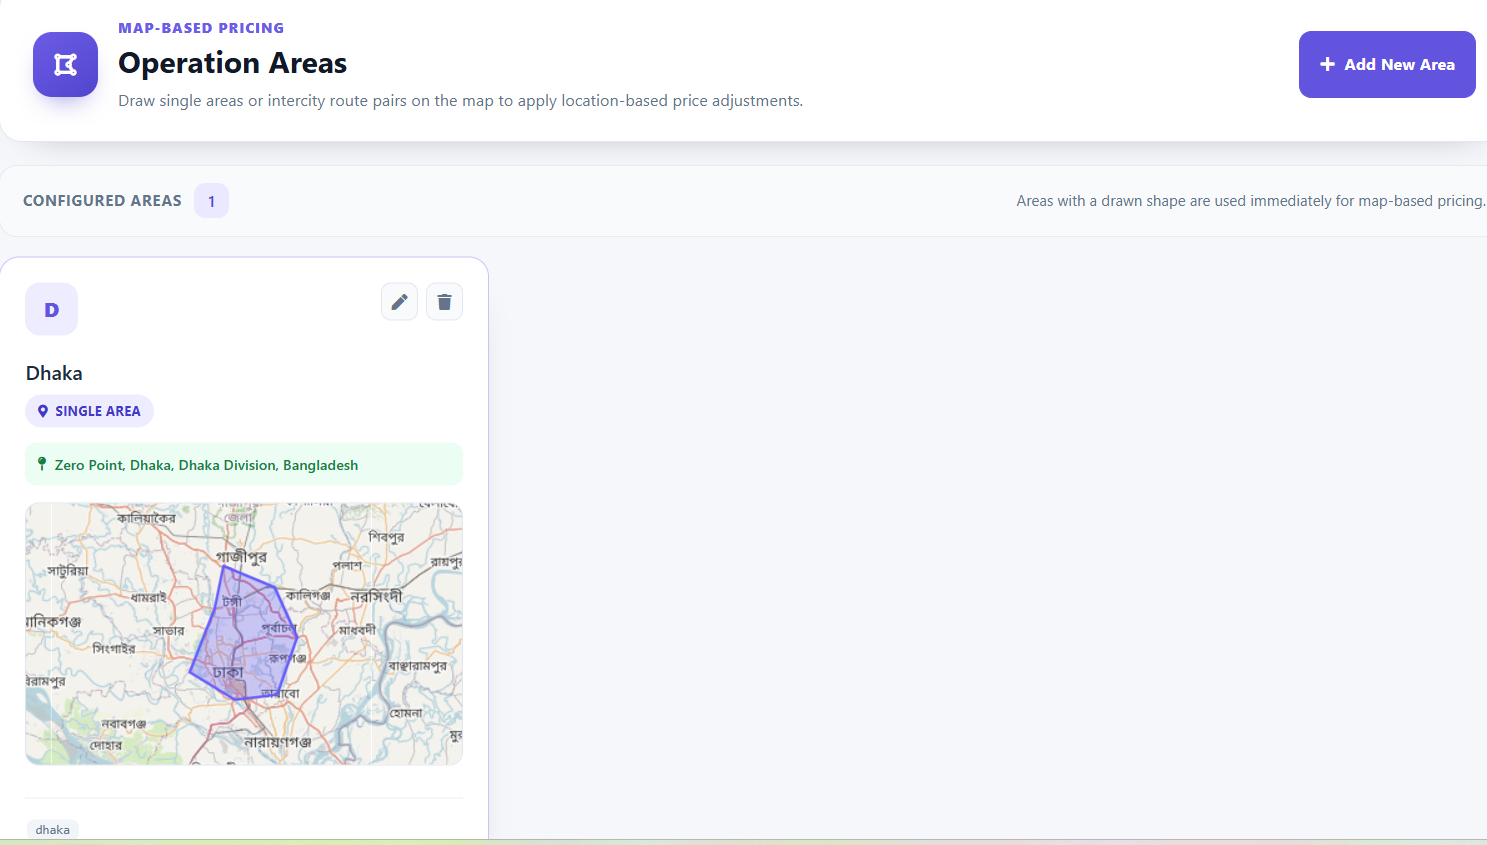
Draw your service areas before you draw your price list. eCab’s Operation Areas module lets you draw custom geofenced zones on an interactive map: service boundary restrictions, zone-based rate multipliers for high-traffic areas, and explicit intercity route pairs with their own fixed or dynamic pricing between two zones. Most launch-day fare complaints trace back to one of two mistakes: overlapping zones that both match an address, or a zone boundary that cuts through a neighbourhood riders think of as a single place. If your service area is small and you charge flat rates between fixed points, the configuration is different from a large city with distance-based fares. For the mechanics of that setup, see the guide to single operation areas and fixed zone pricing, which covers the exact field-by-field configuration.
3. Build your vehicle and pricing tiers
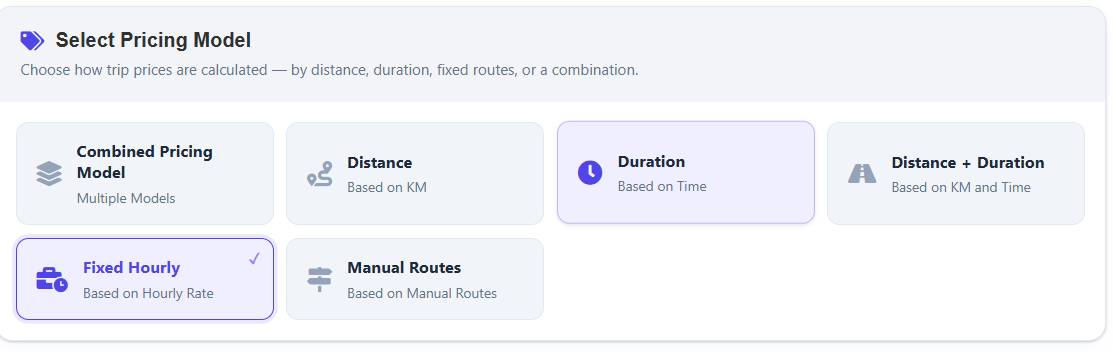
Each vehicle goes through eCab’s 5-step creation wizard: General Info, Pricing, Fees & Extra Service, Operational Date & Time, and Advanced. In the Pricing step, choose the model that matches how you actually charge:
- Combined — distance rate plus duration rate plus add-ons calculated together
- Distance — priced purely by kilometres travelled
- Duration — priced purely by time
- Distance + Duration — both distance and time rates applied together, shown as separate line items
- Fixed Hourly — a flat hourly rate with no distance component
- Manual Routes — fixed, predefined fares for specific popular point-to-point routes, bypassing automatic distance/duration calculation entirely
Define each vehicle class your fleet actually has economy, sedan, SUV, van, or whatever you operate and confirm base fare, base distance included, per-kilometre and per-minute rates, minimum fare, and the capacity and luggage allowance shown to the rider. Use the Inventory Management panel to set stock levels per vehicle model, configure buffer time between bookings, and choose manual or automatic availability checking. Do not list categories you cannot fulfil at 7 am on a Monday; every empty category generates a failed booking and a bad review. The Price Display Settings panel lets you control exactly how (or whether) a price shows for a category that isn’t ready yet, rather than showing a broken or zero fare.
4. Configure extra charges and surcharges
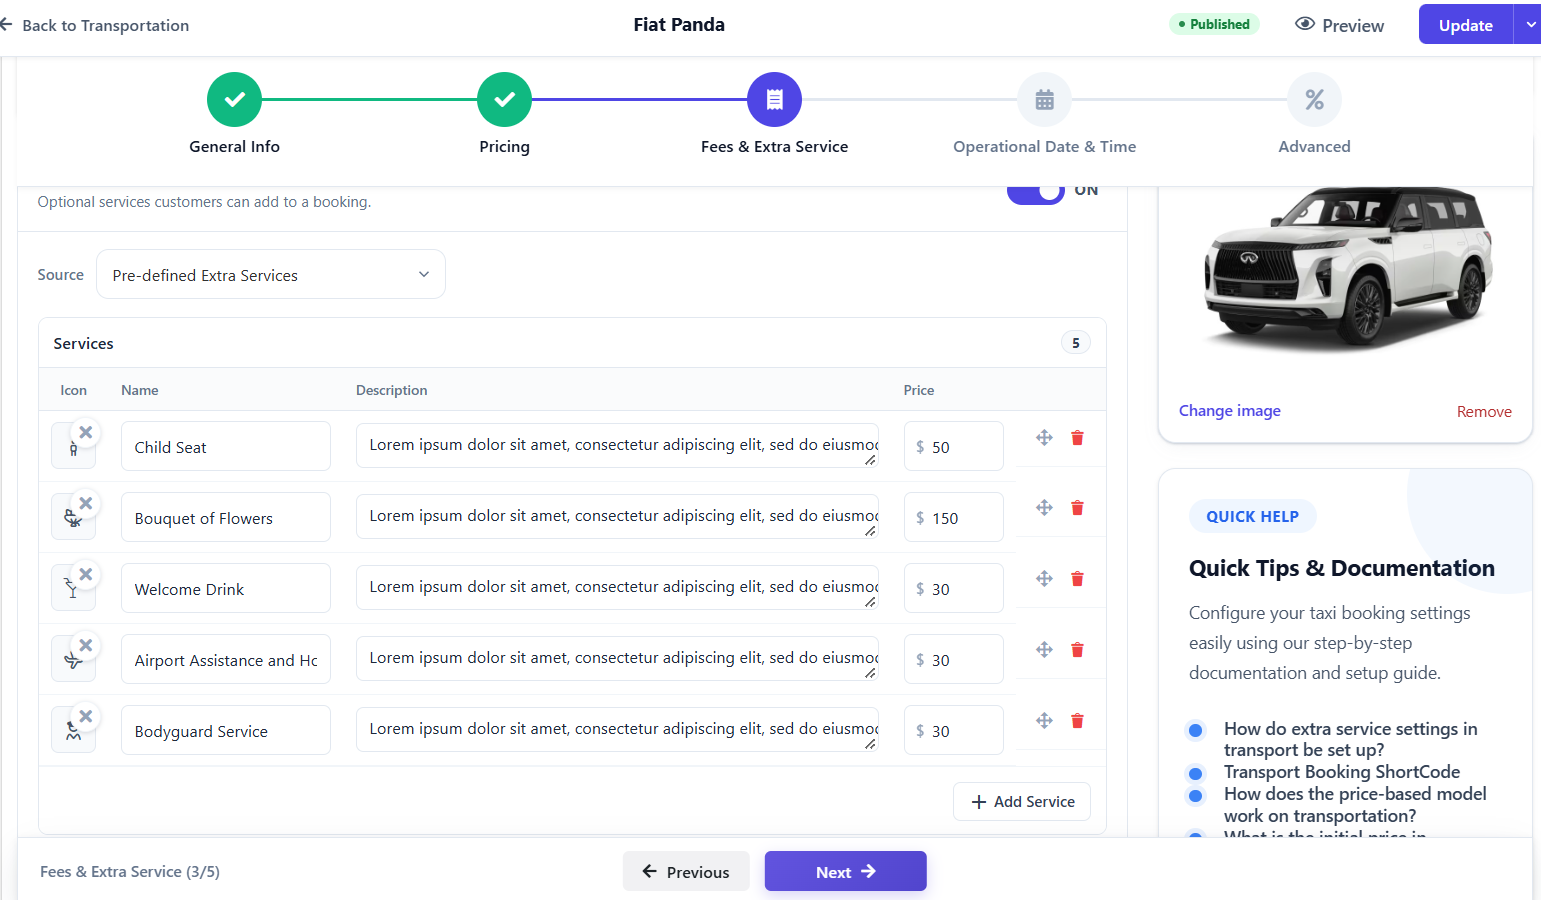
These are the line items riders argue about. eCab supports extra waiting-hour charges as a paid dropdown option, plus intercity surcharges for tolls and out-of-zone fees configured at the operation-area level. Decide your policy now for the rest: night hours, airport or terminal fees, pet or luggage surcharges, and cancellation fees. Each one should appear in the booking summary before the rider pays, not on the final invoice. If you plan to charge more during rush hours, our walkthrough on adding peak hour pricing to your booking site shows how to layer it onto your base rates without breaking zone logic.
5. Connect payment gateways and test both paths
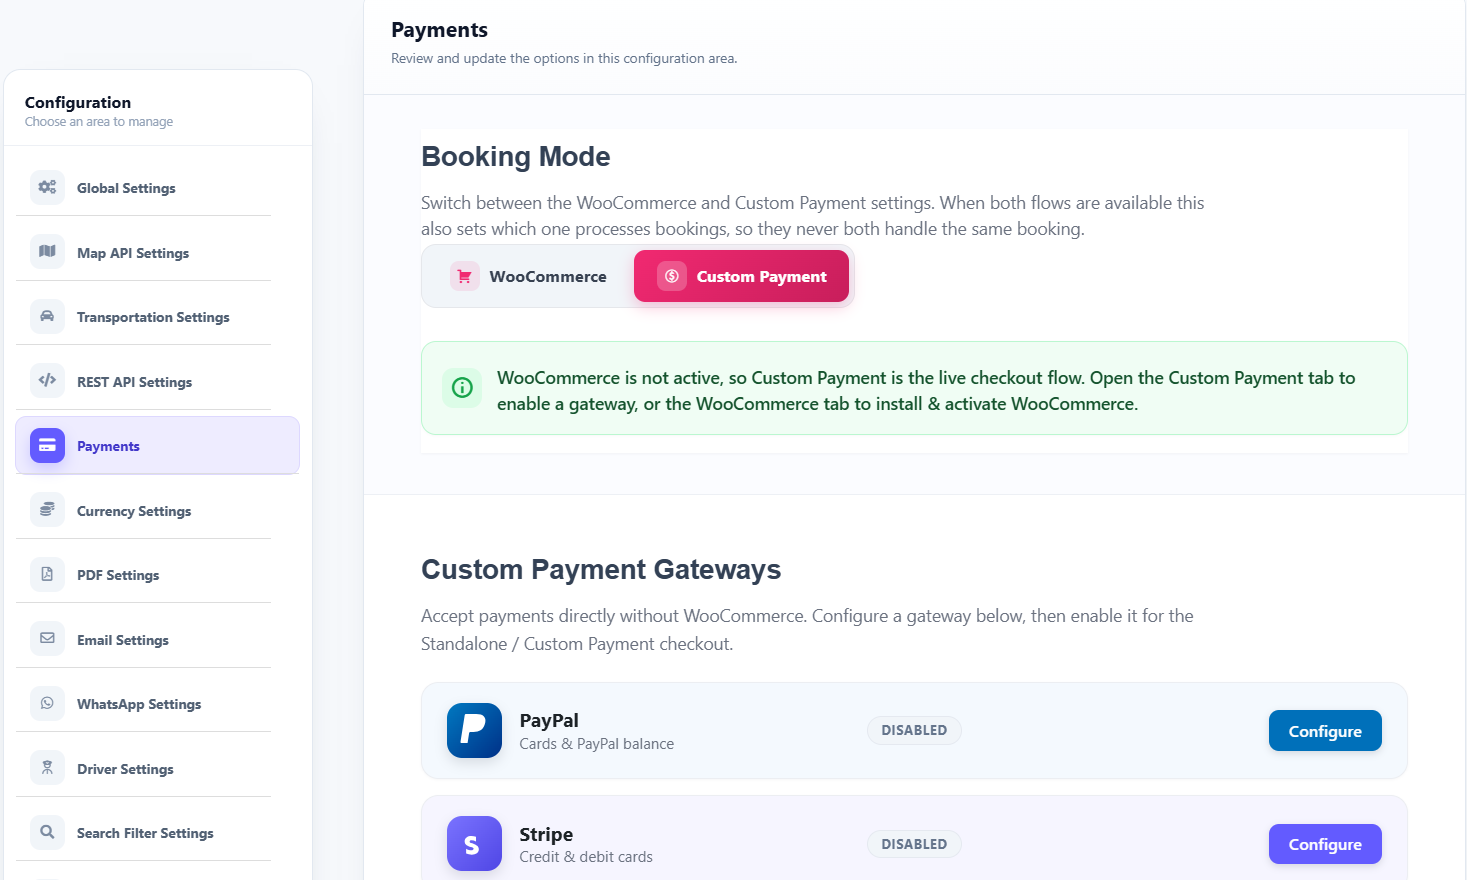
Run a real transaction through every gateway you enable: cash on arrival, card, mobile wallet, or bank transfer depending on your market. Test the refund path too, not just the payment. A gateway that authorises correctly but fails to void an unused booking will cost you money at scale.
To learn more about taxi setup, check out how to make a taxi booking website.
6. Complete driver onboarding and document checks
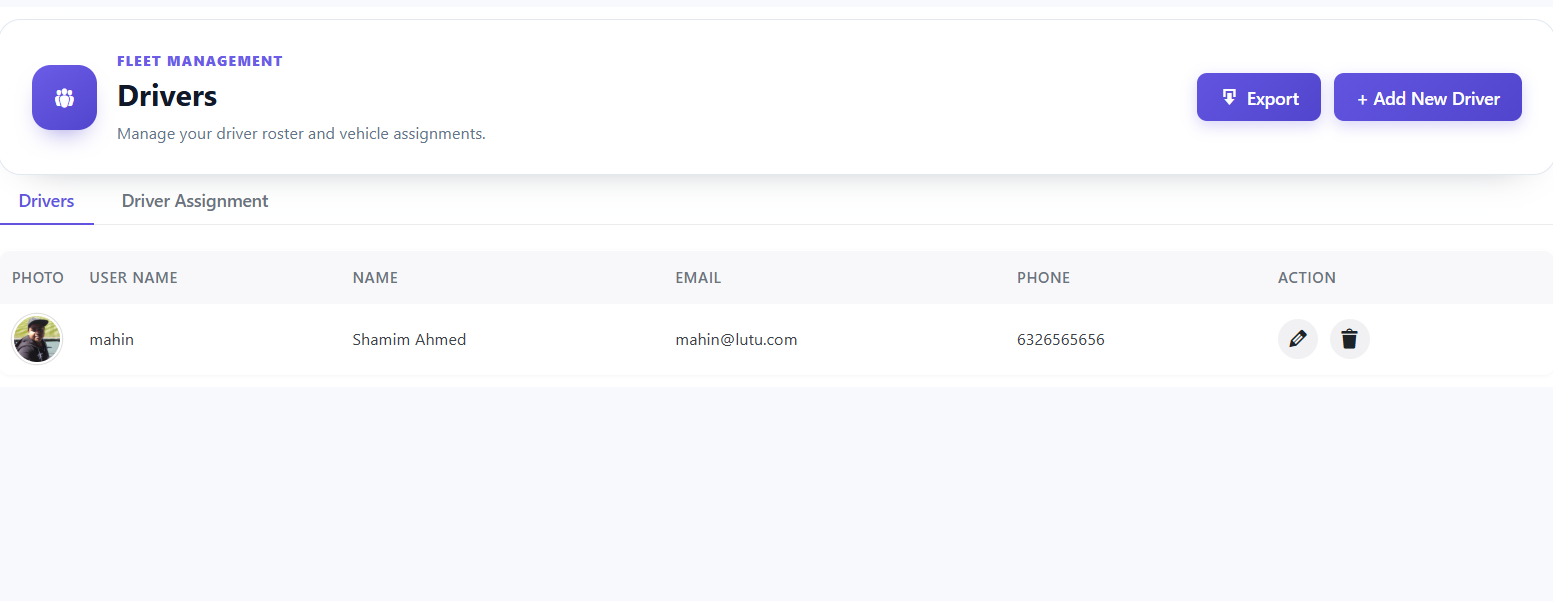
Add each driver through the Drivers & Fleet Assignment module: username, email, phone, name, and login credentials are required fields, plus a profile photo and driving license upload (front and back are stored and verifiable separately). If your operation also requires vehicle registration, insurance, or a formal payout-method record per driver, confirm where that’s captured in your specific setup; those aren’t part of the core driver profile fields, so you may need a separate process or field addition to track them before launch. Give each driver the minimum dashboard access they need and nothing more. Drivers who cannot see their own earnings will not trust the system, so make the earnings view the first screen they see after login.
7. Define commission, driver payouts, and the schedule
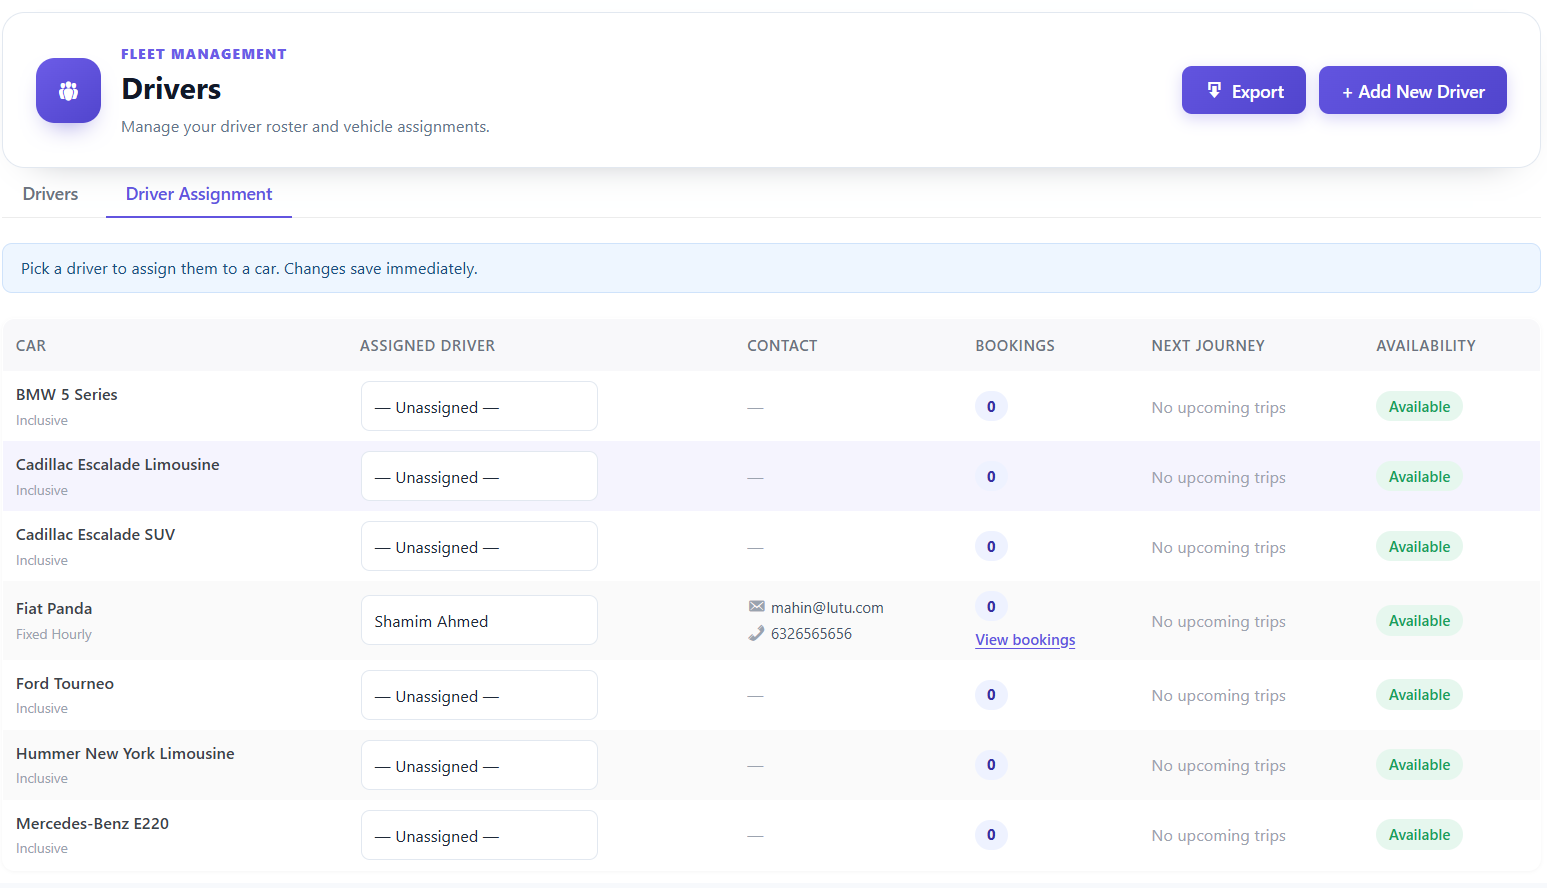
If your setup includes commission or partner-fleet payout handling, write down the commission percentage, what it applies to, and how often drivers are paid: “weekly payout every Monday” beats “when we get around to it” every time. If you’re running a single-operator fleet without a commission structure, this step is simpler: just confirm how and when your own drivers are paid outside the platform, and make sure that schedule is communicated clearly. Ambiguity here is the fastest route to losing driver trust in the system.
8. Set up booking notifications and emails
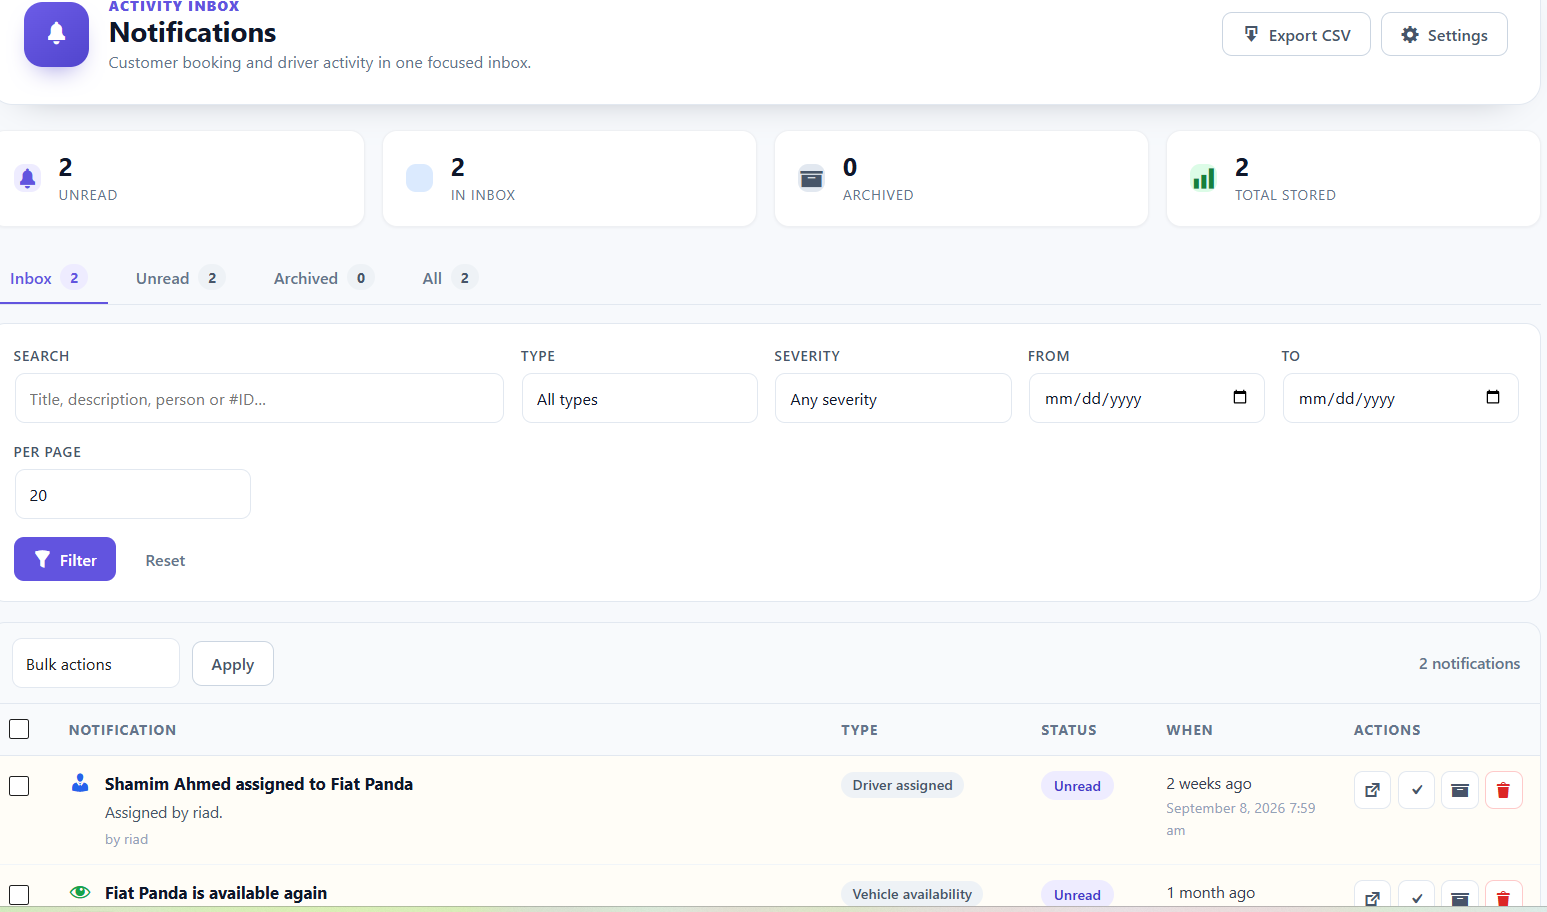
Four messages must work before launch: booking confirmation to the rider, new job alert to the driver, completion receipt, and cancellation notice to both sides. Send a test to a real inbox and a real phone, not the admin address.
9. Configure the cancellation and refund policy
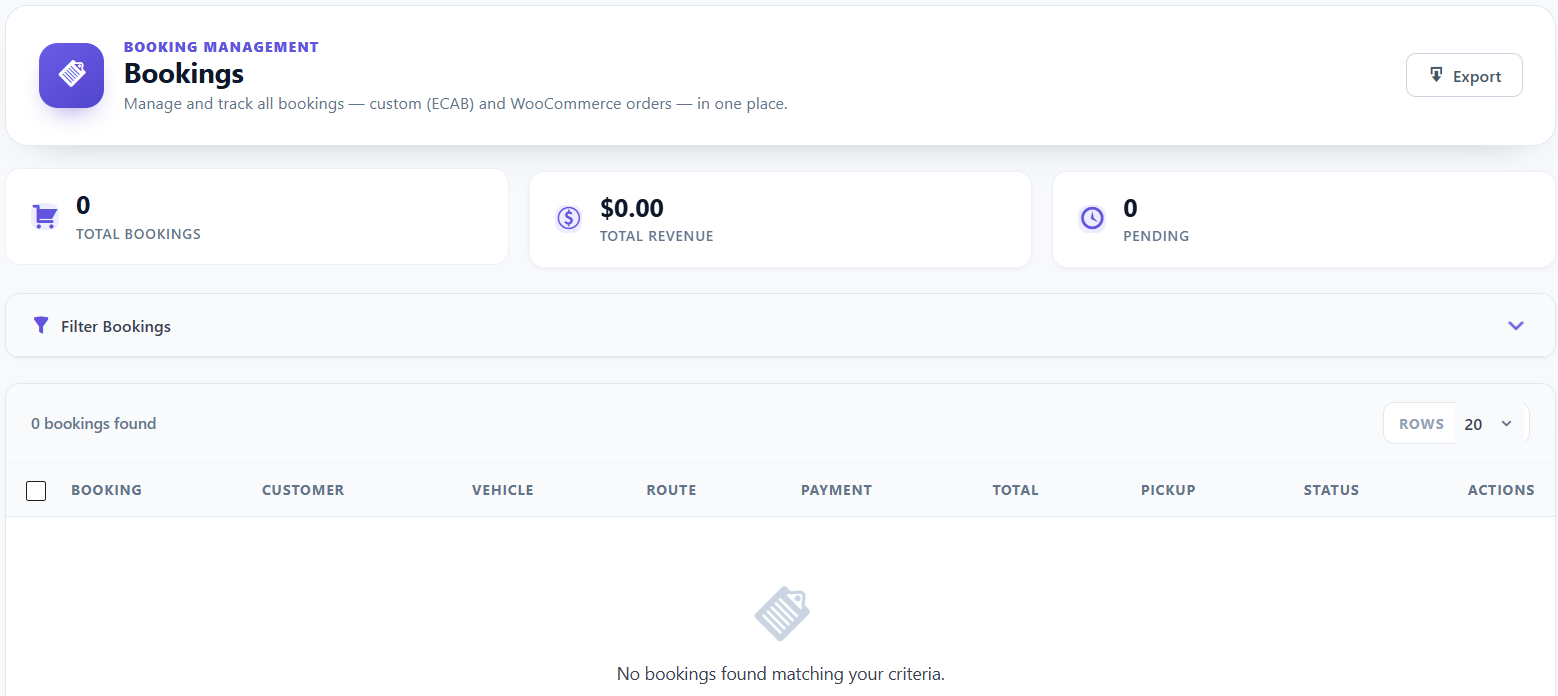
State the free-cancellation window clearly, for example, “free until the driver is assigned.” Publish it on the booking page, not just in your terms. Riders who understand the rule complain far less, and your support volume drops accordingly.
10. Load enough content that the site looks alive
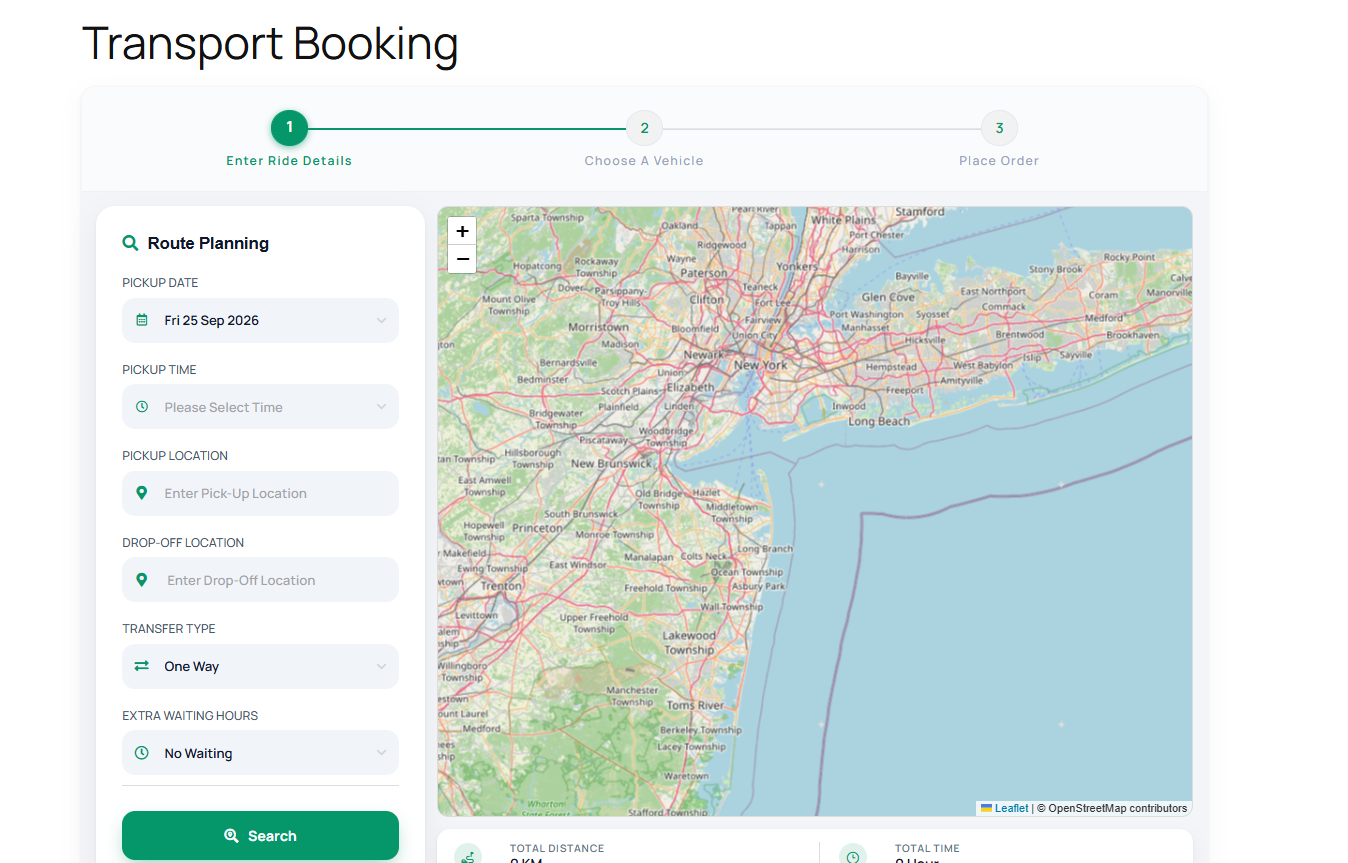
Minimum viable content: a completed fleet page, a fare or estimate page, a driver recruitment page, contact details with real hours, and a privacy page. Search engines and first-time visitors both judge a site within seconds, and empty pages read as abandoned.
11. Run the full end-to-end booking test
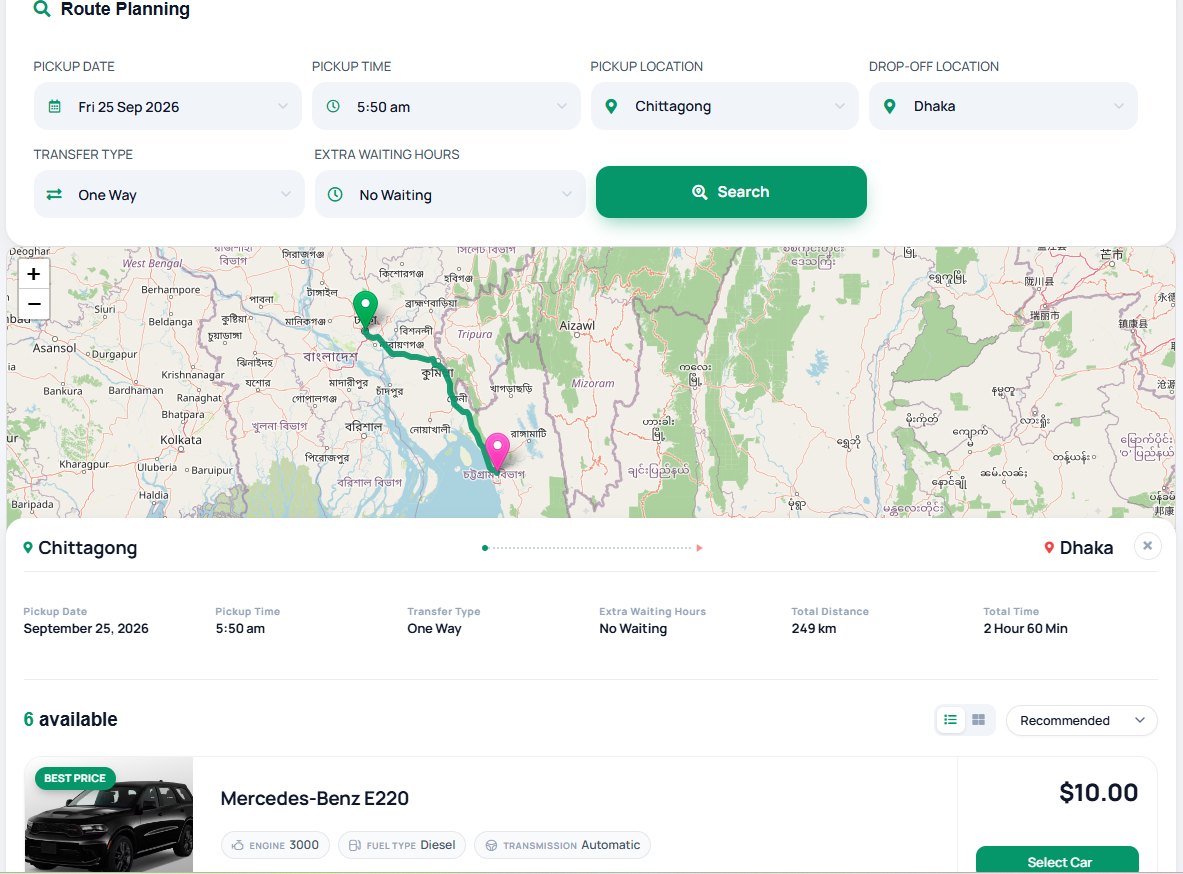
One person books as a guest, another books as a registered user, a third cancels mid-flow. A driver accepts, completes, and marks the job done. You then verify the payout record. If any link breaks, fix it and run the whole chain again; partial tests hide integration faults. eCab’s System Diagnostics panel is worth checking at this stage too, since it flags environment-level issues (server or configuration problems) that could quietly break a booking flow without an obvious error message.
12. Instrument your launch week
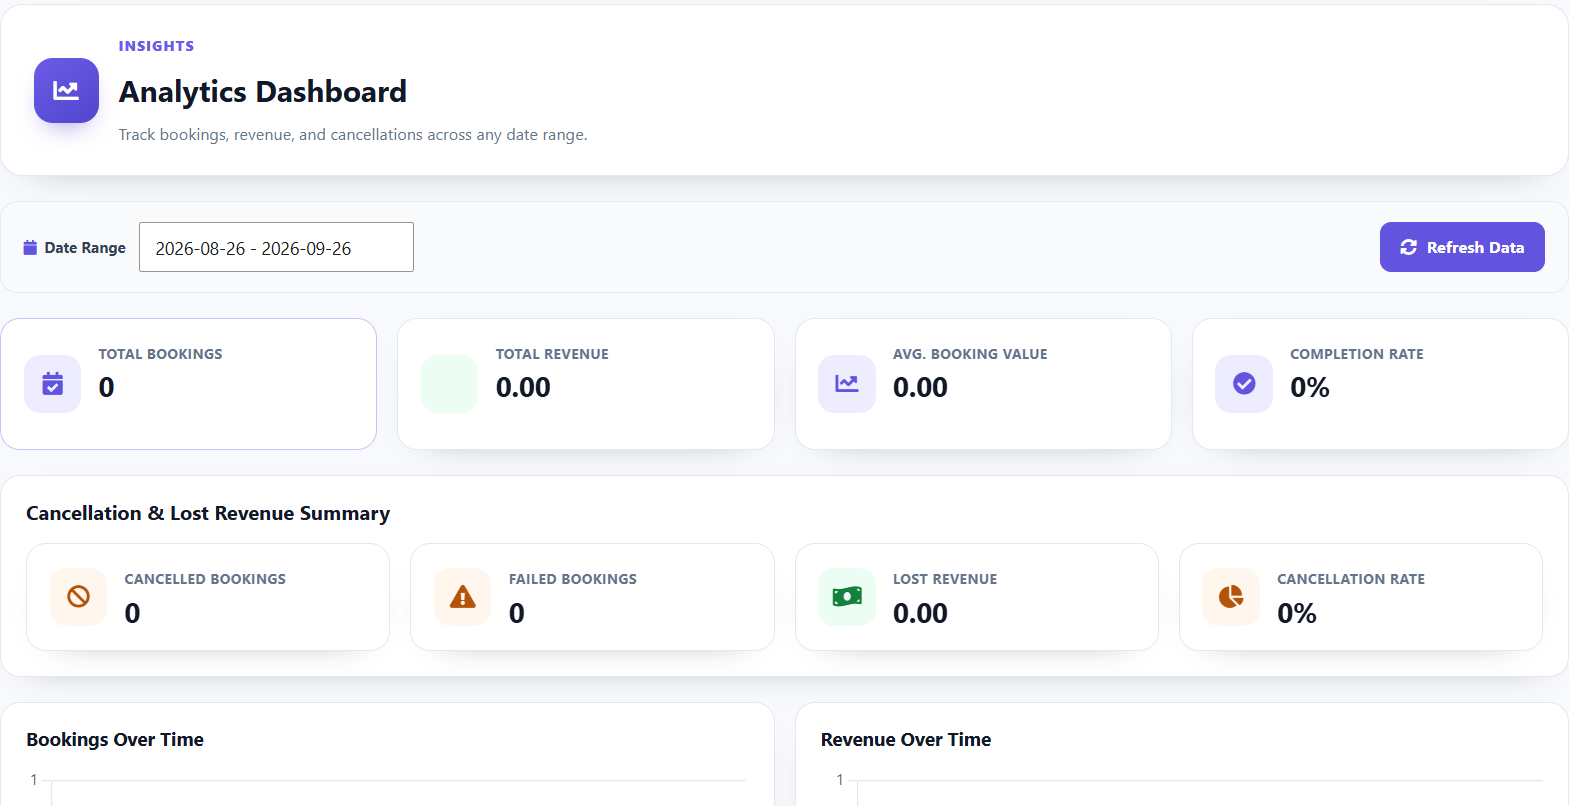
Add analytics and pick three numbers to watch daily: booking attempts, completed bookings, and driver acceptance rate. A gap between attempts and completions usually means the fare is confusing. A low acceptance rate means driver payouts or job alerts are wrong.
Common eCab Taxi Configuration Mistakes to Avoid
| Mistake | What it breaks | Fix |
|---|---|---|
| Overlapping operation areas | Ambiguous or duplicated fares | Redraw boundaries with a map open and test five addresses per edge |
| Pricing tiers with no vehicles assigned | Bookings that no driver can accept | Hide or delete empty categories before launch |
| Surcharges added after payment | Disputes and refund requests | Show every charge in the pre-payment summary |
| Drivers with no clear payout process | Completed jobs that cannot be settled cleanly | Confirm and document the payout method before onboarding, even outside the platform if needed |
| Testing with admin accounts only | Faults invisible until real users arrive | Test with a fresh guest account on a phone |
Where to Go After the Basics Work
Once bookings flow reliably, the next gains come from flexibility rather than configuration: scheduling, airport-specific flows, loyalty, and reporting. Our roundup of the top add-ons to use with eCab covers that layer, and it is a different exercise from the launch setup above. If you are instead still deciding whether this platform is the right foundation at all, the complete eCab review covers positioning and suitability rather than implementation.
Note that exact pricing, licence tiers, and feature availability change between releases. Check current pricing on the vendor’s site and confirm the version you are running before you commit to a configuration decision.
To explore all the major features of eCab taxi, get eCab taxi PRO from MagePeople.
Frequently Asked Questions
How long does a full eCab taxi setup take?
For a single-operator site with a small fleet, most of the work is decision-making rather than configuration: pricing rules, zones, and driver agreements. Budget a few working days, including the end-to-end test, and longer if you need to onboard partner fleets or confirm commission handling.
Do I need zone pricing if I only serve one city?
Not necessarily. A single operation area with distance-based tiers is often simpler and easier for riders to understand. Fixed zone pricing pays off when you serve defined corridors, airports, or intercity routes where customers expect a locked fare. eCab’s intercity route pair configuration is built specifically for that case.
What should I check first if rides are being booked but not completed?
Look at driver acceptance and job alerts first, then pricing tiers. If alerts reach drivers but jobs go unaccepted, the problem is usually payout terms or commission visibility. If pricing tiers exist with no vehicle assigned, the job never reaches a driver at all.
Can I change my fare rules after launch?
You can, but announce it first and change one variable at a time. Riders tolerate price changes far better when they see the new fare before paying rather than on the receipt.
Final Thoughts on the eCab Taxi Setup
Most failed taxi website launches are not software failures; they are sequencing failures. Configure zones before pricing, pricing before drivers, and drivers before payments, then prove the whole chain with a real booking from a phone you have never used before. Get those twelve items right and launch week becomes a matter of response times rather than damage control.