 Get Halloween 15% for Limited Time on Lifetime & Bundle Deal

Hosts often lose direct bookings because guests land on a page that shows photos but cannot check availability or pay. This guide shows you exactly how to create a vacation rental website with WordPress in 2026, using WpRently to build property listings, nightly and seasonal pricing, availability calendars, extras and WooCommerce checkout — without a developer.
Vacation rentals are self-contained properties — villas, cottages, condos or apartments — rented to guests for anything from one night to several weeks. They compete with hotels on space, privacy and a kitchen, and guests expect to book them the same way they book a hotel room: instantly, on a phone, with a card.
That is the gap a WordPress vacation rental site fills. Instead of paying commission on every reservation through a marketplace, you own the booking flow, the guest data and the relationship. Here is how to build it properly.
- Why Build Your Own Vacation Rental Website Instead of Relying on Listing Platforms
- What a WordPress Vacation Rental Plugin Must Do
- Step-by-Step: Create a Vacation Rental Website with WpRently
- Vacation Rental SEO and Conversion Settings Worth Getting Right
- Common Vacation Rental Website Mistakes to Avoid
- Frequently Asked Questions
- Wrapping Up
Why Build Your Own Vacation Rental Website Instead of Relying on Listing Platforms
Marketplace listings are useful for discovery, but they are a rented audience. A website you control gives you:
- Direct bookings with no per-booking commission eating into your margin.
- Guest ownership — email addresses and booking history you can market to again.
- Flexible pricing — peak season, weekend and long-stay rates set exactly how you want them.
- Your own rules — deposits, minimum stays, pet policies and check-in times in your own words.
- A brand that travellers can search for and remember, rather than a row in someone else’s search results.
Most successful hosts run both: a marketplace profile for reach, and a WordPress site that converts repeat guests and direct traffic at a lower cost per booking.
What a WordPress Vacation Rental Plugin Must Do
Before installing anything, use this checklist. If a plugin misses two or three of these, you will be bolting on extra tools later.
- Date-based booking form: guests pick check-in and check-out dates, guest count and extras in one flow.
- Availability calendar: booked, available and blocked dates shown clearly so two guests can never reserve the same night.
- Flexible pricing: nightly, weekly and monthly rates, plus seasonal or event-based pricing tiers.
- Rich property pages: galleries, amenities, house rules and FAQs per listing.
- Extra services: paid add-ons such as airport pickup, breakfast or bike hire.
- Payments: WooCommerce checkout with Stripe, PayPal or local gateways, plus optional security deposits.
- Automated notifications: booking confirmations, reminders and check-in instructions sent without manual work.
- Order and inventory management: a single dashboard showing what is booked and what is still free.
If you are still evaluating options and want a side-by-side breakdown of pricing models, the best vacation rental booking plugin comparison walks through the field before you commit. And if you need the wider picture of what can be rented profitably — from vacation homes to party supplies — the 25 best rental business ideas with WpRently covers more than twenty niches you can launch with the same setup.
Step-by-Step: Create a Vacation Rental Website with WpRently
WpRently is a WooCommerce-powered booking and rental manager. It handles single-night stays and multi-night stays from the same dashboard, and every booking becomes a WooCommerce order, so taxes, coupons and refunds use tools you already know.
Step 1: Install WpRently
From your WordPress dashboard go to Plugins > Add New Plugin and search for “resort”. The WpRently booking and rental manager for WooCommerce appears in the top results. Click Install Now, then Activate. WooCommerce must be installed and active first, since it powers checkout.

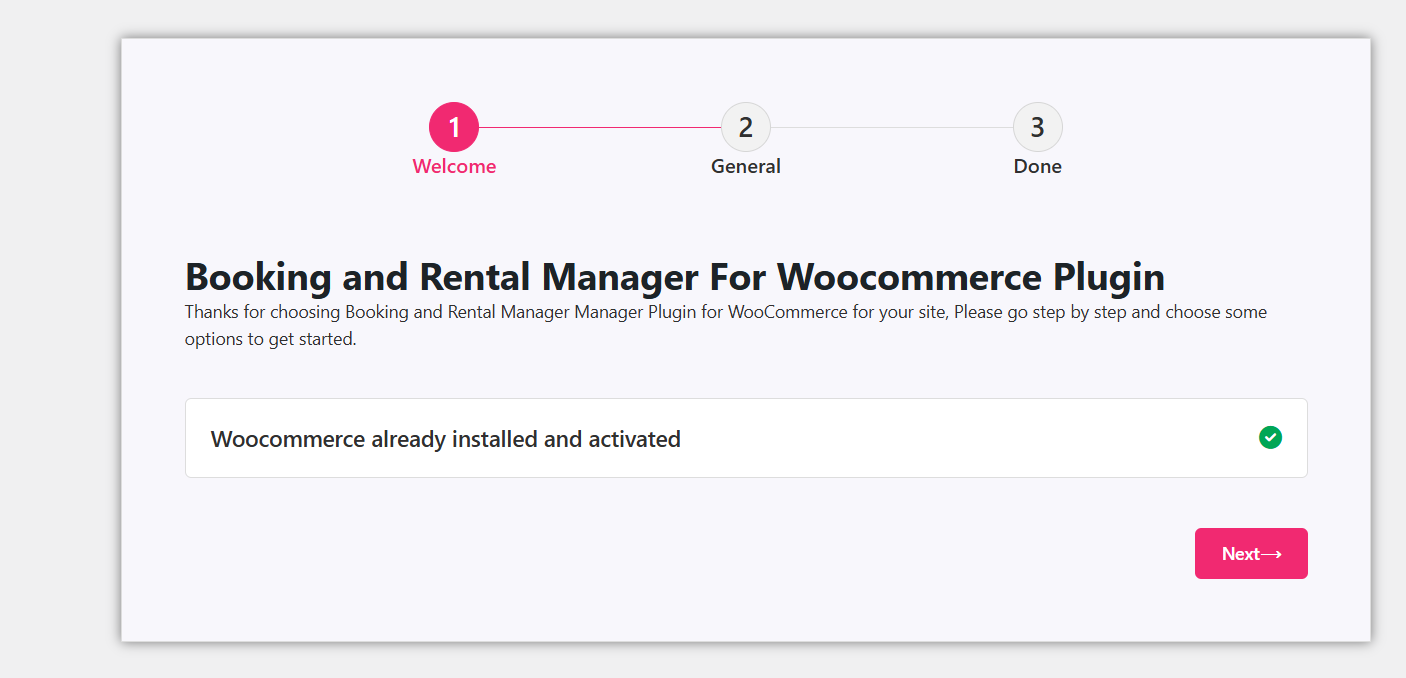
Step 2: Run the Setup Wizard
The setup wizard opens automatically. Work through it and decide three things up front:
- Labels and slugs — how listings are named in the URL, for example /vacation-rentals/seaside-cottage/.
- Payment processors — connect Stripe or PayPal and confirm which currency you are selling in.
- Pages — let the wizard create the listing archive and booking pages rather than building them manually.
You can change any of these later, but getting the slug right early saves you a redirect headache once the site is indexed.
Step 3: Manage Your Rental Listings
Go to Rent Item > All Items in the dashboard. WpRently ships with pre-built starter listings so you can see a working example before you build your own:
- Single-night rental (Classic or Muffin template) — a compact daily-rate form.
- Multi-night rental (Muffin template) — built for stays that span several nights with date-range pricing.
Duplicate the template closest to your property type and edit the copy rather than starting from a blank item.

Step 4: Add the Property Title and Description
Write the listing the way a guest reads it, not the way an agent writes it. Lead with the single strongest selling point, then cover the practical detail people filter on: number of bedrooms, sleeping capacity, bathrooms, distance to the nearest beach or town, and whether parking is included.
Keep the description scannable. A short opening paragraph followed by a bulleted amenity list converts better than three dense paragraphs, because most guests are reading on a phone.

Step 5: Adjust Every Listing Detail
This is where a vacation rental listing differs most from a simple rental item. Work through the tabs in order:
- Title and description — for example, “Seaside Cottage with Ocean Views”.
- Category — assign one under General Settings, such as “Beachfront” or “Mountain Retreat”.
- Features — add items like “Private Deck” or “Fireplace” using Add New Feature Category so guests can compare properties.
- Pricing — set the nightly rate, availability and quantity in the Pricing tab. Add a weekly or monthly rate if you want longer stays to be cheaper per night.
- Date & Time — define check-in and check-out times, then block dates in Off Days for maintenance or owner use.
- Tax — apply taxes through WooCommerce so local tourist or occupancy taxes are calculated at checkout.
- Extras — add paid add-ons such as bike rental or a breakfast package, each with an image and short description.
- Gallery — upload photography that shows the property in daylight, at night and from the guest’s arrival point.
- Related rentals — use the dropdown to cross-sell other homes in the same area.
- FAQs — answer the questions that generate support emails, such as “Are pets allowed?”, using Add New FAQ.
- Security Deposit — set a percentage or fixed amount to protect the property.
- Featured image — choose the hero shot, then save.


Two settings are worth slow, careful attention. First, the availability calendar: any date you forget to block can be sold twice, and cancelling on a guest is far more expensive than a blocked night. Second, the security deposit — pick an amount that is meaningful but not so high it kills conversion, and state the refund conditions in the listing.
Step 6: Review the Front-End Booking Experience
Open the listing on the live site and book it yourself. On the Classic template a guest selects dates and times, adds any extras, sees the price breakdown, clicks Book Now, and completes payment in the WooCommerce cart. An automated confirmation email goes out on success.
Test it on a real phone, not just a desktop browser. Check that the date picker is easy to tap, that the price breakdown is visible before checkout, and that you receive both the guest email and the admin notification. Fix anything confusing here — this is the page that earns your revenue.

Step 7: Manage Bookings Day to Day
All reservations arrive in the Order List and Inventory List inside your dashboard. Use the order list for payment status and refunds, and the inventory list to see at a glance which properties are occupied on which nights. For turnover, sync your cleaning schedule with the check-out dates shown there.
Vacation Rental SEO and Conversion Settings Worth Getting Right
Once the booking flow works, these are the improvements with the highest return:
- One page per property with a keyworded title. Use the pattern “vacation rental in [location]” or “[property type] in [location]” naturally in the page title, description and first paragraph.
- Photo quality over quantity. Twenty sharp daylight photos outperform sixty dim ones. Use the gallery for volume and the featured image for the single best shot.
- A visible Book Now on every screen. Guests decide fast; keep the action button reachable without scrolling on mobile.
- Reviews on the listing. Collect them after checkout and display them beside the booking form, where doubt appears.
- Mobile-first layout. Most searches and a large share of bookings happen on a phone.
- Internal linking. Link neighbouring properties to each other so guests browsing one listing discover the rest of your portfolio.
The practical details of the booking software matter here too. If you want to operate more than one rental category — say, cars alongside holiday homes — see the guide to setting up a car rental website with the same WooCommerce foundation.
Common Vacation Rental Website Mistakes to Avoid
- Publishing rates without seasons. A single flat nightly rate leaves money on the table in peak weeks and prices you out in the off-season.
- Hidden fees at checkout. Show cleaning fees, taxes and deposits in the price breakdown so the final total does not surprise the guest.
- Ignoring the calendar. Unblocked dates lead to double bookings and cancellations that damage your ratings.
- No cancellation policy on the page. State it clearly before payment to reduce disputes.
- Building pages before settings. Decide slugs, currency and taxes in the setup wizard rather than after you have launched.
Frequently Asked Questions
How do I turn my home into a vacation rental?
Furnish it with the essentials guests expect — beds, linens, kitchenware, Wi-Fi and a smart TV — then check local permits and safety requirements before your first booking. Photograph it, write the listing in WpRently, set rates and availability, and publish. You can list on marketplaces for reach at the same time as taking direct bookings on your own site.
Can I start a vacation rental with little or no money?
Yes. Use a property you already own, or manage other owners’ units for a commission so you are not carrying the mortgage. A WordPress site with WpRently keeps software costs low, and organic social content can replace paid advertising while you build reviews.
Are vacation rentals a good investment?
They can be, particularly in high-demand tourist or coastal areas, but profitability depends on location, purchase or lease cost, occupancy and operating expenses including maintenance, taxes and marketing. Research occupancy rates and realistic ROI in your specific market before committing capital.
How much can I charge per night?
Benchmark comparable properties in your area, then adjust for season, weekend demand, capacity and amenities. Rather than publishing one number, set seasonal tiers in WpRently’s Pricing tab and review them each quarter.
Do I still need Airbnb or Vrbo?
Not necessarily, but most hosts keep a marketplace presence for discovery and drive repeat guests to their own site for commission-free direct bookings. Both can run side by side; you simply block the dates you sell directly.
Wrapping Up
You now have the complete path to create a vacation rental website with WordPress in 2026: install WpRently, run the setup wizard, build and configure each property listing, set pricing and availability, test the guest checkout, and manage reservations from one WooCommerce dashboard. Because the booking system sits on WordPress, you keep full control of design, guest data and revenue — no per-booking commission and no marketplace deciding how your properties are presented.
Start with a single listing, get the photos and pricing right, and add properties and extras once the first bookings arrive.
