 Get Halloween 15% for Limited Time on Lifetime & Bundle Deal

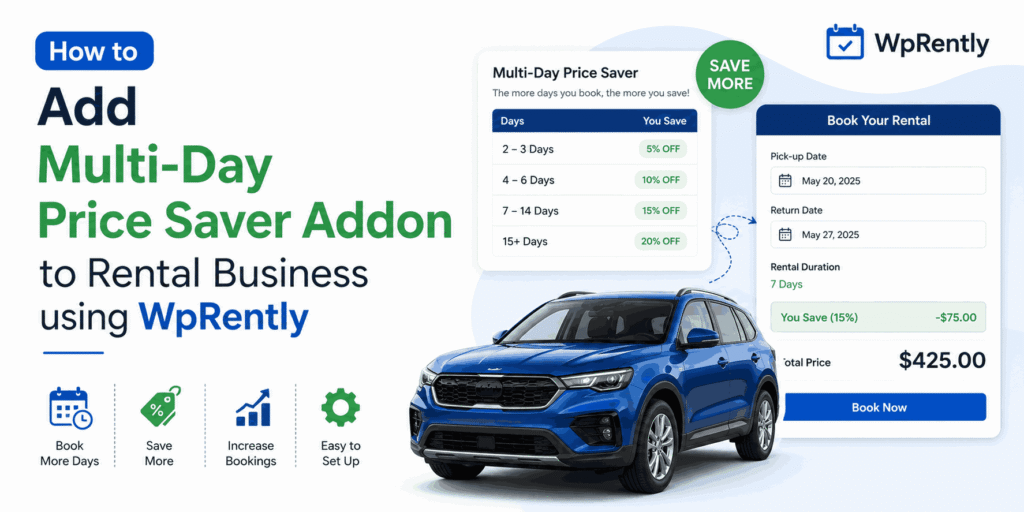
Adding the Multi-Day Price Saver addon to a WpRently rental business takes about 30 minutes: install and activate the plugin, open a rent item, add day-range tiers under Pricing > Multi-Day Saver, then place a test booking to confirm the discounted rate is applied from the correct day. This guide walks through every click, shows where the setup usually breaks, and explains how to choose tier breakpoints that actually raise revenue instead of just cutting your margin.
It assumes you already have WordPress, WooCommerce and the free WpRently core plugin running. If you have not built the rental site yet, start with this walkthrough on creating a vacation rental website with WordPress and come back once a rent item is published.
- What the Multi-Day Price Saver Addon Actually Does
- Before You Start: Requirements and Setup Checklist
- Why Tiered Multi-Day Pricing Is Worth Setting Up
- Where This Fits in Your WpRently Setup
- Step-by-Step: Installing the Multi-Day Price Saver Addon
- Getting the Most From Multi-Day Pricing
- Where the Multi-Day Price Saver Addon Is Not the Right Fit
- Try the Addon on Your Own Rentals
- Frequently Asked Questions
What the Multi-Day Price Saver Addon Actually Does
WpRently handles the calendar, availability, booking form and WooCommerce checkout. The Multi-Day Price Saver addon sits on top of one rent item and changes the rate based on how many days the customer books.
You define a base daily rate, then add tiers expressed as day ranges:
- Day 1 — full price (your base daily rate).
- Days 2–5 — a lower daily rate applied only to those days.
- Days 6–10 — a lower rate again, applied only to that window.
A customer booking seven days therefore pays full price for day one, the tier-two rate for days two to five, and the tier-three rate for days six and seven. The frontend date picker calculates the day count and the final total updates live before the customer reaches WooCommerce checkout. Nothing is quoted manually and no discount code is needed.
This is deliberately different from a site-wide seasonal adjustment. The addon changes pricing based on booking length, per item — a short weekend hire still pays the premium daily rate, while a ten-day hire gets progressively cheaper days.
Before You Start: Requirements and Setup Checklist
Work through this list first. Skipping it is the most common cause of a tier that saves correctly in the product editor but never appears on the frontend.
- WordPress running on a server with a current PHP version and HTTPS enabled — the booking form collects customer details at checkout.
- WooCommerce installed and configured with a payment gateway and a shipping/tax setup that suits rentals.
- WpRently core installed and activated. The addon is an extension and will not run on its own.
- At least one published rent item with a base daily rate, stock quantity and store hours set.
- Your addon licence key, plus the plugin ZIP downloaded from your MagePeople account dashboard.
- A staging site or a low-traffic window, so you can test pricing without a live customer seeing a wrong total.
Why Tiered Multi-Day Pricing Is Worth Setting Up
Every rental business has two costs that don’t scale with booking length: the turnaround between hires (cleaning, inspection, refuelling, re-listing) and the marketing spend needed to acquire one new customer. A five-day booking absorbs that overhead once, not five times. Longer hires also lock in future availability during dates you would otherwise be trying to fill.
The trade-off is real, though: a discount applied too early or too steeply simply moves revenue you already had into the customer’s pocket. The tiers below are designed around that tension.
Designing tiers that keep their value
- Protect the first day. Day one is your highest-value day. Never discount it — tier ranges should start at day 2 at the earliest.
- Break at natural rental lengths. Match your tiers to how customers already book. If weekends dominate, break at day 3; if corporate hires run a working week, break at day 6.
- Keep each step worth mentioning. A tier that saves a customer very little is noise on the booking page. Make the difference obvious enough to justify a line in the pricing breakdown.
- Check your floor rate. Calculate the lowest per-day rate your tiers can produce and confirm it still covers turnaround costs, wear and your payment fees before publishing.
- Segment by item, not by site. High-demand, fast-depreciating stock can take steeper tiers than premium equipment where high daily margins matter more.
Where This Fits in Your WpRently Setup
An addon is only one part of a working rental site. Pricing rules interact with availability, deposits and delivery, so it helps to know which lever handles which problem before you start configuring.
| Setup piece | What it controls | When you need it | Cost |
|---|---|---|---|
| WpRently core plugin | Rent items, booking calendar, availability, order flow in WooCommerce | Always — the addon cannot run without it | Free core available |
| Multi-Day Price Saver addon (publisher’s own product) | Day-range tiered rates applied per rent item | When you sell hires of two days or more | Check current pricing |
| Seasonal pricing settings | Date-based rate changes across a season or peak period | When demand shifts by calendar, not by length of hire | Included in core configuration |
| Deposit-related addon | Security holds and part-payments on high-value items | When hire value or damage risk is high | Check current pricing |
| WooCommerce | Cart, taxes, gateways, order emails, reports | Always — required by WpRently | Free, with paid extensions optional |
If your problem is demand that spikes in a particular month rather than customers booking too few days, you want the seasonal route instead — our guide to adding a seasonal price to your rental booking site covers that lever, and the two can run together on the same item.
Step-by-Step: Installing the Multi-Day Price Saver Addon
Have your WpRently core install and at least one rent item ready before you begin.
1. Installation and Activation
Purchase the Multi-Day Price Saver addon for WpRently from the MagePeople store and download the ZIP from your account dashboard. Keep the licence key from the order confirmation email to hand — you will need it to receive updates.
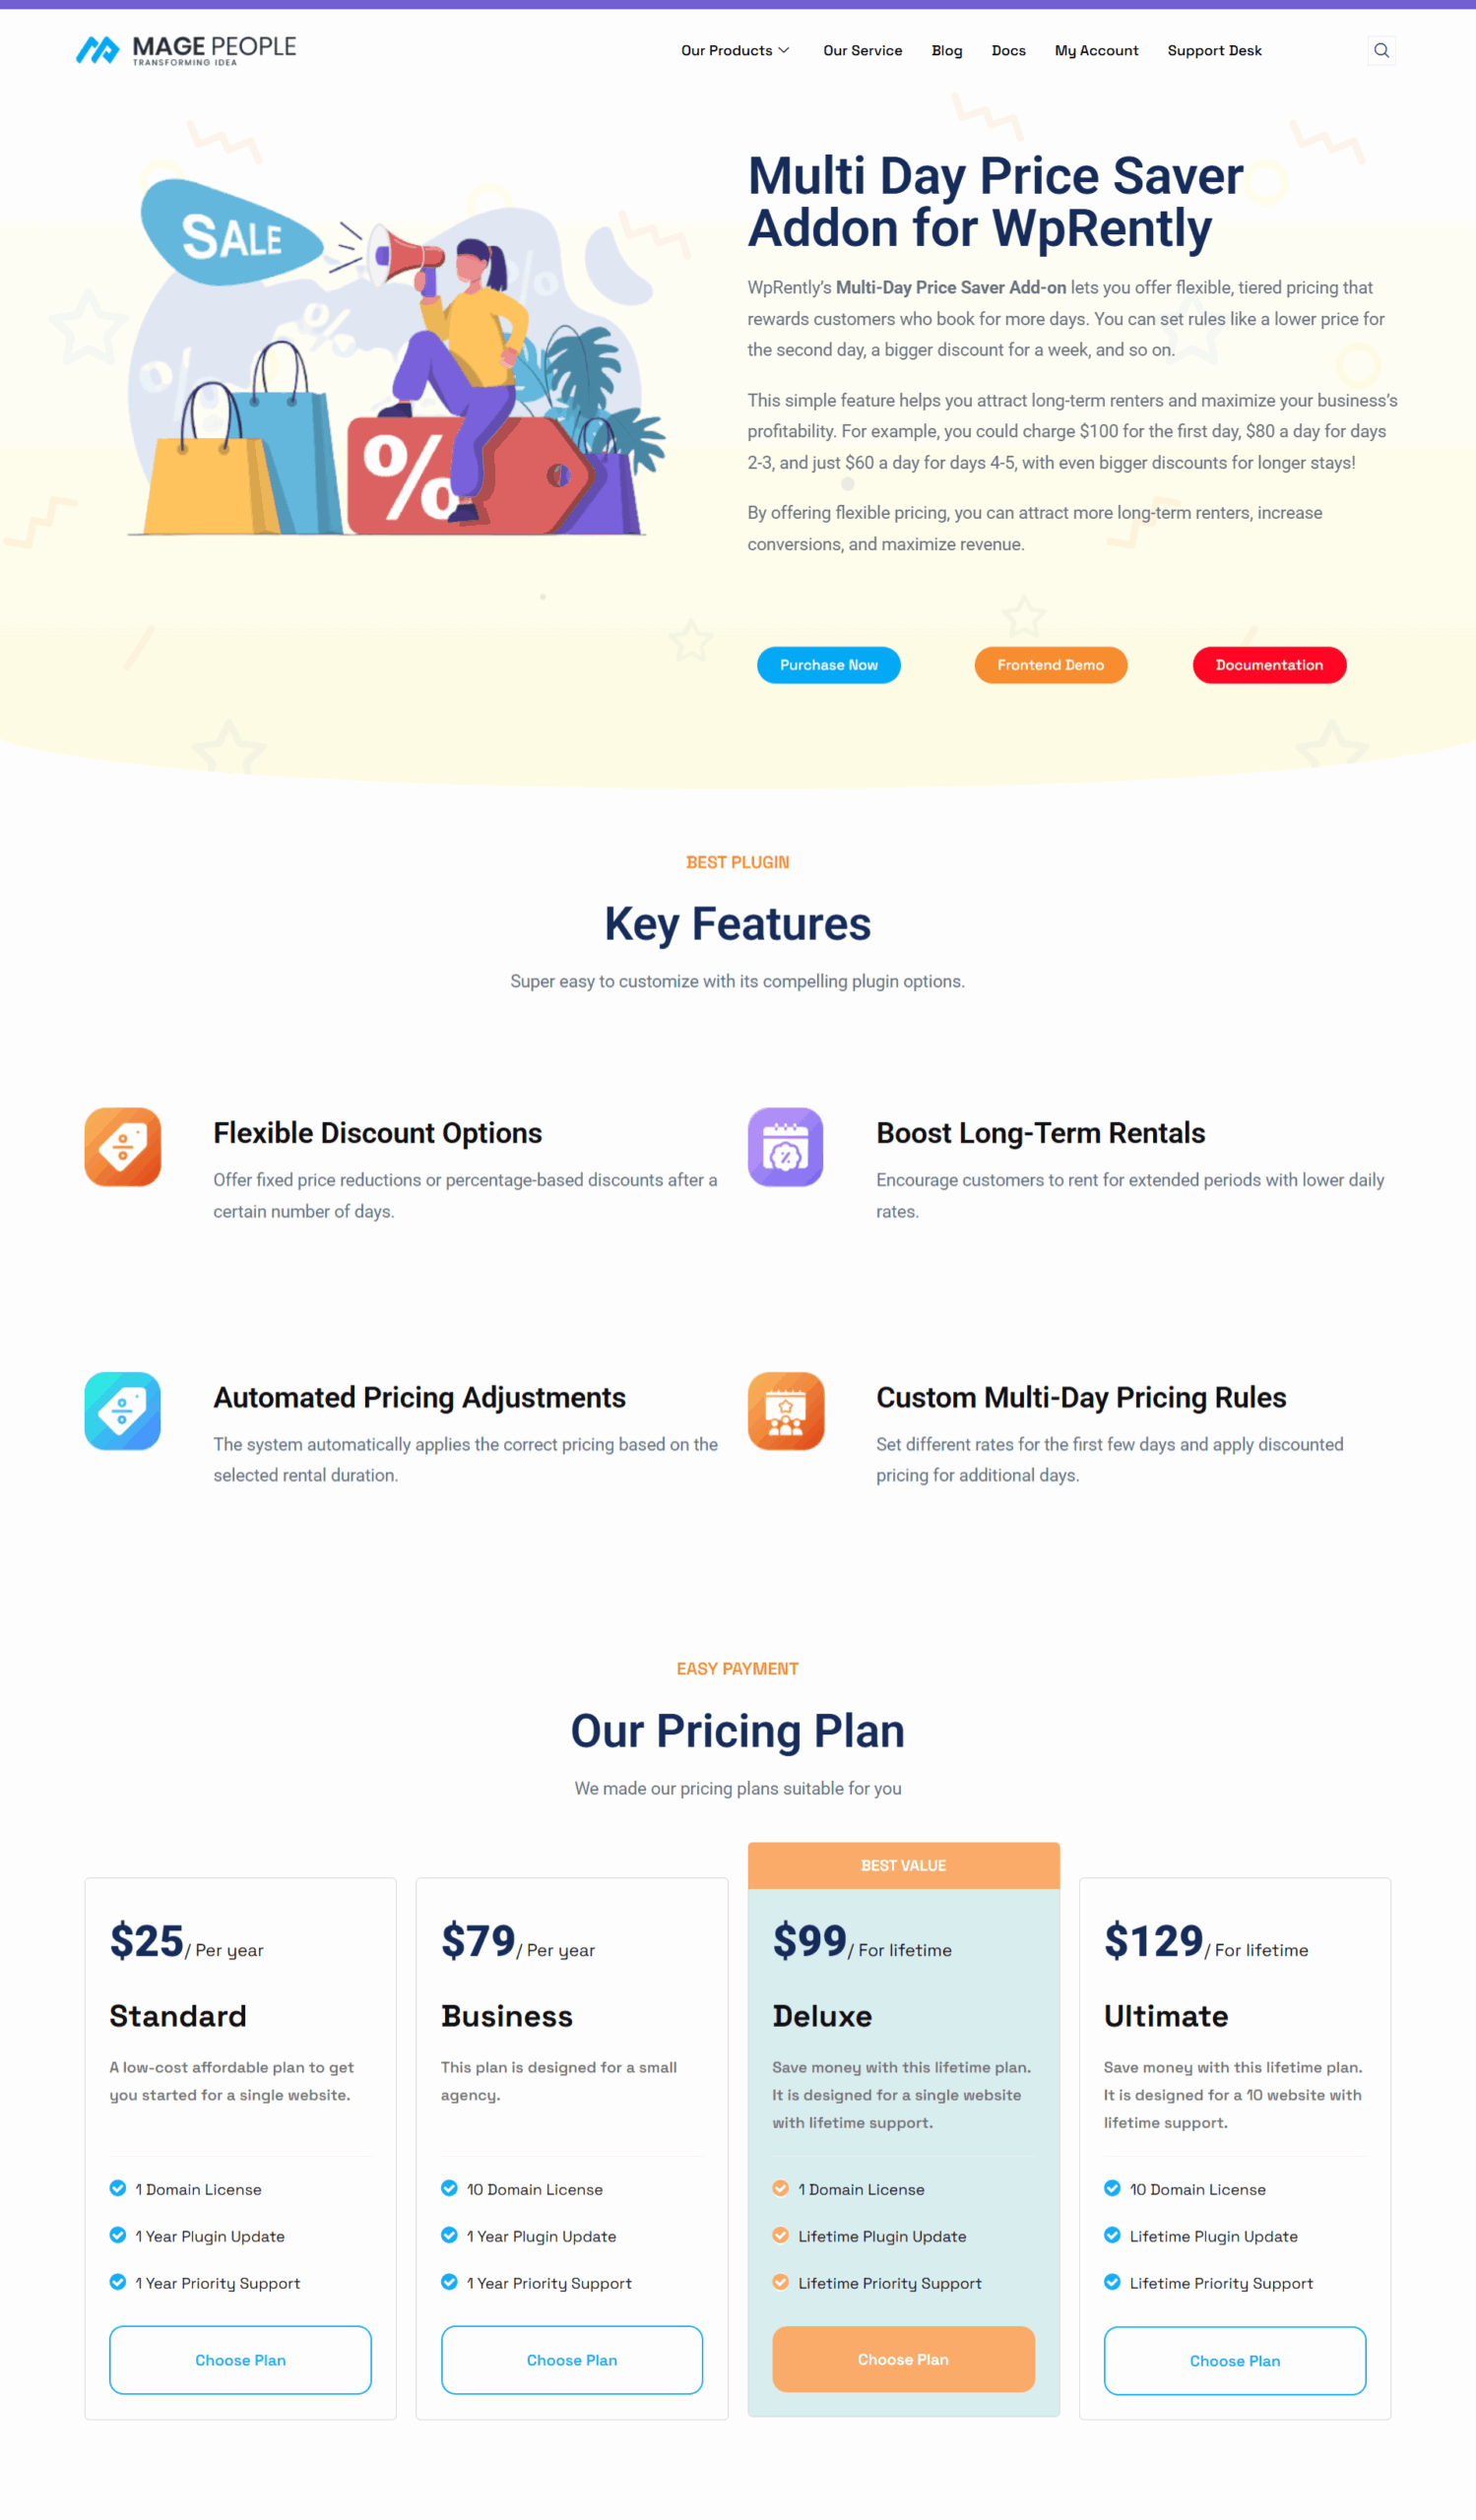
Upload the addon through the standard WordPress plugin installer. The screenshots below show the download step and the upload screen side by side.
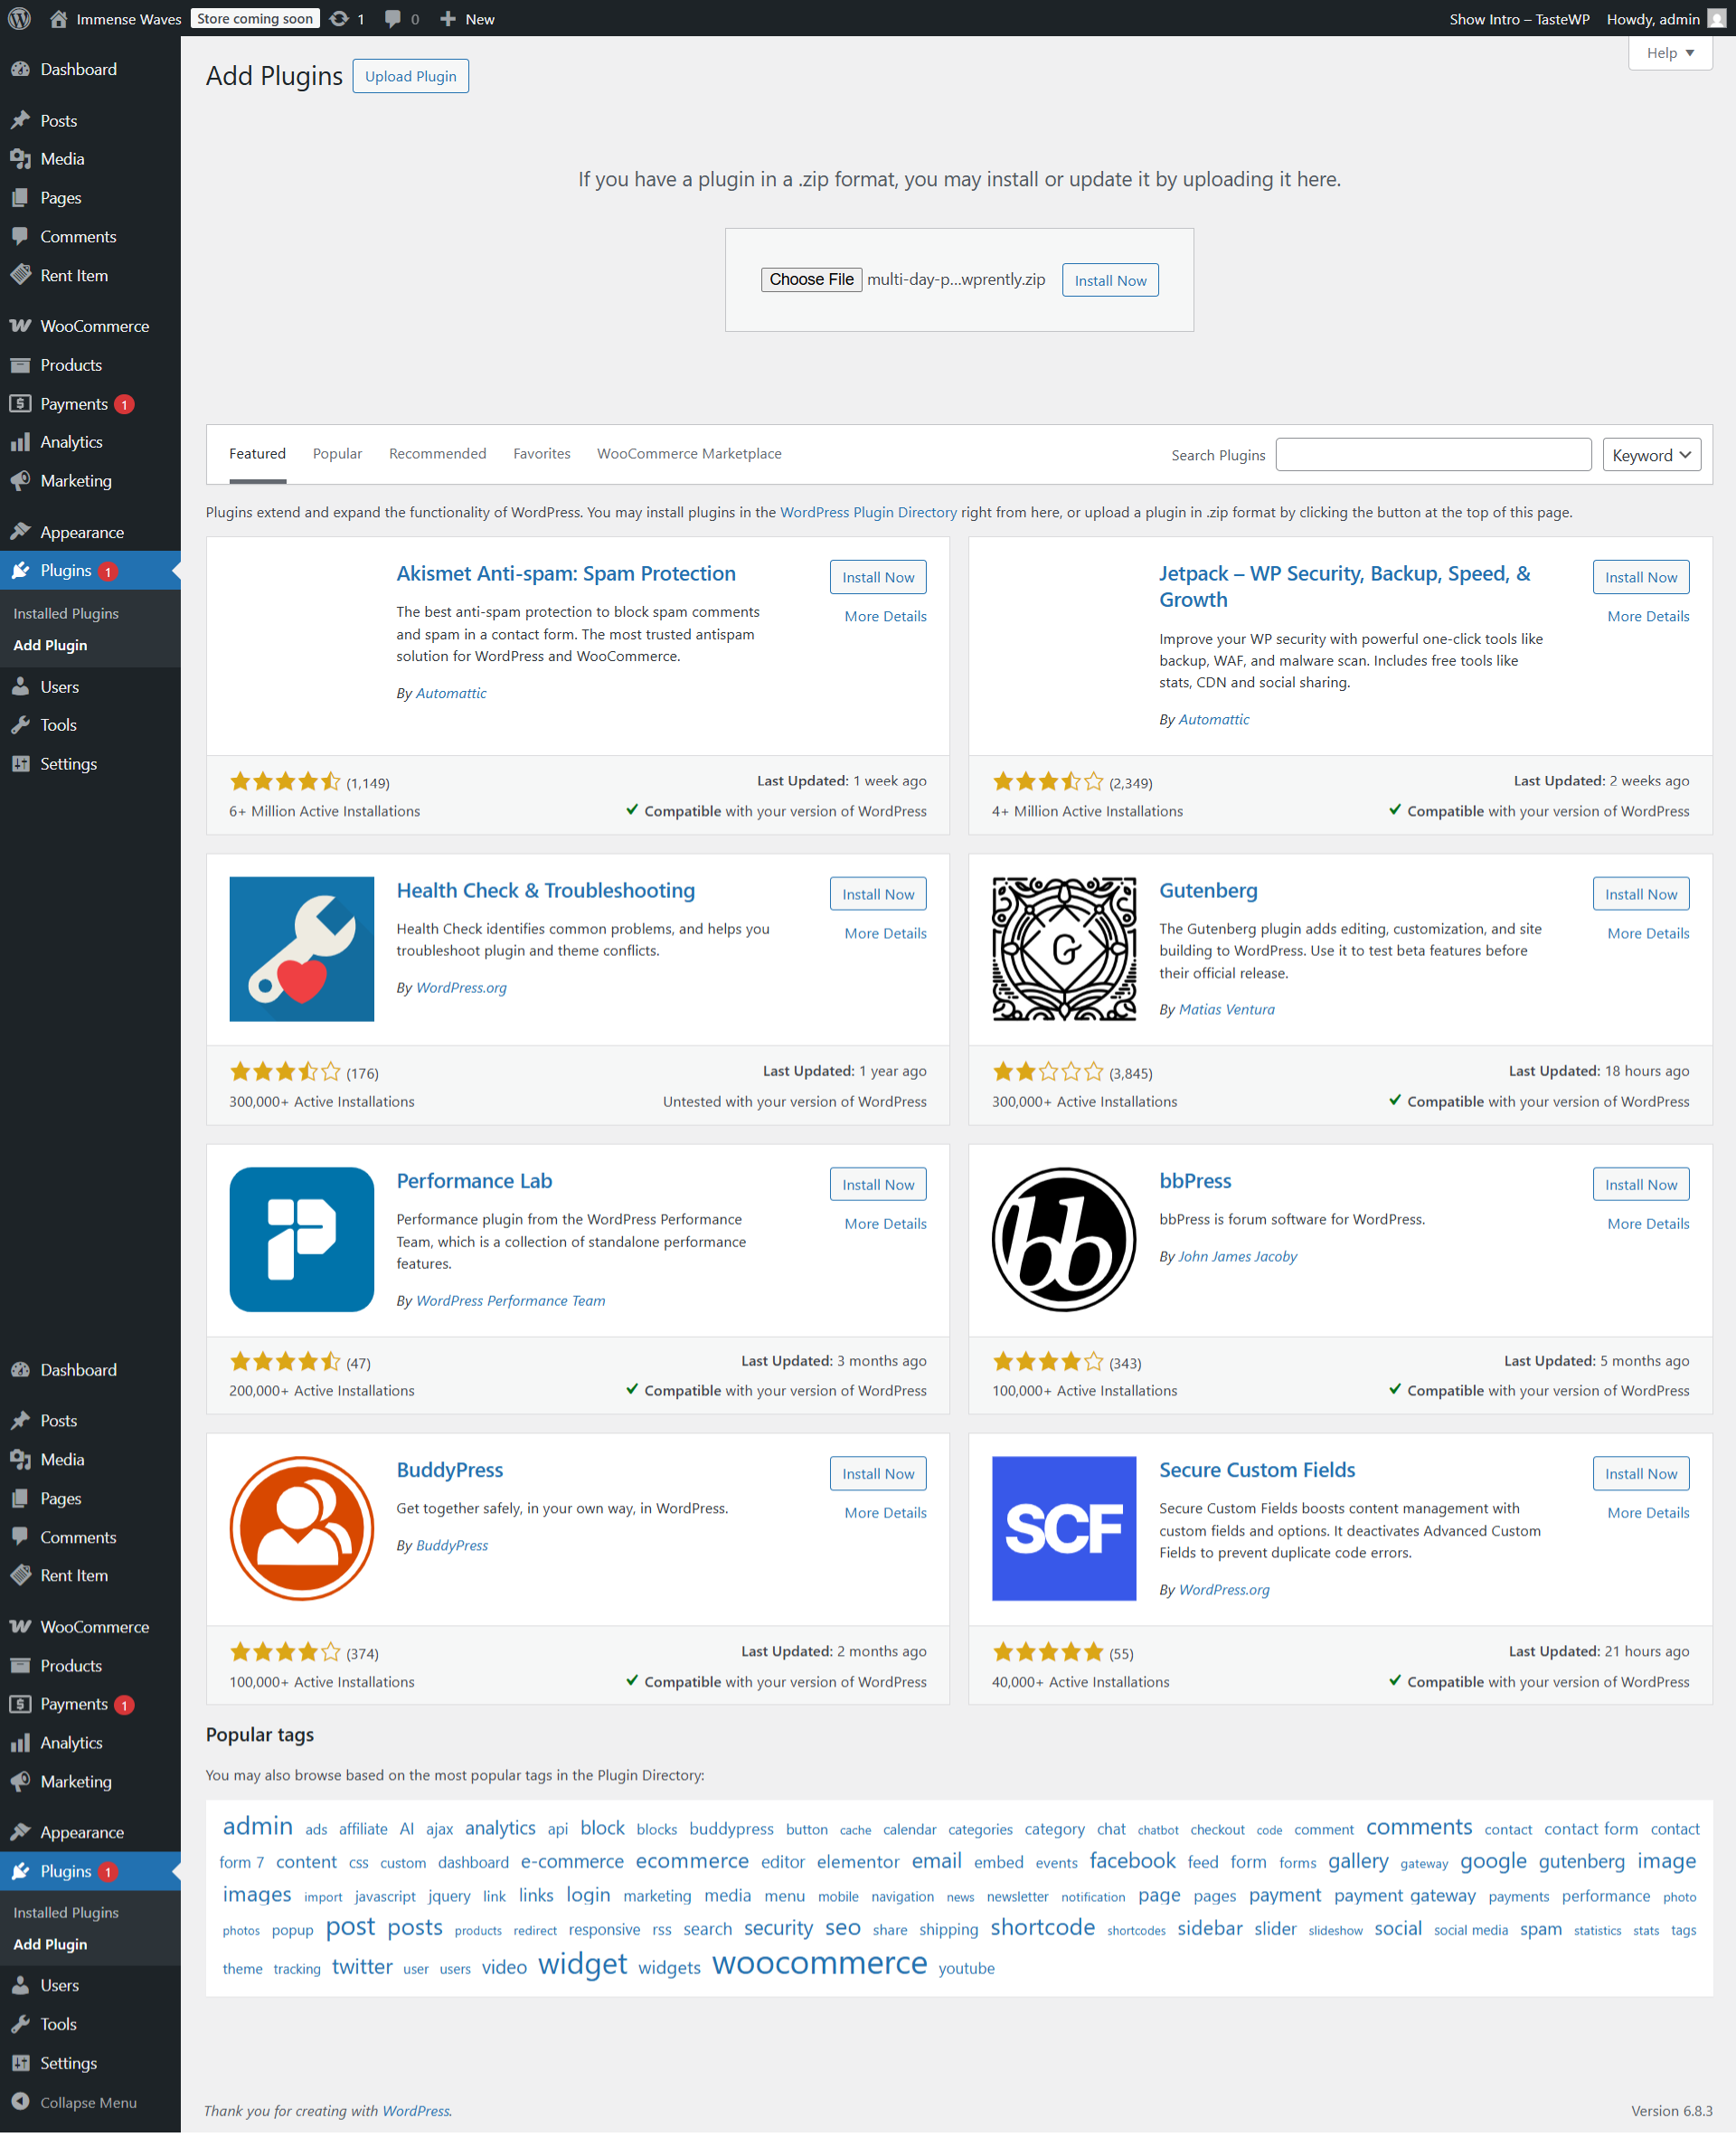
In your WordPress dashboard go to Plugins > Add New > Upload Plugin, choose the addon ZIP file, click Install Now, then Activate Plugin when the install finishes. A licence or activation notice should appear in the WpRently settings area — enter your key there so automatic updates work.
If activation fails: check the ZIP uploaded is the addon package and not the WpRently core plugin, and confirm the core plugin is still active. Deactivating core while the addon is live hides the multi-day settings entirely.
2. Configure Multi-Day Saver
Multi-day tiers are configured per item, so your pricing rules never bleed into the wrong listing.
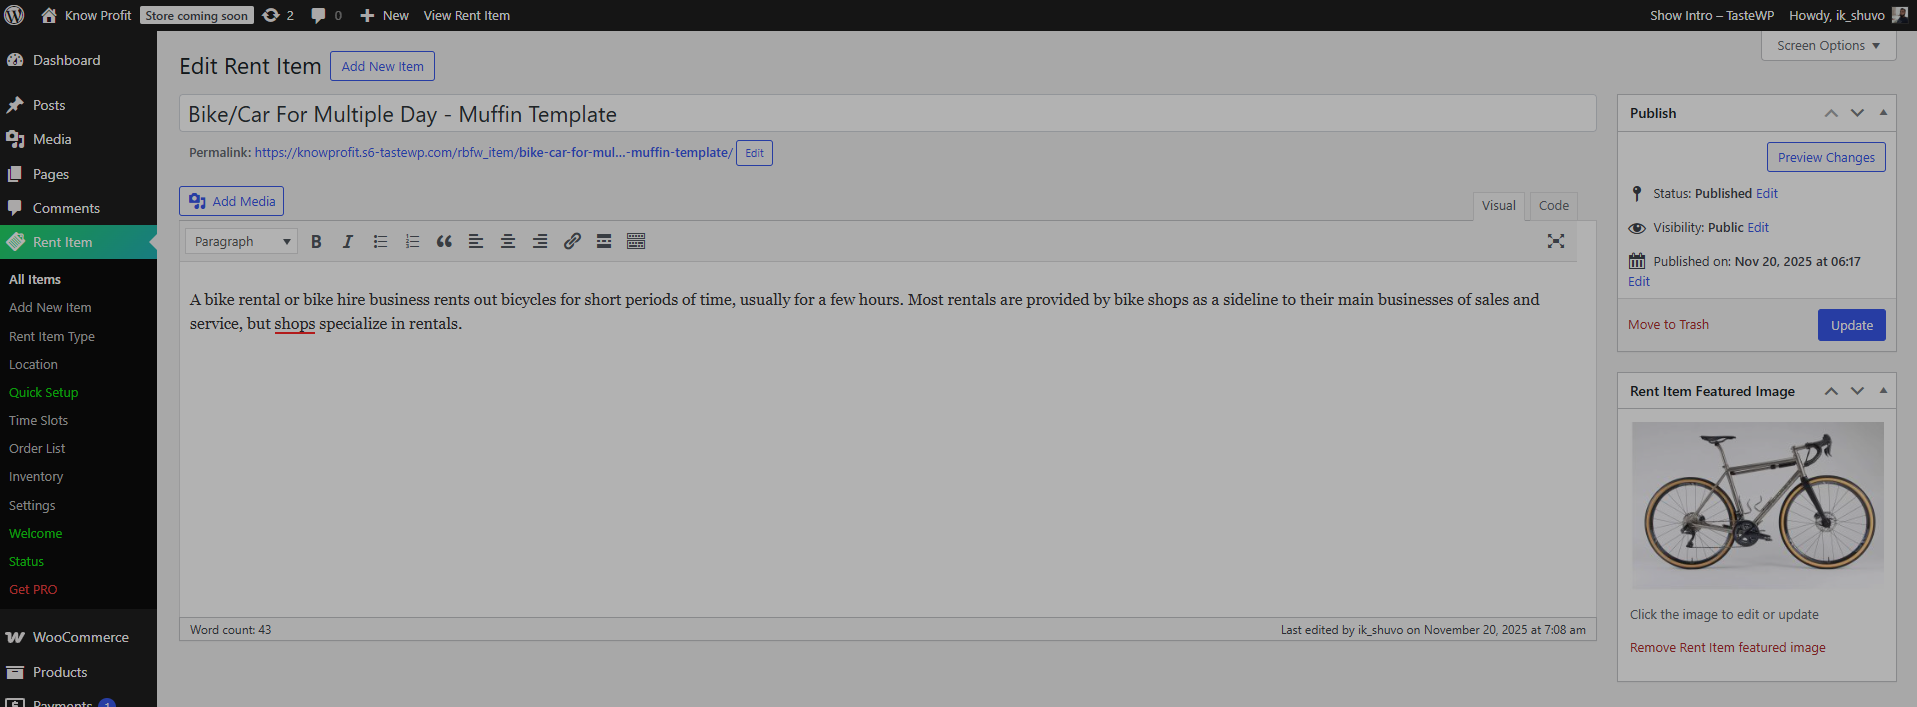
Go to Rent Item > All Items and open the rent item you want to price. The multi-day fields live on that item’s pricing tab, as shown below.
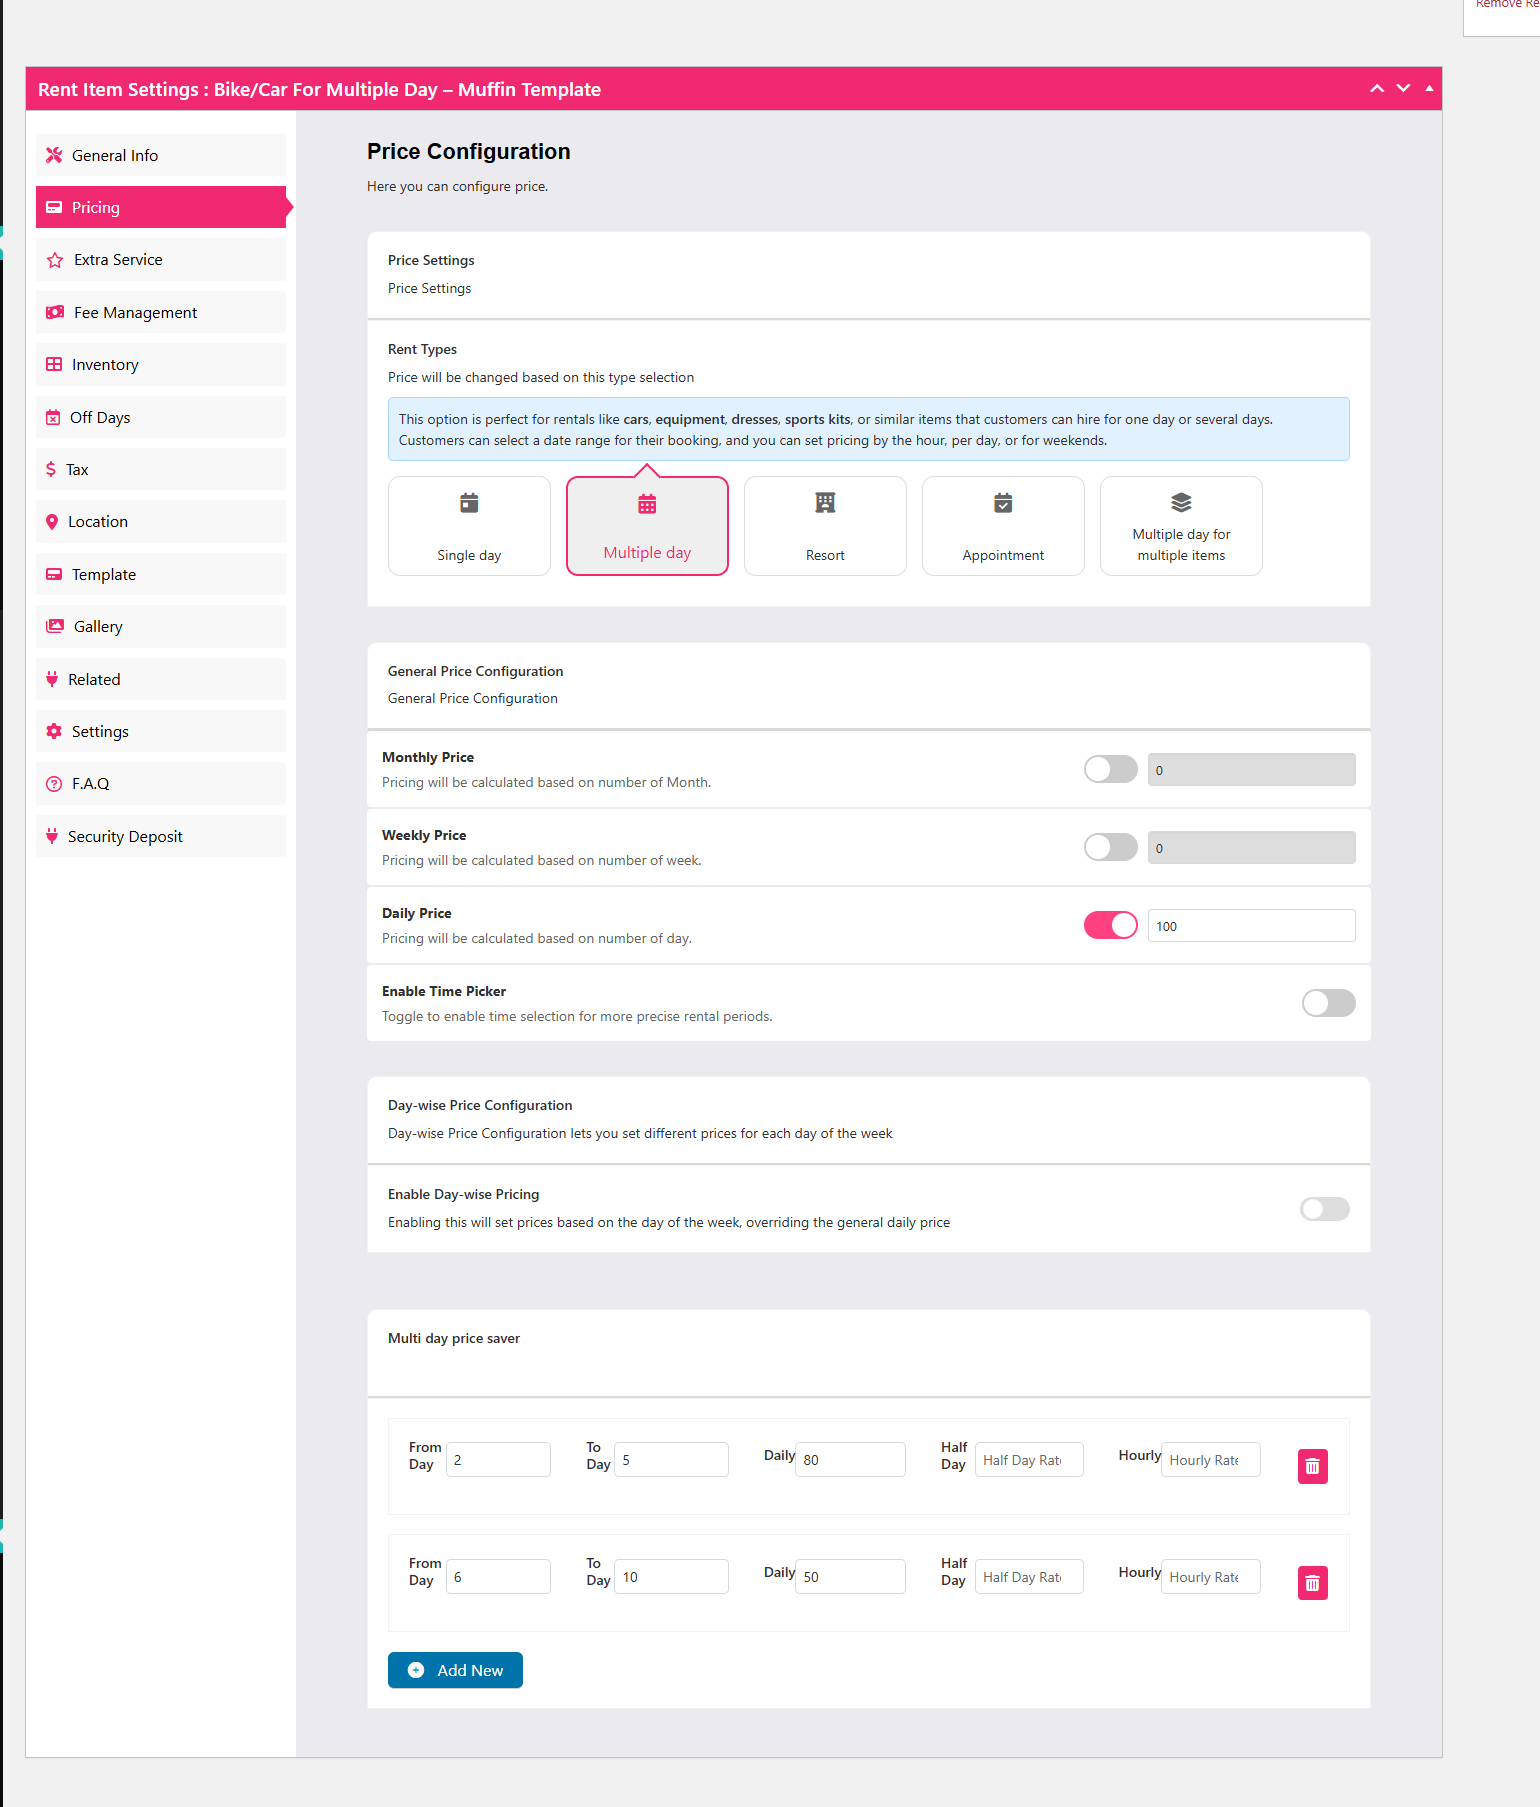
Open Pricing > Multi-Day Saver and click Add New to create your first tier. Enter the day range and the daily rate that applies inside that range — for example From Day 2 to Day 5 at a reduced daily rate.
Click Add New again for each additional tier, then Update or Publish to save the item.
Fields you’ll fill in
- From day / To day — the day-range the tier covers. Ranges must not overlap, or only one will take effect.
- Rate — the daily rate for days inside that range. Most setups use an absolute rate rather than a percentage, so the price the customer sees is fixed and predictable.
- Order of tiers — keep ranges sequential from the shortest hire to the longest so the pricing breakdown reads sensibly.
Two tier designs that work
Simple two-step (most rental businesses):
- Day 1 — base daily rate.
- Days 2–6 — one reduced daily rate for the rest of the booking.
Graduated three-step (long-hire inventory such as e-bikes, tools or trailers):
- Day 1 — base daily rate.
- Days 2–4 — a moderate reduction.
- Days 5+ — the strongest reduction, aimed at converting week-long hires.
Before publishing, sanity-check one longer booking by hand: multiply each tier’s days by its rate, add day one, and compare the total against your expected figure. If the number looks wrong here, it will look wrong to the customer.
3. Check Availability and Booking Rules Still Apply
Multi-day pricing changes rates, not calendar logic. Confirm on the same item that blocked dates, minimum and maximum rental length, and buffer days between bookings are all still set the way you want. A discount tier that fires on a hire length your booking rules reject is wasted configuration.
If you rent vehicles rather than general equipment, the equivalent day-based scheduling controls sit in WpCarRently — see what’s new in WpCarRently for multi-branch and analytics features.
4. Test the Frontend Booking
Never launch a pricing rule you have not run through the customer journey yourself. Open the rent item’s frontend page and switch the date picker into multi-day mode.
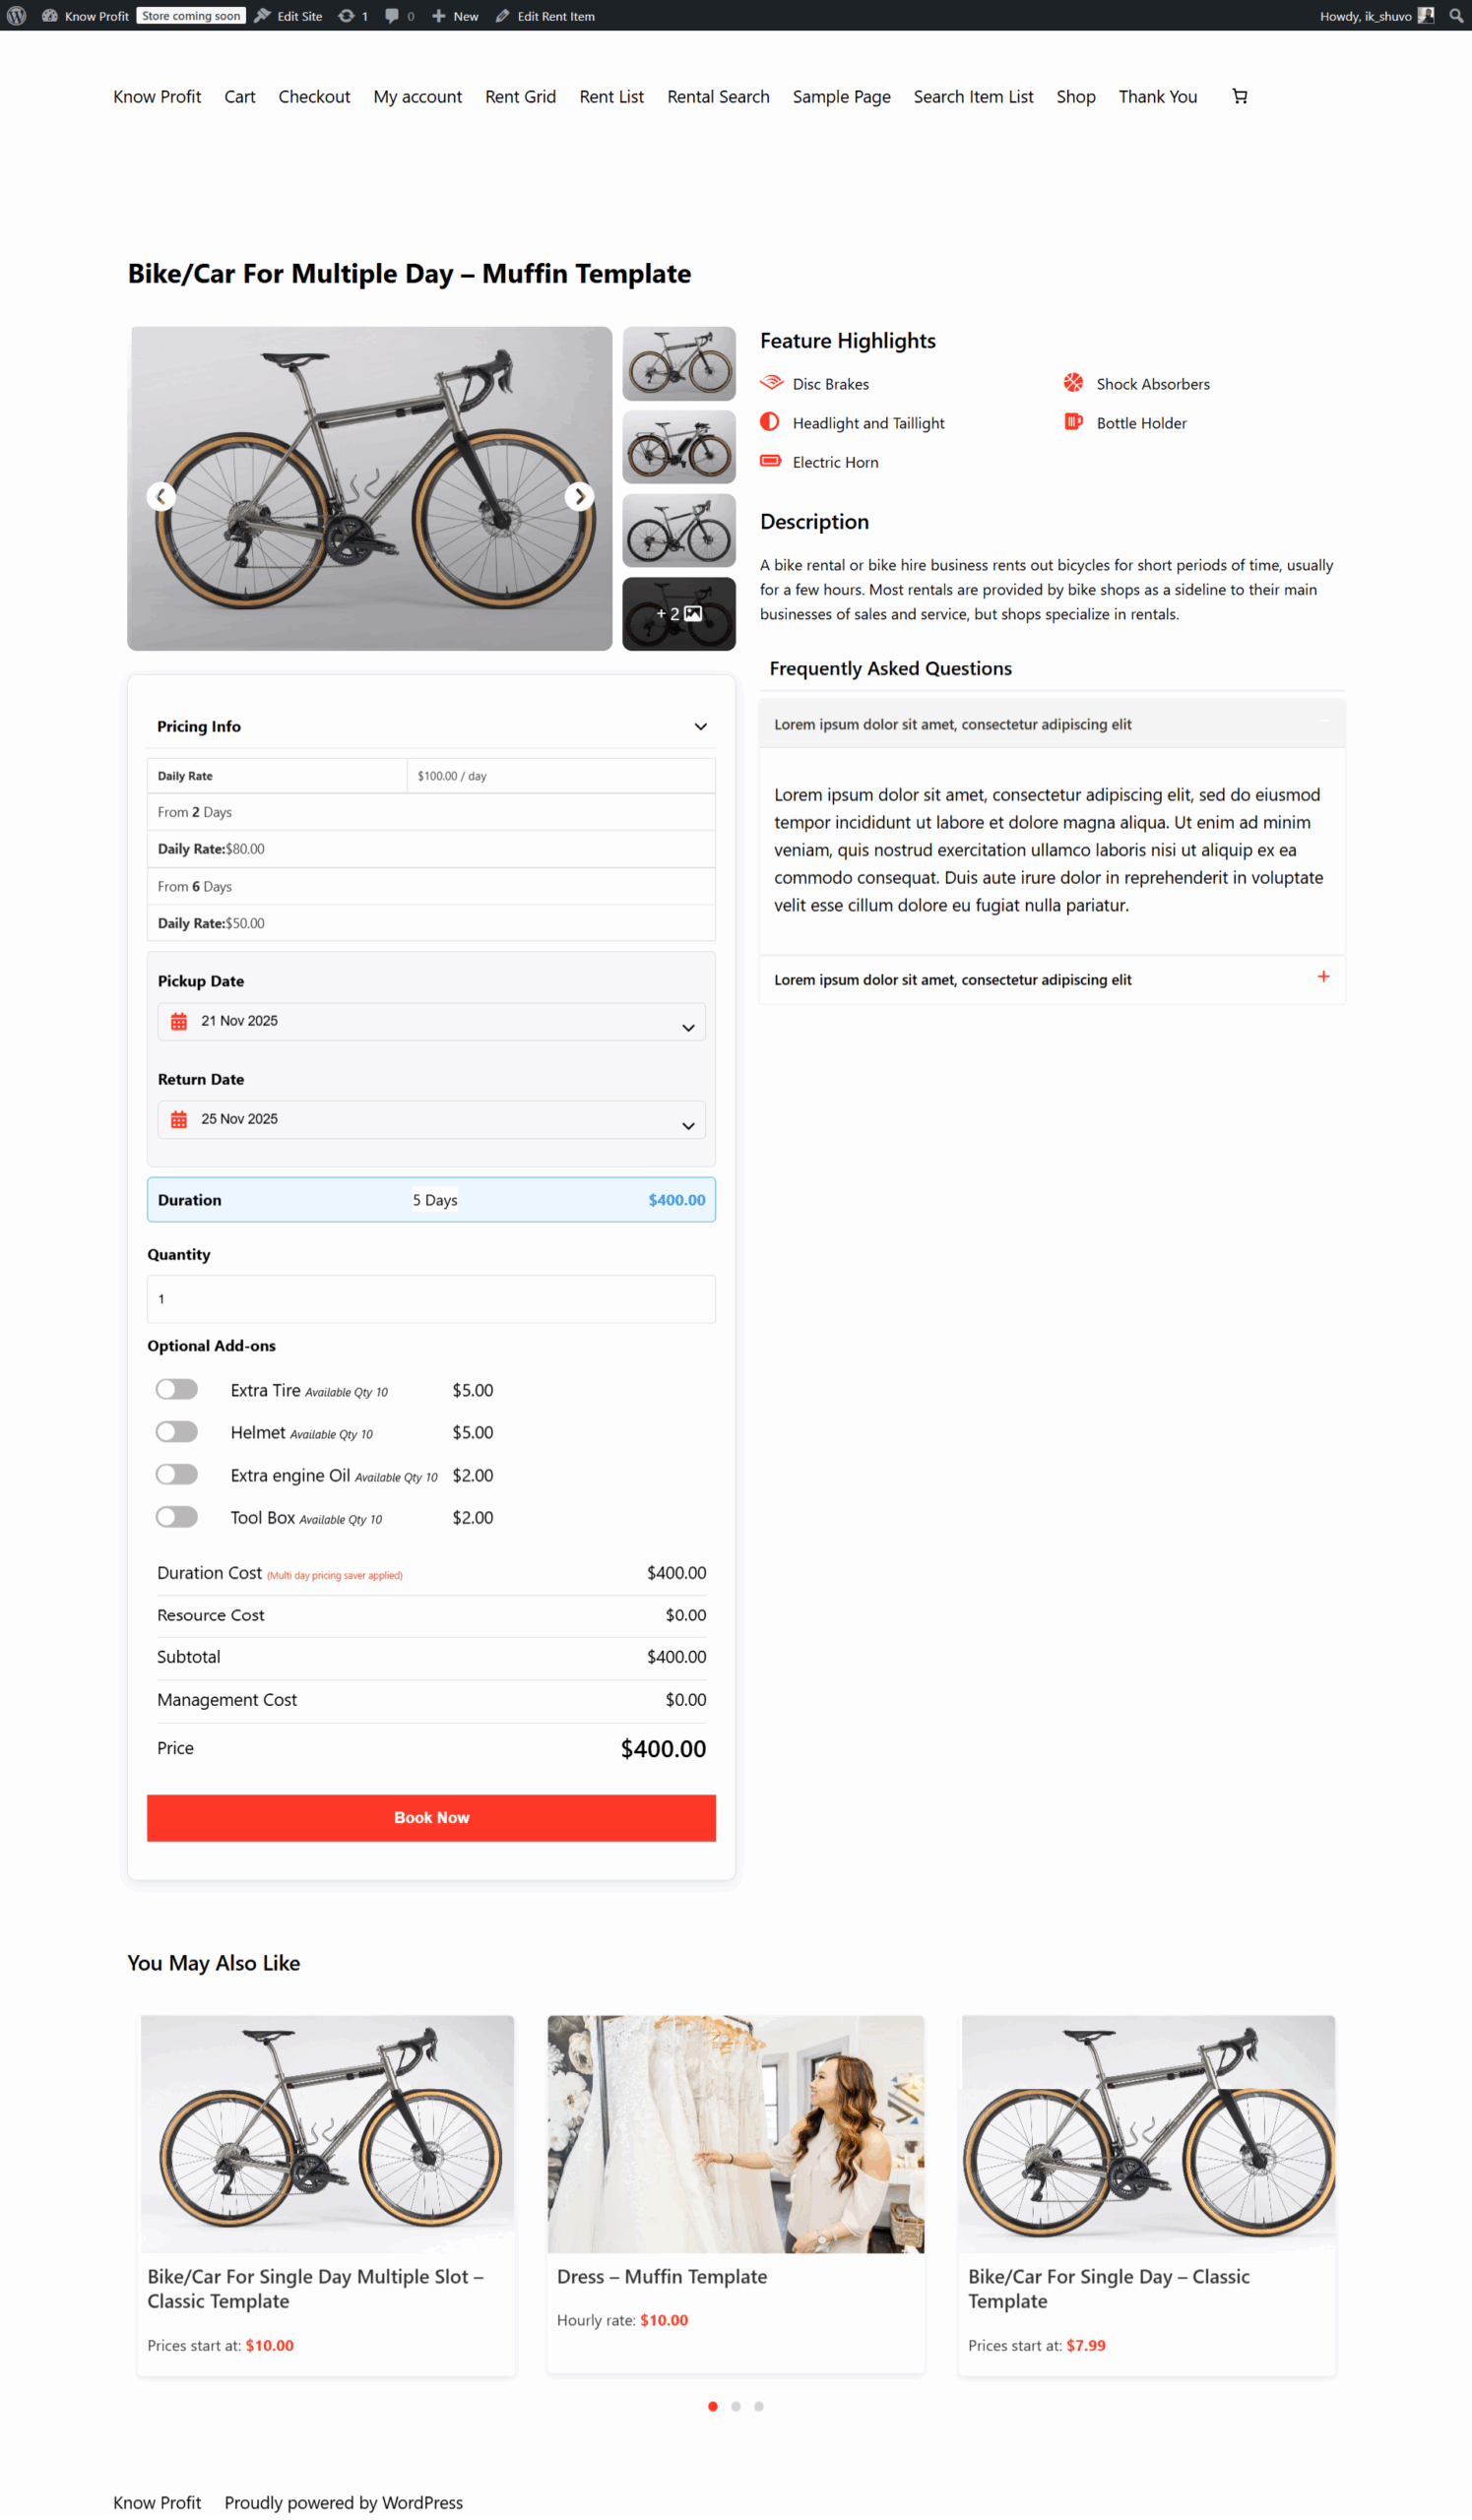
First, select a single day. The total must equal your base daily rate with no discount applied — this is the check that proves day one is protected.
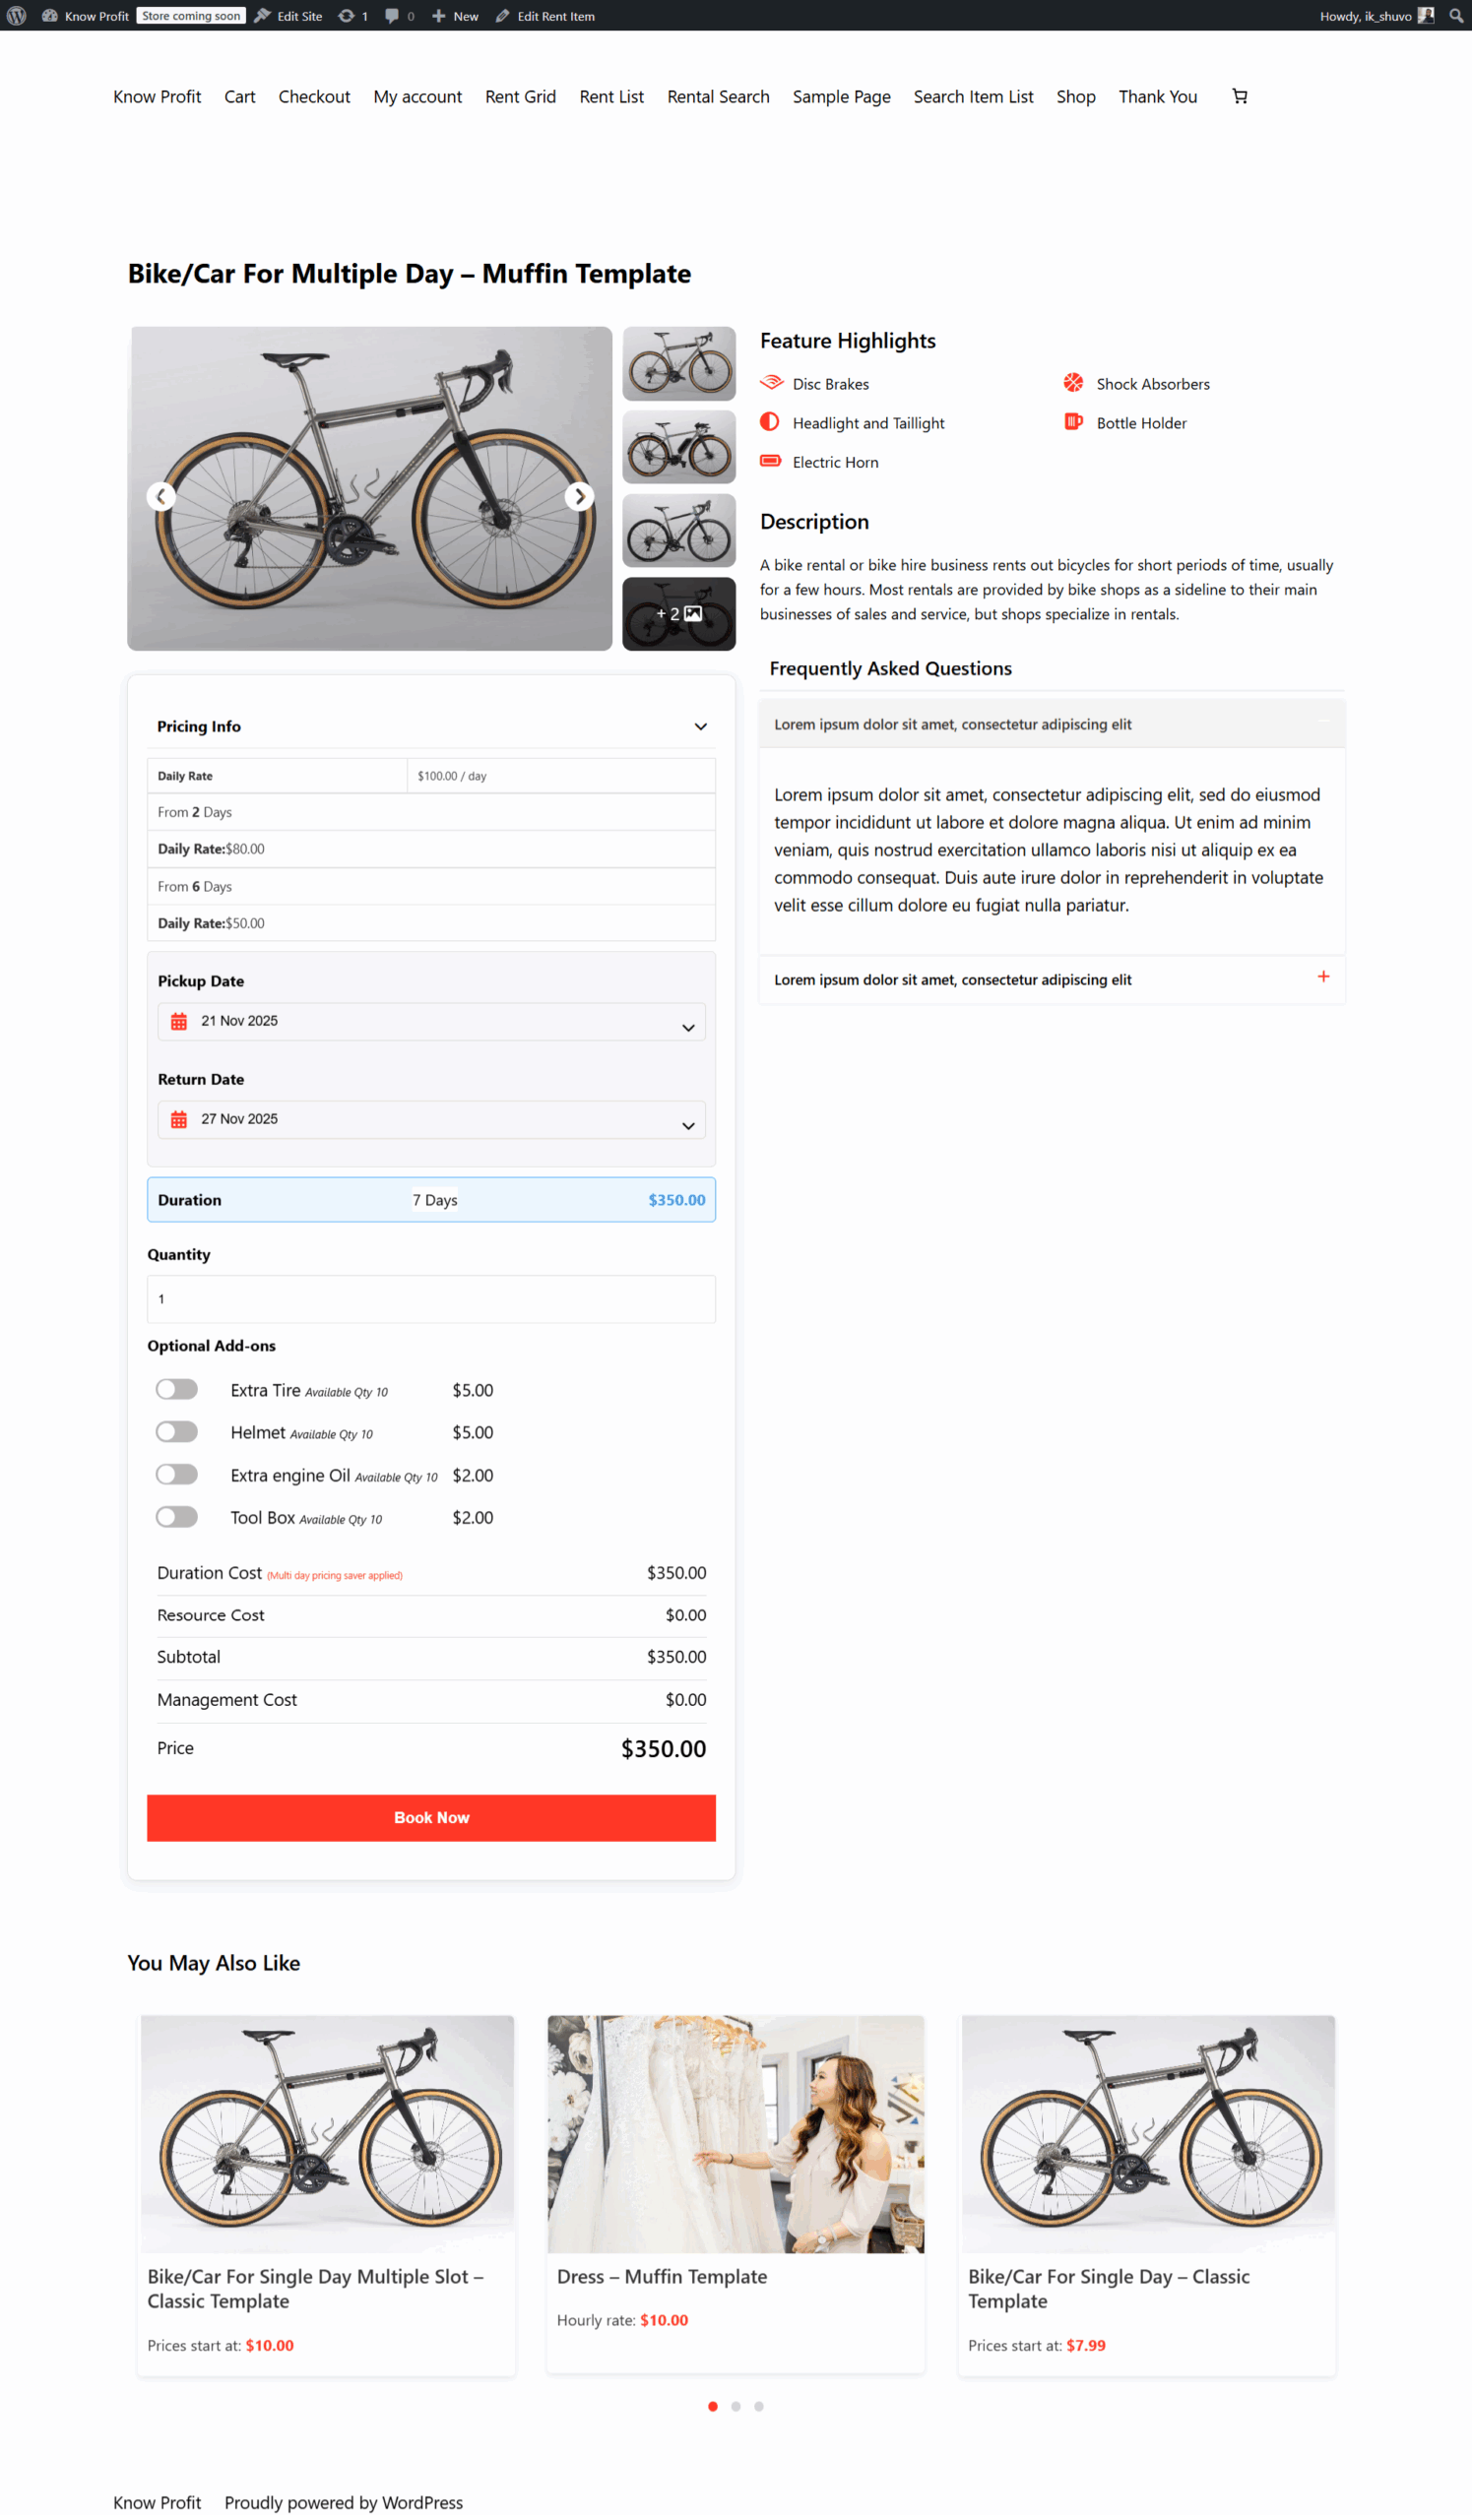
Then select a range that crosses a tier boundary, for example seven days. Confirm three things:
- The pricing breakdown itemises each day range at its own rate.
- The discounted days start exactly where your rule starts, not one day earlier or later.
- The grand total matches your hand calculation from the configuration step.
If the total is wrong or no discount appears:
- Clear the WooCommerce and WordPress object caches, then hard-refresh the page.
- Re-open the item and check your day ranges for overlap or a gap before day two.
- Confirm the addon is active and licensed, and that WpRently core is not deactivated.
- Switch the theme’s script optimiser off temporarily — a minified or deferred date-picker script can stop the live total recalculating.
- Test in a clean browser session without an active cart, since old cart contents can mask a fresh calculation.
Repeat the test once with a hire that falls entirely inside one tier, so you know both the boundary case and the simple case behave.
Getting the Most From Multi-Day Pricing
Tell customers the saving exists
Tiered rates only change behaviour if customers notice them. Put the message where the decision happens: a short line on the rent item page above the date picker, a banner on category pages, and one line in your booking confirmation email that points at the longer-hire rate. A simple “hire longer, pay less per day” statement next to the price does more for conversion than a page of policy text.
Align discounts with slow periods, not just length
If a tier and a seasonal rate both apply to the same dates, check the combined result on the frontend before you rely on it. The safest pattern is to use the multi-day addon for the base length discount and seasonal rules for genuinely high-demand windows, then verify one overlapping booking so you know how the two interact.
Review tiers quarterly
Use WooCommerce order reports to see the mix of hire lengths. If most bookings already run five days, your two-to-five-day tier is discounting revenue you were going to earn anyway — push the breakpoint out to day four or five. If very few bookings cross your longest tier, lower the threshold or deepen the saving until the step becomes worth taking. Adjust one tier at a time so you can attribute the change.
Measure the right things
- Average order value for the item, before and after the pricing change.
- Share of bookings that are multi-day rather than single-day.
- Occupancy across the calendar — the point of the discount is filling days you would otherwise lose.
- Effective daily rate, so you can see whether longer hires are actually profitable after the discount.
Set a review date roughly a quarter out and compare against your pre-addon numbers. If average order value rises while your effective daily rate holds, the tier is working.
Where the Multi-Day Price Saver Addon Is Not the Right Fit
Disclosure: the Multi-Day Price Saver addon and WpRently are MagePeople products, and this article is published by MagePeople.
Being straight about the limits: this addon is a per-item length-discount tool, and it is the wrong purchase in several situations.
- You only take single-day bookings. If every hire is one day — hourly tours, single-session equipment, event-day staffing — there is no second day to discount and the addon adds configuration with no return.
- Your pricing problem is calendar-based, not length-based. Peak seasons, holiday surcharges and weekday-versus-weekend rates are handled by date-based pricing, not day ranges. Buy the seasonal route first.
- You need per-group or per-person rates. Tiered pricing is about duration. Capacity pricing, per-head ticket rates and quantity-based discounts solve a different problem.
- You want one blanket site-wide discount. Tiers are configured item by item. Grocery-style store-wide promotions across dozens of items are faster to do with WooCommerce coupon rules than by opening each listing.
- You are not running WpRently or WooCommerce. The addon requires both. On a different booking stack it will not install usefully at all.
If one of those describes your business, spend the budget on the piece that matches your actual bottleneck. If multi-day hires are already a meaningful share of your bookings, the addon is a fast win.
Try the Addon on Your Own Rentals
Open Multi-Day Price Saver for WpRently to see the current licence options and purchase the package, then request a walkthrough from the MagePeople team if you would like help mapping your first two tiers onto your real rates. Teams running a larger catalogue or multiple client sites can ask about licence coverage for more than one domain before buying.
Set it up on one item first, run the single-day and seven-day tests, and compare the two totals. Once the numbers agree with your hand calculation, roll the same tier structure out to the rest of your inventory.
Frequently Asked Questions
These are the questions that come up most often when setting up multi-day tiers for the first time.
Do I need WpRently core installed to use this addon?
Yes. The Multi-Day Price Saver is an addon, not a standalone plugin. WpRently core and WooCommerce must both be installed and active, and the core plugin must stay active for the multi-day settings to remain visible on your rent items.
Where do I set the day-range tiers for a rent item?
Open Rent Item > All Items and edit the item, then go to Pricing > Multi-Day Saver and click Add New to add each day range and its daily rate. Save with Update or Publish. Tiers are per item, so you can give premium equipment gentler discounts than high-demand stock.
Why is my multi-day discount not showing on the frontend booking form?
The most common causes are overlapping or gapped day ranges, a caching plugin serving a stale page, the addon being deactivated or unlicensed, or a script optimiser breaking the live total recalculation. Clear caches, re-check the ranges, confirm the addon is active, and test in a clean browser session with an empty cart.
Does the addon discount the first day of a booking?
No, not unless your first tier starts at day one. Tiers begin at whichever day you set, so starting a range at day two keeps day one at your full base rate while still rewarding the longer hire. This is the recommended setup because day one carries most of your per-booking overhead.
What happens if a multi-day tier applies during a peak season?
Both sets of rules can apply to the same dates, and the result depends on how your seasonal configuration is set. Always test one overlapping booking on the frontend before going live so you know the exact total a customer will see during your busiest window.
How long does it take to set up multi-day pricing on one item?
For a single rent item with a two-tier structure, installation and configuration usually take under half an hour, including the frontend test booking. The time investment grows with the number of items and tiers you configure, not with the complexity of each individual rule.
Can I use the addon on more than one website?
Licence coverage depends on the plan you buy, so check the current plan terms on the product page before purchasing for a client or multi-site setup. Confirm the number of domains your plan allows if you manage several rental sites.
