

Want to take hotel and room reservations directly on your own WordPress site instead of paying commission to third-party travel sites? This tutorial shows you how to add a hotel booking plugin in WordPress using WpTravelly, step by step. You will install the plugin, create hotel features and activities, publish a hotel with rooms and prices, and attach that hotel to a tour package so guests can search, select a room, and pay.
Everything below is based on the WpTravelly Pro admin screens. Budget about an hour for your first hotel, then far less for the ones that follow.
- Step 1: Install and activate WpTravelly Pro and run the setup wizard.
- Step 2: Create hotel features, activities, and your first hotel with rooms and pricing.
- Step 3: Attach the hotel to a tour package and test a live booking.
What a Hotel Booking Plugin Actually Does
A hotel booking plugin turns your WordPress site into a reservations front desk. It handles the parts you would otherwise track manually in a spreadsheet or an inbox:
- Availability by date, so the same room is never sold twice.
- Room types, capacity and seasonal or sale pricing.
- Checkout and payment through a WooCommerce gateway.
- A single booking list in the dashboard where you confirm, edit or refund orders.
WpTravelly is built for tour and travel businesses, so its hotel module is designed to sit inside a package rather than stand alone. That is the key difference from a generic hotel-only plugin: your rooms become part of an itinerary product.
Why Run Hotel Bookings on WordPress
Owning the booking flow means owning the guest relationship. You keep the customer email, you control the upsell, and you avoid the commission an online travel agency takes from every reservation. It is also a natural upsell for the rest of your inventory: the same backend that sells a tour can sell the hotel that comes with it.
If you want to see how hotel inventory fits into a wider booking business rather than a single hotel page, the broader WpTravelly guide to managing a travel business covers tours, trips and payment settings end to end.
Step 1: Install and Activate WpTravelly Pro
Log in to your WordPress dashboard and go to Plugins > Add New. Search for WpTravelly, then click Install Now and Activate.
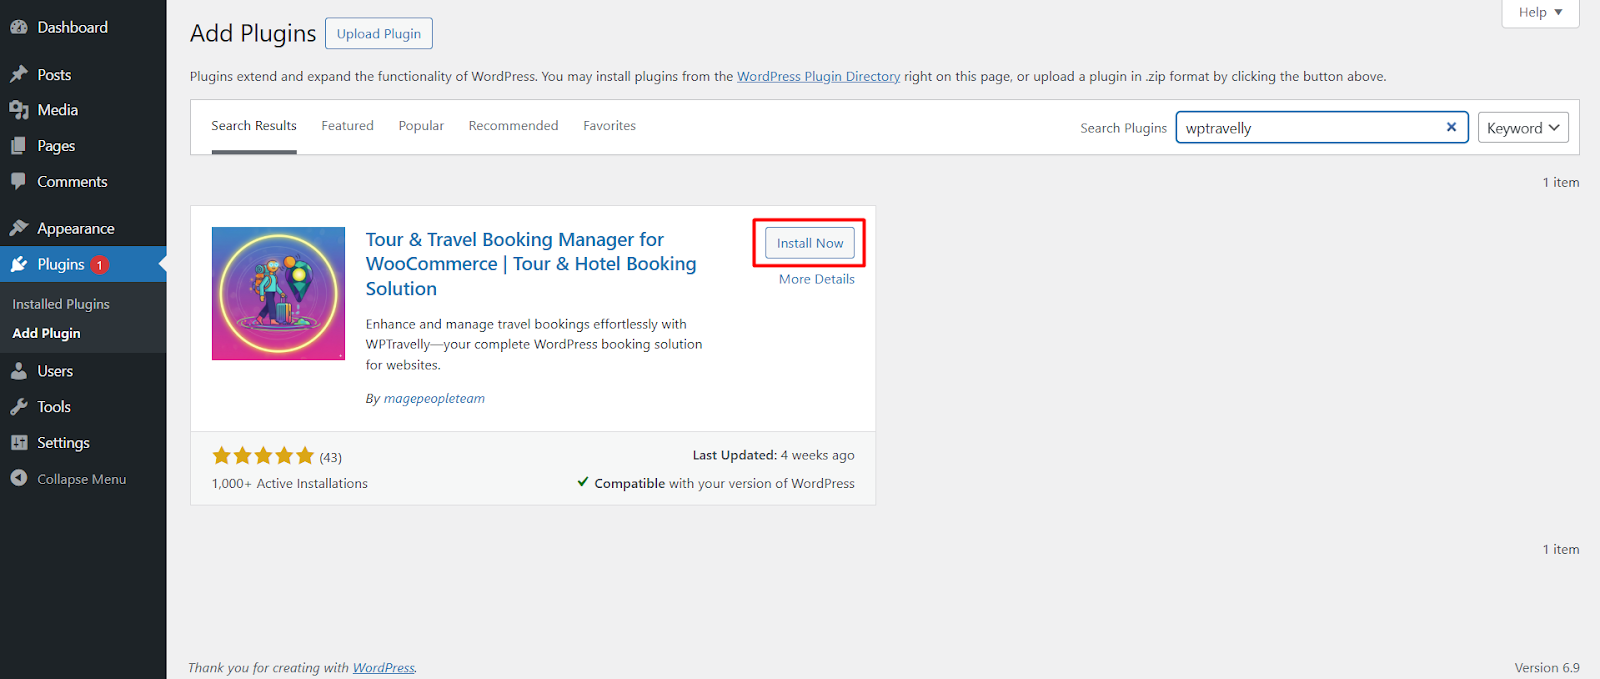
You can download the WooCommerce Tour and Travel Booking Manager Pro package directly if you prefer to upload the zip rather than search the directory.
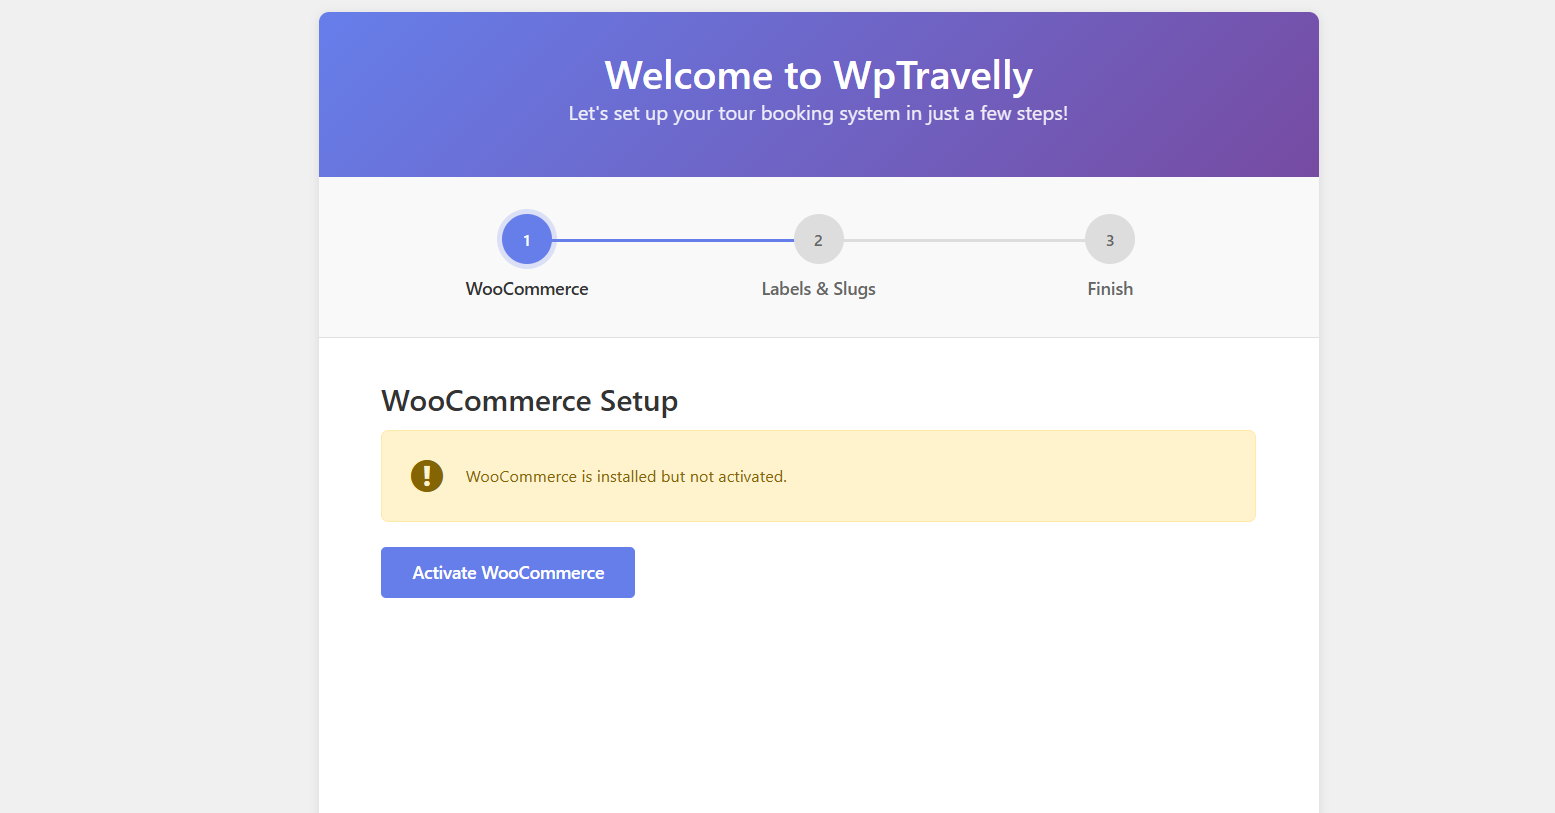
Activation launches the setup wizard. Approve the WooCommerce connection here; WooCommerce is what processes the payment for every room you sell.
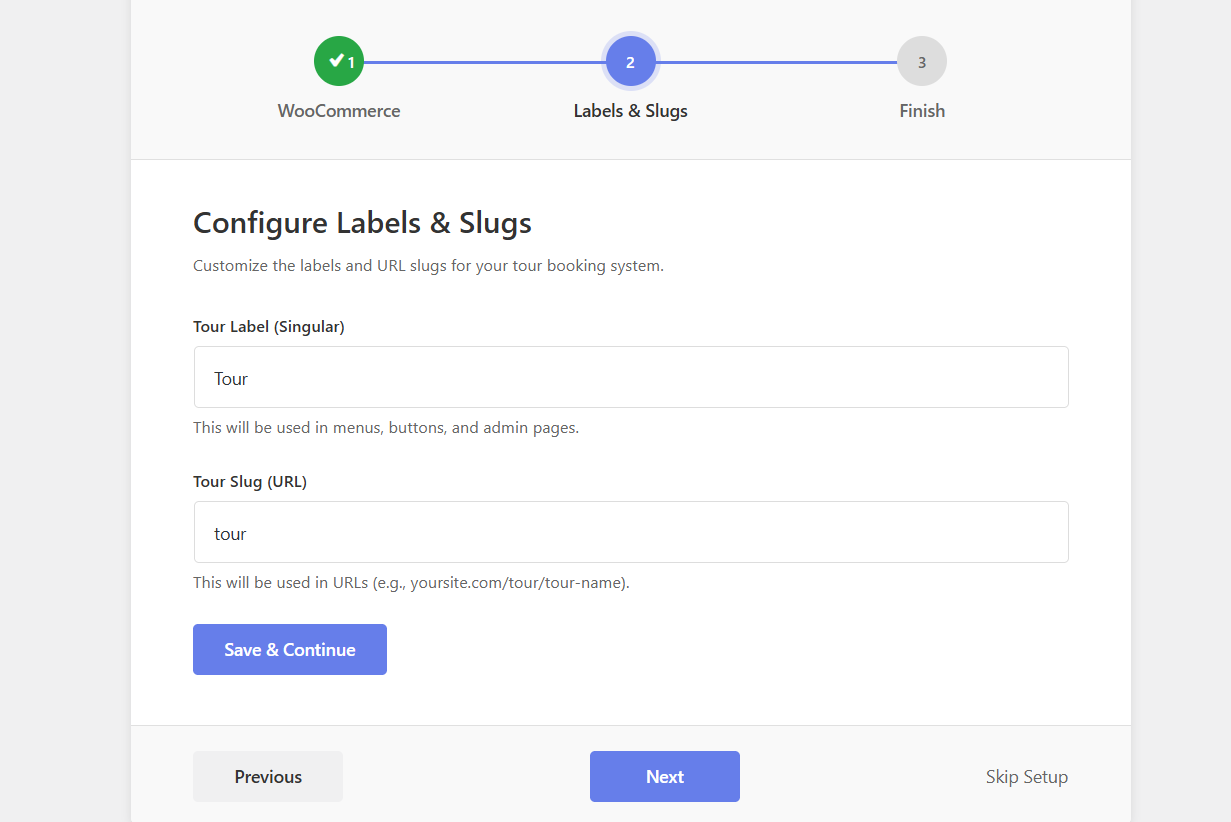
Next, set your labels and permalink slugs. Choose short, readable slugs such as hotel and tour because they appear in your URLs and in search results.
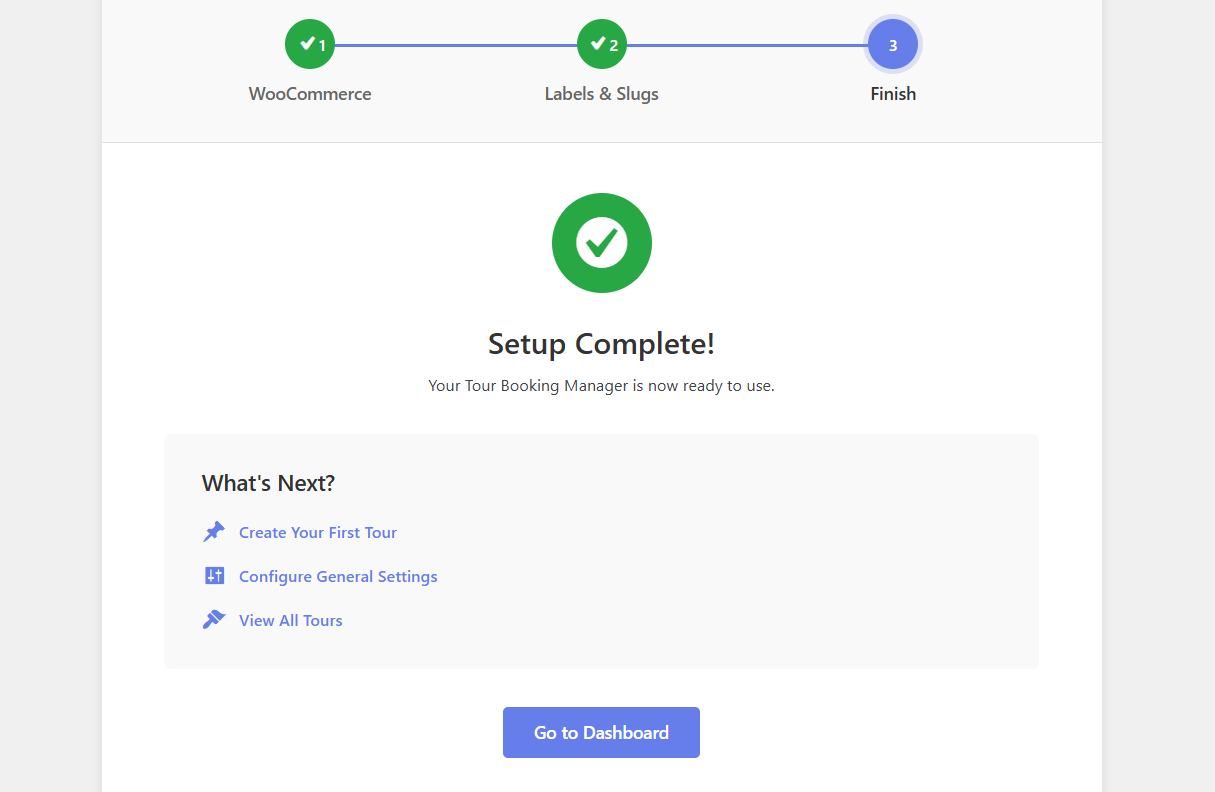
When the wizard finishes, click Go to Dashboard. You will now see the Tour menu in the admin sidebar.
Step 2: Create a Hotel for a Tour Destination
Open the Tour menu and select Hotel Lists. This is where all hotel inventory lives.
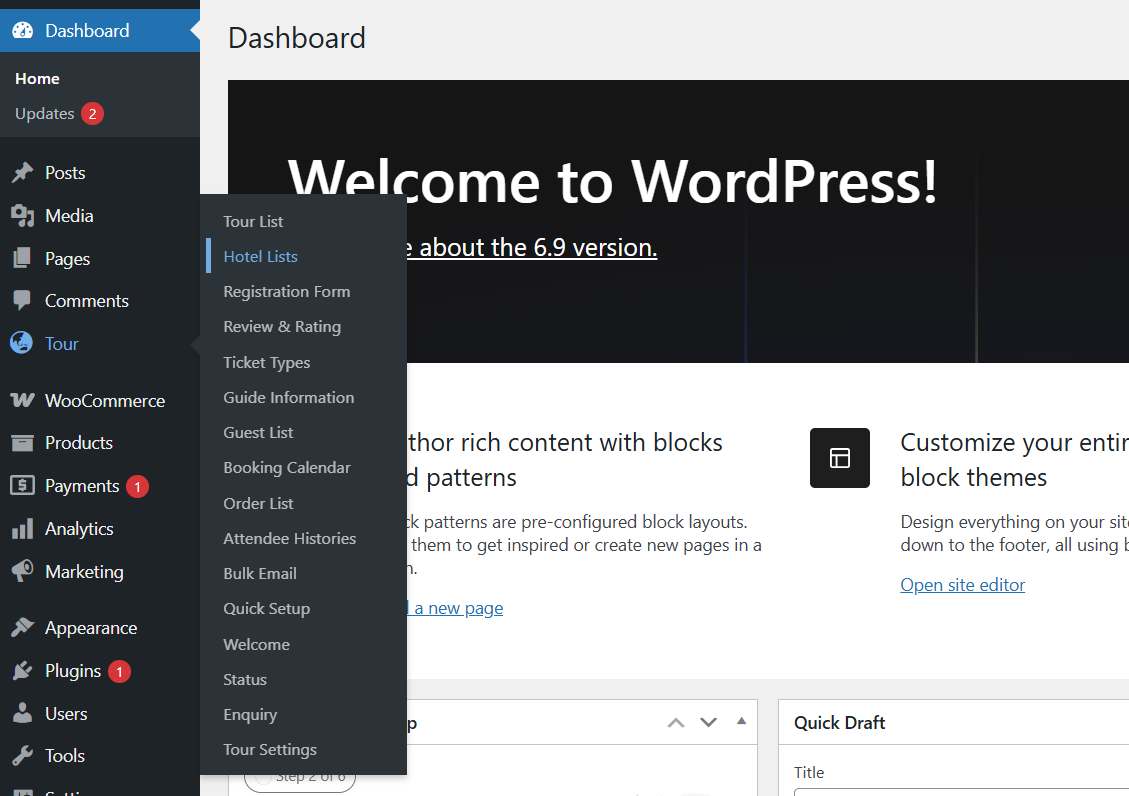
Before you add a hotel, add the reusable pieces it will draw on: hotel features and activities. Setting these up first keeps each new hotel listing consistent and fast to build.
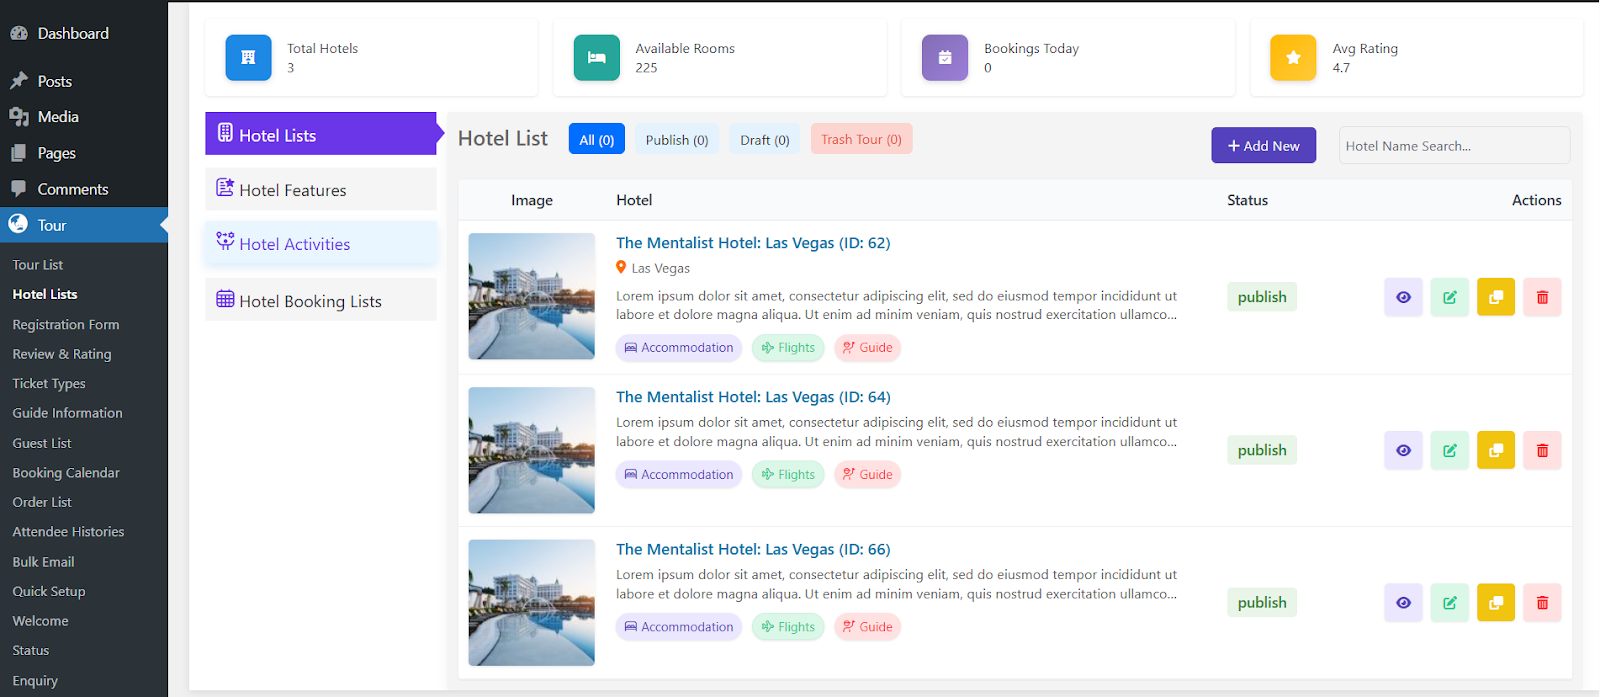
The Hotel List screen shows every hotel you have created, along with summary widgets at the top for total hotels, available rooms, today’s bookings and average ratings. From here you can add a new hotel or edit an existing one.
Add Hotel Features
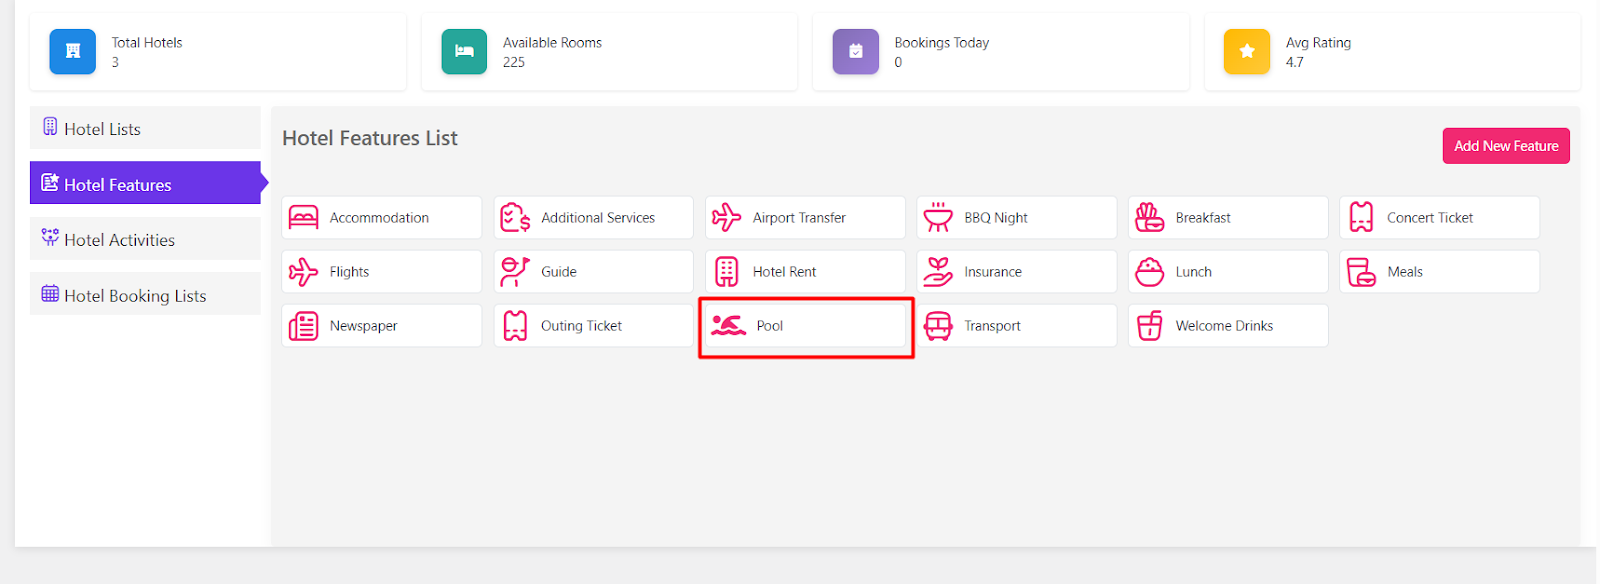
Go to the Hotel Features tab. These are the amenities guests filter and scan for: breakfast, airport transfer, free Wi-Fi, parking and so on.
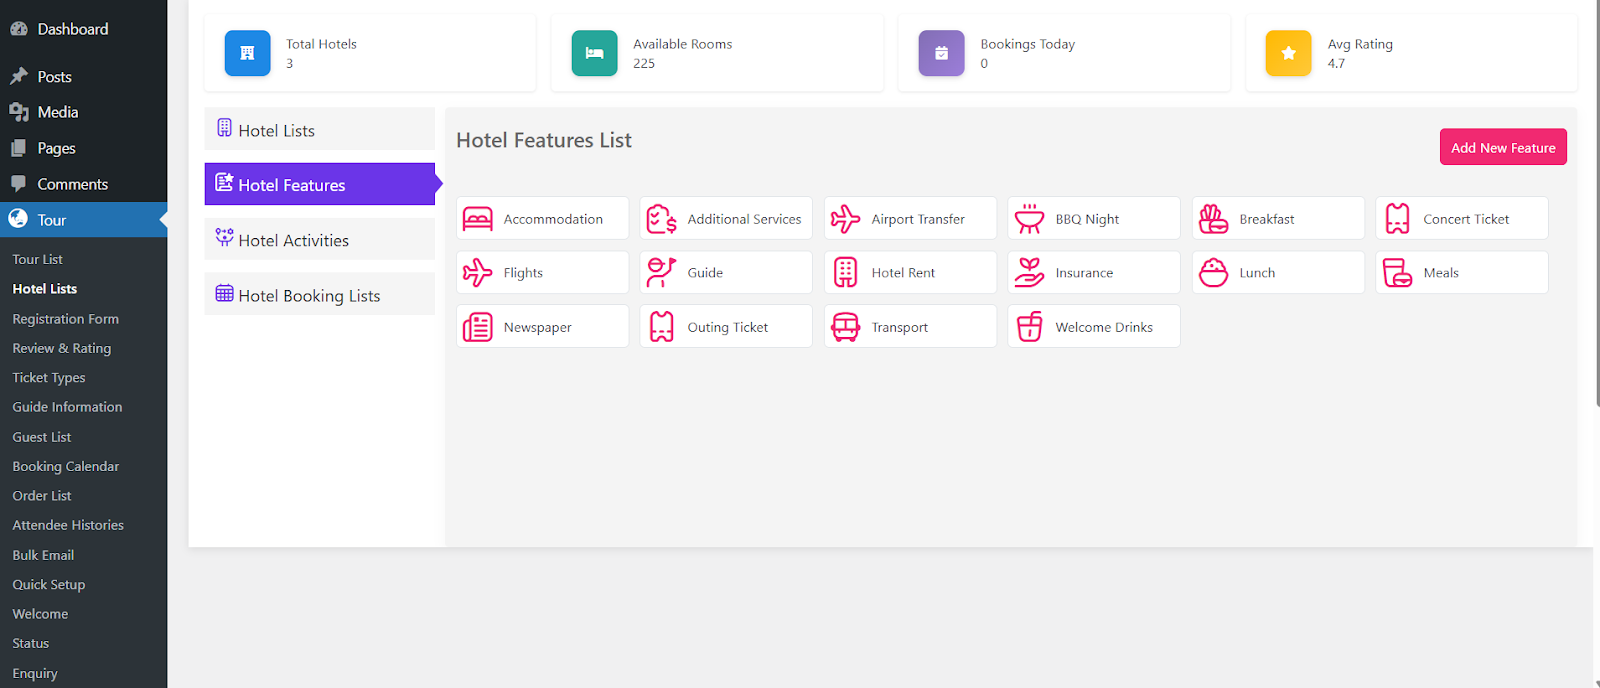
Click Add New and type the feature title and slug.
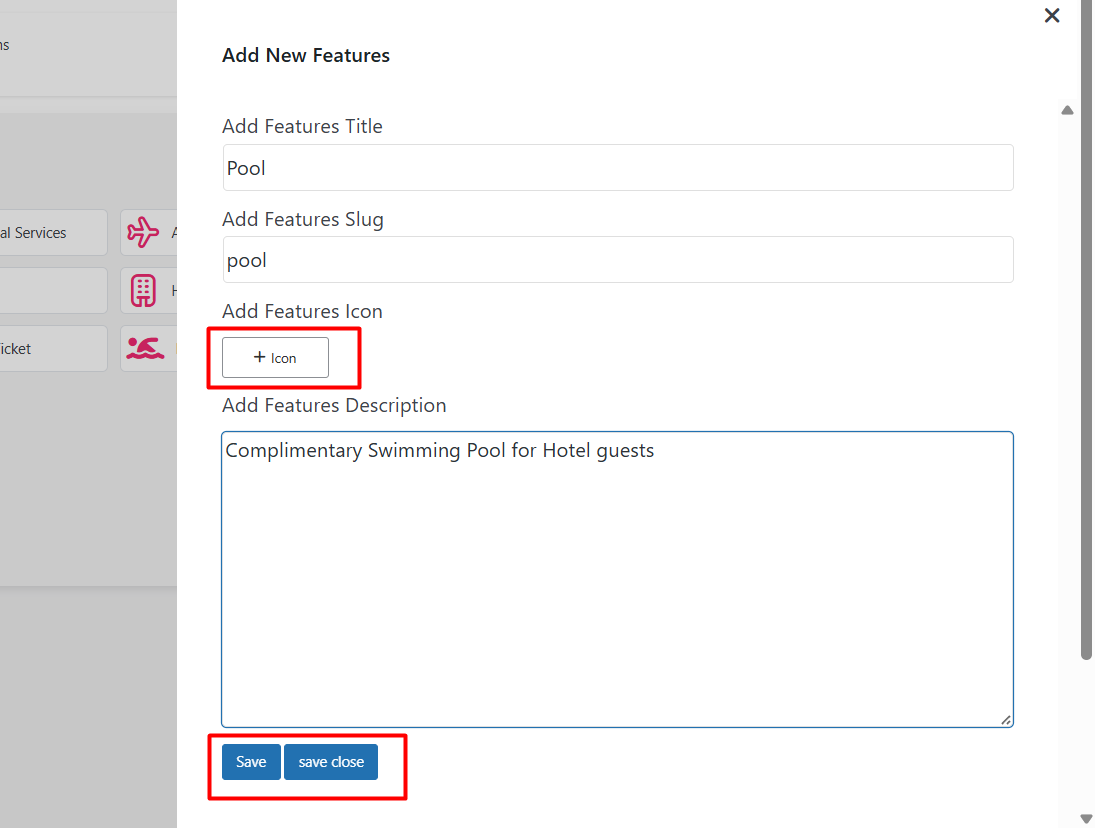
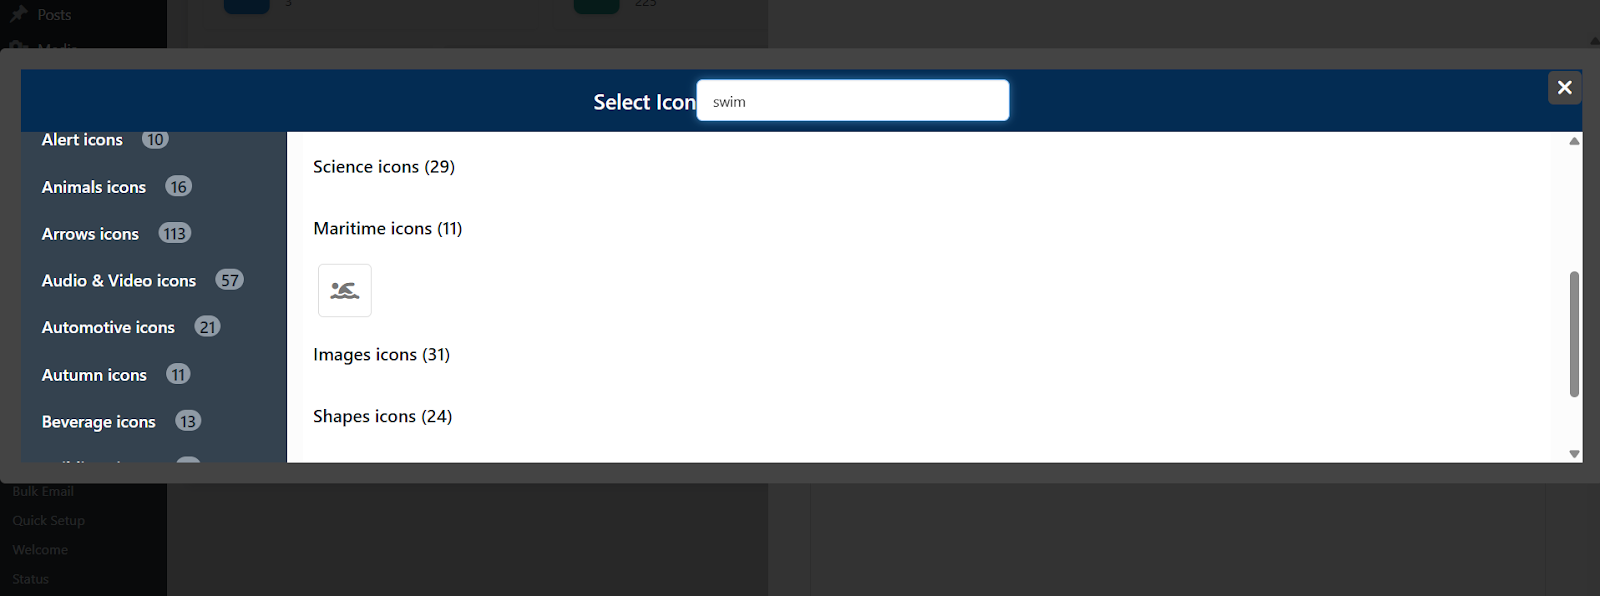
Then pick an icon for the feature and save it. The icon is what appears beside the amenity on the front end.
Your first feature is saved. Repeat for every amenity your property offers.
Add Hotel Activities
Activities work the same way. Open the Hotel Activities tab and click Add New.
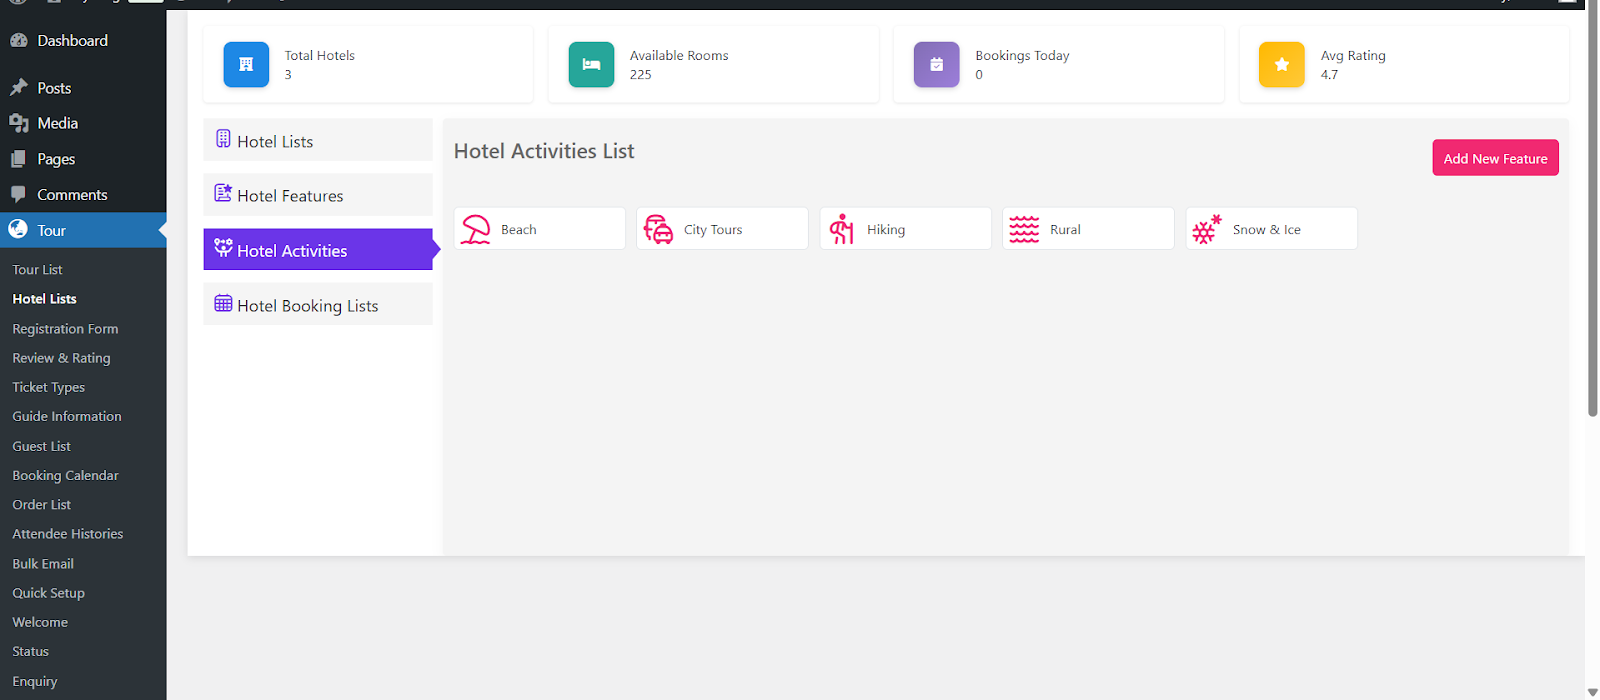
Add each activity your hotel offers, such as boat trips, city tours or spa sessions.
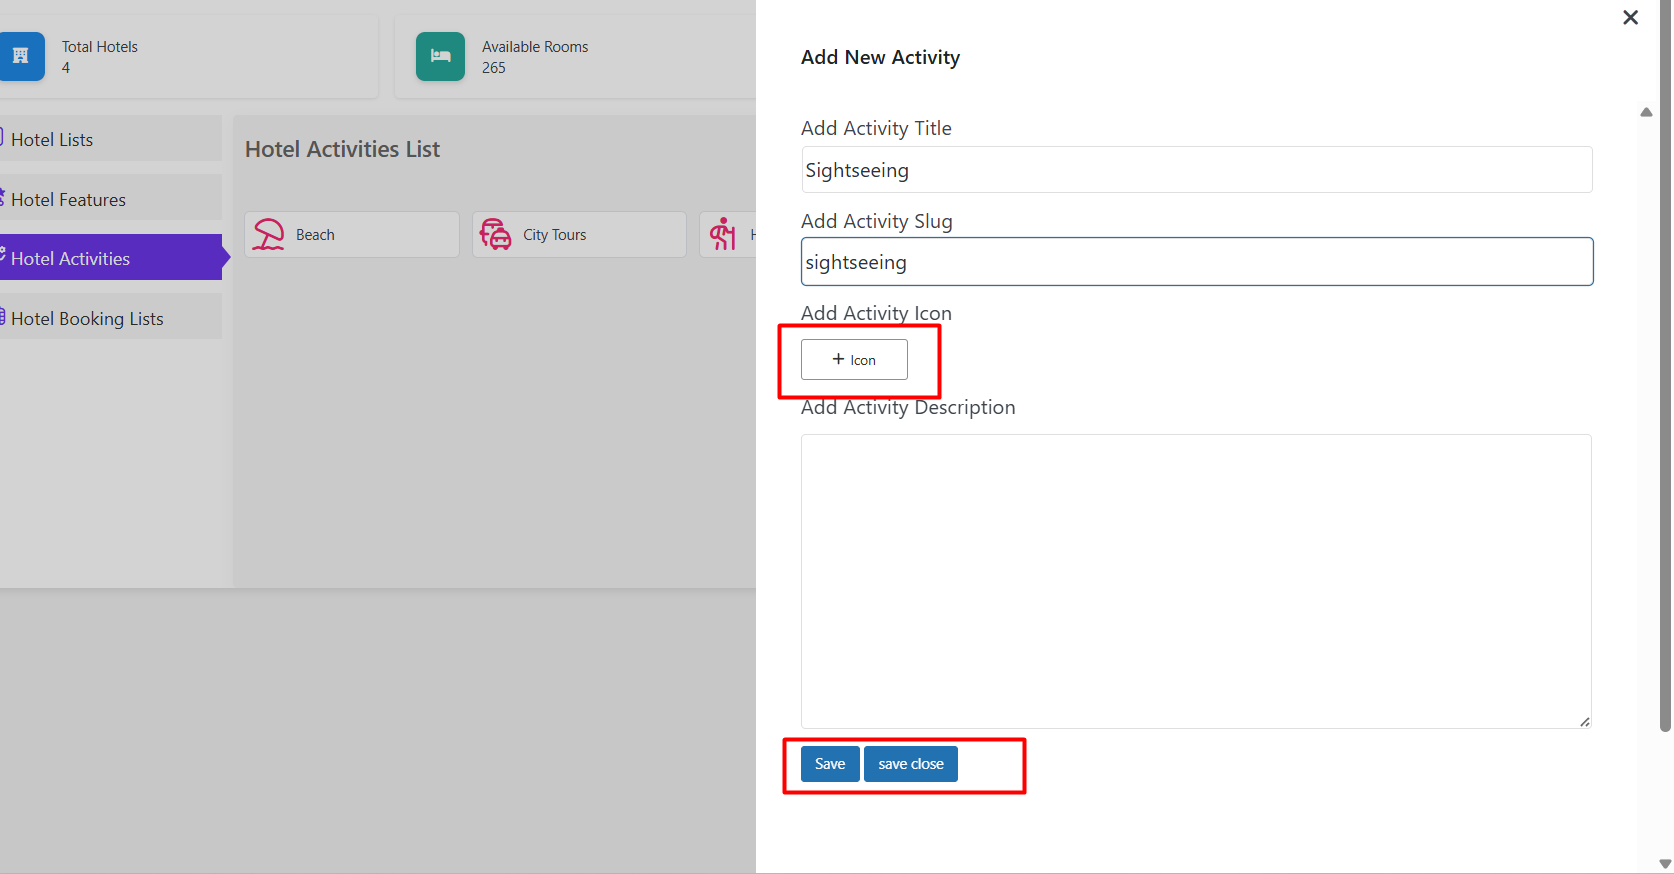
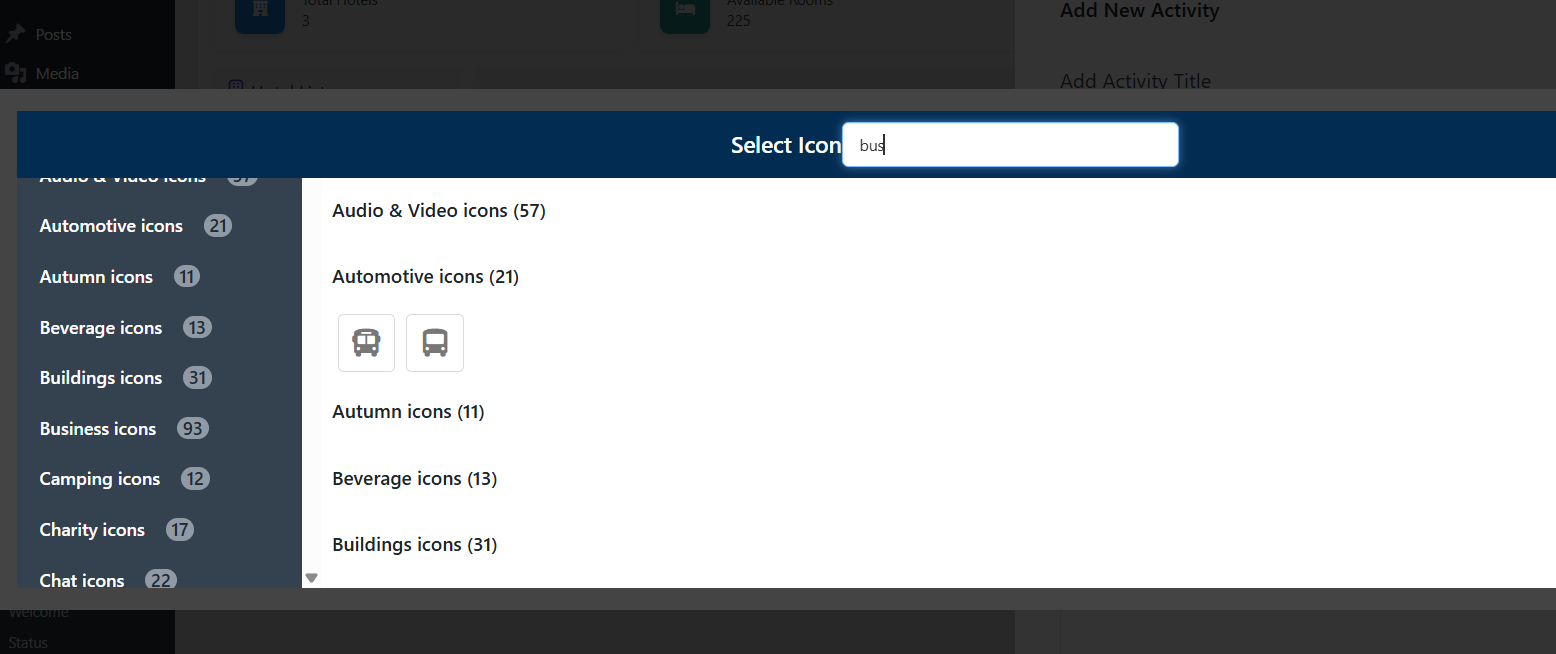
Assign an icon to the activity, just as you did for the features.
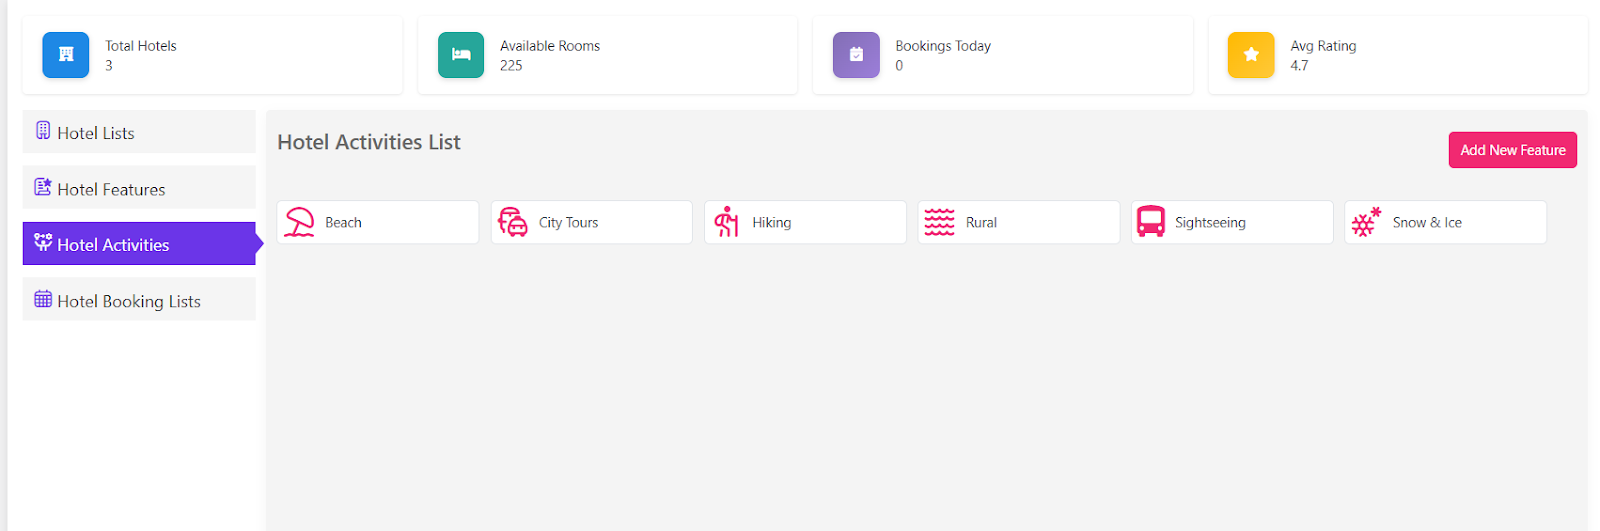
The activity is now available to select inside any hotel listing.
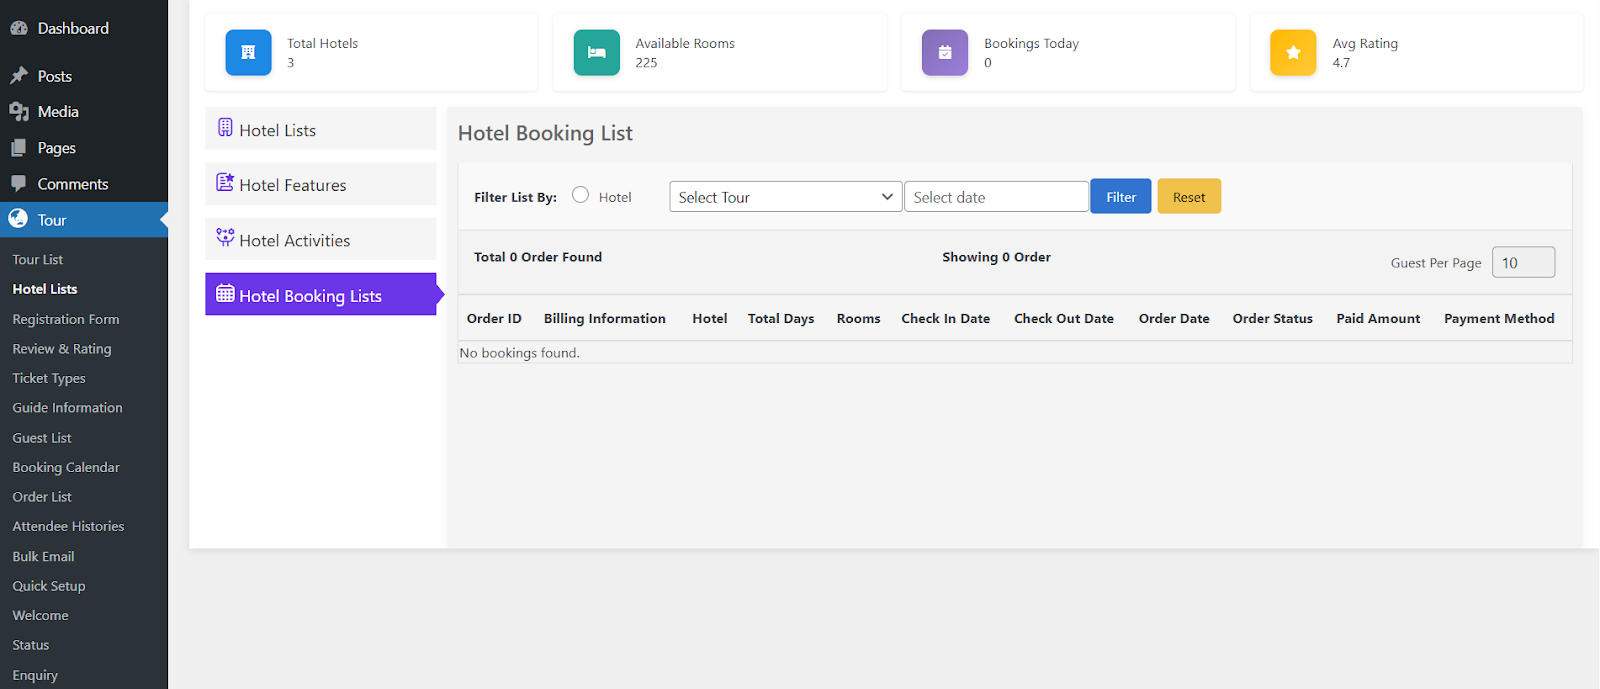
The Hotel Booking List tab sits alongside these. It collects every room reservation made against your hotels, and it is the screen you will return to daily once you are live.
Create the Hotel Listing
Click Add New on the Hotel Lists screen to build the property itself.
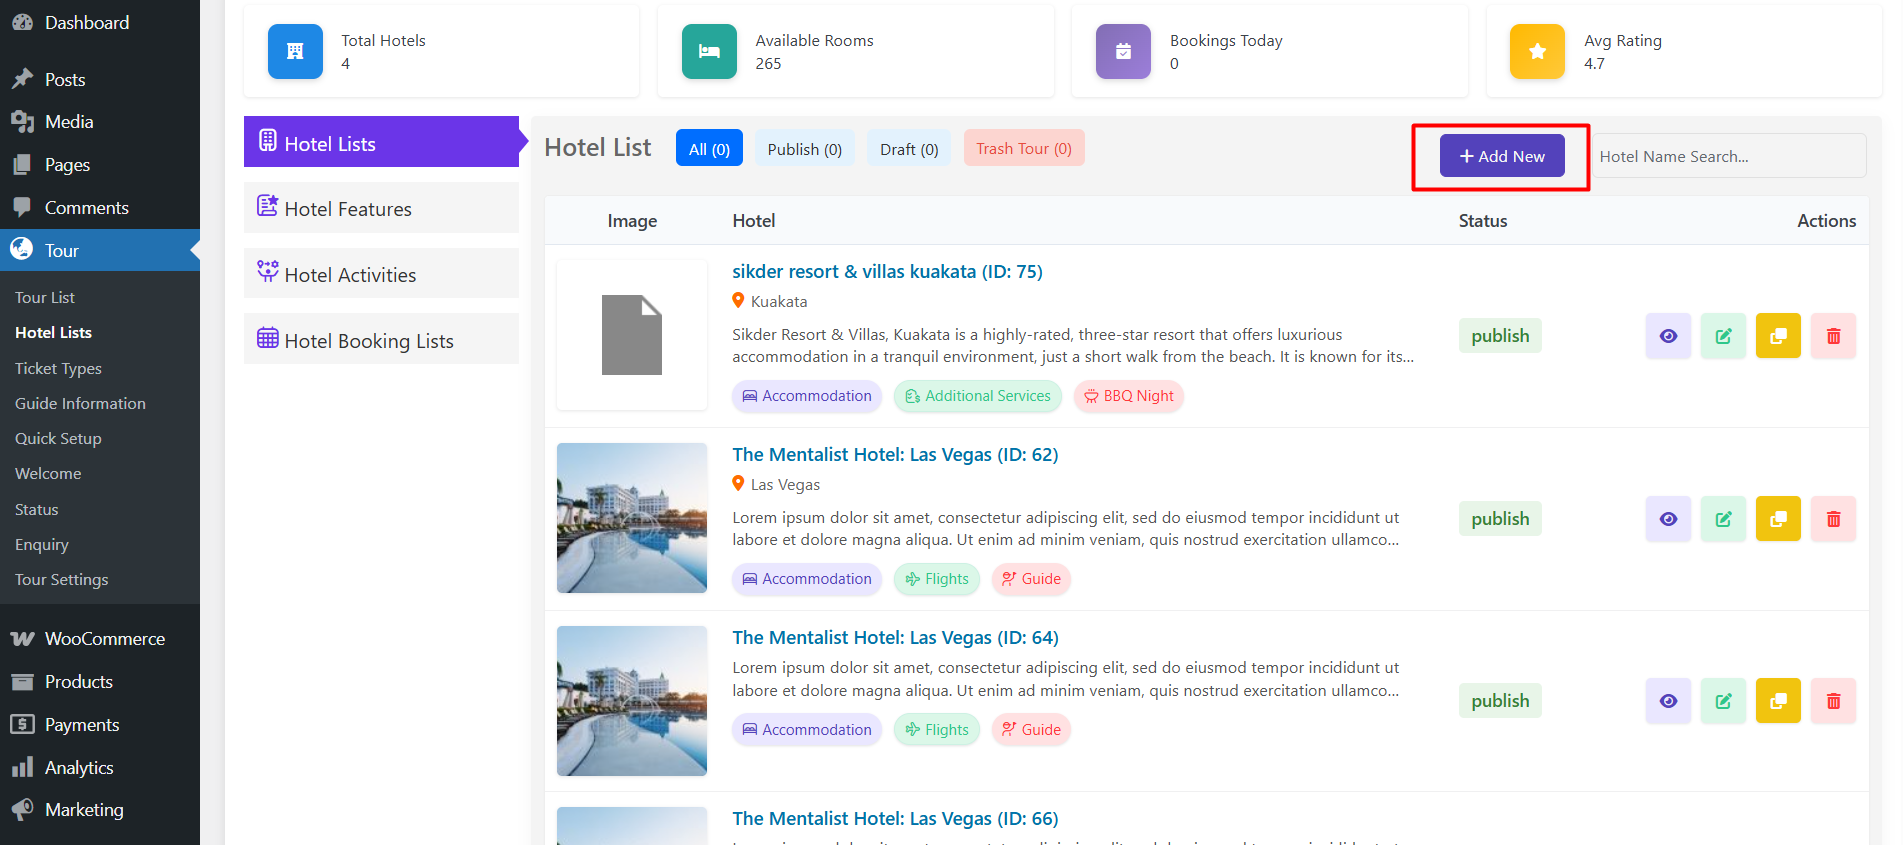
The first tab is General Info, where the core details of the property go.
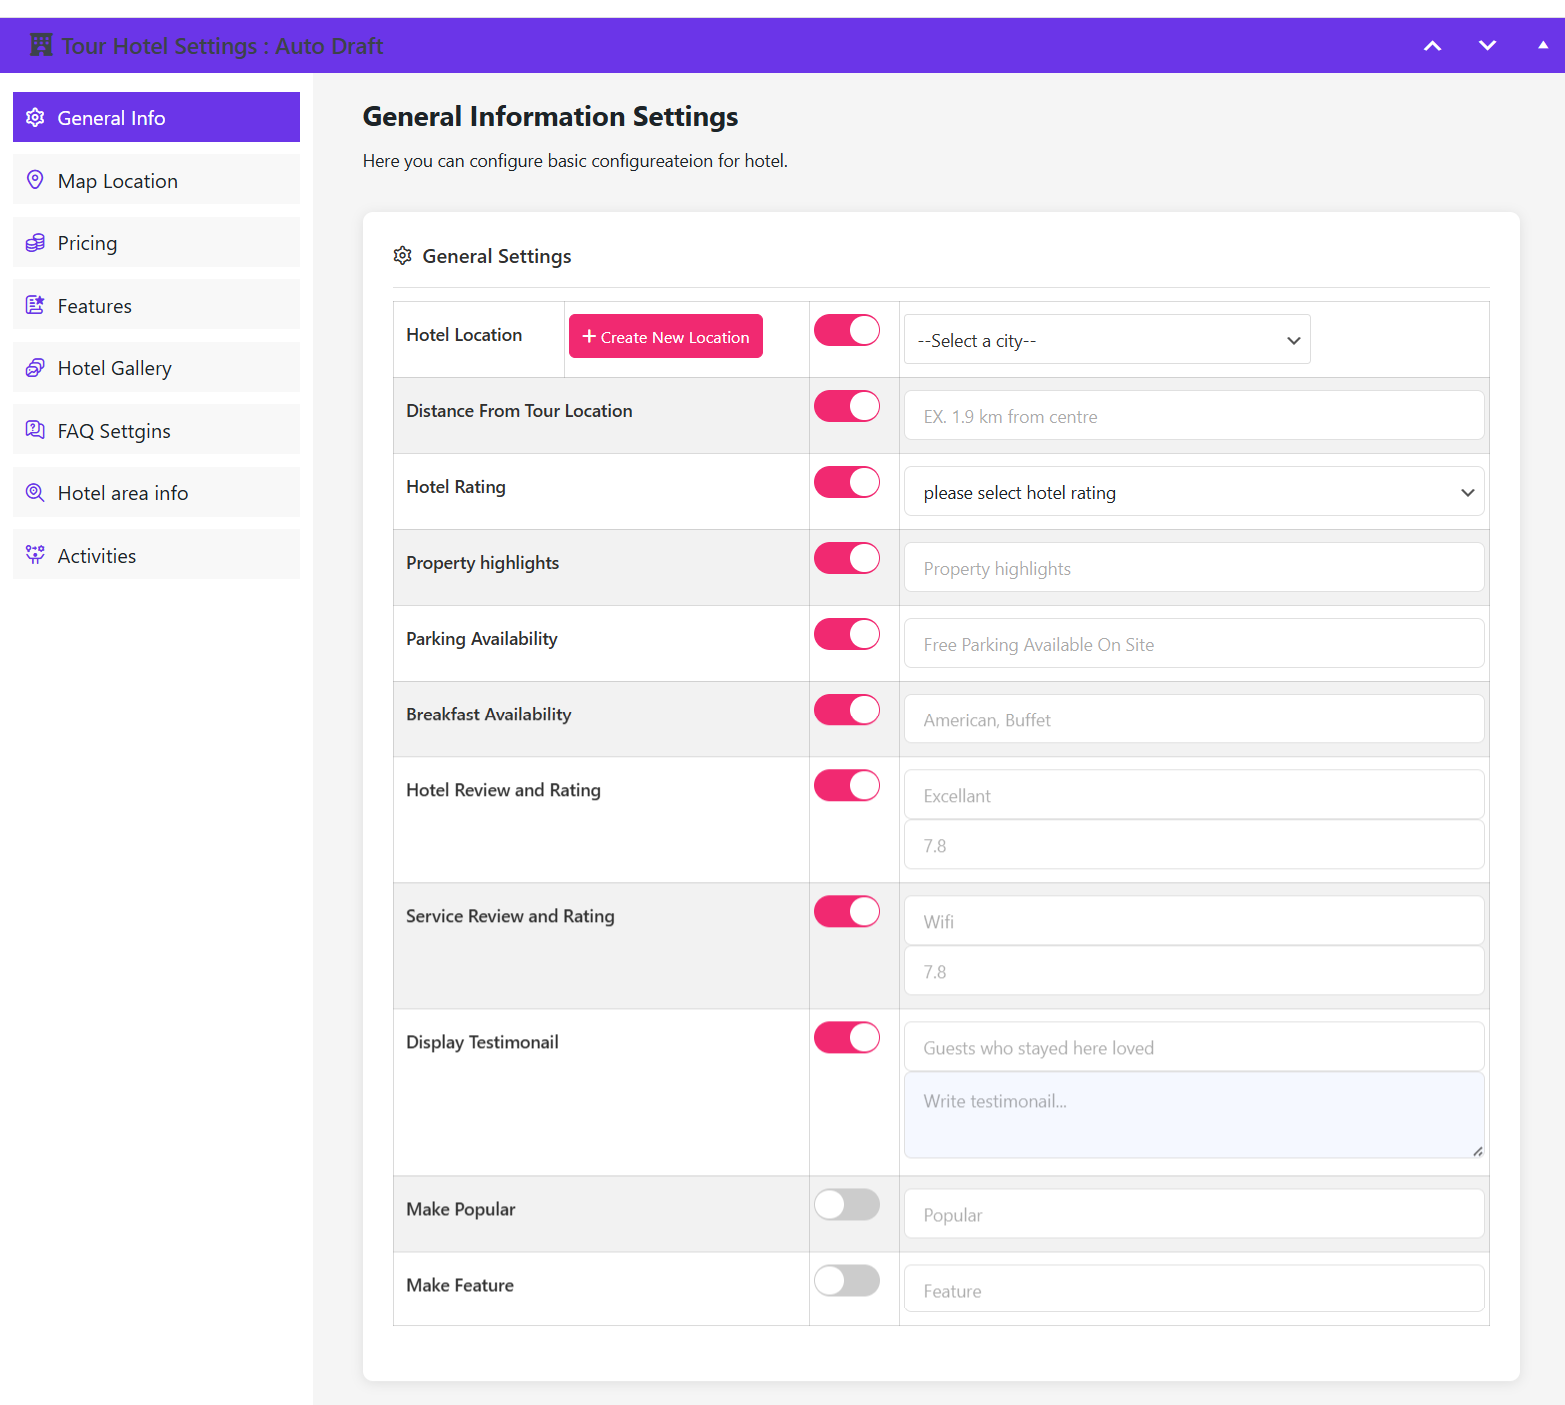
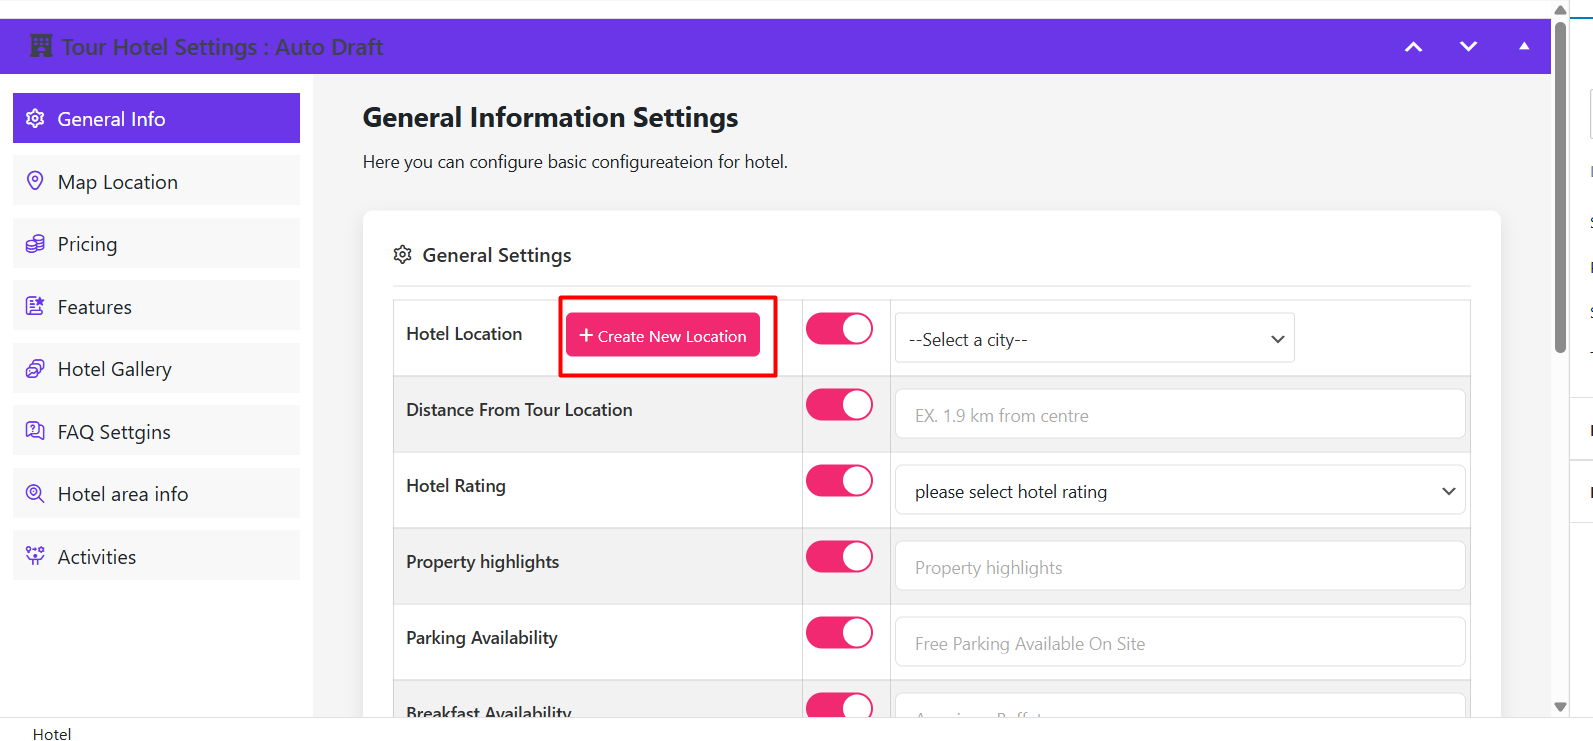
Start with the location. Pick an existing location from the drop-down or create a new one.
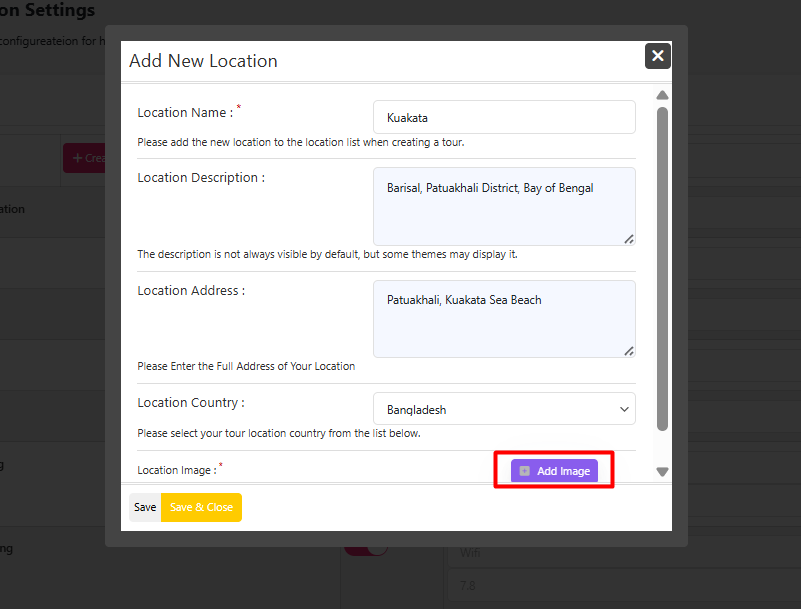
To create a location, enter its name, description, address, country and images, then save.
Select the new location from the drop-down so the hotel is filed under the right destination.
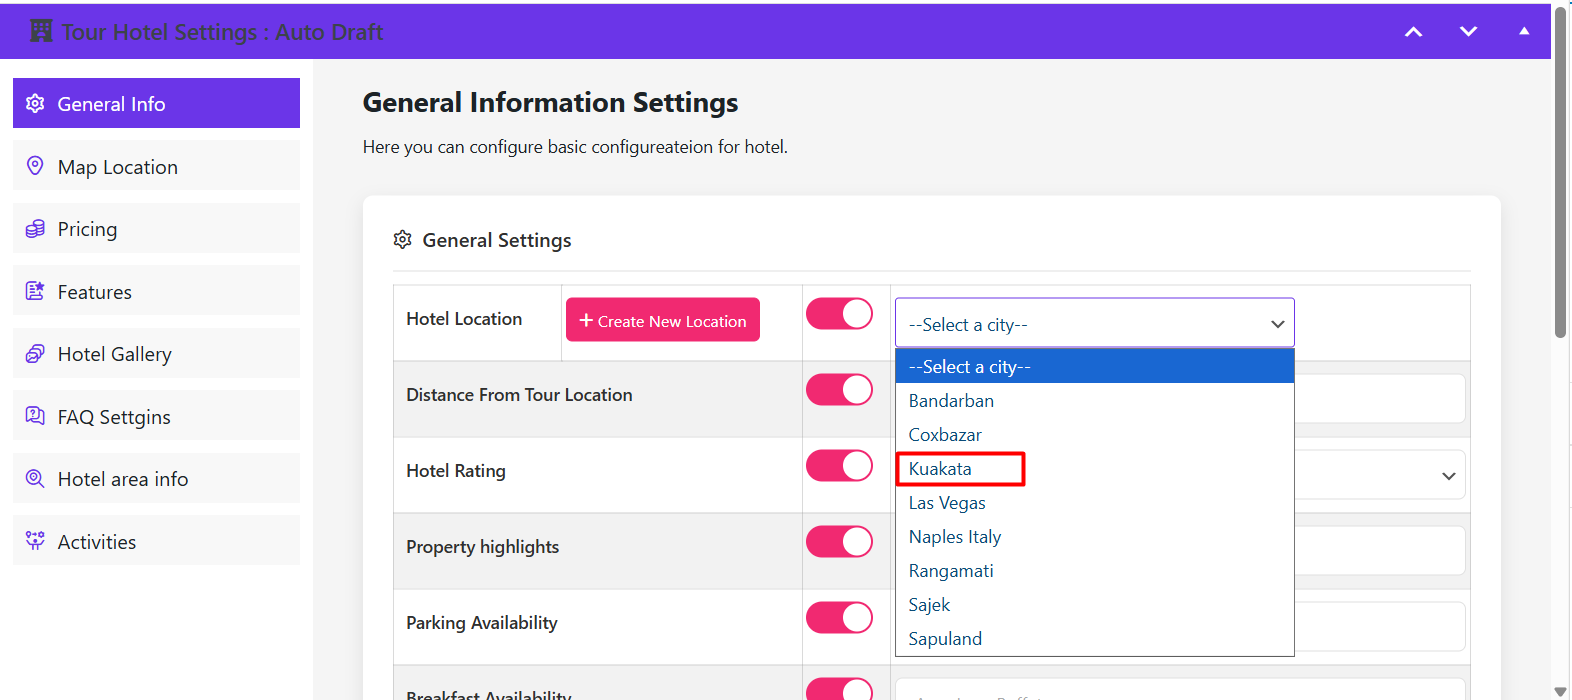
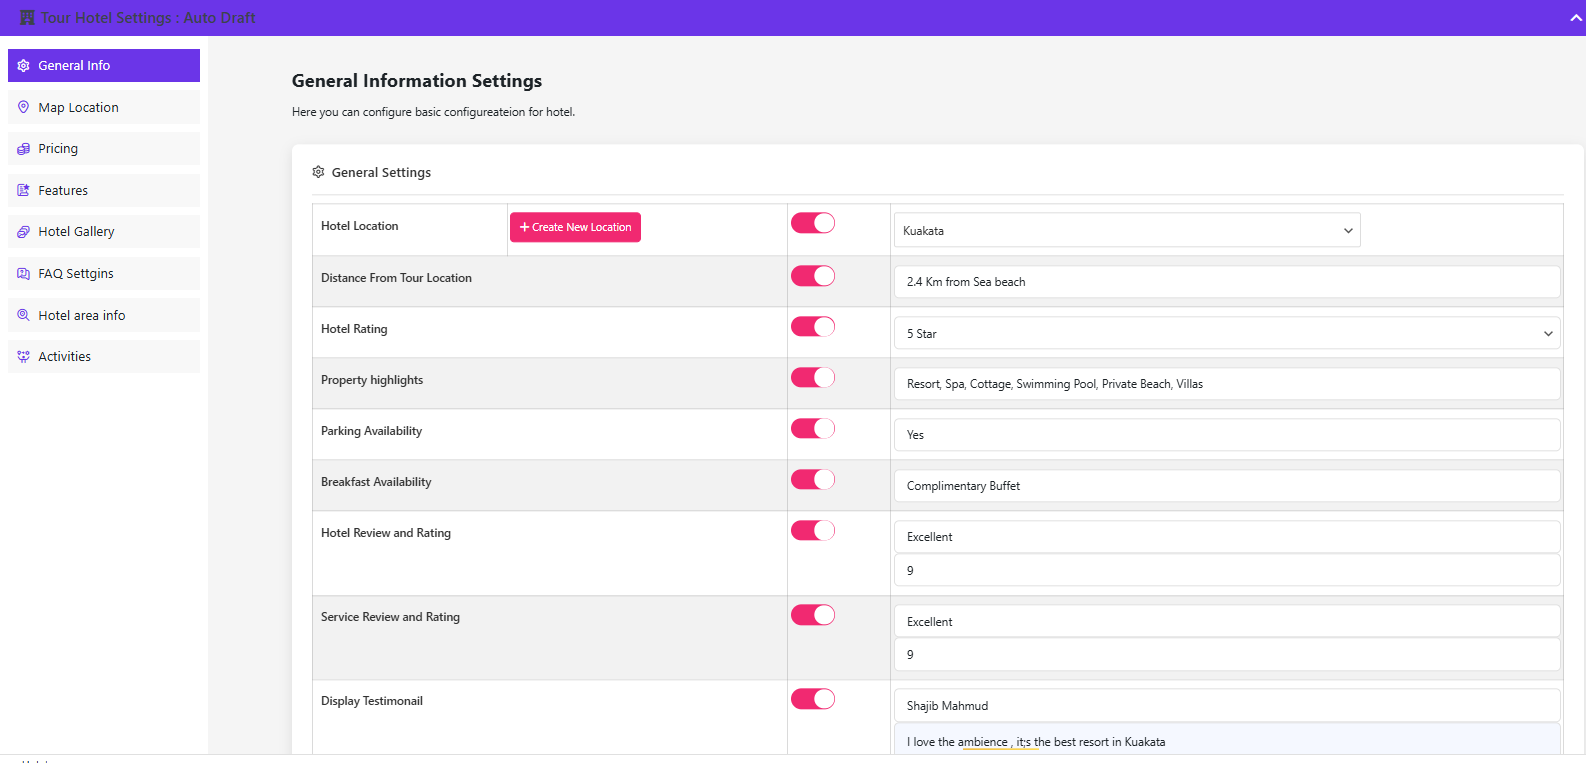
Still on General Info, fill in the distance from the tour location, hotel rating, property highlights, parking availability and breakfast details. You can also add review and rating fields, plus a testimonial to display on the listing.
Location Settings and Map
Switch to the Location Settings tab and toggle it on.
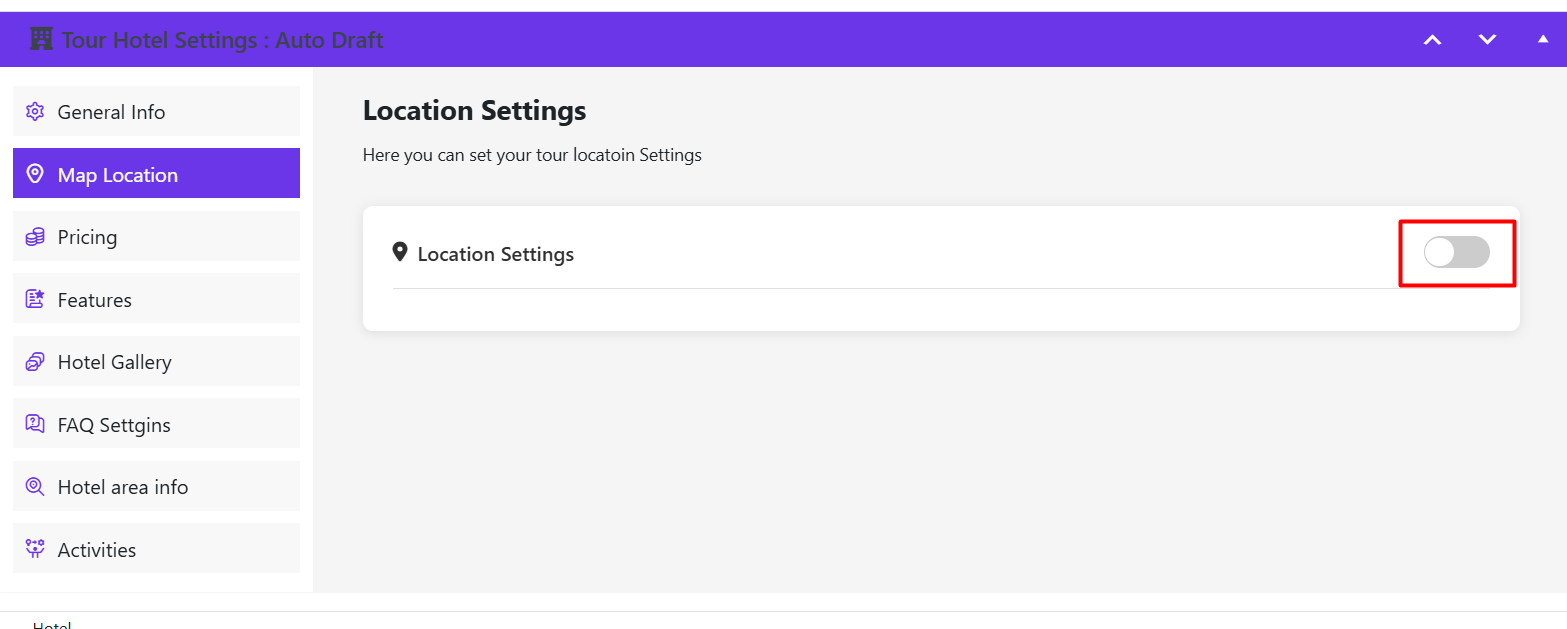
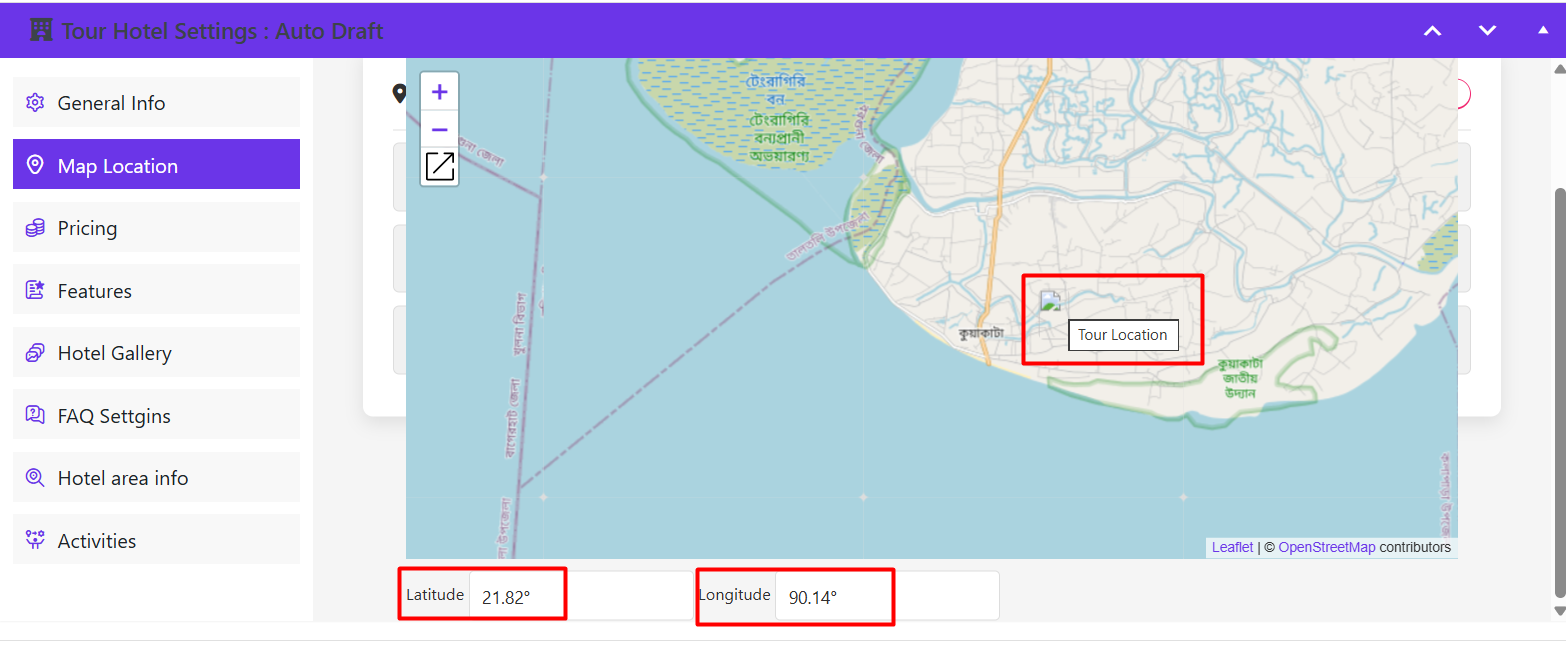
Once enabled, a map appears. Enter the latitude and longitude and your hotel is pinned on the map that guests see.
Add Rooms and Pricing
Now the commercial part. On the pricing tab, click Add New Room.
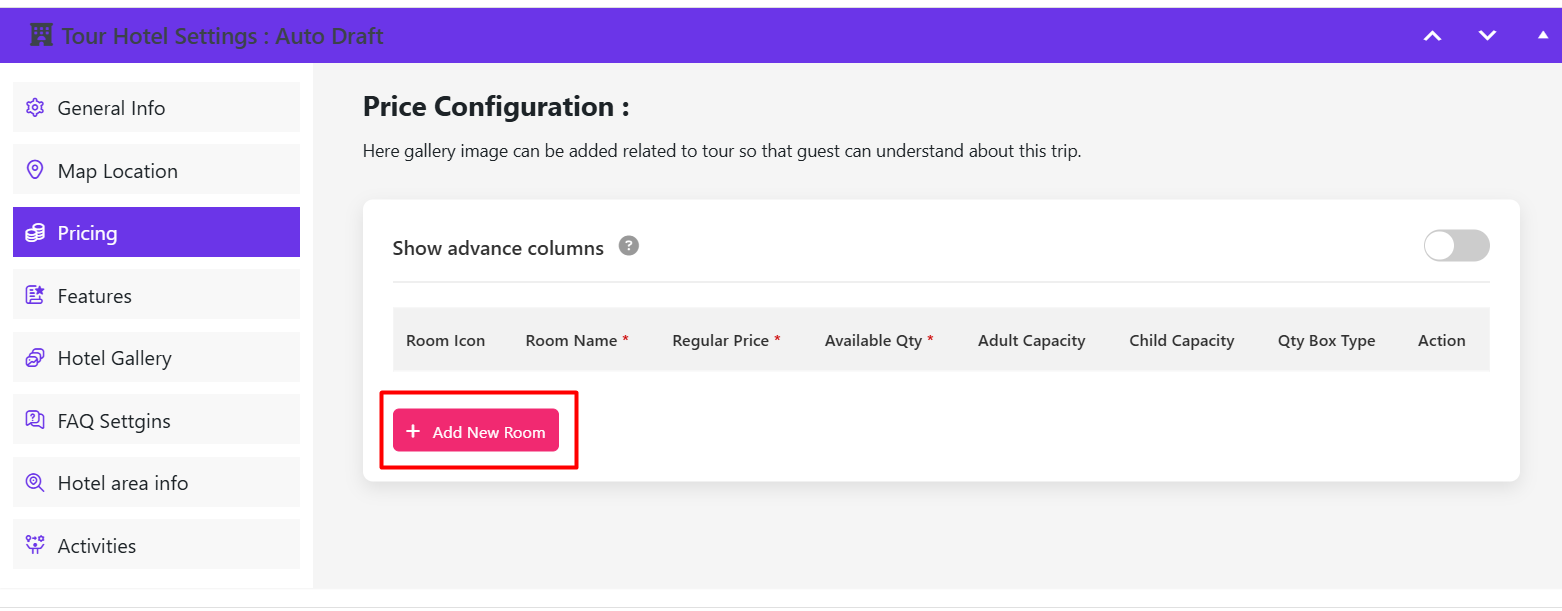
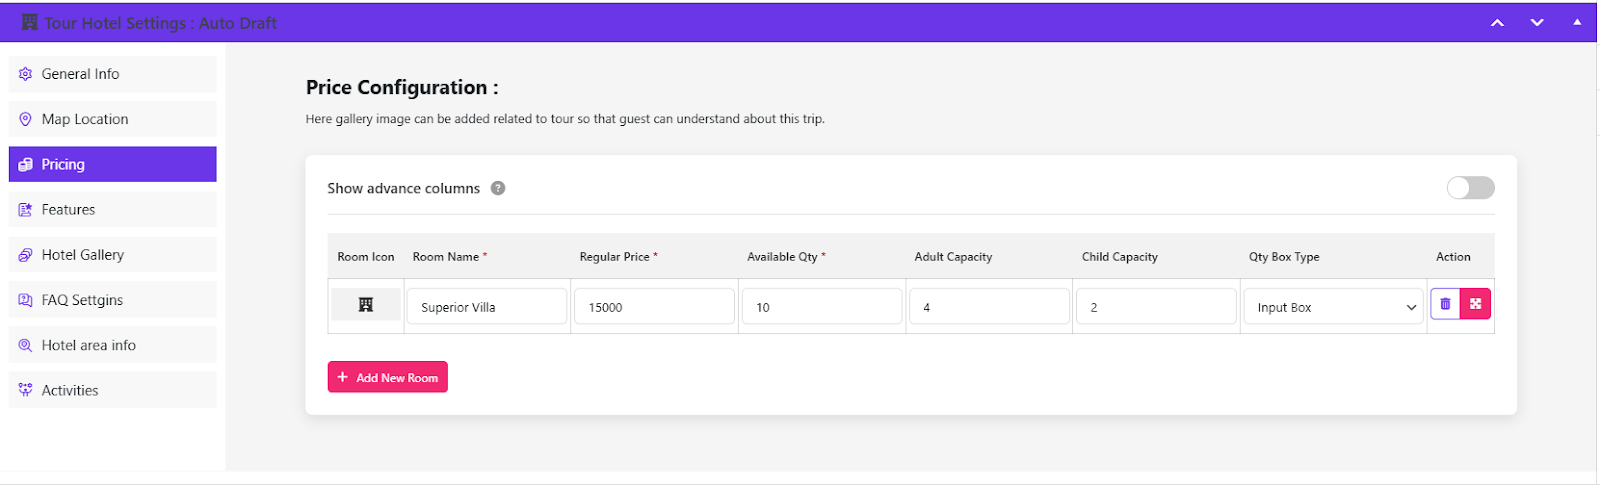
For each room type you set the room icon, room name, regular price, available quantity, adult capacity and child capacity, then select whether the quantity box is shown at checkout.
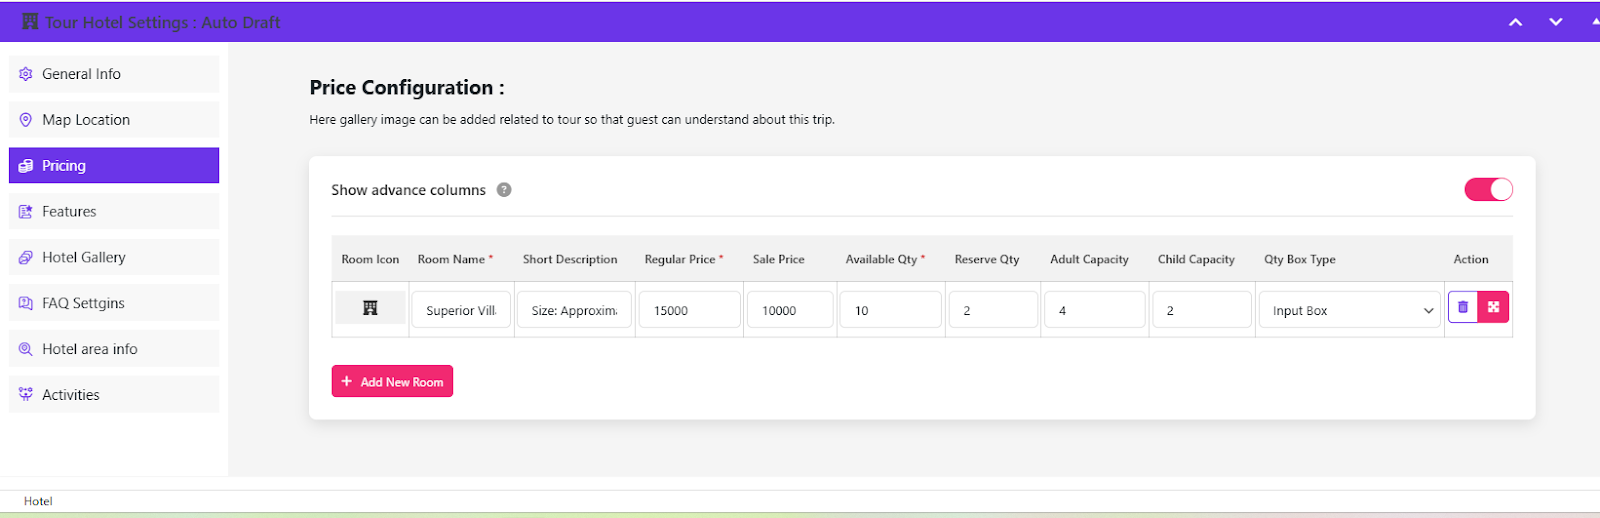
Running an offer? Toggle Show Advanced Columns to reveal the sale price and reserve quantity fields.
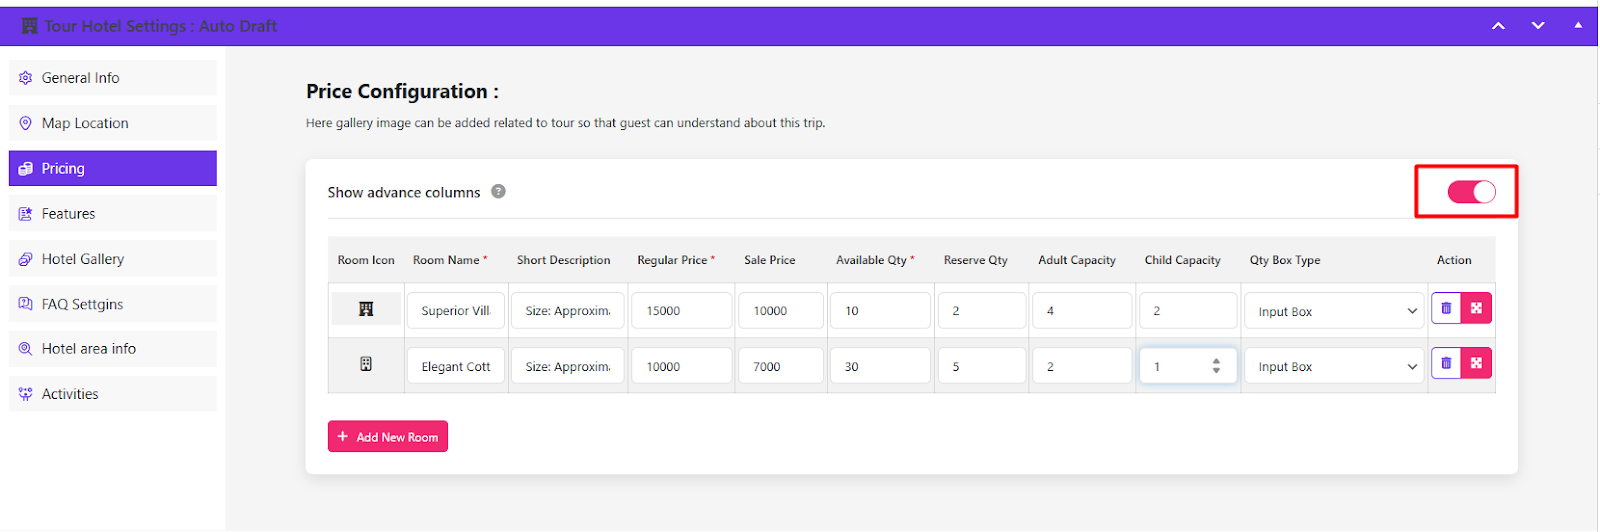
You can add as many room types as the property needs, each with its own capacity and price.
Feature Settings, Gallery and FAQ
The Feature Settings panel is where you attach the amenities you built earlier.
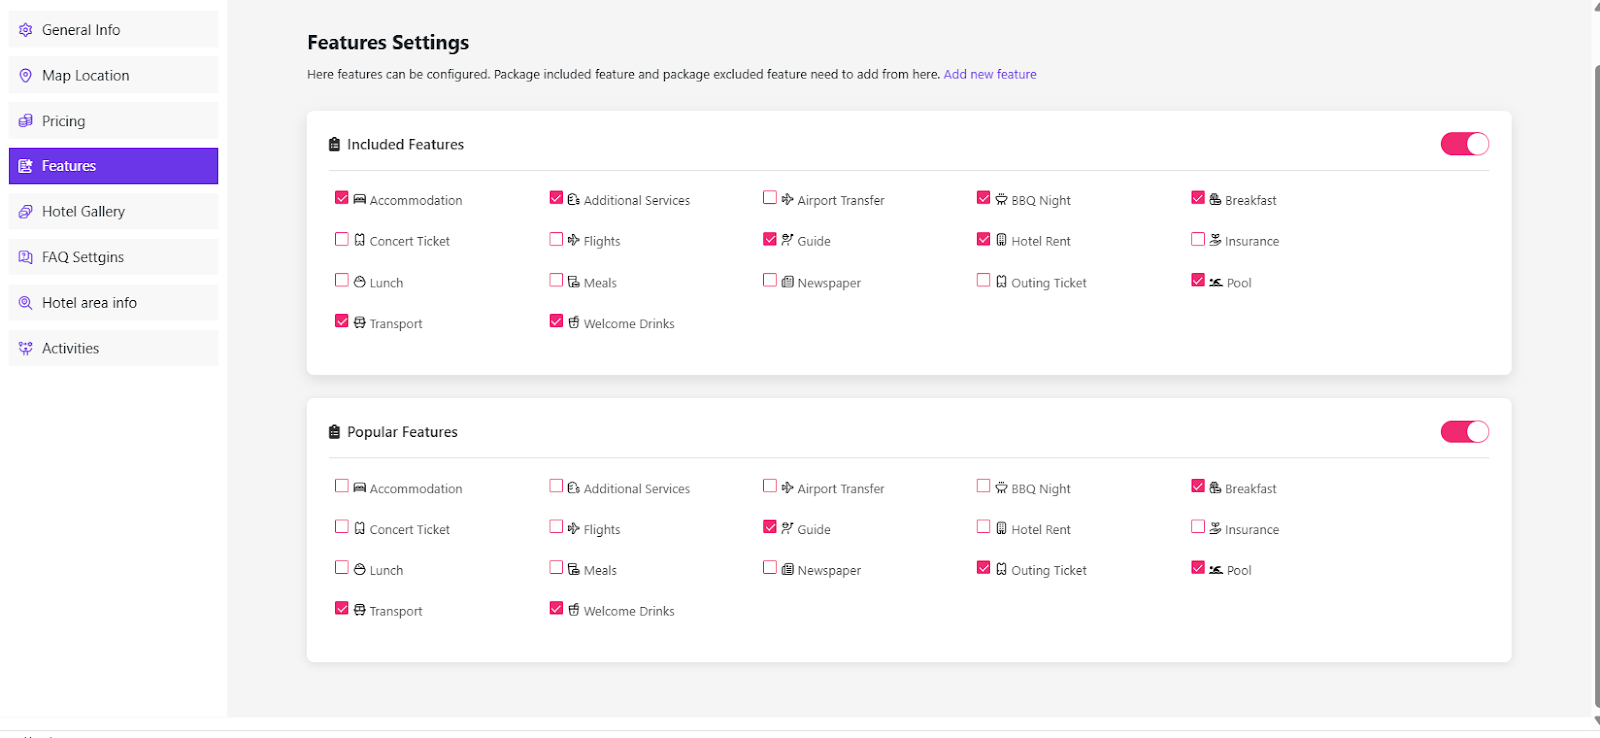
Select the features that apply to this hotel.
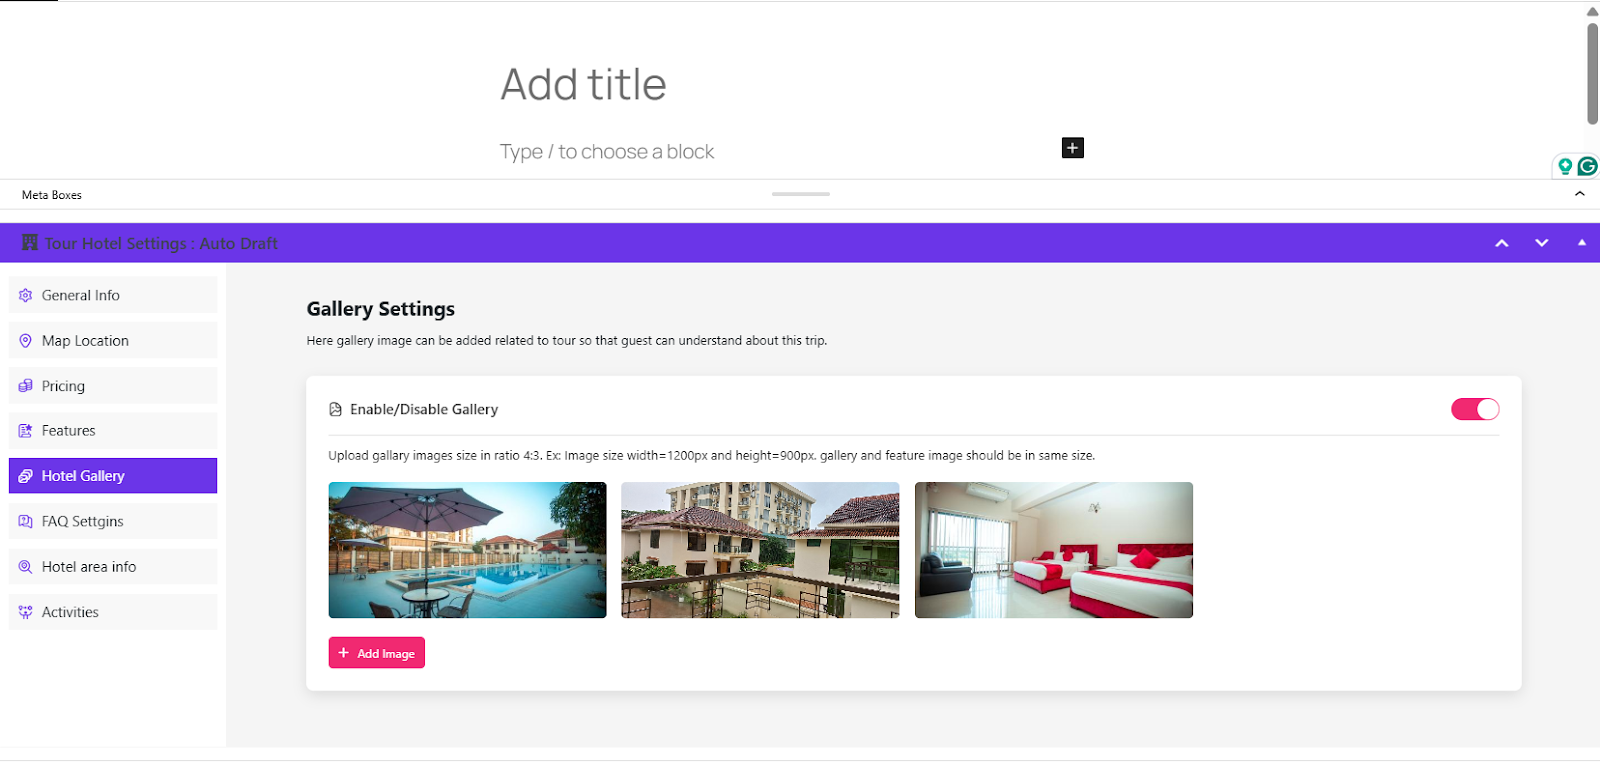
Then add room and property photos from the gallery. Good photography is the single biggest lever on your conversion rate for a hotel listing.
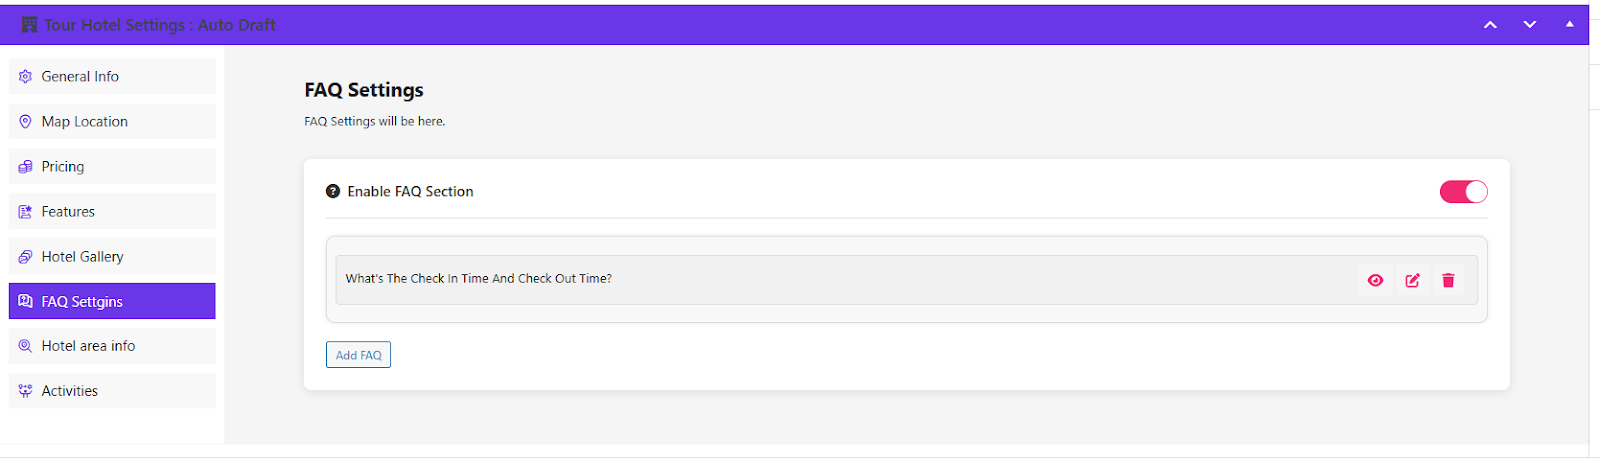
If guests ask the same questions before booking, answer them on the page. Open the FAQ section.
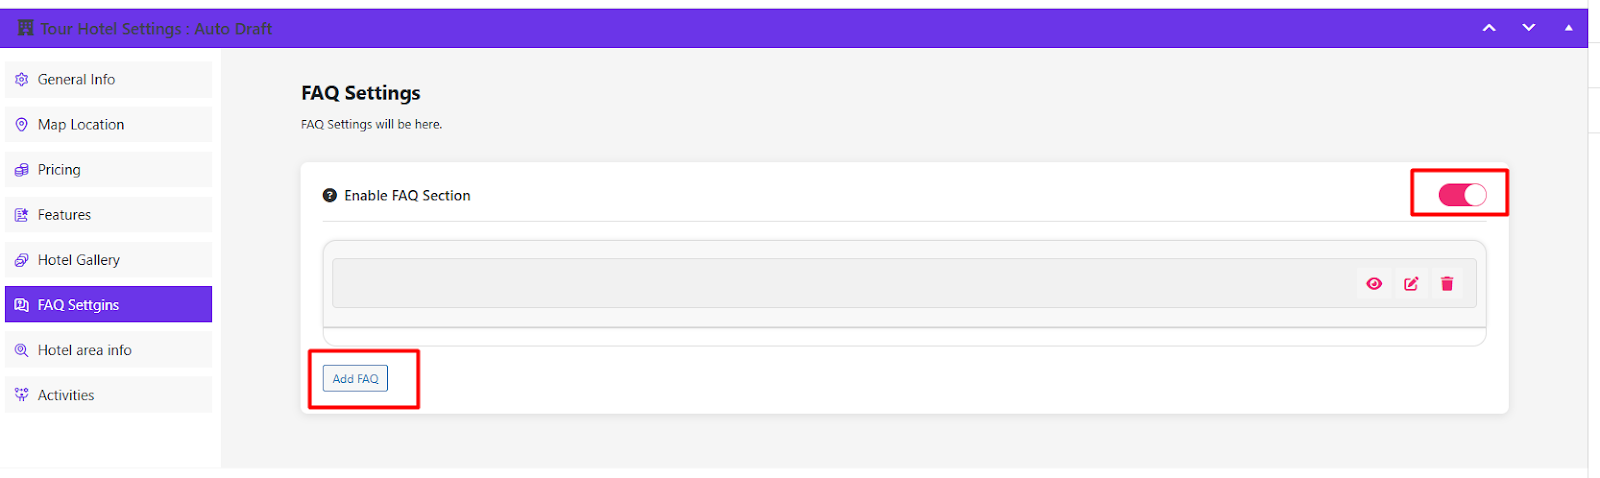
Add the title and content for each question.
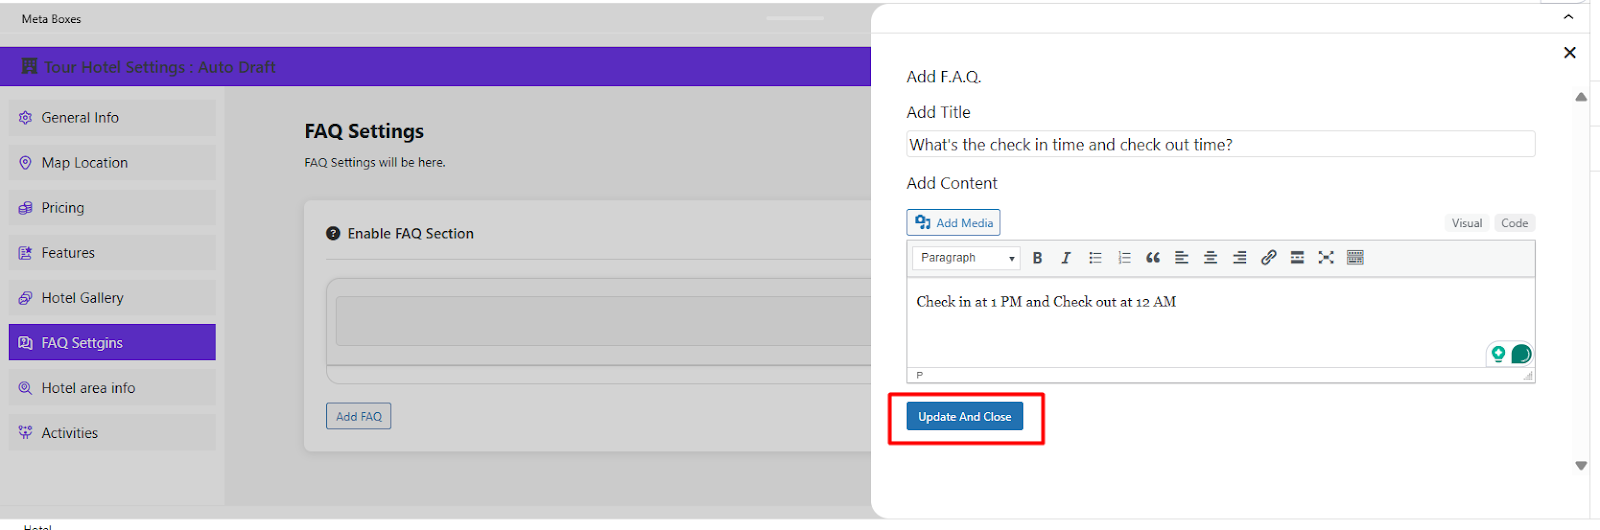
Use the toggle to enable or disable the FAQ block on the listing without deleting your answers.
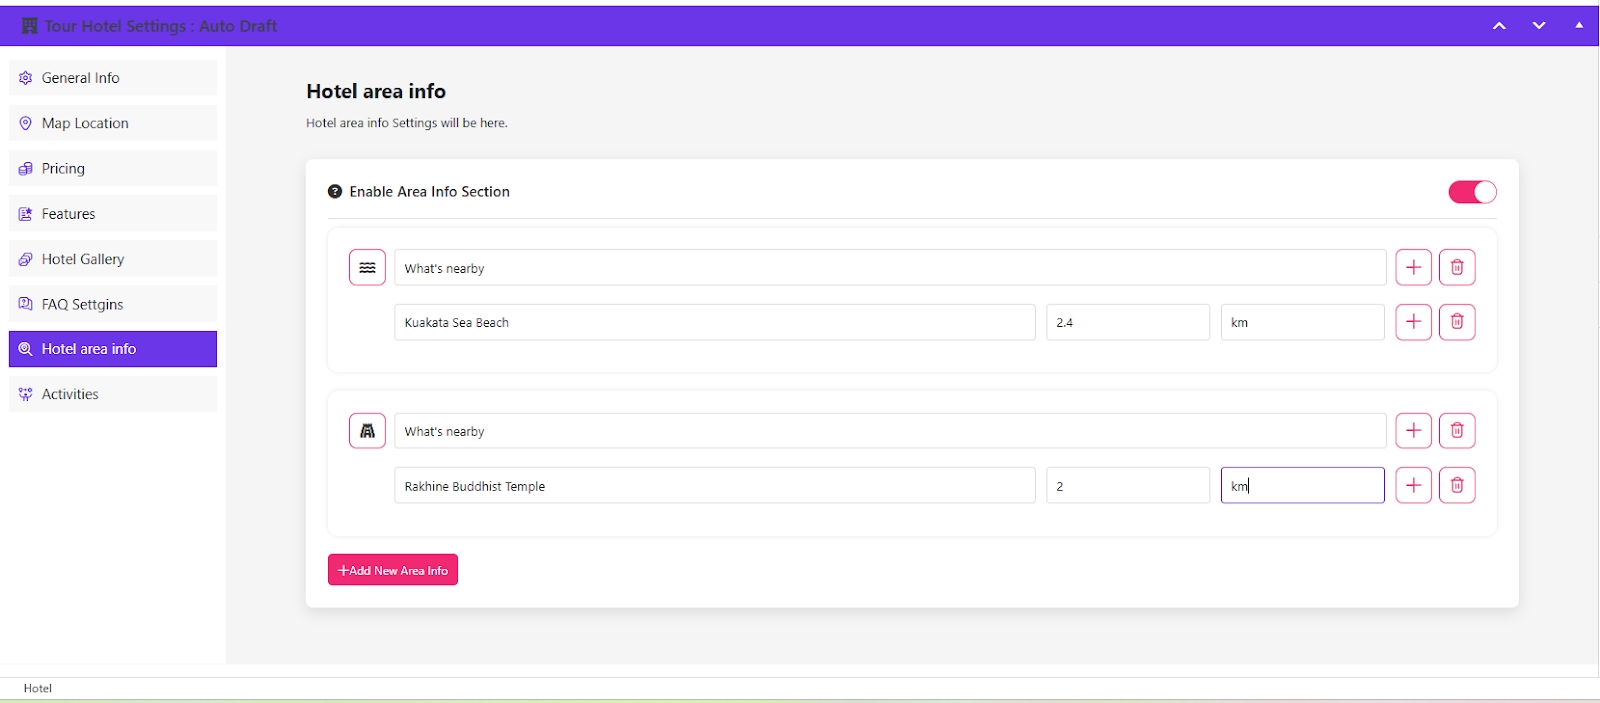
The Hotel Area Info tab holds what is nearby: landmarks, restaurants, transport links and anything else that helps a guest picture the stay.
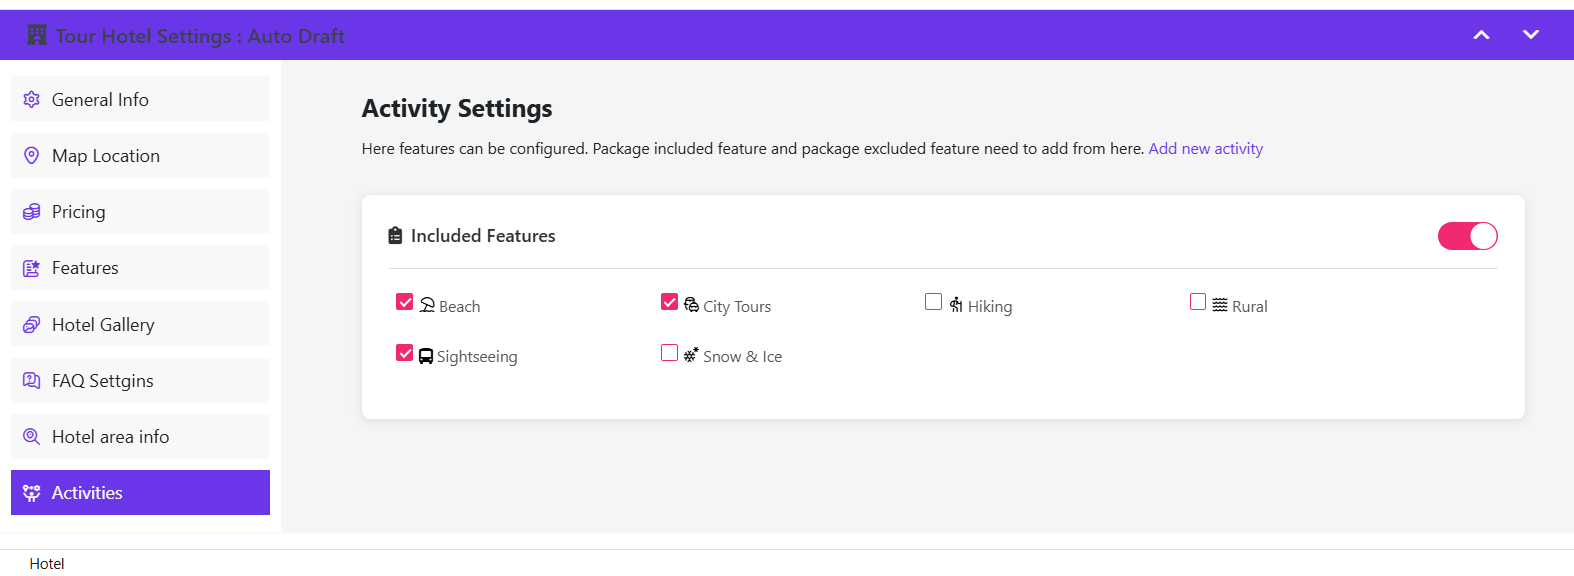
The final tab is Activities, where you select the activities your hotel offers.
With the content complete, click the arrow icon at the top to expand the title and description fields.
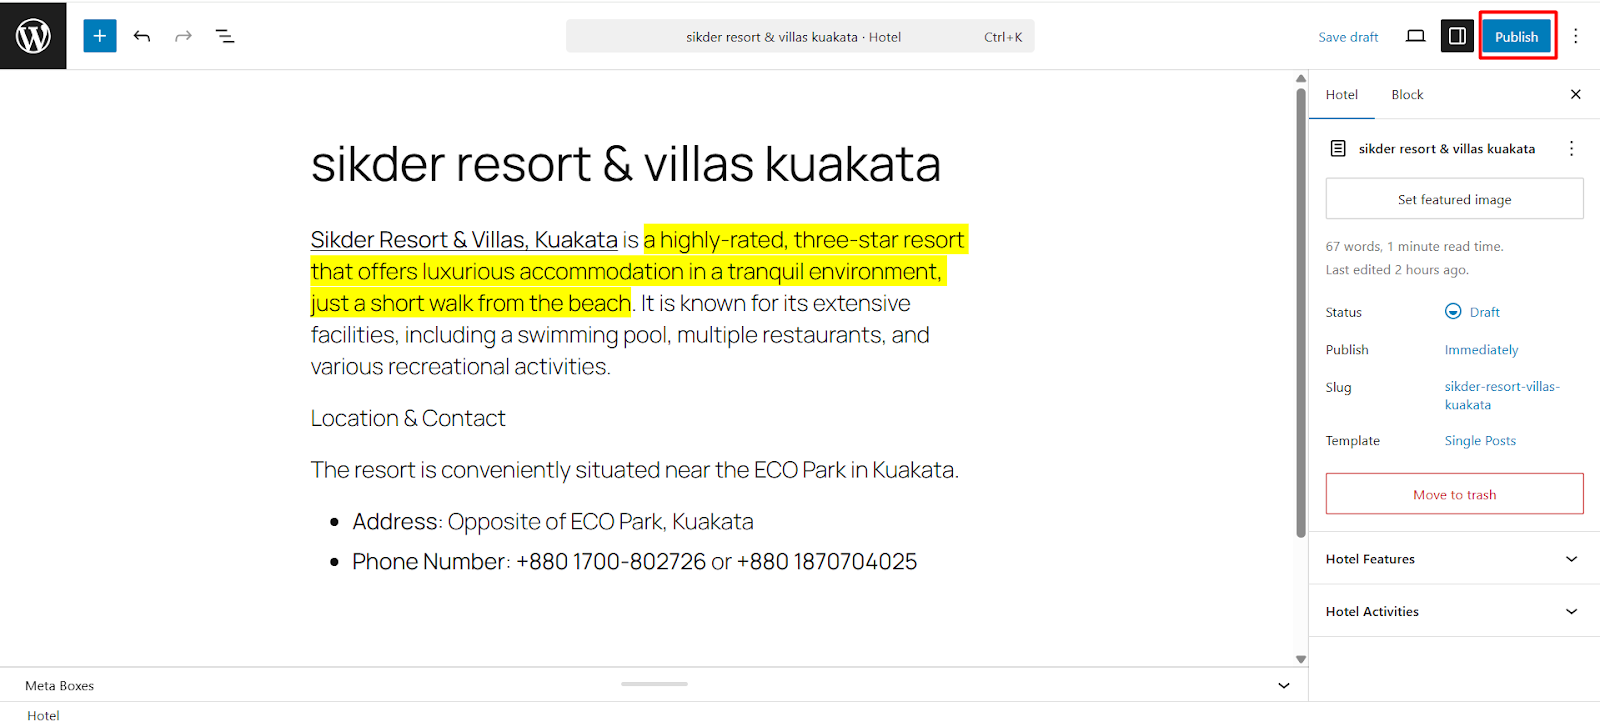
Enter the hotel name and description, then click Publish.
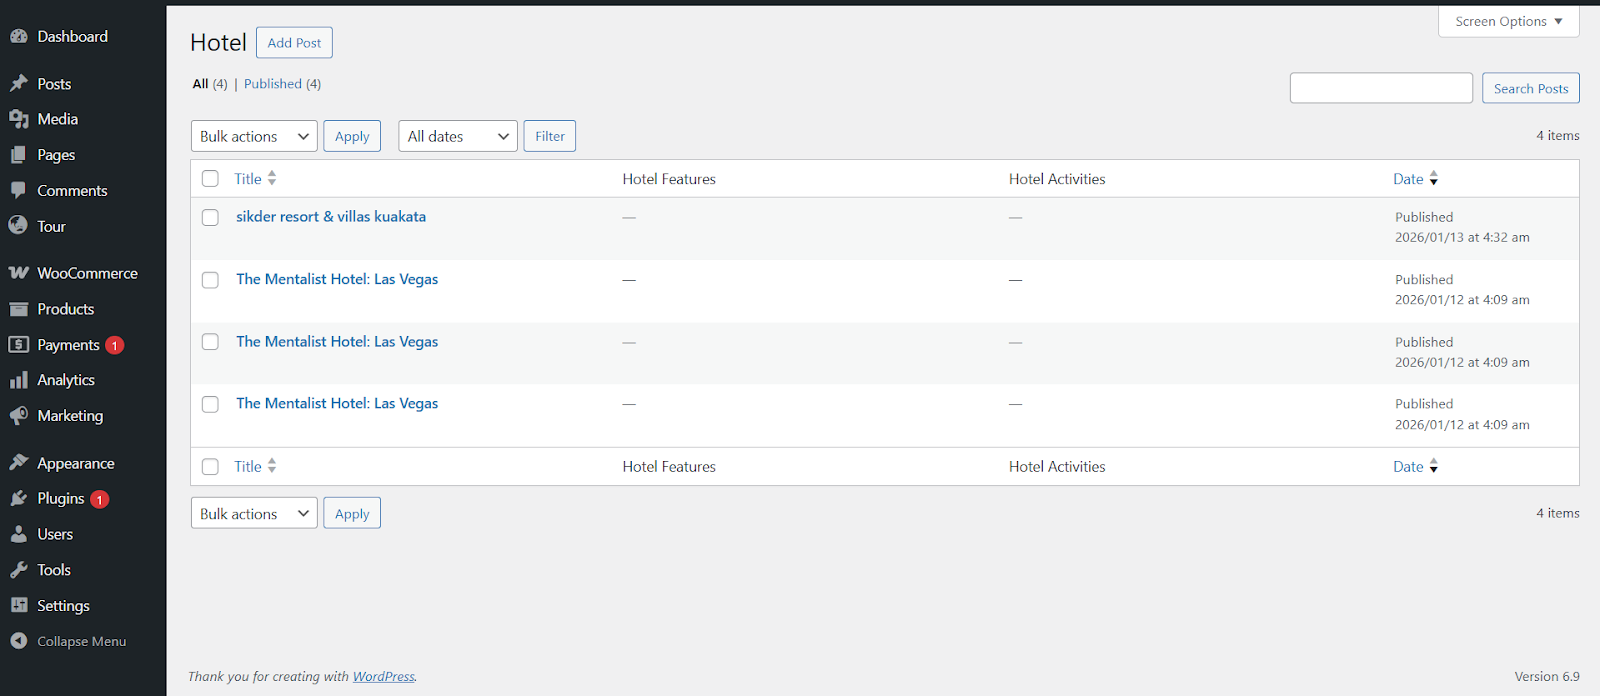
Your hotel is live. Repeat the process for as many properties as you sell. Note that a hotel only becomes bookable through the tour flow once you complete Step 3, because WpTravelly sells rooms as part of a package rather than as a standalone listing.
Step 3: Add Your Hotel to the Tour Package
Go back to the Tour menu and either create a new tour or edit an existing one to attach the hotel.
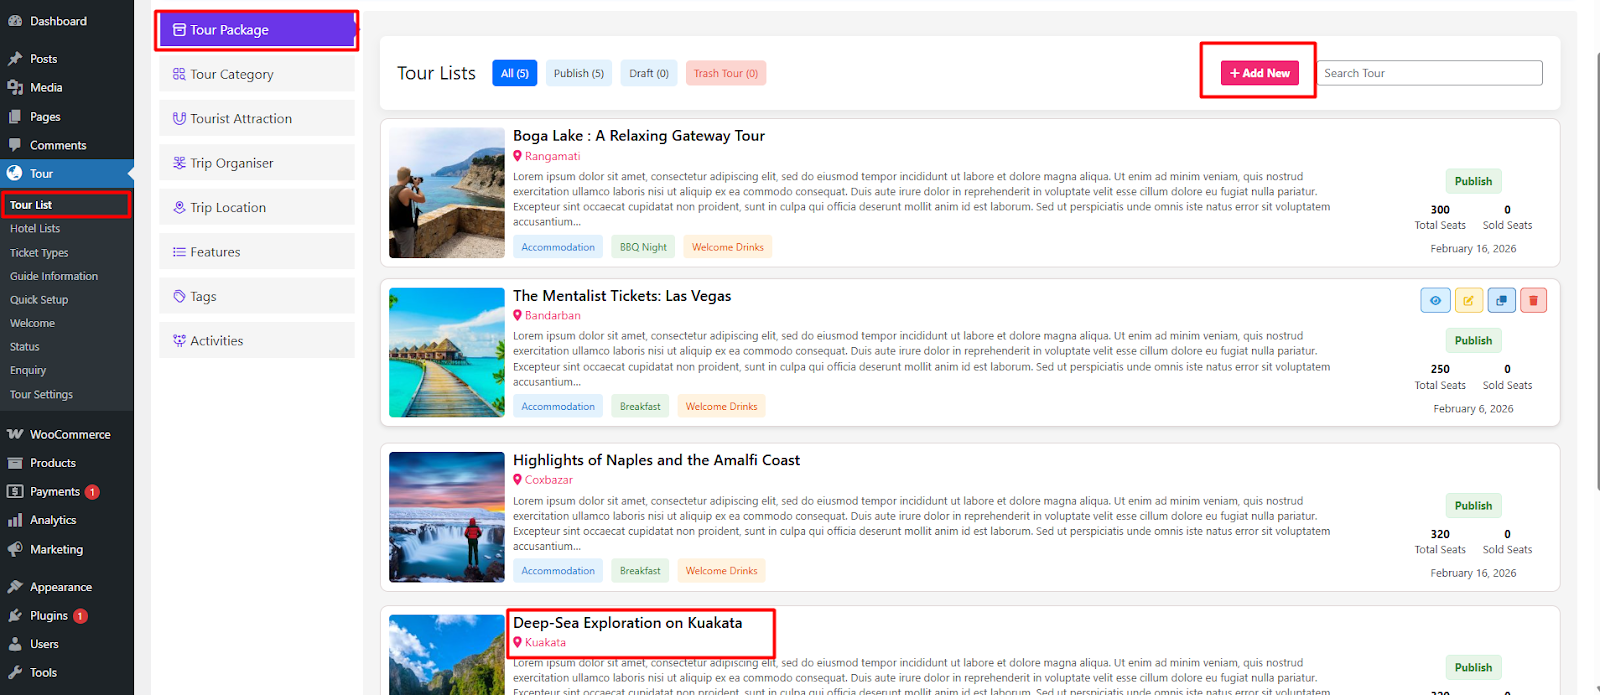
If tours are new to you, this walkthrough of building a personalised travel booking website with WpTravelly shows how a tour package is structured from the front end.
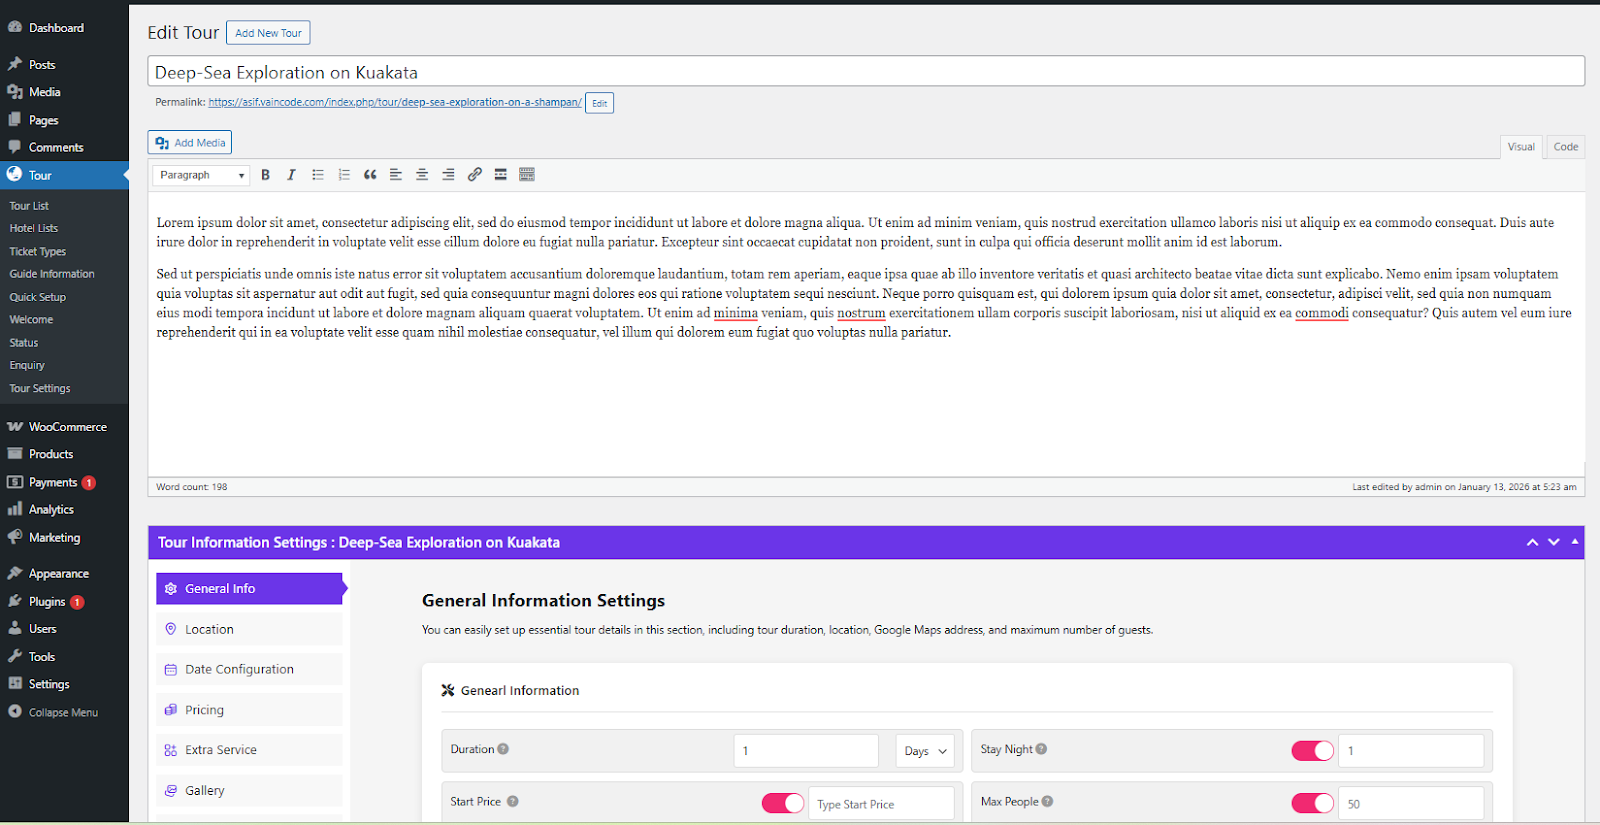
Open the tour and set its location from the Location tab.
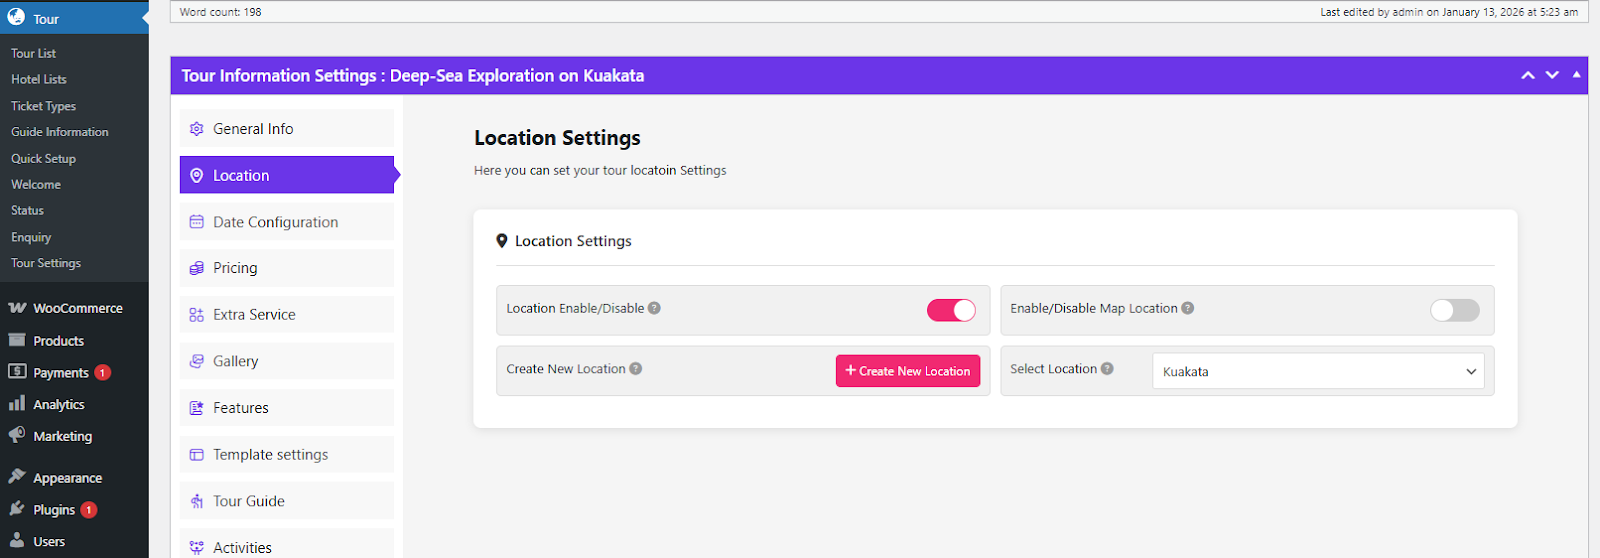
You can attach a mapped location with coordinates, or simply enter the location name.
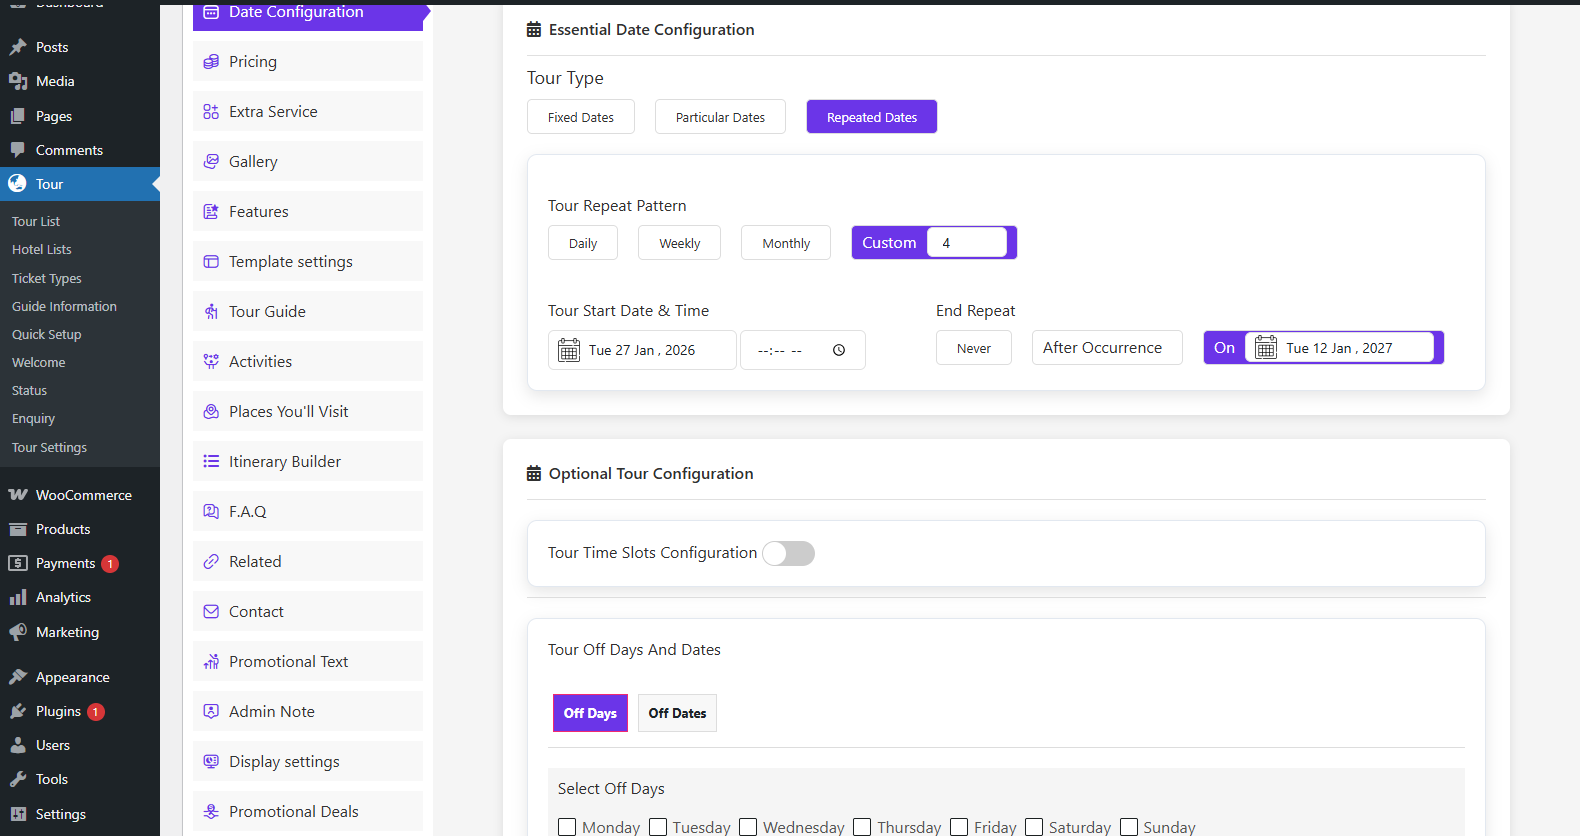
Use the Date Configuration tab to set the start and end dates and times for the package and its hotel stay.
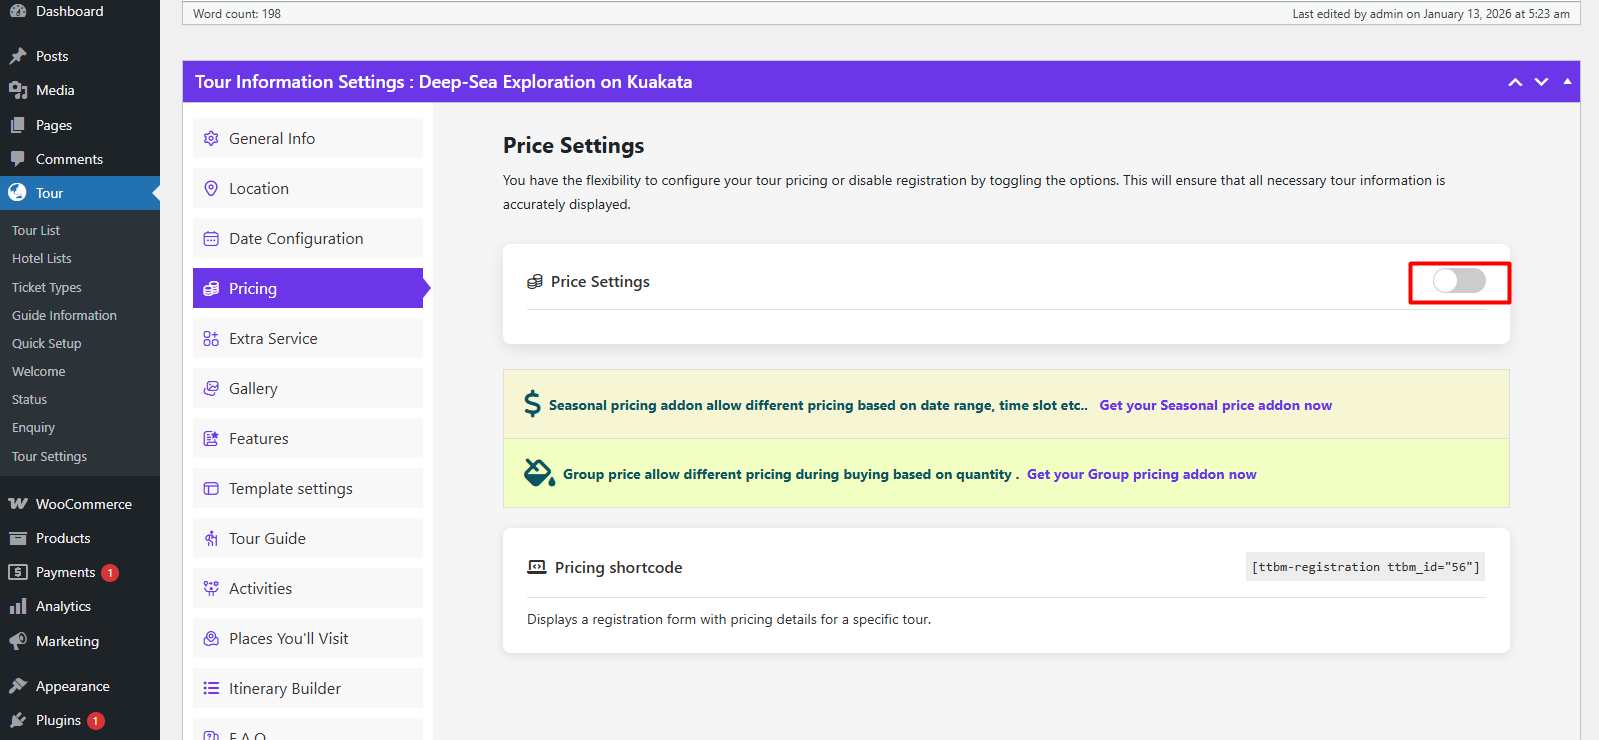
Next, toggle on Price Settings, the part that connects the hotel to the package.
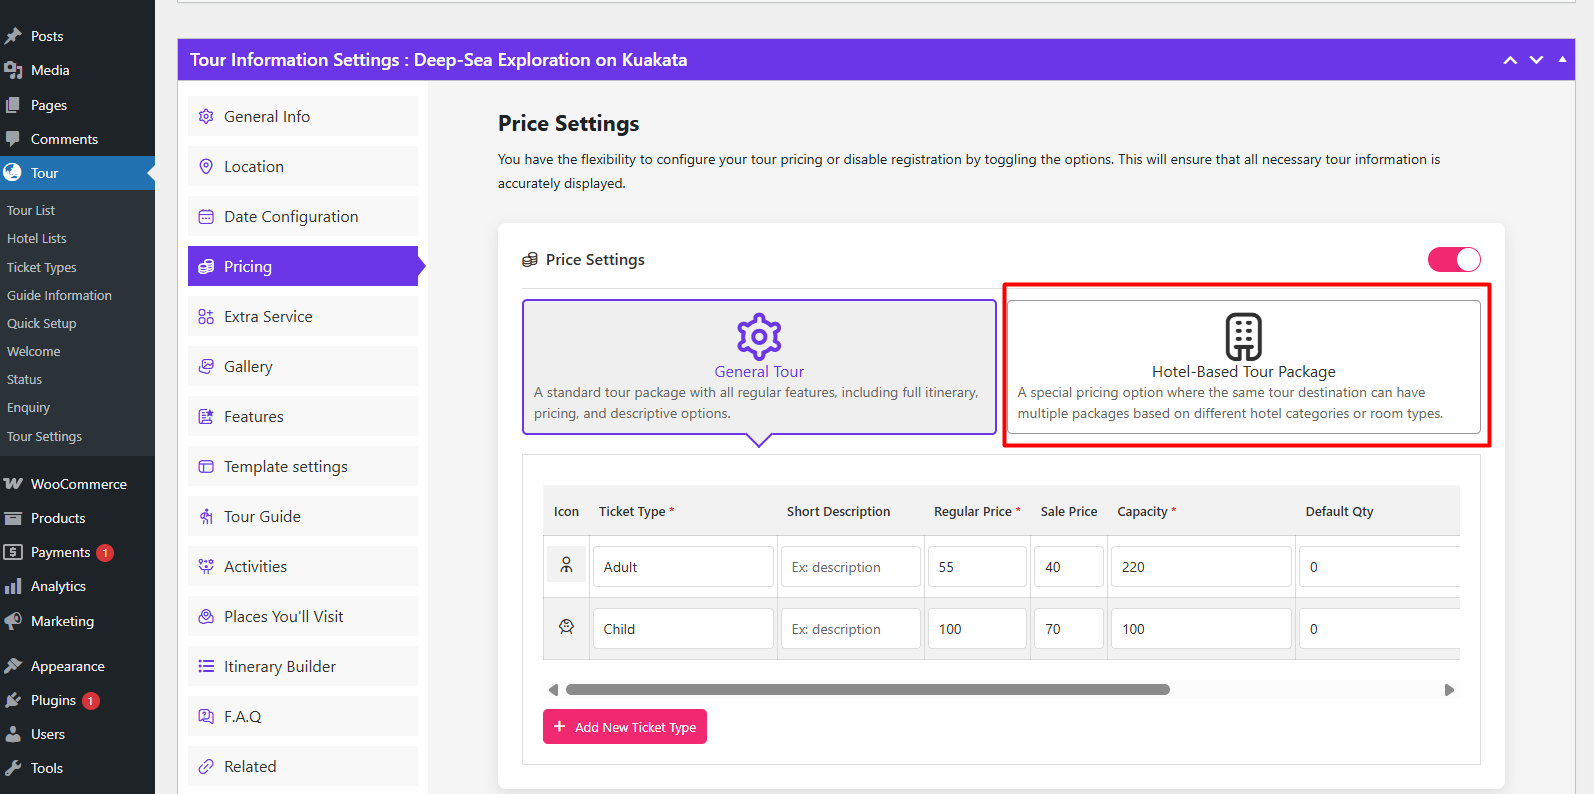
For a package with no accommodation, leave it as General Tour.
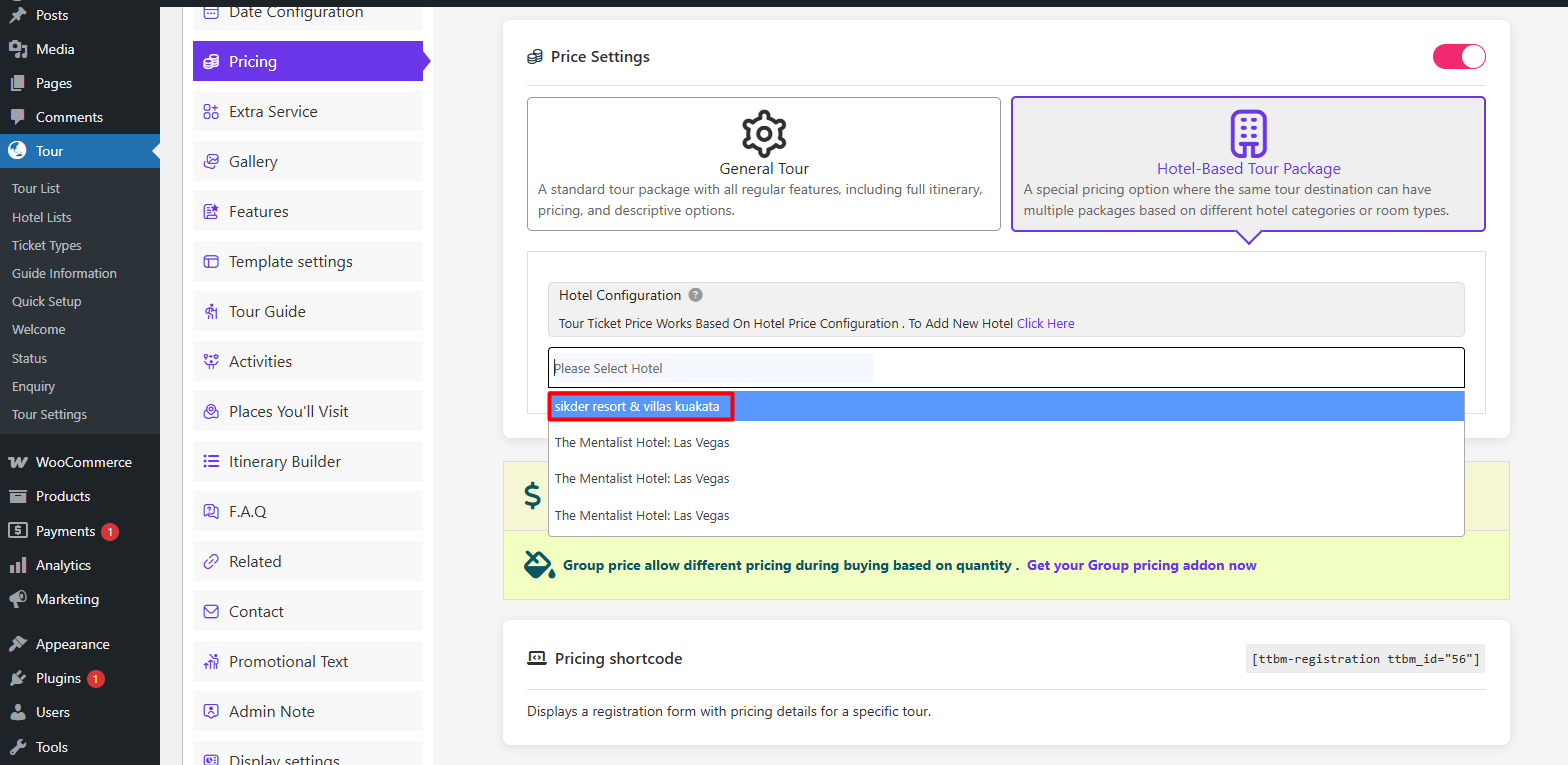
Because this is an overnight package, select Hotel-Based Tour Package and choose the hotel you just published from the drop-down.
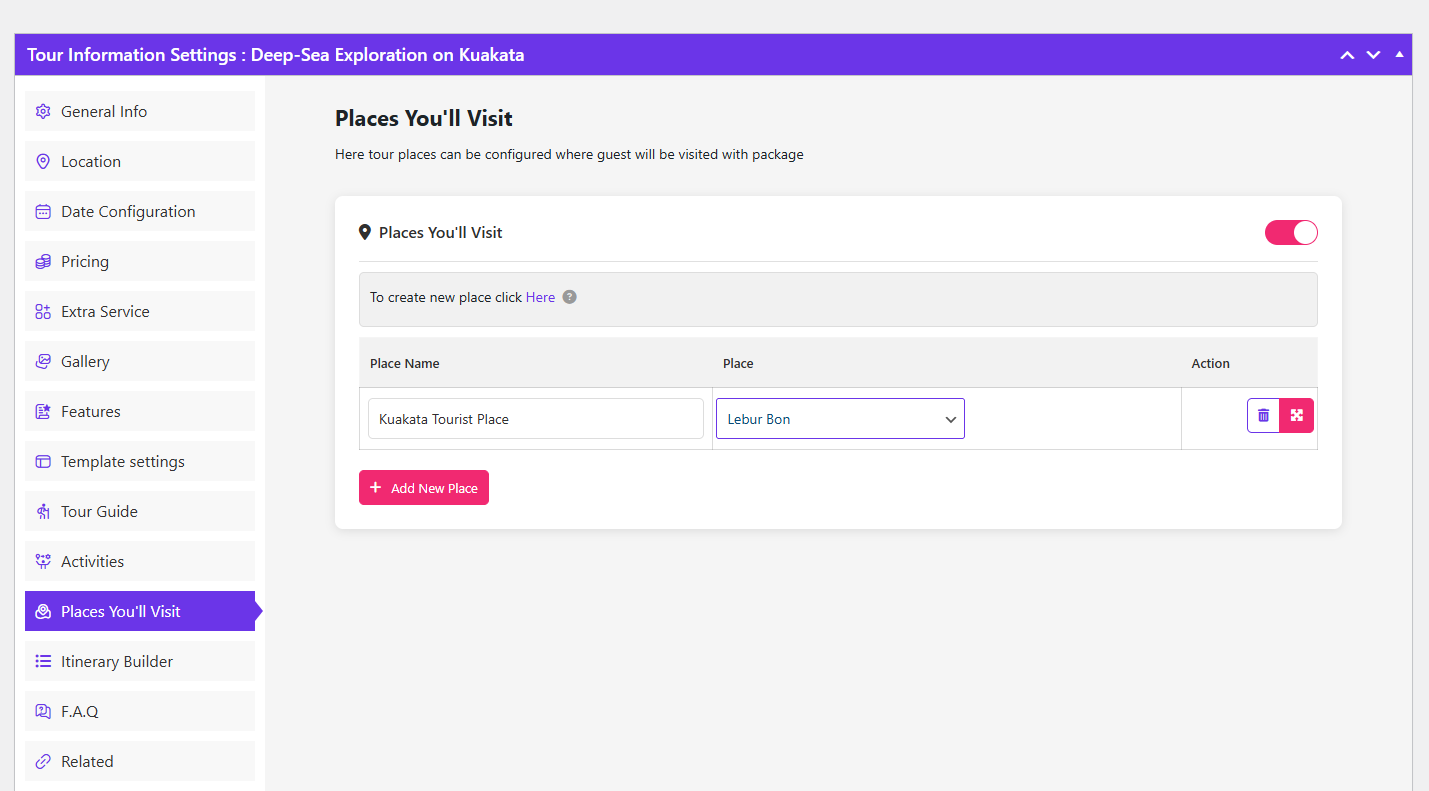
The itinerary tab lets you list the places the tour visits, which pairs naturally with the hotel area information you filled in earlier.
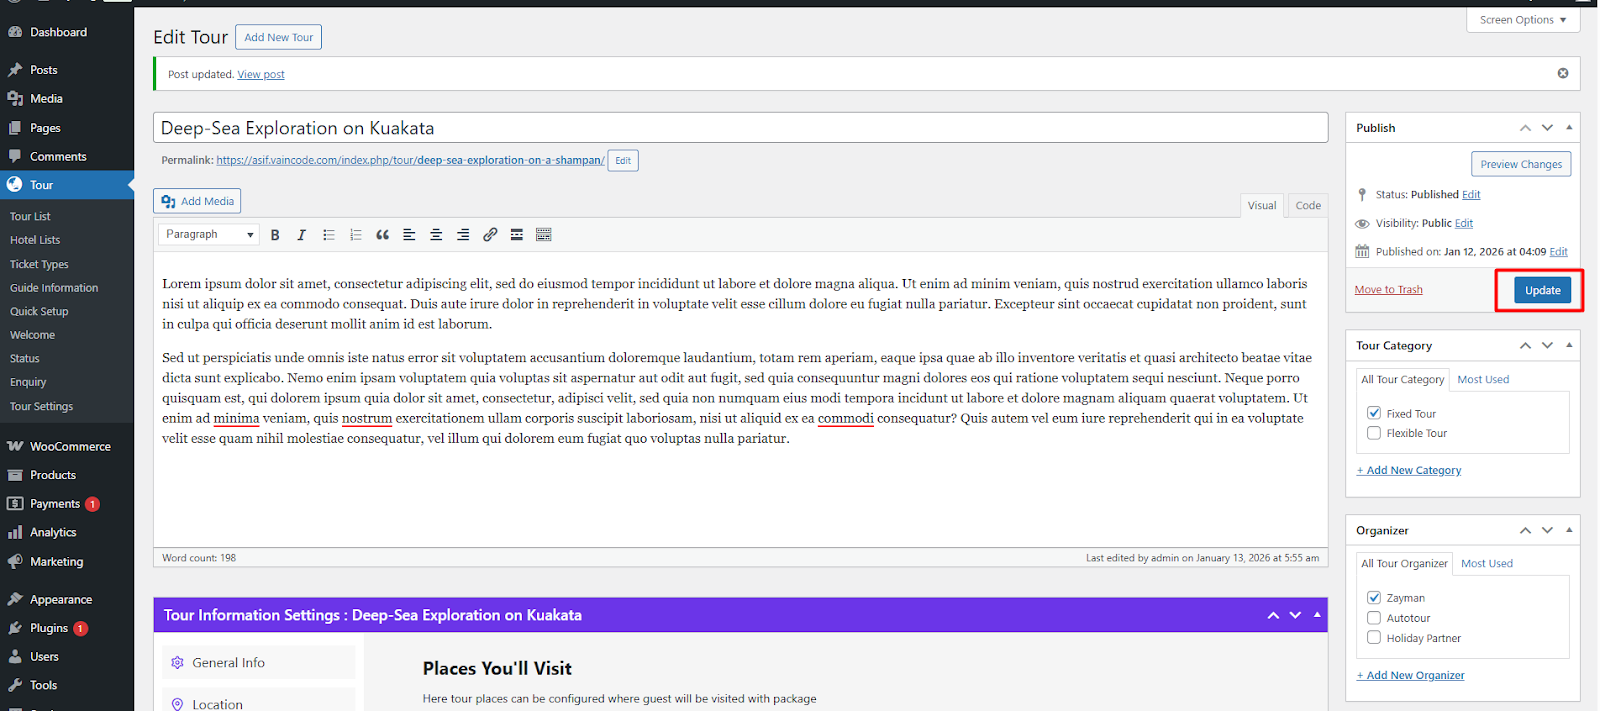
Click Publish or Update to save the tour.
Test the Booking From the Front End
Always test your own booking flow before you promote it. Go to the hotel search page on the front end of your site.
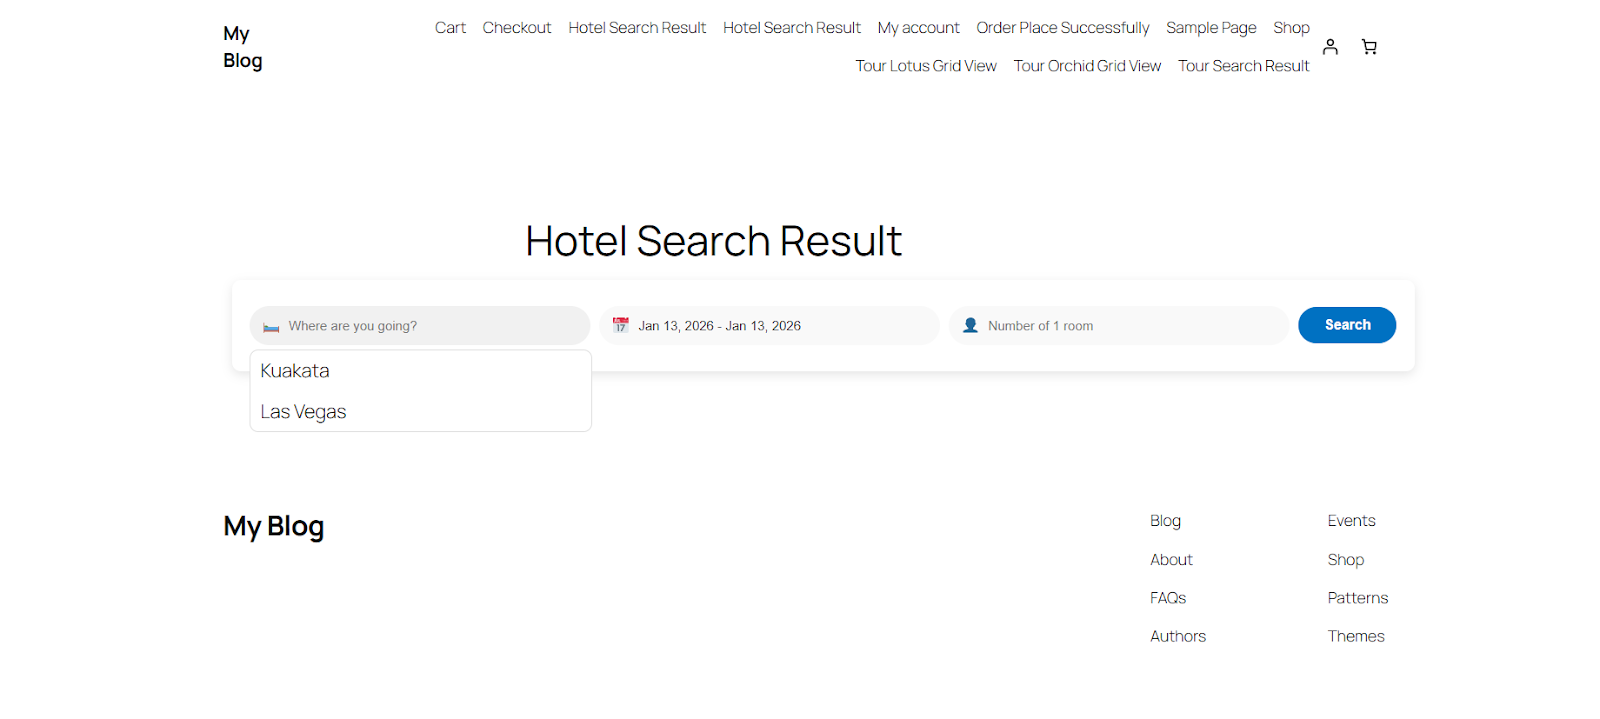
Enter the hotel or destination, choose check-in and check-out dates from the calendar, set the number of rooms and click Search.
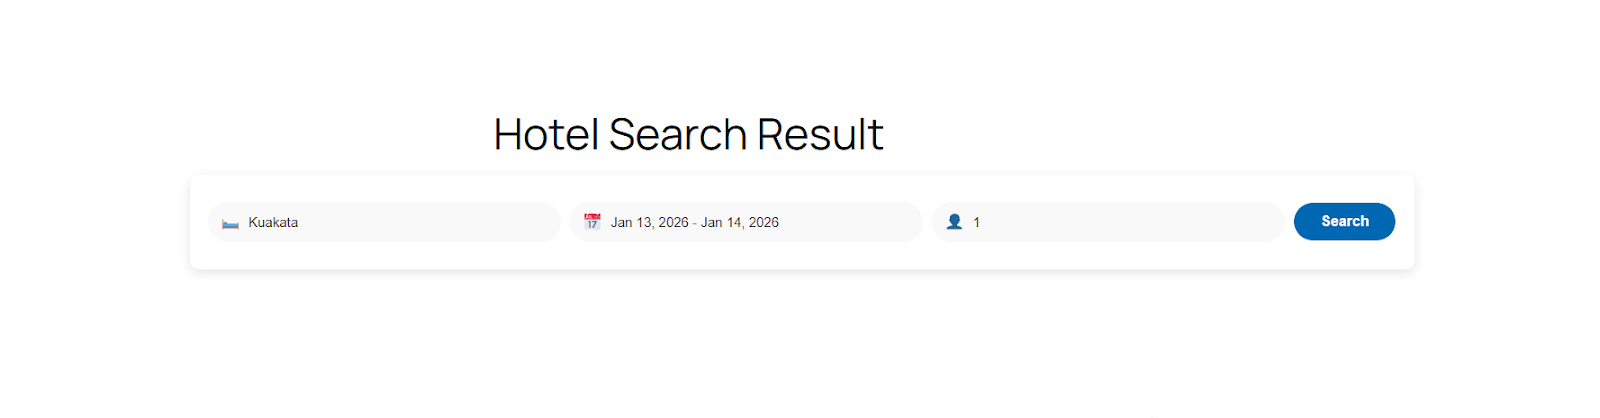
Matching hotels appear in the results based on your search criteria.
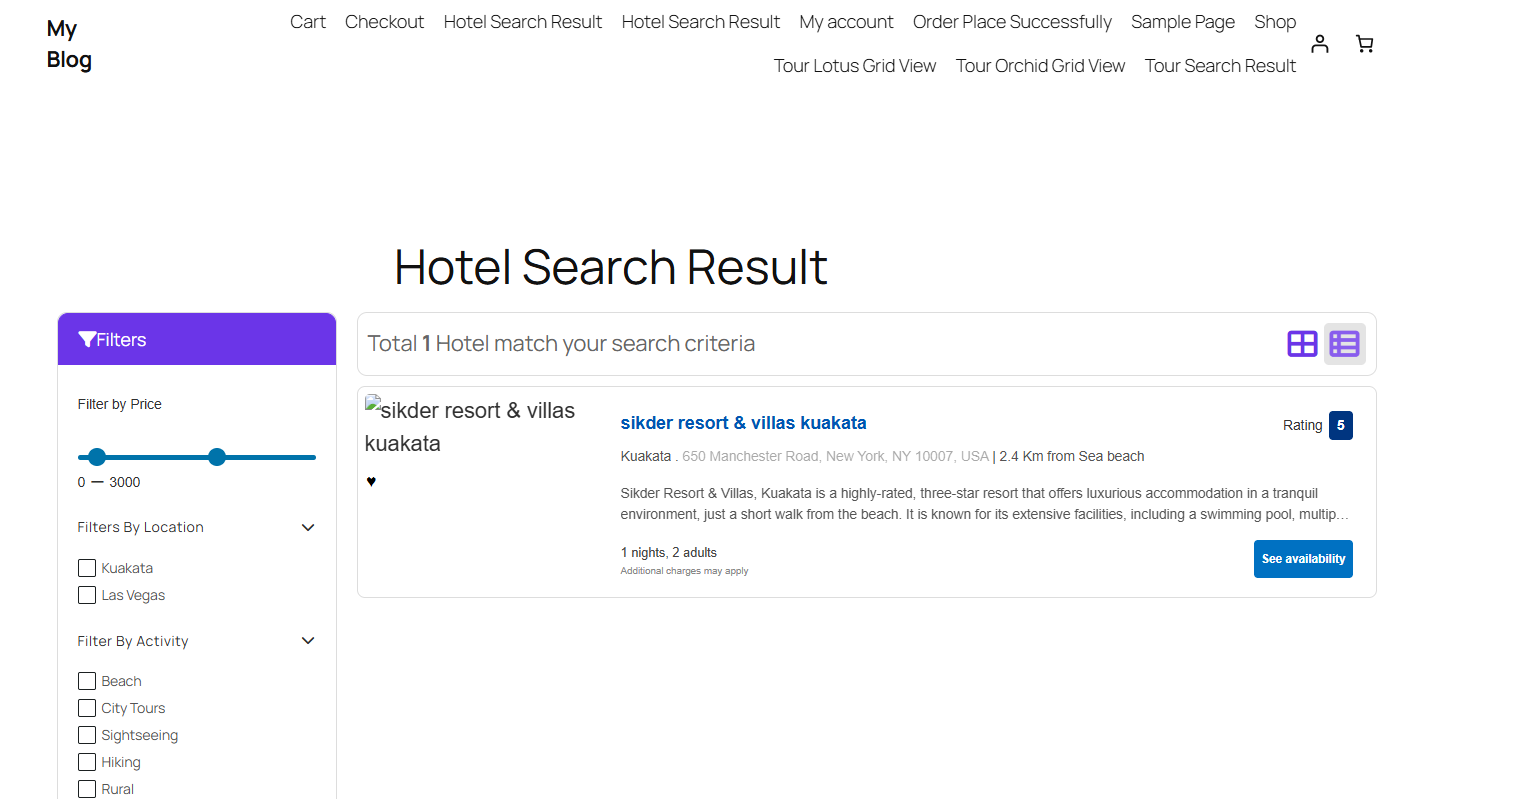
Select a hotel, choose the number of rooms and click Book Now.
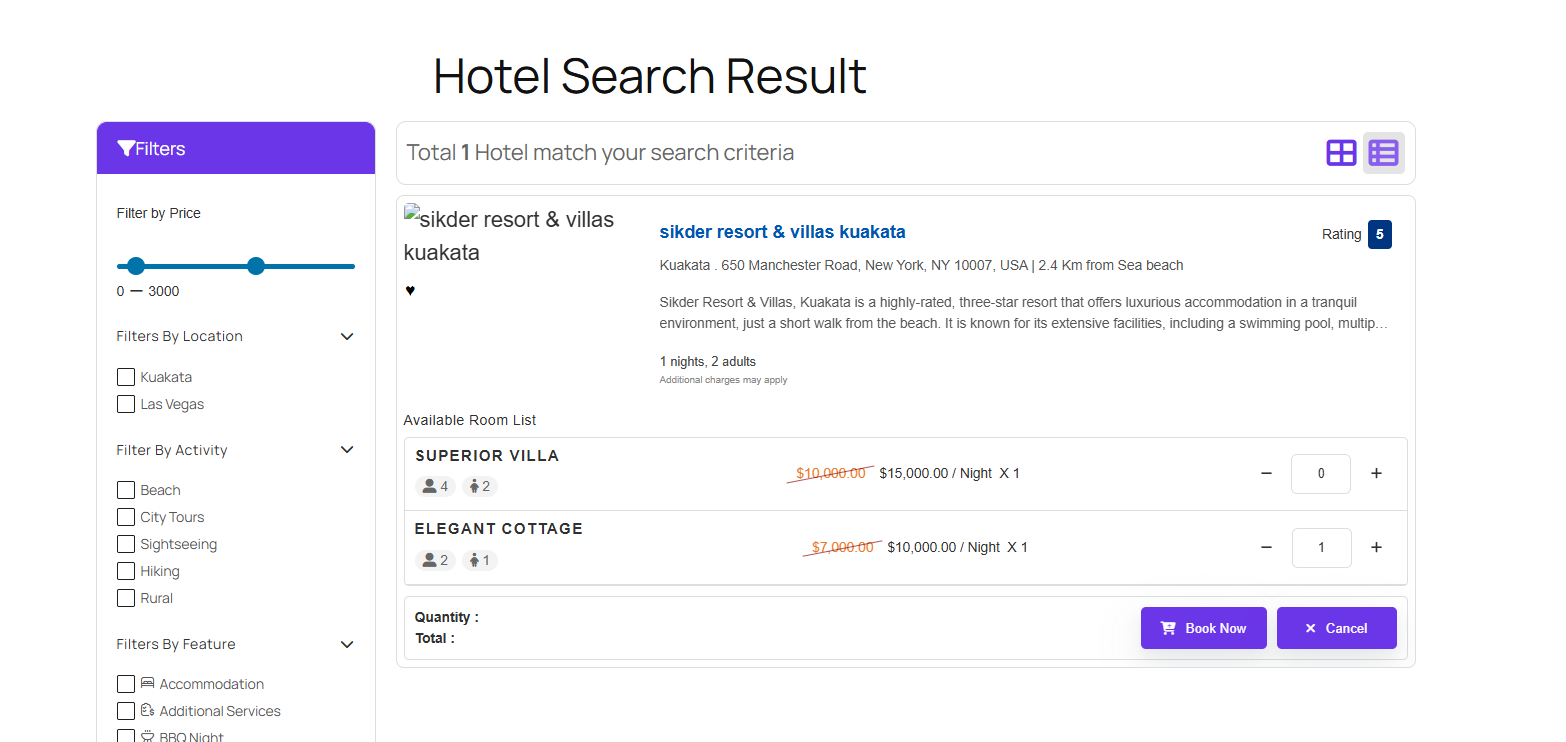
Choose the room type and confirm the quantity.
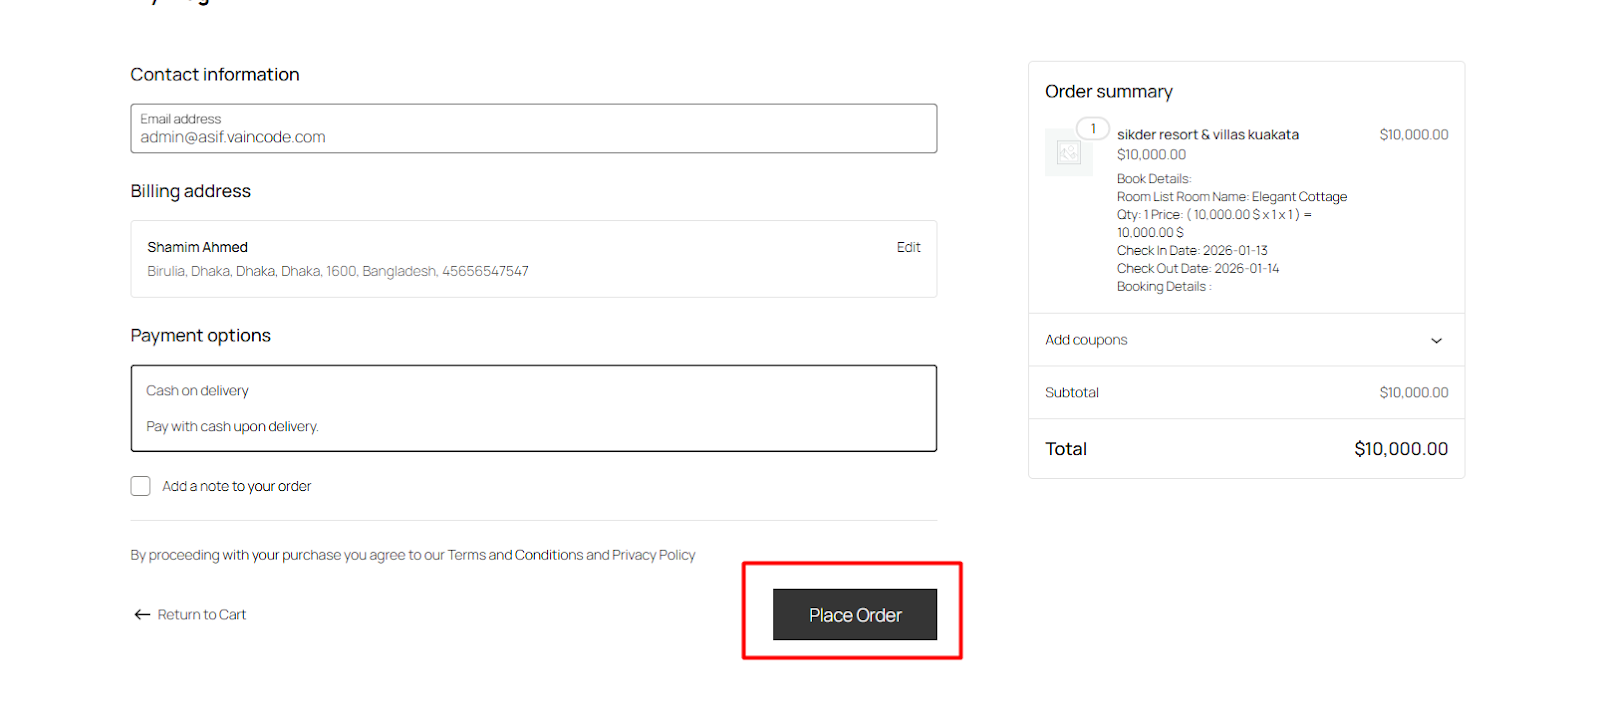
Fill in guest details and place the order through the WooCommerce checkout.
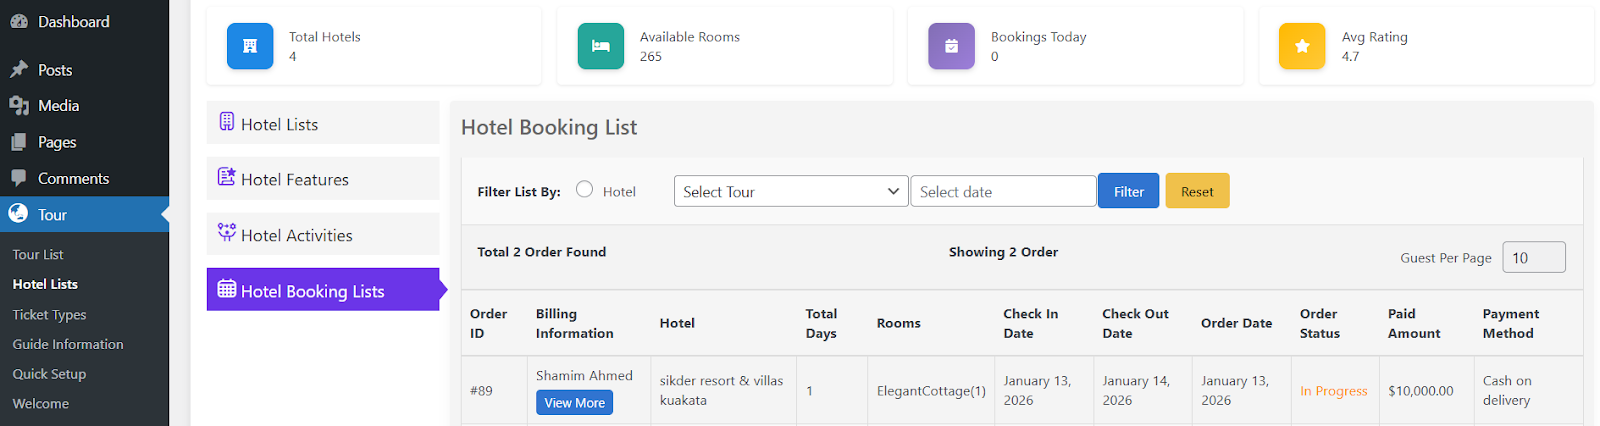
Once the order is placed, the reservation appears in the Hotel Booking List in your dashboard, where you can view or edit the booking.
Last step: confirm your payment gateway is live. A booking engine is only as good as its checkout, so test a real transaction before launch.
Common Setup Mistakes to Avoid
- Publishing the hotel before the tour. Rooms only become bookable once the hotel is attached to a hotel-based tour package.
- Skipping features and activities. Add these first, or you will have to reopen every listing later to tag them.
- Leaving capacity blank. Adult and child capacity drive your price calculation; wrong numbers mean wrong totals.
- Ignoring slugs. The labels and slugs you set in the wizard become your URLs, so fix them before you publish dozens of hotels.
- Never testing checkout. Run one booking end to end yourself, including payment, before you send traffic to the site.
Wrapping Up
Adding a hotel booking plugin in WordPress with WpTravelly comes down to three passes: configure the plugin, build the hotel with its rooms and prices, then connect it to a hotel-based tour package. Get one property right, and every hotel after it is a copy-and-adjust job.
Start with your highest-margin room type, publish it, and run a full test booking today.
