 Get Halloween 15% for Limited Time on Lifetime & Bundle Deal


Building a taxi cab booking system in WordPress means turning a standard WordPress site into a dispatch-ready booking platform: you define your fleet, set fixed or distance-based fares, let riders choose pickup and drop-off points, and collect payment through WooCommerce. This guide walks through the full build in order, from the first plugin install to the route pricing rules that decide whether your fares actually make money.
It is written for operators — small fleets, chauffeur services and single-car owners — who want to run bookings themselves rather than renting a marketplace listing. You will not need to touch code at any point.
- What a Taxi Cab Booking System Actually Needs to Do
- Why Build on WordPress Instead of a Marketplace App
- Step 1: Install the Two Plugins You Need
- Step 2: Add Your First Vehicle
- Step 3: Publish, Test and Preview
- Step 4: Decide How Drivers Get Their Jobs
- Common Mistakes When Setting Up Taxi Bookings
- Launch Checklist
- Frequently Asked Questions
- Over to You
What a Taxi Cab Booking System Actually Needs to Do
Before installing anything, be clear about the jobs your system has to perform. A booking plugin that does three of these five well will still cost you bookings.
- Vehicle and fleet records — each car with its passenger and luggage capacity, so the right vehicle is offered for the trip.
- Fare logic — fixed point-to-point rates, distance-based pricing, or hourly hire, plus extras like waiting time.
- Availability rules — off days, blocked dates, and how far ahead a customer may book.
- Checkout and payment — card, wallet or cash on arrival, handled through a real e-commerce layer rather than a contact form.
- Driver and order management — someone has to see the booking, assign it, and mark it complete.
That last point is where most DIY setups fall apart. A form that emails you a request is not a booking system; it is an inbox. The rest of this guide assumes you want the booking, the fare and the order record to live in one place.
Why Build on WordPress Instead of a Marketplace App
Marketplace apps bring demand but take a commission on every trip, own the customer relationship, and give you almost no control over pricing rules. A self-hosted booking system flips that: you keep the margin, the customer list and the data.
The practical trade-off is that you also own the marketing. If you are weighing up the platforms themselves before committing, the comparison of the best taxi booking plugins for WordPress covers what each option does and does not handle.
Step 1: Install the Two Plugins You Need
Almost every serious WordPress taxi plugin is built as an extension of WooCommerce, because WooCommerce already solves cart, tax, coupons, order emails and payment gateways. That means you install two things, in this order:
- Install and activate WooCommerce from the WordPress plugin repository and complete its short setup wizard (store address, currency, payment method).
- Install and activate your taxi booking plugin. The eCab plugin used in this walkthrough is Taxi Booking Manager for WooCommerce — eCab, available from the MagePeople WordPress taxi cab booking plugin for WooCommerce page and in a free version on WordPress.org.
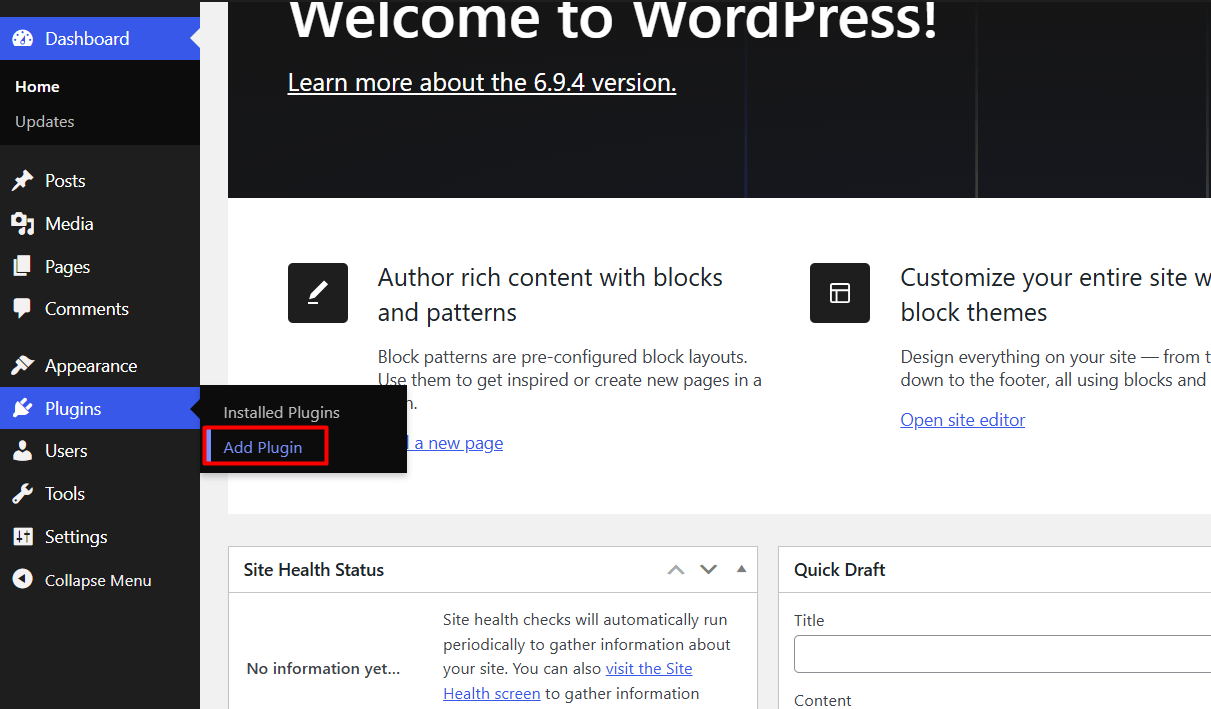
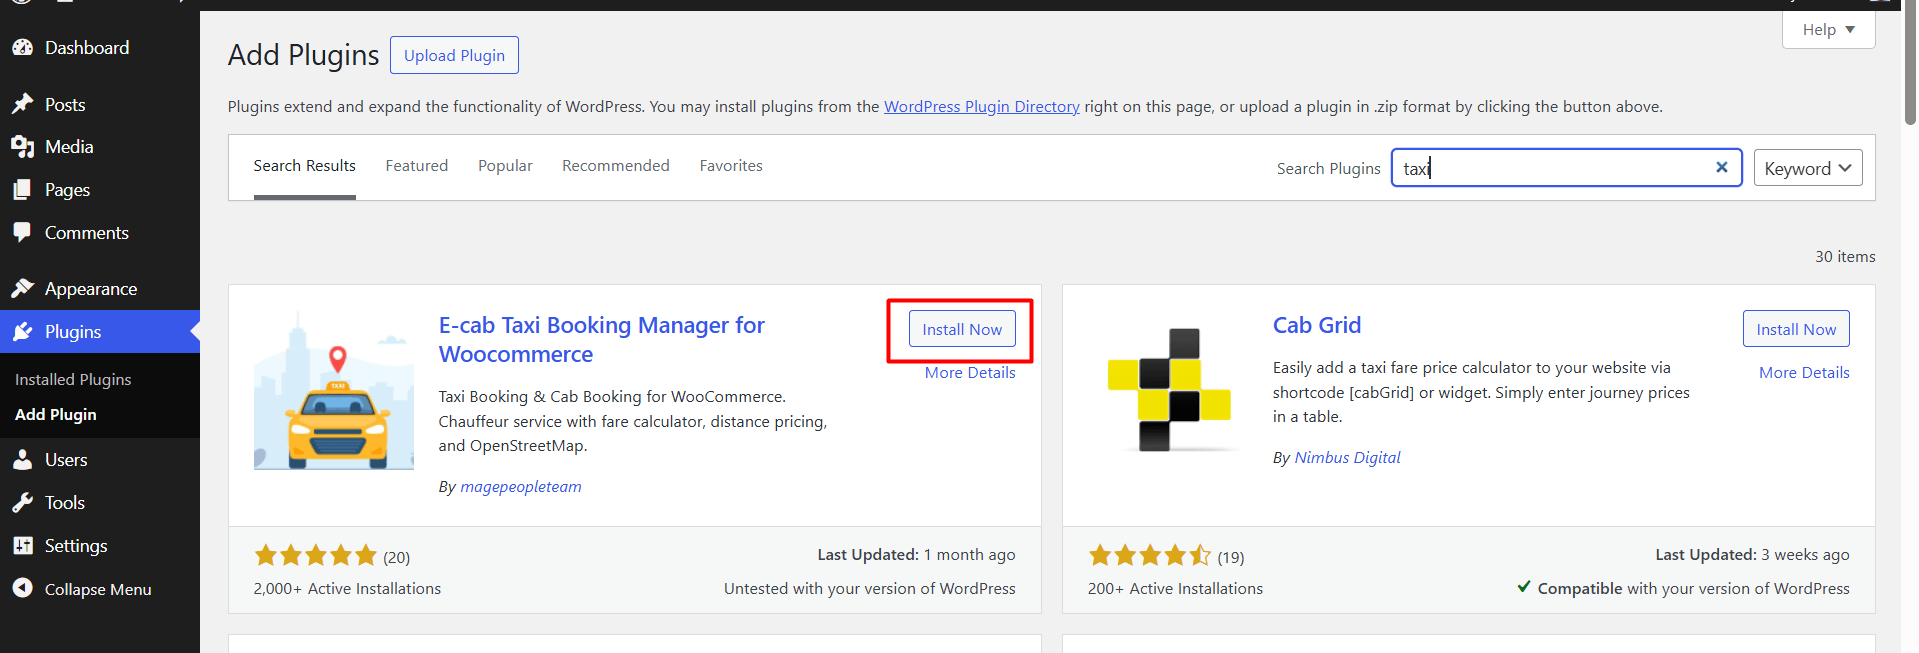
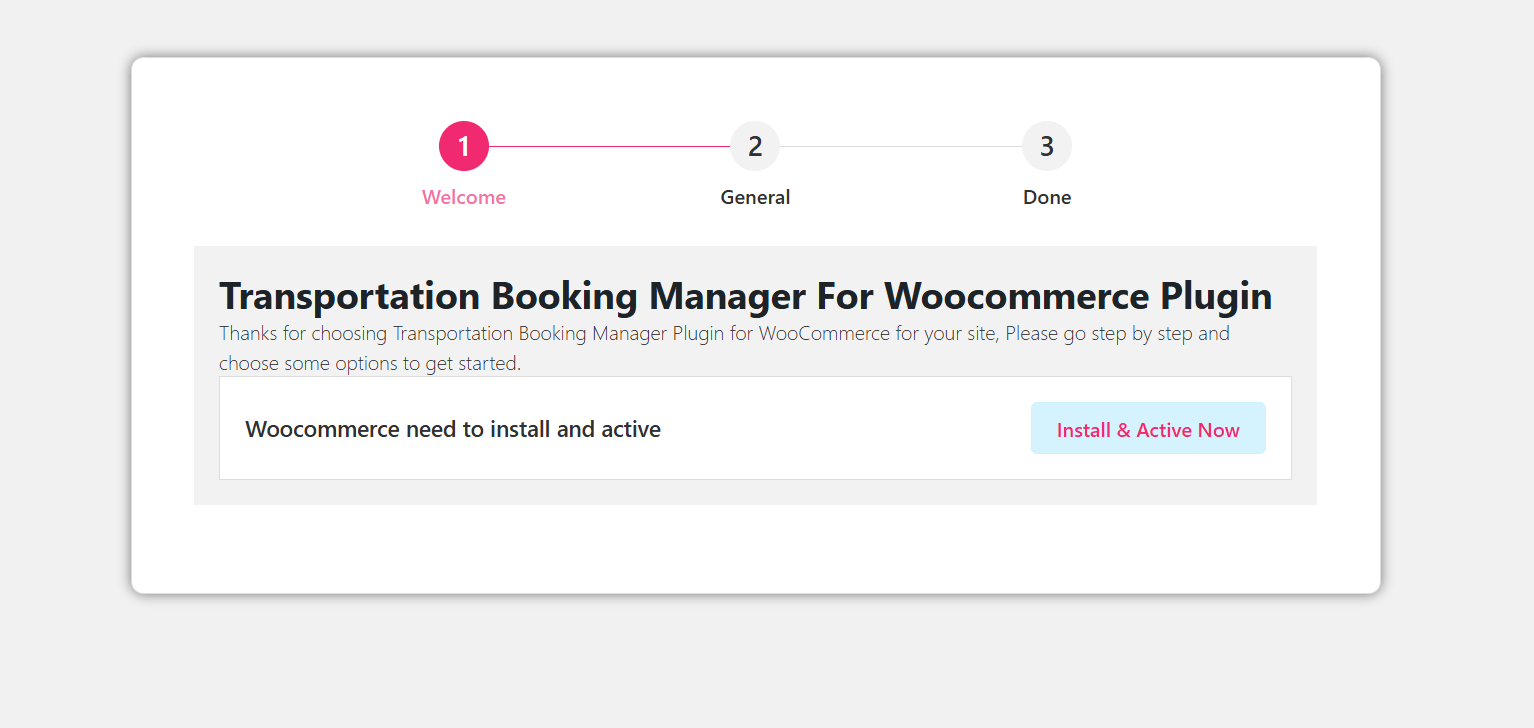
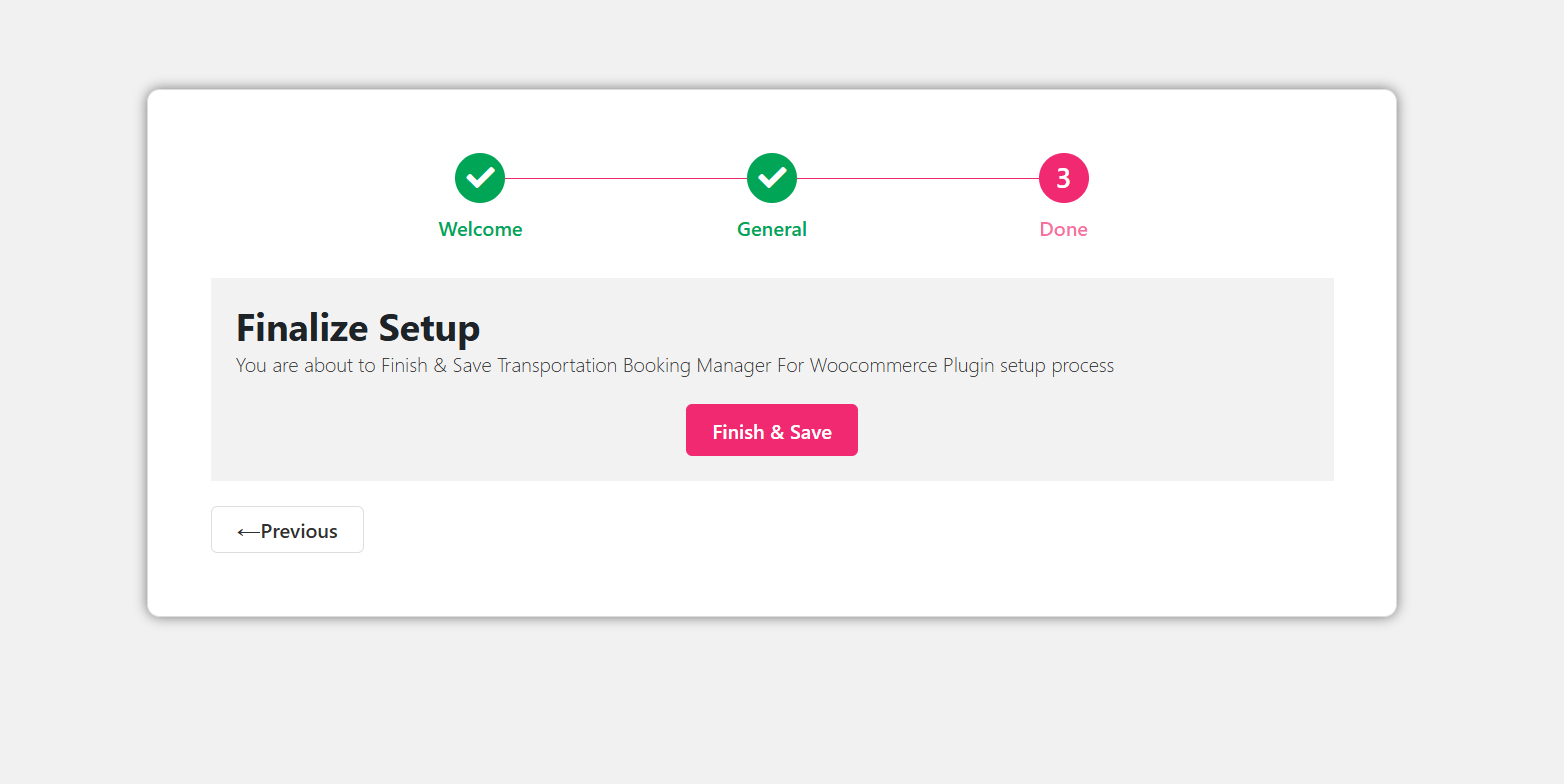
After activation, a Transportation menu appears in your dashboard. If you see a Map API notice, ignore it for now — fixed-point pricing works without it, and you only need a key once you move to map-based trips.
Two housekeeping items worth doing here rather than later:
- Set your currency and time zone correctly. A one-hour time zone error will silently mis-price every peak-hour booking.
- Create a dedicated WordPress user account for each driver so order notes and assignments are traceable.
Step 2: Add Your First Vehicle
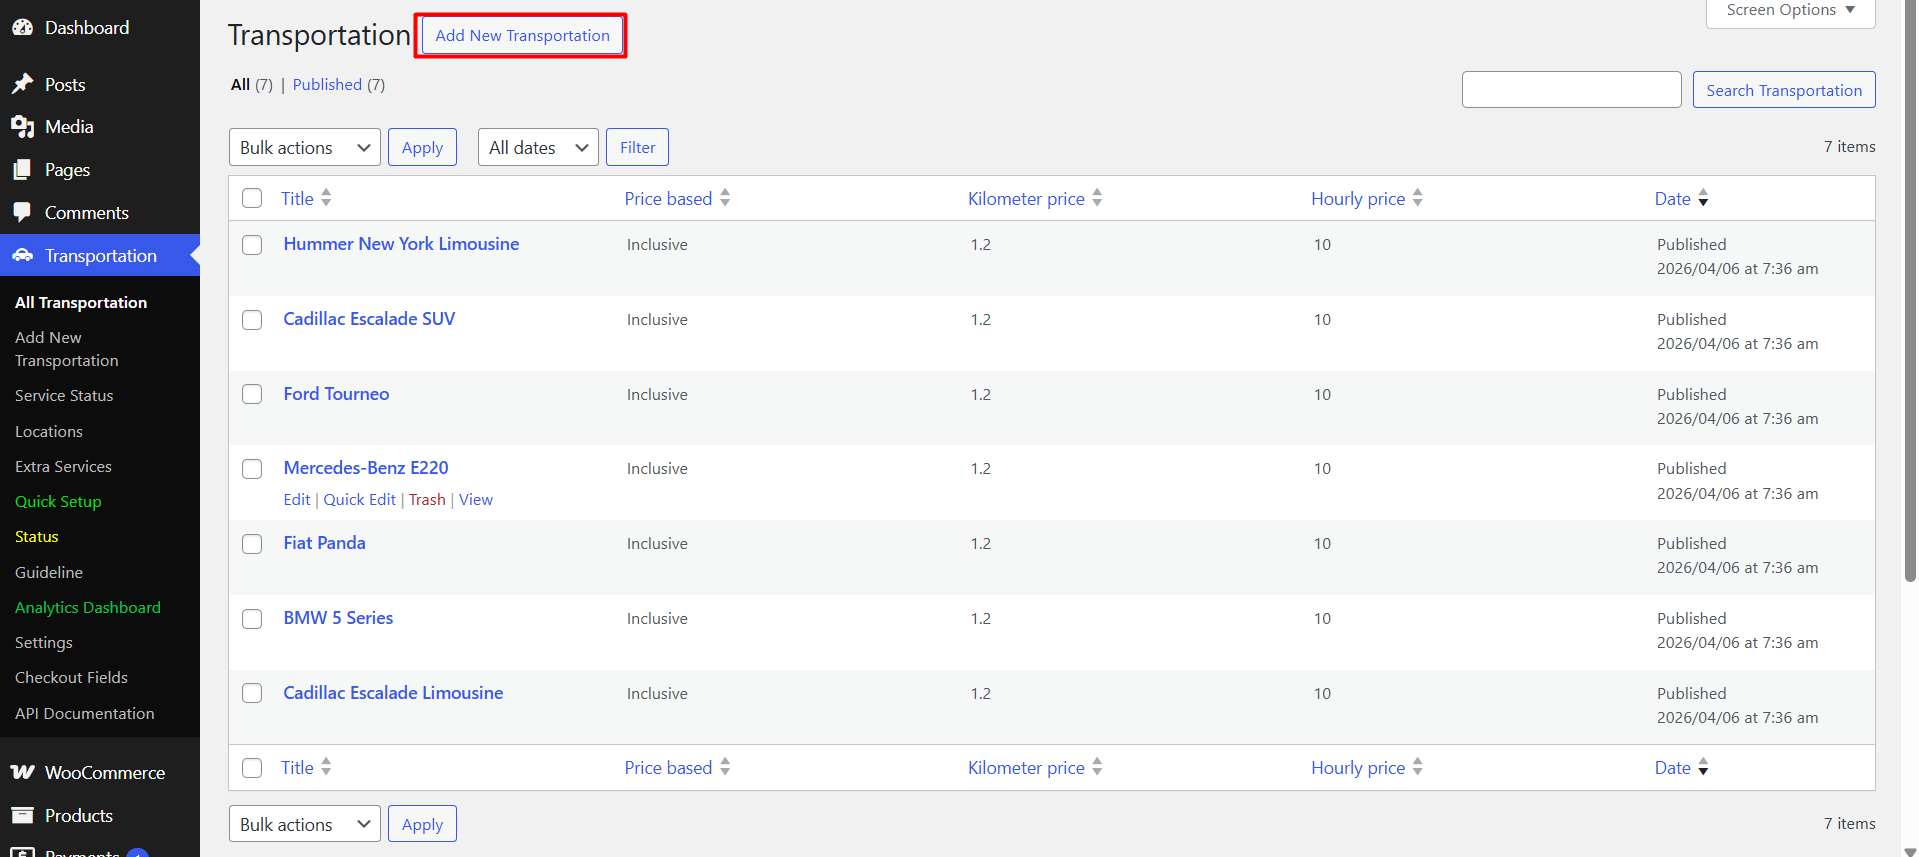
Go to Transportation → Add New Transportation. The title you enter here is what customers see on the booking form, so use something a rider recognises — a class name such as “Sedan — up to 4 passengers” beats an internal fleet code.
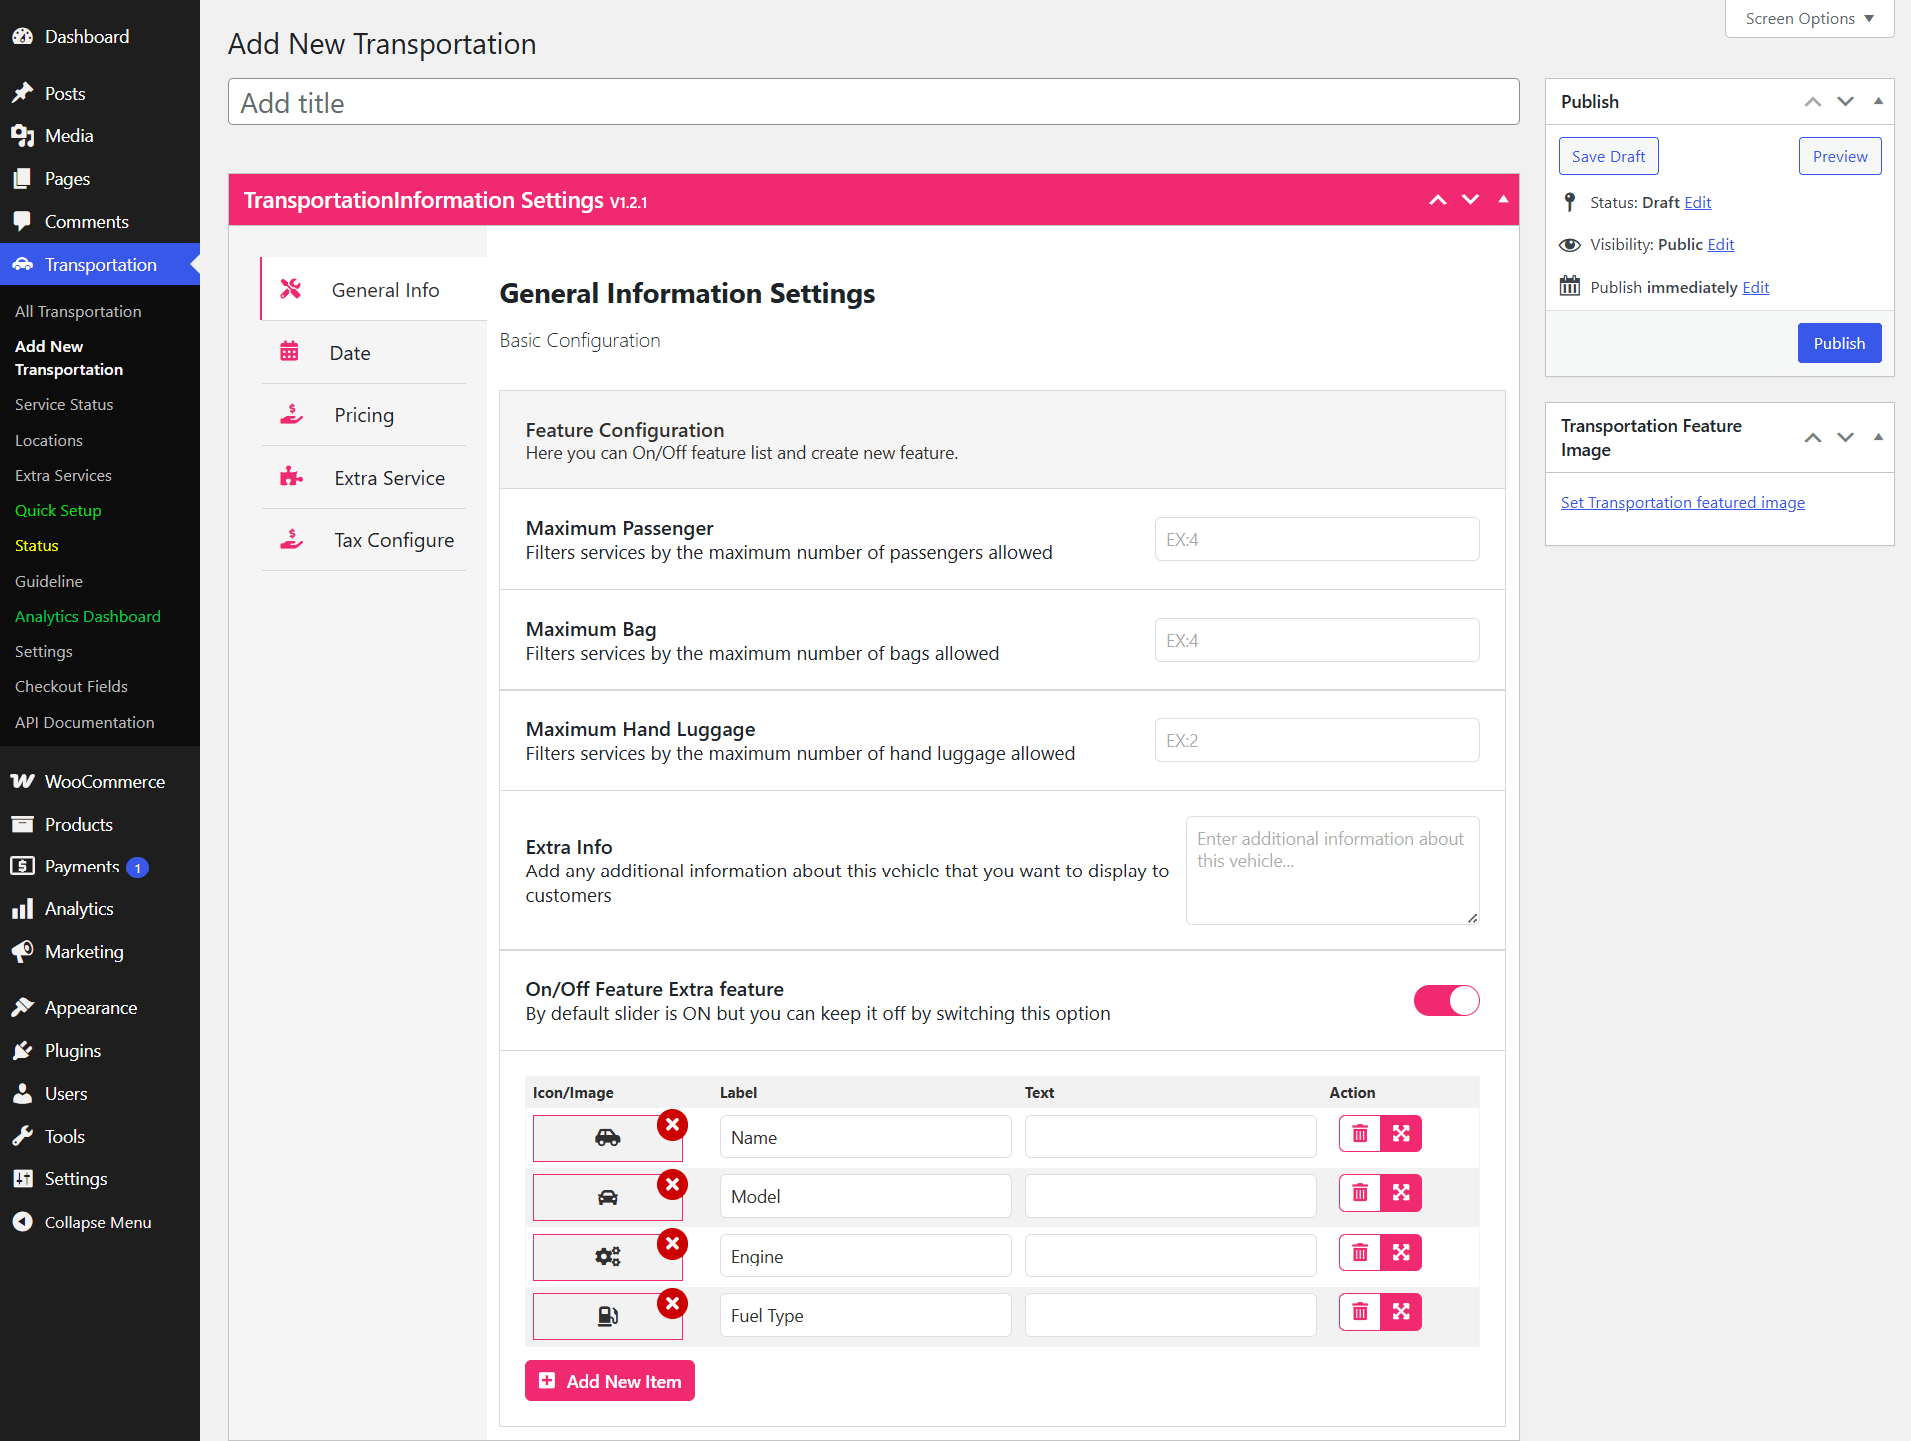
General info and capacity
Open the General Info panel and complete the vehicle record: name, model, engine capacity, fuel type, maximum passengers and maximum luggage. The two limits are not decorative — they are what stops a family of five from booking a four-seat car and leaving you to fix it at the kerb.
If you need extra attributes — child seat availability, wheelchair access, pet-friendly — use Add New Item to create your own fields rather than squeezing the detail into the description.
Dates and availability
In the Date settings, choose your date type and set the repeat window and the maximum advance booking period. A seven-day advance limit keeps your schedule realistic; an unlimited one invites bookings for next Christmas.
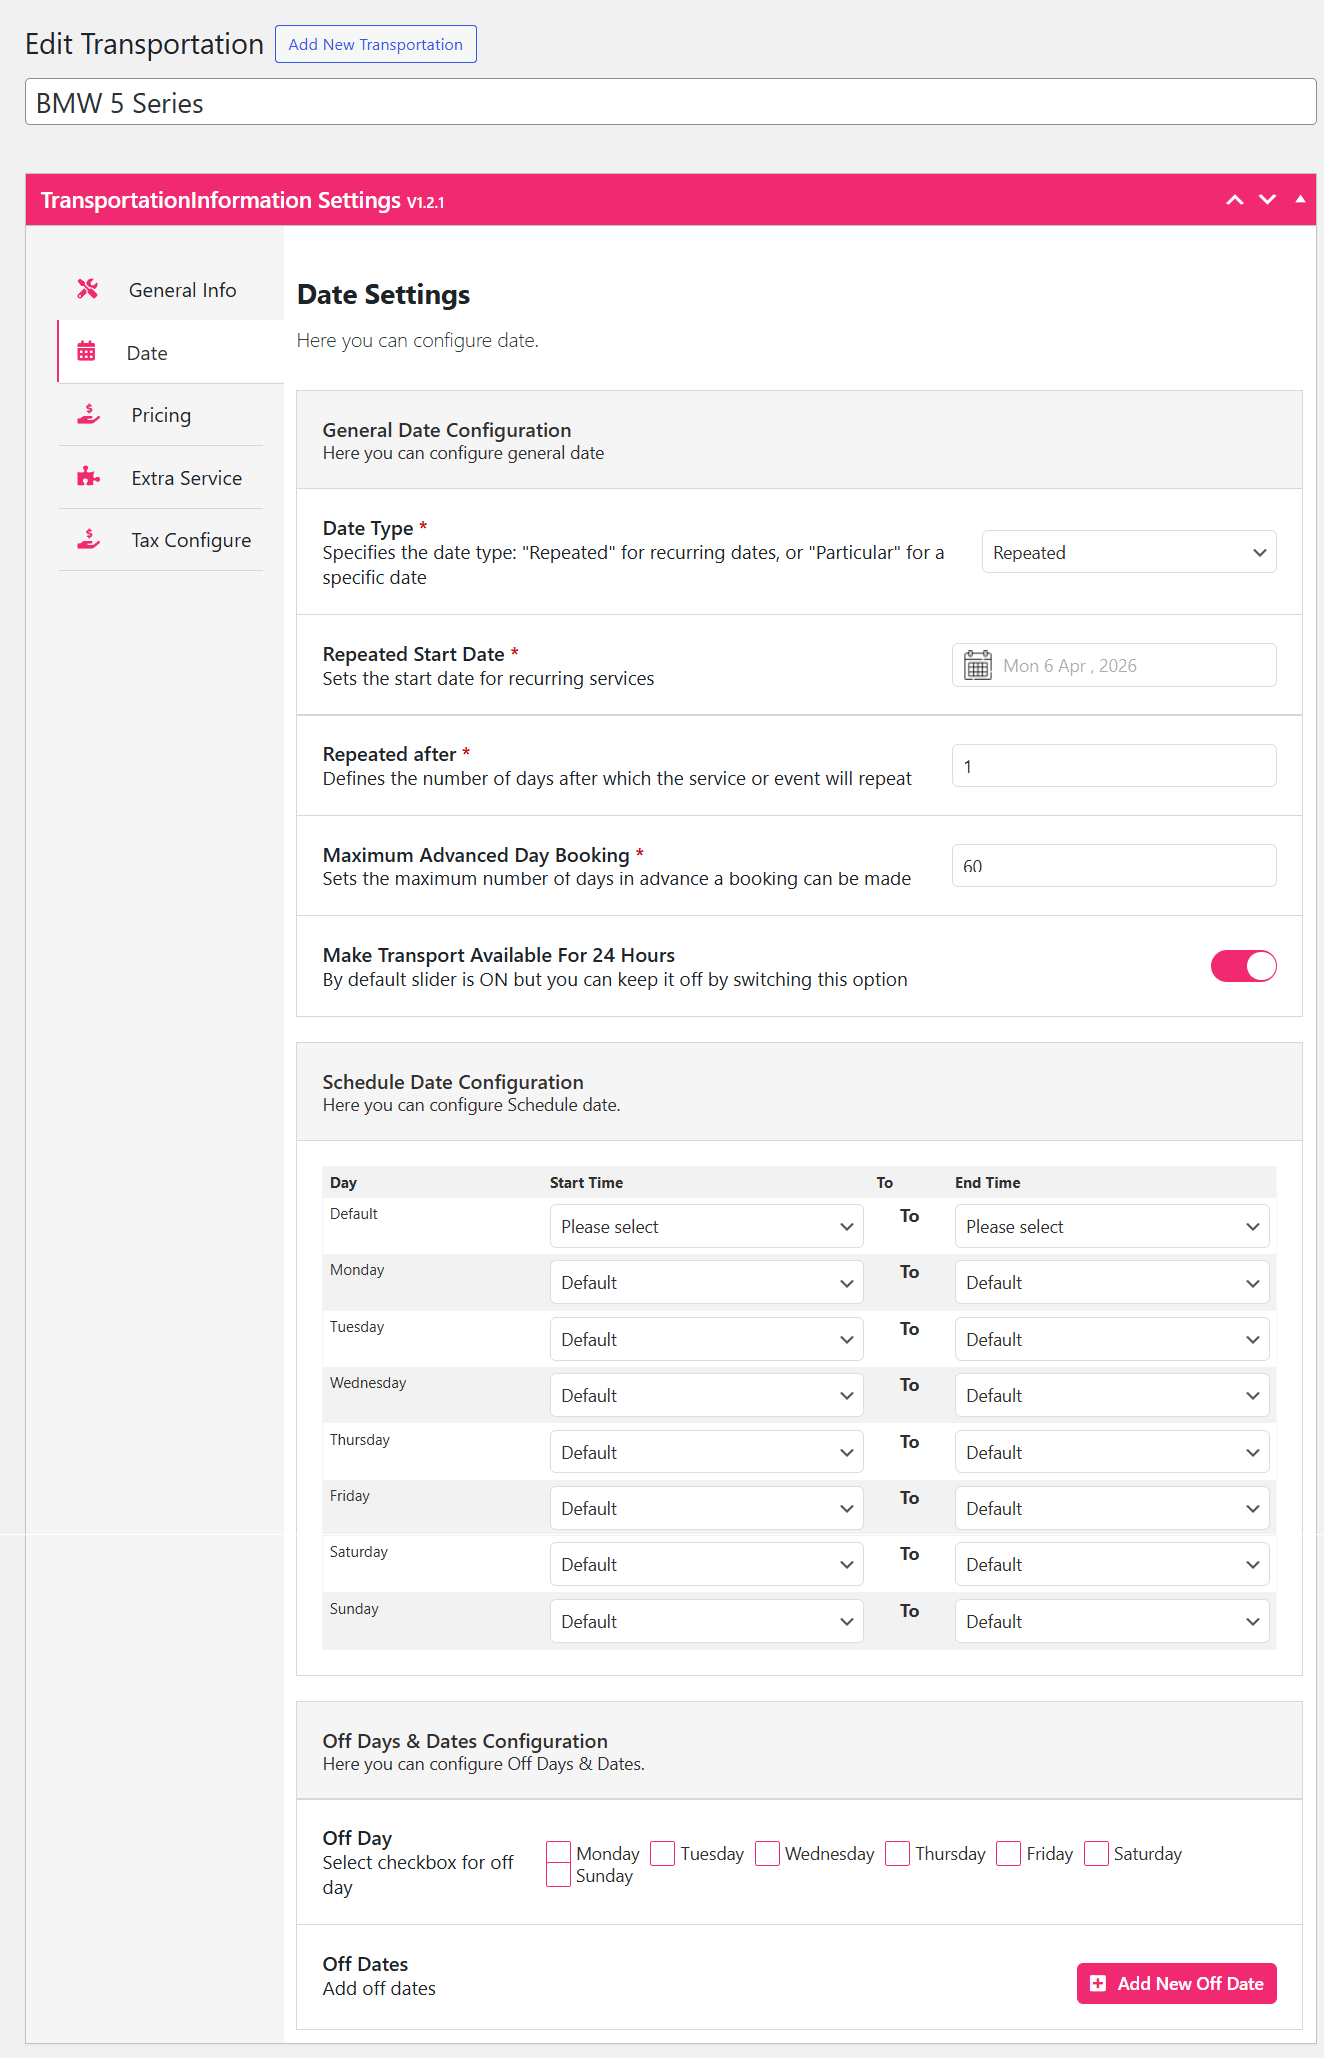
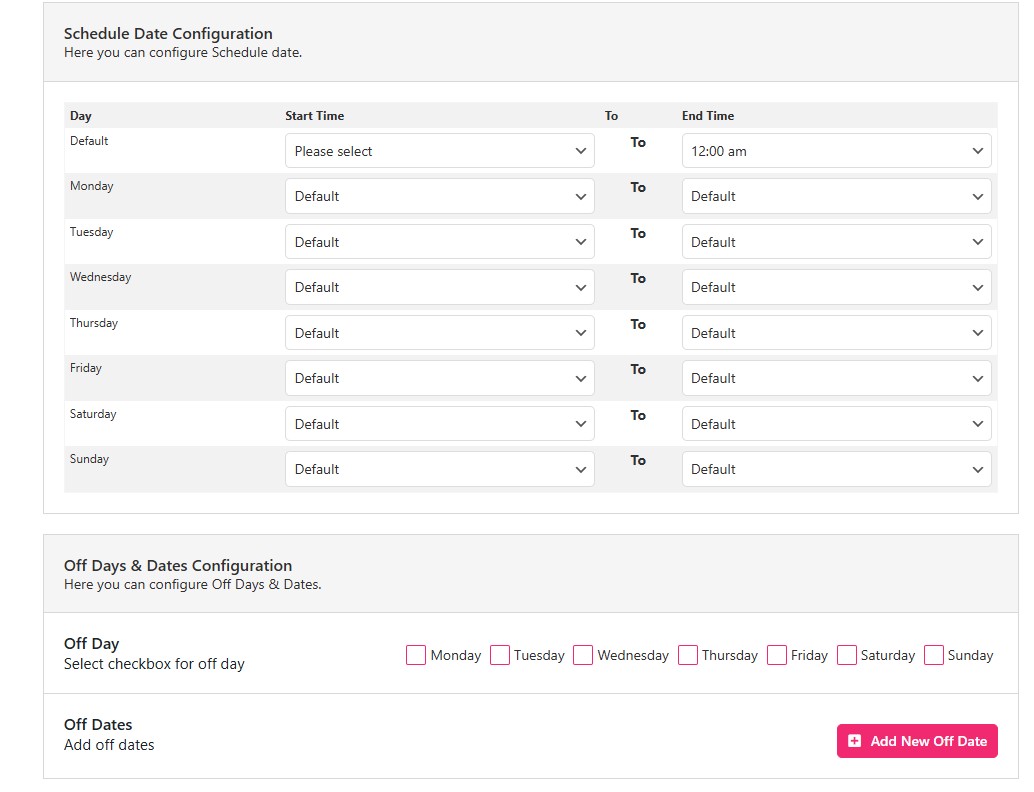
Then use Off Days & Dates to block the days that car is unavailable — servicing, driver rest days, public holidays. Blocked dates are removed from the calendar the customer sees, which prevents the awkward cancellation call.
Pricing and locations
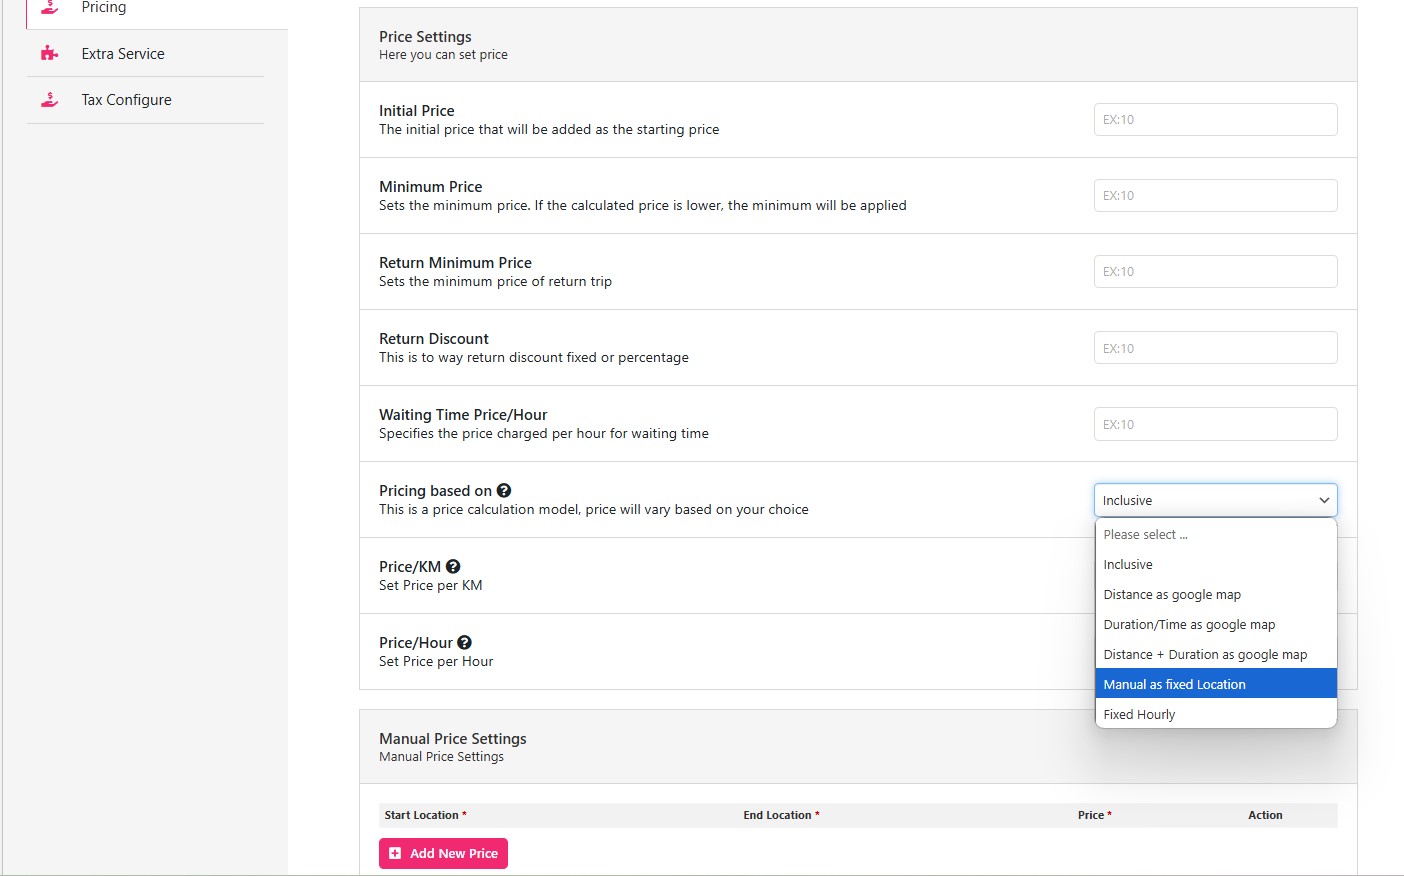
Pricing is where you earn or lose money. Pick a pricing type first, then build the rules underneath it:
| Pricing type | Best suited to | Watch out for |
|---|---|---|
| Fixed location-to-location rate | Airport runs, station transfers, repeat routes | Stale rates — review them against fuel and tolls every few months |
| Distance-based rate | City-wide coverage, unknown routes | Requires a working map and API key |
| Hourly hire | Chauffeur work, weddings, full-day hire | Needs a clear overtime policy in your booking terms |
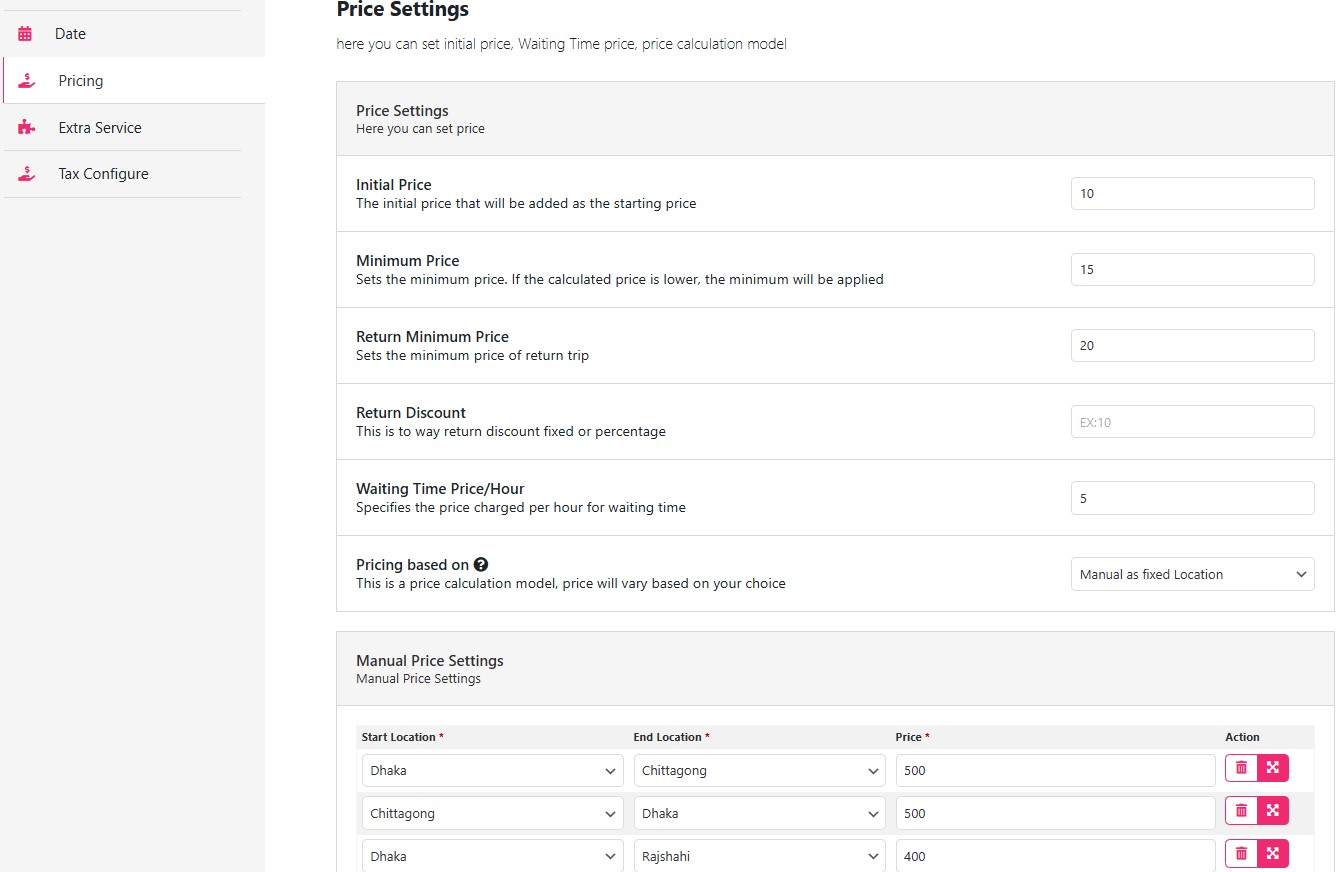
For the first vehicle, fixed point-to-point pricing is the simplest to get right. Use Add New Price to add each start location, end location and its fare, then set a waiting-time rate per hour if you plan to charge for delays.
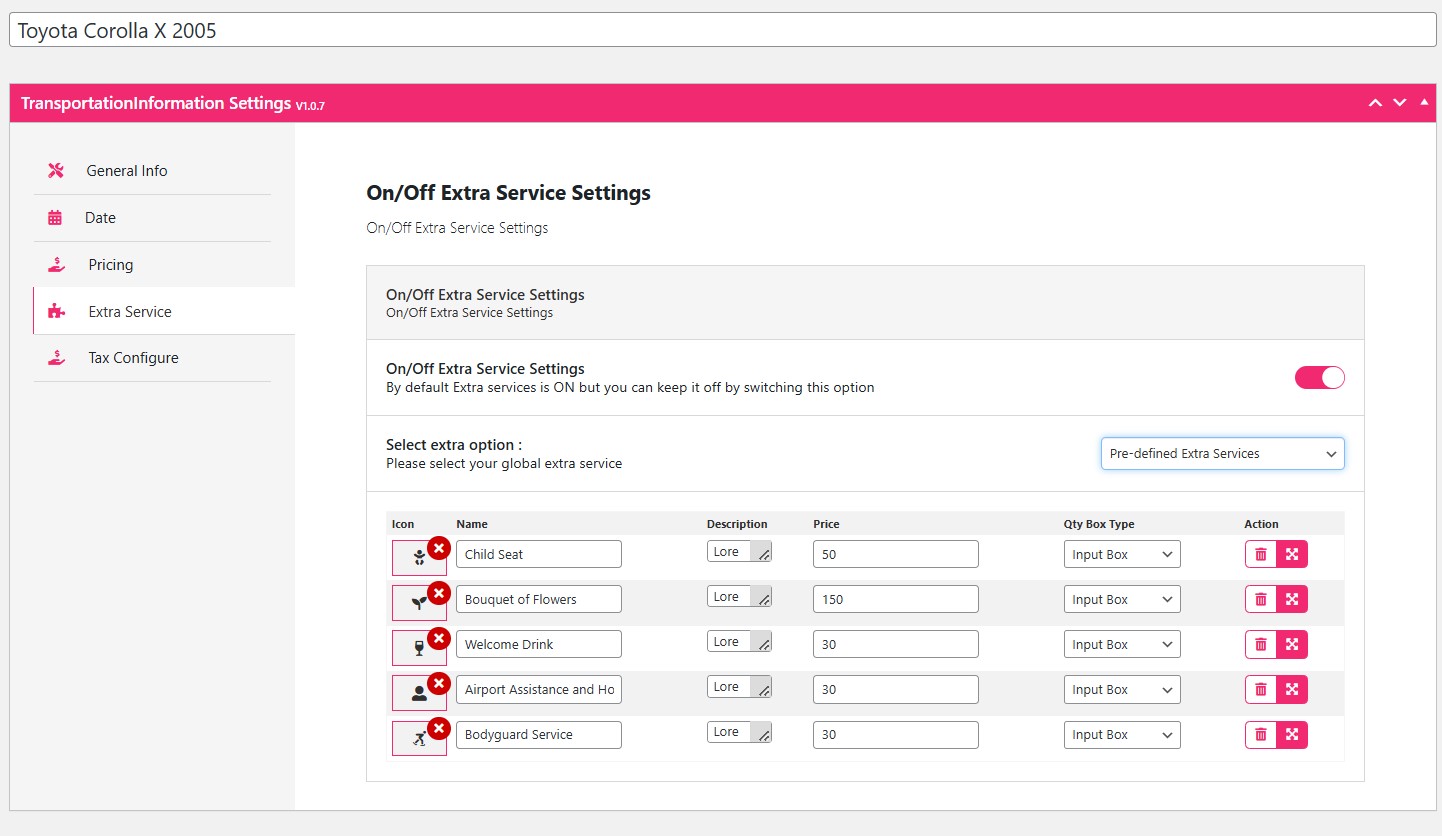
Under extras, switch on the Extra Service setting to sell add-ons — meet-and-greet, extra stop, oversized luggage. These lift average order value without changing the base fare, and they are easy to remove later if customers ignore them.
Gallery and presentation
The gallery panel lets you show the actual vehicle and driver at checkout, which measurably reduces no-shows for pre-booked airport work. Toggle the slider off if you would rather keep things plain.
Step 3: Publish, Test and Preview
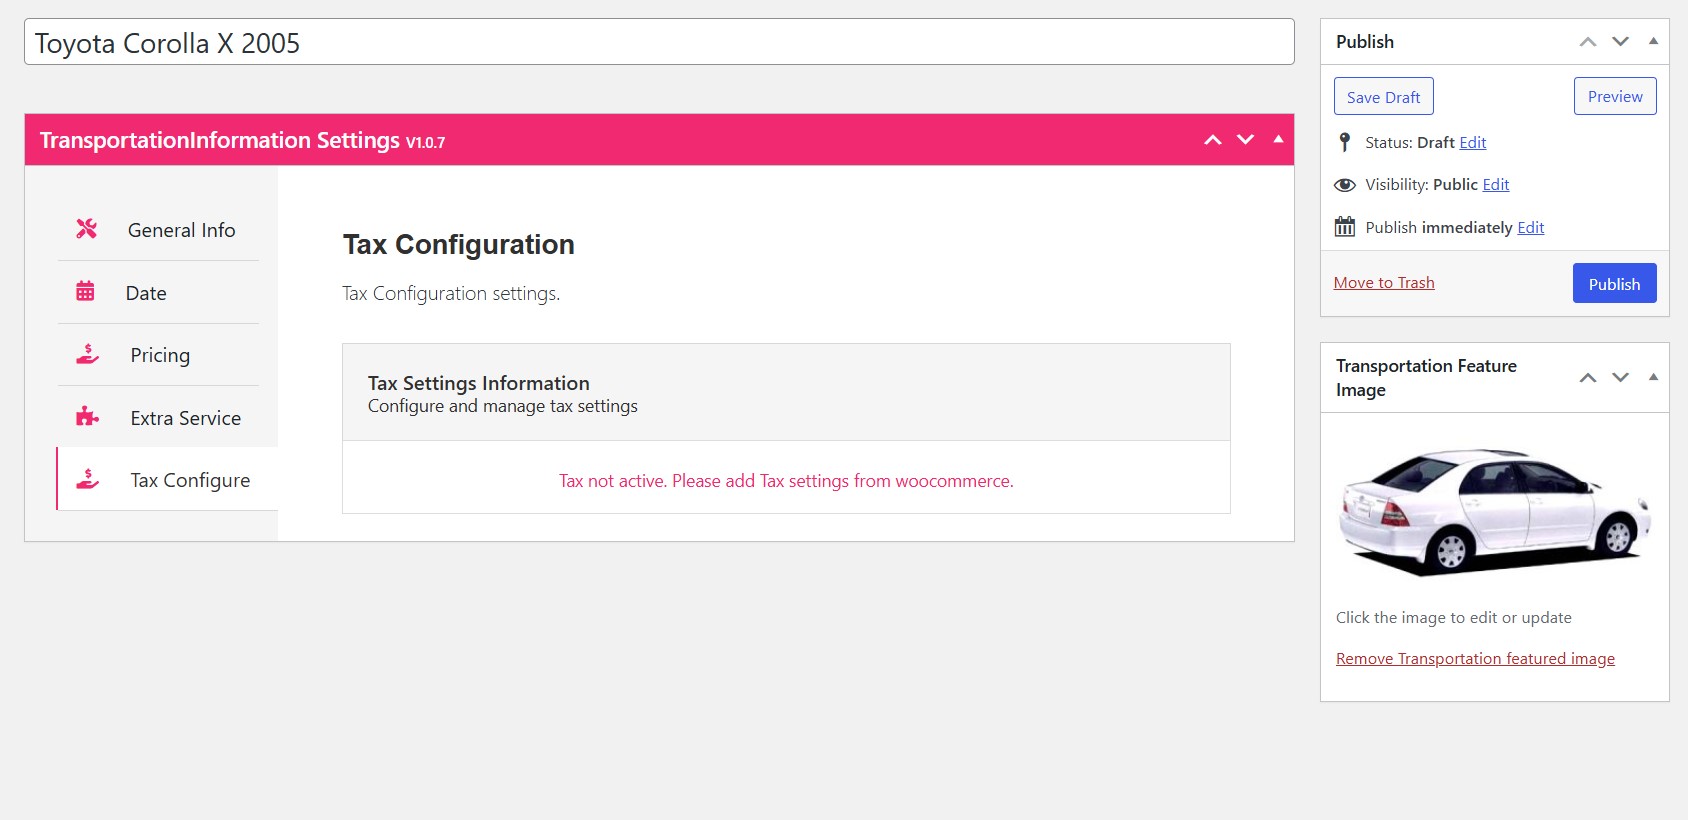
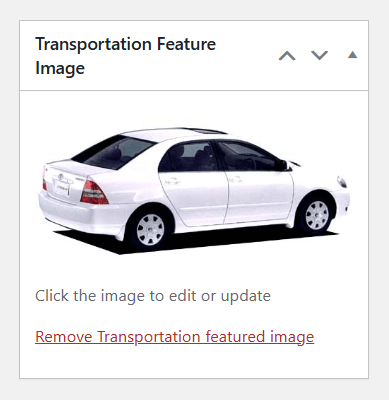
Add a featured image showing the vehicle, then preview the booking page before publishing. Run through the customer journey yourself with a real booking:
- Choose date, pickup time, pickup point, drop-off point and transfer type.
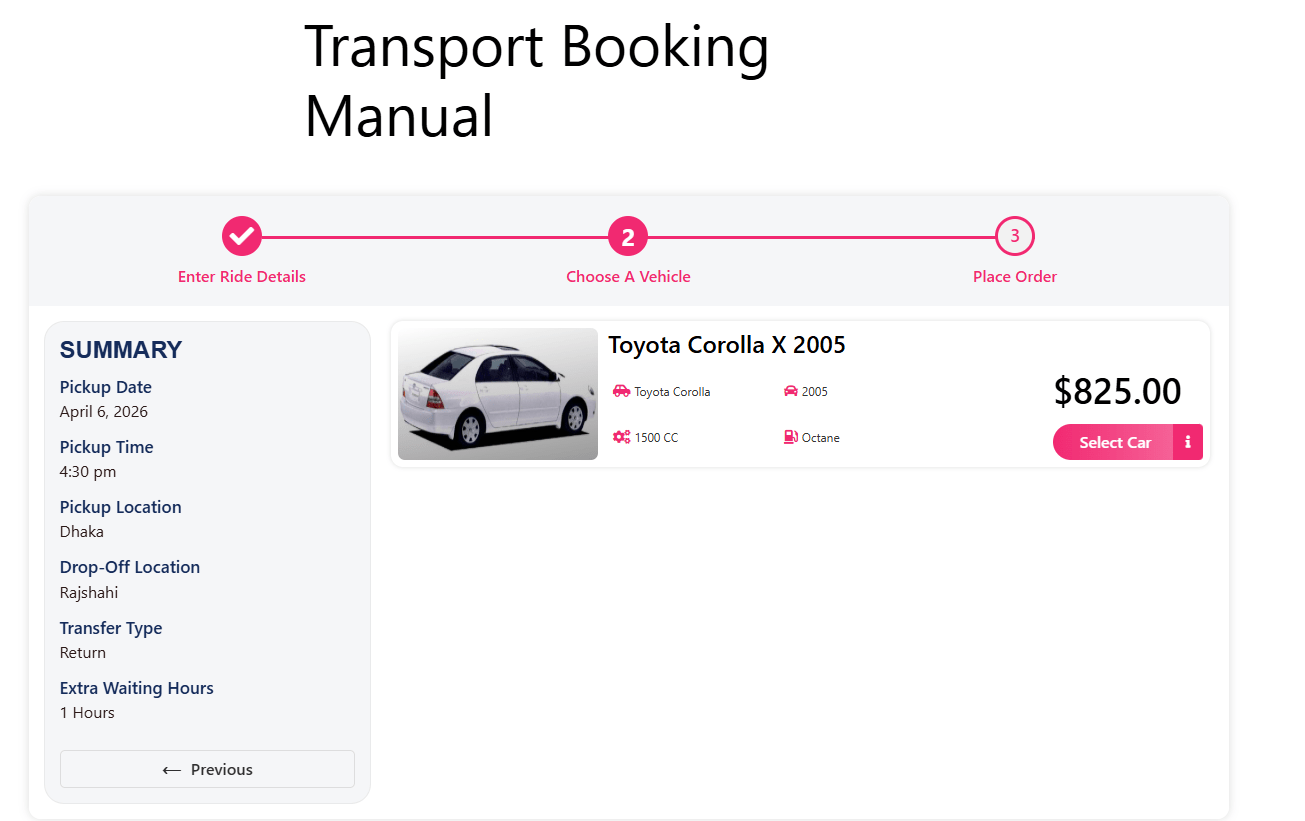
- Check that the correct vehicle appears with the fare you expect — not a placeholder.
- Add an extra service and an hour of waiting time and confirm both are priced.
- Complete checkout with a test payment and confirm the WooCommerce order is created with the trip details attached.
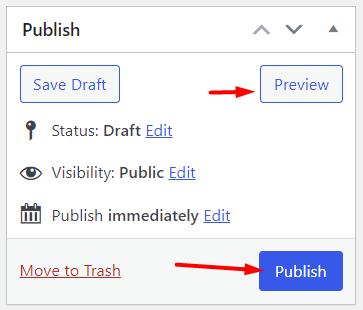
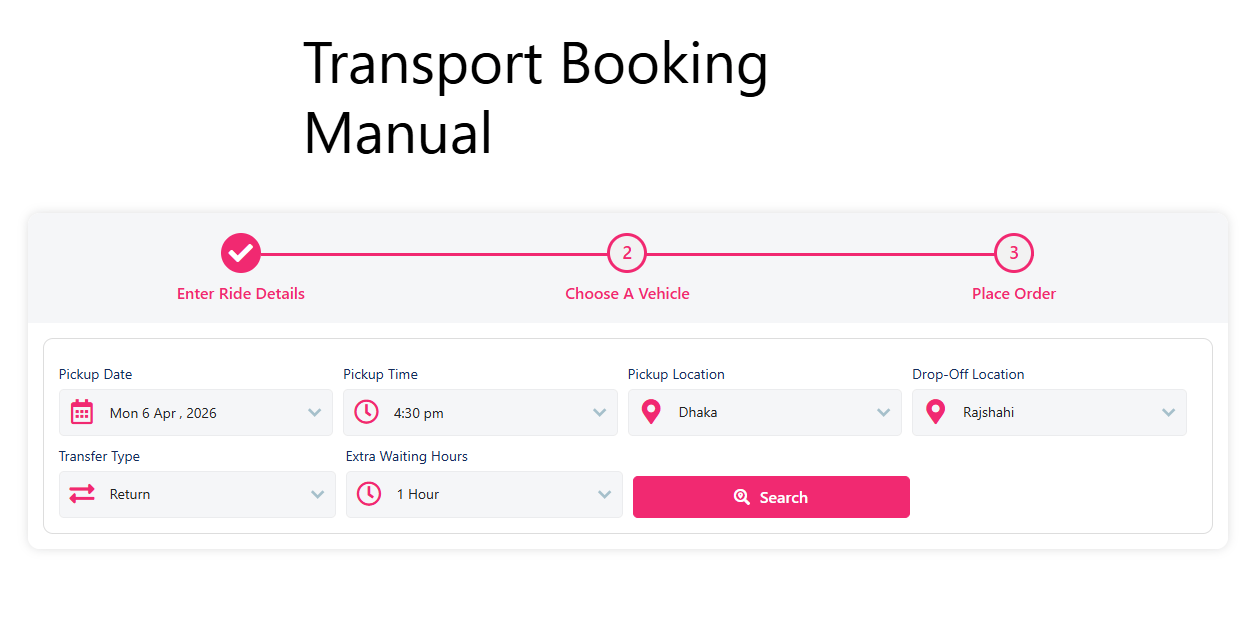
If the vehicle does not appear in step two, the usual causes are an off day matching the test date, an advance-booking limit shorter than your chosen date, or a missing start/end location pair for that route. Fix those before you publish — a live booking page that silently fails is worse than no page at all.
When you are ready to go further, the more advanced setup covering map-based bookings, API keys and live location handling is covered in the walkthrough on how to make a taxi booking website in WordPress. Treat the present guide as the foundation layer and that one as the next.
Step 4: Decide How Drivers Get Their Jobs
Automated dispatch is not a switch you flip — it is an operating decision. Most small fleets choose one of three models:
- Manual assignment — every new order lands in your dashboard and you assign it. Fine up to roughly a handful of cars.
- Driver accounts — drivers log in and see their own assigned trips, which removes the phone-call round trip.
- Zone-based assignment — each driver covers an area and bookings route accordingly. This needs real operational discipline to maintain.
Pick the simplest model that matches your current fleet size. You can always move up; you cannot easily walk back a dispatch rule that has confused customers.
Common Mistakes When Setting Up Taxi Bookings
- Copying a competitor’s fare table. Your costs are not theirs. Build fares from your own fuel, insurance, maintenance and idle time.
- Leaving test bookings live. Delete test orders before launch, or they inflate your reports and confuse drivers.
- Treating the map key as optional. Fixed pricing works without it, but distance pricing will not — and customers notice the difference immediately.
- No cancellation policy on the page. State it near the booking form, not buried in terms. It prevents most disputes before they start.
- Ignoring mobile. Most taxi searches happen on a phone. Test the entire checkout on a real handset, not a resized desktop browser.
Launch Checklist
- WooCommerce installed with currency, time zone and at least one live payment method.
- Each vehicle has capacity limits, availability rules and a pricing type configured.
- At least one end-to-end test booking completed and the order verified in WooCommerce.
- Driver accounts created and an assignment model chosen.
- Cancellation, waiting-time and refund terms written into the booking page.
- Mobile checkout tested on a real device.
Frequently Asked Questions
Do I need WooCommerce to run a taxi booking system in WordPress?
Not strictly, but practically you do. WooCommerce handles payments, taxes, coupons, invoices and order emails — rebuilding all of that inside a single booking plugin would be far more work. Every mainstream WordPress taxi plugin in this walkthrough is built on top of it.
Can I charge different fares for different routes?
Yes. Fixed location-to-location pricing is exactly that: you define each start point, end point and its fare. For variable routes, distance-based pricing calculates the fare instead. You can also layer waiting-time charges and paid extras on top of either.
How long does it take to get a booking page live?
The technical build is fast — installing the plugins and configuring your first vehicle is an afternoon’s work. The part that takes longer is getting your pricing and availability rules right, which is operational judgement rather than setup.
Will this work for a chauffeur or private hire business, not just taxis?
Yes. Hourly hire and fixed-transfer pricing both suit chauffeur work well. The vehicle records, advance booking windows and extras cover the common private hire requirements too.
If you would rather grow demand than build the plumbing first, the playbook on how to grow your online taxi business covers the demand side.
Over to You
A taxi cab booking system on WordPress is two plugins and a set of decisions: which vehicles you offer, how you price each route, and how a job reaches a driver. Get those three right and the software stays out of the way.
Start with one vehicle and one route pair, take a real booking end to end, then scale the fleet. Adding the tenth car is much easier once the first one works perfectly.
